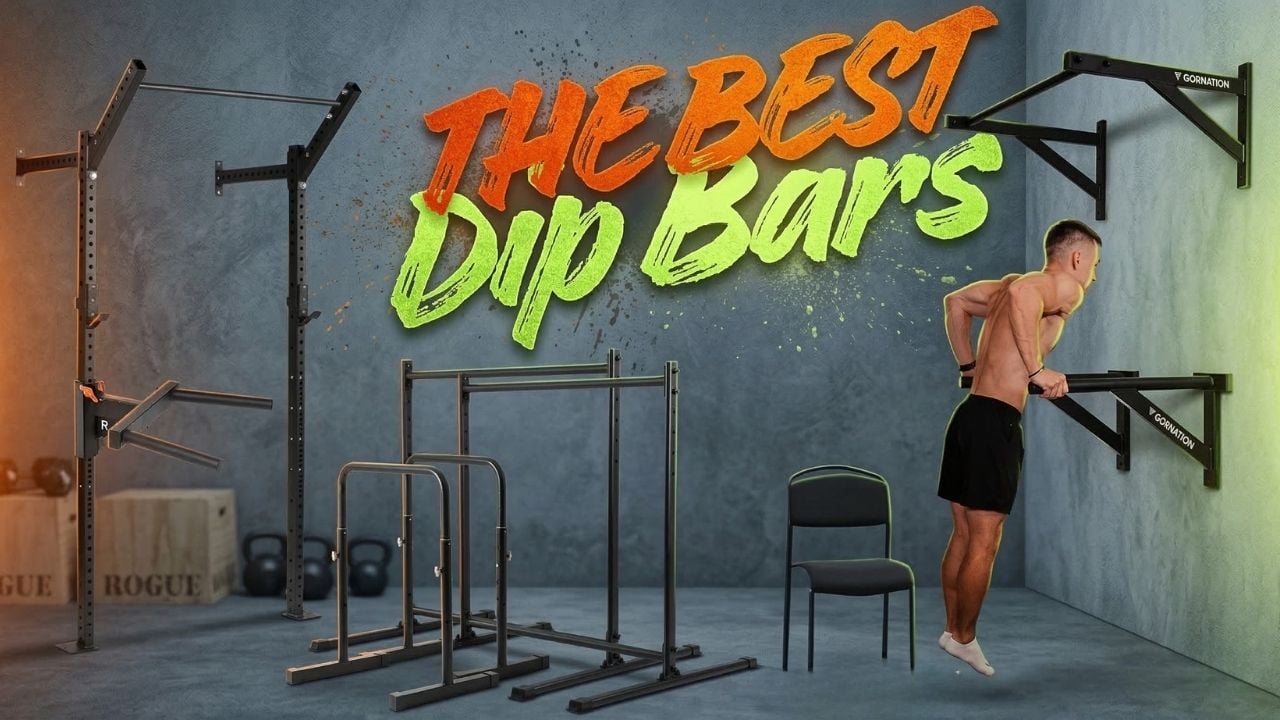
Dip bars are one of the best pieces of calisthenics equipment you can own for a home gym. They let you train dips, L-sits, knee raises, rows, planche leans, and more without needing a full gym setup.
The best dip bars for you depend on three things: your height, your available space, and whether you want to do regular bodyweight dips or heavy weighted dips. For most people, a pair of freestanding dip bars is the best all-round choice. If you are taller, want more leg clearance, or plan to load your dips heavily, higher bars or a rack-mounted setup will usually be the better option. If you want the most stable and space-efficient permanent setup, wall-mounted dip bars are hard to beat.
I’ve trained on cheap foldable stands, heavier welded bars, wall-mounted stations, and full pull-up towers with dip extensions. In this guide, I’ll show you the dip bar setups I would actually buy for a home gym, who each option is best for, and where the cheaper alternatives still make sense.
How I picked the best dip bars
I compared each setup based on:
- stability under bodyweight and weighted dips
- height and leg clearance
- bar spacing and comfort
- versatility for exercises beyond dips
- ease of setup and portability
- value for the price
TLDR: My Top 3 Dip Bar Recommendations
After testing dozens of different setups over the years — from cheap foldable stands to commercial-grade rigs — these are the three dip bar setups I recommend most often. Each serves a slightly different purpose depending on your height, space, and training style, but all of them are safe, stable, and built to last.
Best overall for most people
- If the budget is tight, get these 👉 Amazon Portable Dip Bars
- If you are tall (above 6 feet/183cm) you might need more leg room. Get two of these 👉 Static bars or go with a cheaper Kingkang Dip Bars from Amazon.
Best all-in-one home gym option
🥈 GORNATION Pull-up Station with Dip-Extension - it's the best freestanding pull-up bar out there and you can add a dip bar extension to it.
- For a full-blown home gym option, I'd recommend the 👉 Titan T-3 Dip Bar Attachment, as it is compatible with either the Titan T-3 Space Saving Rack or the Titan T-3 Power Rack. All available from Amazon. Titan is the best budget alternative to Rogue on the market in my opinion.
Best permanent space-saving setup
🥉 GORNATION Wall-Mounted Dip Station - most stable and space-efficient solution for a permanent setup.
- For a budget option, you can pick up this 👉 Wall-Mounted Dip Station from Amazon
Dip Bar Comparison at a Glance
| Setup | Best for | Pros | Cons |
|---|---|---|---|
| GORNATION Portable Dip Bars | Most people, small home gyms, travel-friendly use | Adjustable, portable, great value | Less leg clearance for tall athletes or heavy weighted dips |
| 2x GORNATION Static Bars | Tall athletes, weighted dips, advanced calisthenics | Maximum stability, height, and versatility | Costs more and requires buying two bars |
| GORNATION Pull-Up Station + Dip Extension | Compact all-in-one home gym | Lets you train pull-ups and dips in one station | Needs a bit more space and may benefit from counterweight for dynamic moves |
| Titan T-3 Dip Bar Attachment | Heavy weighted dips and hybrid strength training | Extremely stable and rack-integrated | Only makes sense if you own or want a compatible rack |
| GORNATION Wall-Mounted Dip Station | Permanent garage/home gym setup | Rock-solid and saves floor space | Requires drilling and careful installation |
1. Portable & Adjustable Dip Bars — Best All-Rounder
If you’re just starting out or you want a setup that works anywhere — from your living room to your backyard — the portable dip bars are hands down the most versatile choice.

I personally love the 👉 Gornation Premium Dip Bars. They’re beautifully made, easy to assemble, and you can adjust the bar distance to match your shoulder width perfectly. The grip feels great (even during longer sessions), and because they’re lightweight yet stable, I can move them around easily depending on the weather or space.
I’ve used these bars for dips, knee raises, L-sits, and even incline rows. They’re sturdy and grip well even when your hands get a bit sweaty. The one downside? If you’re tall or want to do weighted dips, you might find the leg clearance a bit tight. In that case, the high dip bars below will be a better fit.
Ratings
- Stability: ⭐⭐⭐⭐⭐
- Bar Height: ⭐⭐☆☆☆
- Bar Distance: ⭐⭐⭐⭐⭐
- Maximum Load: ⭐⭐⭐⭐☆
- Ease of Setup: ⭐⭐⭐⭐⭐
- Versatility: ⭐⭐⭐⭐☆
- Price: ⭐⭐⭐⭐⭐
🏆 Winner for price and portability.
For anyone on a tighter budget, there’s also a very similar option on Amazon that performs surprisingly well for its price:

👉 Portable & Adjustable Dip Bars from Amazon
If you’re taller than average (over 6 feet or ~183 cm) or regularly train weighted dips, I recommend going for a higher setup. The extra height gives you more leg clearance and lets you perform straight-leg dips and bodyweight rows without hitting the floor.

For that, my go-to is the 👉 Gornation Static Bar. You’ll need two of them to create a parallel setup, but trust me — the quality, stability, and versatility are unmatched. I use these myself and they’ve completely replaced my old dip stands.
The Static Bars are rock solid. Even during explosive dips or planche leans, they don’t move an inch. I love using them for front lever holds, ring rows, and even handstand push-up prep. The non-slip feet also keep them stable on concrete or tiles.
Ratings
- Stability: ⭐⭐⭐⭐⭐
- Bar Height: ⭐⭐⭐⭐⭐
- Bar Distance: ⭐⭐⭐⭐⭐
- Maximum Load: ⭐⭐⭐⭐⭐
- Ease of Setup: ⭐⭐⭐⭐⭐
- Versatility: ⭐⭐⭐⭐⭐
- Price: ⭐⭐⭐⭐☆
🏆 Winner for stability, height, and versatility.

If your budget is tighter or you’re just starting to explore higher dip setups, a great affordable alternative is the 👉 Kingkang Dip Bars on Amazon. They’re sturdy, have a similar height profile, and provide great value for the price.
Why I recommend this setup:
- Incredibly versatile — great for dips, L-sits, rows, levers, and more
- Easy to move and store
- Adjustable width and solid grip
- Scales with you as you get stronger
2. Squat Rack / Pull-Up Bar Attachments — Best for Heavy Weighted Dips
If you already have a squat rack or you’re building a complete home gym setup, dip bar attachments are the most efficient and stable way to go. These setups let you perform weighted dips safely and integrate your dip station right into your pull-up or squat system.
The two best options I’ve used are:

The Gornation station is ideal if you want an all-in-one training setup. You can do pull-ups, dips, push-ups, and even attach rings or bands — all without drilling a single hole in your wall. It’s sleek, well-balanced, and can handle up to 250 kg of load.
I use this station in my own home gym. It’s excellent for both dips and pull-ups, and it gives you a complete training solution without drilling anything into the wall. The only thing I noticed is that during ring rows or very dynamic moves, it benefits from having a counterweight (like a kettlebell) to keep it perfectly stable.
Ratings
- Stability: ⭐⭐⭐⭐☆
- Bar Height: ⭐⭐⭐⭐⭐
- Bar Distance: ⭐⭐⭐⭐☆
- Maximum Load: ⭐⭐⭐⭐☆
- Ease of Setup: ⭐⭐⭐⭐⭐
- Versatility: ⭐⭐⭐⭐⭐
- Price: ⭐⭐⭐⭐☆
🏆 Winner for all-in-one versatility and compact setup.

- 👆 Titan T-3 Dip Bar Attachment(for those who already own or plan to get a compatible rack)
If you want or already own a rack (or want to build a heavy-duty home gym), the Titan T-3 Dip Bar Attachment is unbeatable in terms of stability and load capacity. It’s compatible with the Titan T-3 Space Saving Rack or the Titan T-3 Power Rack, which are one of the best compact squat racks on Amazon. This combo gives you a truly professional setup that can handle anything from dips to ring work to static holds.
I love this setup for weighted dips — it feels like training in a commercial gym. Once mounted, it’s absolutely rock solid. The only downside is setup time and cost — you need the compatible rack, and it’s not exactly portable.
Ratings
- Stability: ⭐⭐⭐⭐⭐
- Bar Height: ⭐⭐⭐⭐⭐
- Bar Distance: ⭐⭐⭐⭐⭐
- Maximum Load: ⭐⭐⭐⭐⭐
- Ease of Setup: ⭐⭐☆☆☆
- Versatility: ⭐⭐⭐⭐⭐
- Price: ⭐⭐⭐⭐☆
🏆 Winner for heavy weighted dips and professional setups.
Why I recommend this setup:
- Perfect for weighted dips and hybrid calisthenics / strength training
- Extremely stable — no wobbling even under heavy load
- Saves space by integrating into your existing rack
- Commercial-grade construction
3. Wall-Mounted Dip Bars — Best for Permanent Setups
If you have a sturdy wall and you want something rock-solid and space-saving, then wall-mounted dip bars are the way to go. Once installed correctly, they feel absolutely immovable — like training on equipment in a professional gym.

My favorite version is the 👆Gornation Wall Mounted Dip Station It’s made from thick, powder-coated steel and comes with quality mounting hardware (Fischer anchors), so you can safely install it in a brick or concrete wall. The handles are long and comfortable, and you can choose your own height and width during installation.
Once installed correctly, these feel indestructible. I mounted mine at around 50 inches (130 cm) height so I can do dips with straight legs. The only downside is obvious — you’re committing to one position. If you mount them wrong, changing height or width later is a pain.
Ratings
- Stability: ⭐⭐⭐⭐⭐
- Bar Height: ⭐⭐⭐⭐⭐
- Bar Distance: ⭐⭐⭐⭐⭐
- Maximum Load: ⭐⭐⭐⭐☆
- Ease of Setup: ⭐⭐⭐☆☆
- Versatility: ⭐⭐⭐☆☆
- Price: ⭐⭐⭐⭐☆
🏆 Winner for space-saving and rock-solid setup.

If you prefer a more budget-friendly option, the 👆Amazon Wall Mounted Dip Bar is a decent alternative. It’s not as refined, but it’s stable enough for regular bodyweight dips if installed correctly.
Why I recommend this setup:
- Rock-solid stability — zero wobble once installed
- Saves floor space, perfect for garage or home gyms
- Clean and professional look
- Ideal for anyone who trains primarily at home
So Which Dip Bars Are Best For Home Gyms
If I had to choose only one, I’d go with the Gornation Static Bars — they offer the perfect balance of stability, height, and versatility. They let me train everything from dips and rows to levers and handstands, and they don’t take up much space.
That said, all three setups above are excellent choices — it really comes down to your priorities:
- Choose portable dip bars if you value flexibility and convenience.
- Choose rack-mounted bars if you’re serious about weighted calisthenics.
- Choose wall-mounted bars if you want a permanent, professional setup.
No matter which route you go, all of these dip bars will serve you for years and help you build a stronger, more functional upper body.
Important Considerations When Choosing Dip Bars
Over the years, I’ve realized that buying dip bars isn’t just about picking the coolest-looking set. It’s about getting the right tool for your body, your space, and your training goals. A good pair of dip bars can last a lifetime and completely change how your upper-body workouts feel — while a poorly designed one can limit progress or even cause injuries.
Here are the most important things I consider before recommending any dip bar setup:
1. Stability — Non-Negotiable
This is the single most important factor.
If your dip bars wobble, flex, or shift under load, it’s not just annoying — it’s dangerous. Every dip, every leg raise, every static hold relies on a stable base of support. I’ve used bars that felt like balancing on a boat, and others that didn’t move a millimeter even with 40 kg added. Guess which one made me progress faster?
Look for:
- A wide base and non-slip feet — these prevent rocking and sliding, especially on tiles or concrete.
- Heavy-duty steel or thick tubing — thin frames might look fine in photos but can flex over time.
- Even weight distribution — symmetrical frames and consistent welds make a big difference in balance.
If you’re on the heavier side or plan to do dynamic movements like Korean dips, stability becomes even more critical. I’d rather carry 2 kg extra in frame weight than risk an unstable setup.
2. Bar Height — Aim for Hip Level or Higher
Bar height is one of the most overlooked factors. Personally, I prefer dip bars that reach roughly hip height or slightly above. This gives me:
- Enough leg clearance for straight-leg dips, which look and feel cleaner.
- Room to attach a dip belt with weights without hitting the floor.
- The ability to perform rows, leg raises, and L-sits with full range of motion.
Higher bars are more versatile because you can always step up using a plyo box or sturdy chair — but you can’t magically make short bars taller. So, if you’re unsure, err on the side of going higher.
For reference: bars around 110–115 cm tend to offer ideal clearance for most people.
3. Bar Distance — Shoulder-Friendly Setup
This one is crucial for joint health. Many cheaper dip bars have bars set too wide apart, which forces your shoulders into an unnatural externally rotated position. Over time, that can easily cause impingement or rotator cuff strain.
The ideal distance between the bars should allow your arms to stay just slightly wider than shoulder-width when performing dips. I find the sweet spot to be around 45–55 cm depending on your build.
Adjustable-width bars are a huge advantage because you can fine-tune the spacing to match your shoulder width and comfort.
A good rule of thumb:
👉 If your elbows flare too much or you feel pinching in the front of your shoulders, your bars are too wide.
4. Maximum Load — Plan for Progress
Never assume your dip bars only need to handle your current bodyweight. If you train seriously, you’ll eventually want to add weight — either with a dip belt, backpack, or weighted vest. And even if you don’t, dynamic movements like explosive dips or tucked planches put far more than your bodyweight worth of force on the frame.
As a general rule, I recommend choosing dip bars that can safely handle at least 150% of your bodyweight.
So, if you weigh 80 kg, your bars should comfortably support at least 120 kg — preferably more. For weighted calisthenics, aim for 250–300 kg capacity. Anything less will limit your potential or fail sooner than you’d like.
5. Versatility — Get the Most Out of Your Space
There’s absolutely nothing wrong with owning single-purpose dip stands. But if you’re training in a limited space, versatility becomes a big win.
Personally, I like equipment that can do more than one thing without sacrificing performance. I use my dip bars not only for dips but also for:
- Bodyweight rows
- Tuck front levers
- Planche leans
- Handstand push-up practice
- Even muscle-up transitions when set high enough
Of course, versatility shouldn’t come at the expense of function. The bars still need to be excellent for dips first — everything else is just a bonus. That’s why I lean toward setups like the Gornation Static Bars, which have the right height, clearance, and width to handle it all.
6. Ease of Setup — Once Done, But Worth Considering
You’ll probably only assemble your dip bars once, but the process can still make or break your experience.
Portable freestanding bars are the kings of easy setup — no tools, no drilling, just unbox and train. They’re also easy to move if you ever rearrange your gym.
Wall-mounted dip bars, on the other hand, require some planning. You’ll need a solid, load-bearing wall (concrete or brick), a drill, and precision alignment. It’s worth doing properly, but repositioning later is a hassle.
My rule:
- If you rent your home or train outdoors, go portable.
- If you own your space and want a clean, fixed station, go wall-mounted.
7. Ergonomics — The Feel in Your Hands
Ergonomics might sound like a minor detail, but it’s what you’ll feel every single rep. The diameter, coating, and shape of the bars can completely change your experience.
Here’s what I’ve learned:
- Thicker bars (38–45 mm) feel more comfortable if you have larger hands and can actually build better grip strength.
- Thinner bars (32–35 mm) are easier for beginners or smaller hands.
- Powder-coated or matte finishes are ideal — they prevent slipping but don’t tear your skin like rough knurling can.
- Y-shaped bars are a great hybrid design — you can use the narrower section for shoulder-friendly dips and the wider section for more chest activation.
Ultimately, ergonomics come down to personal preference. There’s no universal “right” answer — but there is a right fit for your body.
8. Price and Value — Buy Once, Cry Once
Price is always part of the equation. You can find dip bars from €50 to €500, but price alone doesn’t tell the full story. What matters is the value you’re getting.
Here’s how I think about it:
- If you’re new to calisthenics or on a tight budget, start with a portable set of dip bars. They’re cheap, compact, and still let you perform every variation of dips and core work.
- If you want to future-proof your setup, it’s worth paying extra for something stable, adjustable, and built to last. A solid set of dip bars will outlive any cheap alternative — and you’ll feel safer pushing your limits.
Typically:
- Portable dip bars → best bang for the buck.
- High dip bars / wall-mounted → great mid-range options.
- Squat rack or commercial-grade attachments → expensive, but professional quality.
My philosophy: buy quality once and never think about it again. The peace of mind and training experience are absolutely worth it.
9. Bonus: Storage & Portability
If you train in a small space, this is worth thinking about too. Some dip bars are designed to stack or fold flat, while others are large, welded pieces that you can’t move easily.
If you travel often, choose a set that can be disassembled or packed flat. I’ve taken portable dip bars on road trips and even used them in hotel rooms — they take up surprisingly little space in a car trunk.
Final Thoughts on Choosing the Right Dip Bars
In the end, the best dip bars are the ones that make you want to train more. They should feel safe, comfortable, and aligned with your body. Whether you go for a premium setup like the Gornation Static Bars or a budget-friendly pair from Amazon, the key is to pick something that supports your current level but doesn’t limit your progress later.