
Wall walk
How to do Wall walk?
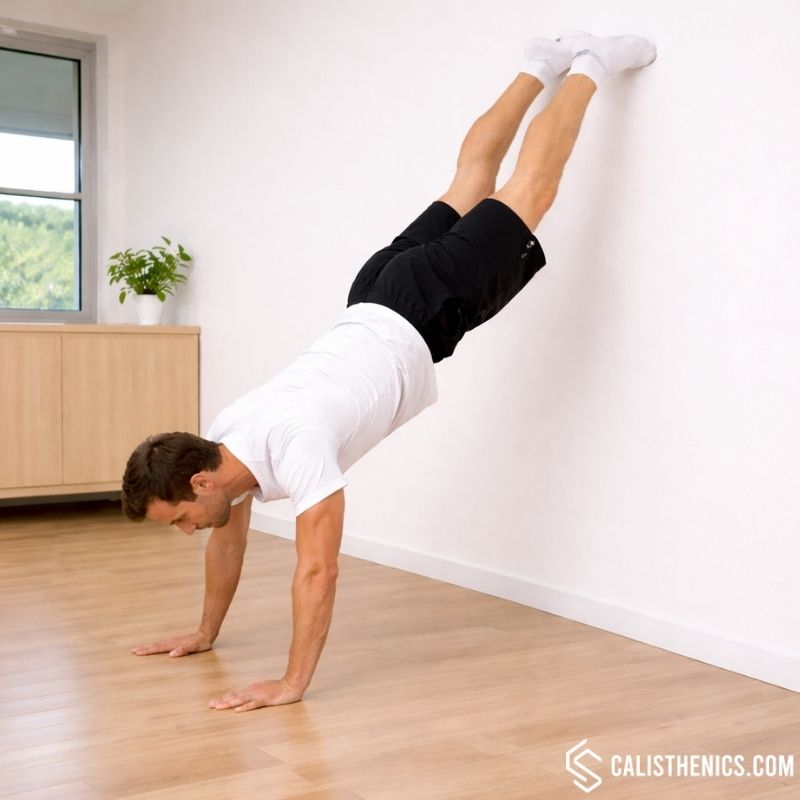
The wall walk is a challenging bodyweight exercise that strengthens the shoulders, chest, core, and back. It involves starting in a prone position, walking your feet up a wall while your hands walk closer to the wall, and then returning to the starting position. This movement builds shoulder stability, improves upper body strength, and serves as an excellent progression for handstands.
Steps to Perform a Proper Wall Walk:
1. Start in a Prone Position:
• Lie face down on the ground with your feet against a wall.
• Place your hands under your shoulders as if setting up for a push-up.
2. Perform a Push-Up to Enter the Plank Position:
• Press through your palms to lift your body into a high plank position, keeping your core engaged and your body in a straight line.
3. Begin Walking Your Feet Up the Wall:
• Slowly walk your feet up the wall while simultaneously walking your hands closer to the wall.
• Keep your core tight and your back straight as you move.
4. Stop When Your Body is Vertical or Close to Vertical:
• Walk your hands as close to the wall as your shoulder mobility and strength allow, ideally achieving a vertical handstand position.
• Keep your head neutral and focus on the ground or slightly in front of your hands.
5. Walk Back to the Starting Position:
• Reverse the movement by walking your hands away from the wall while slowly lowering your feet back down to the ground.
• Control the descent to maintain stability and avoid collapsing.
6. Repeat the Movement:
• Perform the desired number of repetitions, focusing on maintaining proper form and control throughout.
Benefits of the Wall Walk
• Builds Upper Body Strength: Strengthens the shoulders, chest, and arms, preparing you for advanced movements like handstands and handstand push-ups.
• Improves Shoulder Stability: Challenges shoulder stabilizers, reducing the risk of injury and improving functional strength.
• Enhances Core Engagement: Requires significant core activation to maintain alignment and stability during the movement.
• Progression for Handstands: Serves as an excellent preparatory exercise for mastering handstands and handstand push-ups.
• Increases Body Awareness: Improves proprioception and balance by requiring full-body control.
• No Equipment Needed: Requires only a wall, making it accessible for home or outdoor workouts.
Common Mistakes to Avoid
• Arching the Back: Engage your core to keep your back straight and avoid overloading your lower back.
• Rushing the Movement: Move slowly and with control to maximize effectiveness and prevent injury.
• Incomplete Range of Motion: Walk your hands as close to the wall as your mobility and strength allow, gradually progressing over time.
• Head Position: Keep your head neutral to avoid straining your neck.
• Uneven Weight Distribution: Ensure both hands and feet are evenly engaged to maintain stability.
Tips for the proper execution of Wall walk
Engage Your Core: Keep your core tight to prevent arching your back and maintain stability.
Move Slowly and Controlled: Avoid rushing; focus on smooth, deliberate movements to maximize muscle engagement.
Align Your Body: Keep your shoulders, hips, and feet aligned as you move up and down the wall.
Keep Your Head Neutral: Avoid looking up or down excessively; maintain a neutral neck position for better alignment and reduced strain.
Breathe Steadily: Exhale as you walk up the wall and inhale as you walk back down to maintain a steady rhythm.
Muscles worked when doing Wall walk
Primary Muscles:
•Shoulders (Deltoids): Provide stability and strength during the push-up and wall walk phases.
•Chest (Pectorals): Engage during the push-up and help stabilize during the wall walk.
•Core Muscles: The rectus abdominis, transverse abdominis, and obliques stabilize the torso and maintain body alignment.
Secondary Muscles:
•Triceps: Assist in the push-up and stabilize the arms during the wall walk.
•Upper Back (Trapezius, Rhomboids): Support shoulder stability and posture.
•Forearms and Grip: Engage to stabilize the hands and support weight-bearing during the wall walk.
•Glutes and Hamstrings: Activate to maintain hip alignment and assist in controlling the descent.
Primary Muscle(s):

Abdominal
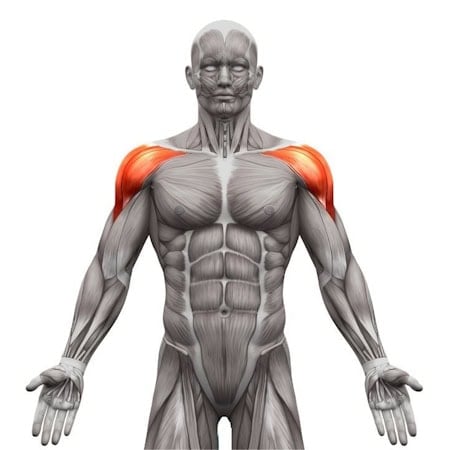
Anterior delt
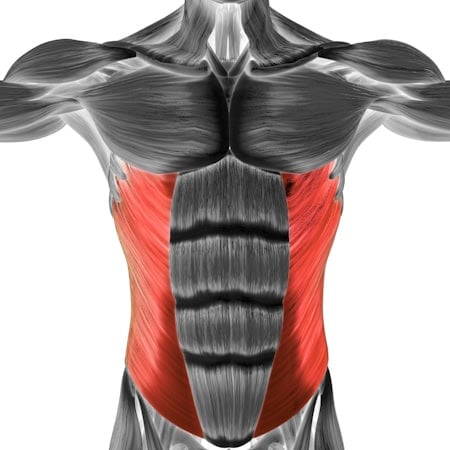
Oblique
Secondary Muscle(s):
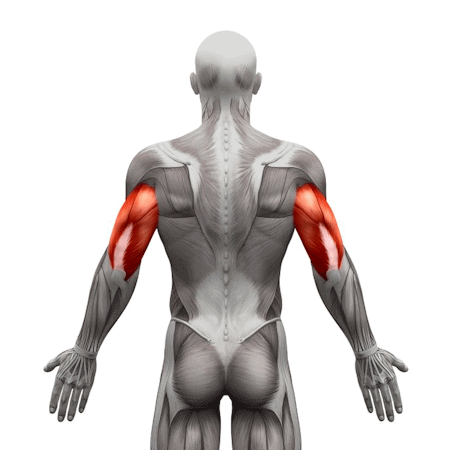
Triceps
Equipment needed for Wall walk
No equipment needed for this exercise.
Adjust the difficulty of Wall walk
How to make Wall walk harder?
How to make Wall walk easier?
How to make Wall walk harder?
To make Wall walk harder:
-
Walk Hands Closer to the Wall: Aim to get your hands as close to the wall as possible, ideally achieving a full vertical handstand position.
-
Hold at the Top: Pause in the vertical position for 3-5 seconds to increase time under tension and challenge your balance and strength.
-
Perform More Repetitions: Increase the number of wall walks in your set to build endurance and upper body strength.
-
Add a Shoulder Tap: In the vertical position, lift one hand to tap the opposite shoulder to further challenge your stability and coordination.
-
Wear a Weight Vest: Add a weight vest to increase the load on your shoulders and core during the movement.
How to make Wall walk easier?
To make Wall walk easier:
-
Limit the Range of Motion: Walk your hands only partway toward the wall, stopping when you feel comfortable, and gradually increase the range over time.
-
Use a Wider Hand Position: Placing your hands slightly wider than shoulder-width can make the movement more stable and less intense.
-
Perform Against a Slanted Surface: Instead of a vertical wall, use a slanted surface to reduce the intensity while building strength.
-
Assist with a Partner: Have a partner support your legs or guide you as you walk up and down the wall to build confidence.