I used to treat my back like a fragile vase. Every time I felt a twinge in my lumbar spine—whether after a long run or a heavy deadlift session—I would freeze. I would stop moving, lie flat, and wait for the "danger" to pass.
I was wrong. Most of us are.
We tend to treat back pain as an injury that requires rest, when in reality, the vast majority of chronic, non-specific back pain is a signal of insufficiency. Your spine isn't necessarily broken; it’s unsupported.
As someone who has navigated the worlds of endurance sports, heavy lifting, and the inevitable sedentary periods of modern life, I have found that the solution isn't in a bottle of pills or a softer mattress. It is found in gravity. Specifically, mastering your own body weight—calisthenics—to build an "invisible corset" of muscle that protects your spine regardless of what you throw at it.
This isn’t just about doing a few planks. It’s about re-engineering how your body handles load. Whether you are a cyclist with tight hip flexors, a powerlifter afraid of a herniation, or an office worker fighting the "hunch," this guide is for you.
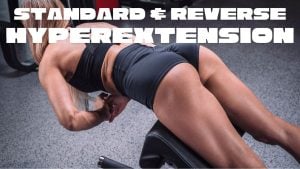
If you are ready to start strengthening your posterior chain - make sure to read my ▶️ guide to hyperextension and reverse-hyperextension.
Part I: The Anatomy of Support (and Why You’re Failing It)
To fix the back, you have to stop looking at the back.
The biggest misconception in back pain management is the obsession with the erector spinae—those two strap-like muscles running up your spine. While important, they are rarely the root cause of the problem. The spine is a suspension bridge, and the tension cables holding it up are the glutes, the deep abdominals, and the scapular retractors.
The "Anterior Pelvic Tilt" Epidemic
Runners and cyclists, I’m looking at you. When you spend hours in a saddle or pounding pavement, your hip flexors (specifically the psoas major) become short and tight. This pulls your pelvis forward (anterior tilt).
When the pelvis tips forward, the lower back arches excessively (hyperlordosis). This jams the facet joints of the lumbar spine together. No amount of massage will fix this if you don't strengthen the opposing force: the glutes and the deep core.
The "Extension Intolerance" of Lifters
Weightlifters often suffer from the opposite issue. We become so obsessed with "keeping a flat back" that we lock our spines into rigid extension under load. Over time, we lose the ability to articulate the spine, leading to stiffness and an inability to absorb shock. We become strong, but brittle.
The "Creep" of the Sedentary
For the office worker, the enemy is a phenomenon biomechanists call "ligamentous creep." When you sit with a rounded back for 20 minutes or longer, the ligaments in your spine stretch and deform. They lose their elasticity. This transfers the load directly to the discs. Calisthenics reverses this by forcing the muscles to take back the load that the ligaments have been unfairly bearing.
Part II: The Calisthenics Philosophy for Spine Health
Why calisthenics? Why not just use machines?
Machines stabilize the load for you. When you do a leg press, the seat stabilizes your spine. When you do a pistol squat (a single-leg bodyweight squat), you must stabilize your spine.
Calisthenics forces "co-contraction." This is a mechanism where the abdominal muscles and back muscles contract simultaneously to create a rigid cylinder of protection around the spine. This increases intra-abdominal pressure (IAP), which effectively unloads the spinal discs.
Here is the blueprint. We will divide this into three pillars: Anti-Motion, Glute Dominance, and Thoracic Mobilization.
Pillar 1: Anti-Motion (The True Core)
Forget crunches. Crunches flex the spine, which mimics the poor posture we are trying to correct. Real core strength for back health is about resisting motion, not creating it. We call this "anti-motion" training.
1. The Dead Bug (The Master Reset)


Tips
-
Start with small ranges of motion and only extend further as long as your lower back stays gently pressed into the floor.
-
Imagine zipping your ribs toward your pelvis before each rep to lock in your core position.
-
If you struggle to keep tension, press your opposite hand and knee together (same-side contact) on the non-moving side to wake up your deep core.
-
Move slowly and deliberately—2–3 seconds out, short pause, 2–3 seconds back.
-
If your hip flexors dominate, think about exhaling fully and relaxing the front of the hips while maintaining abdominal tension.
-
Use a soft surface like a mat for comfort, but avoid overly squishy surfaces that make it hard to feel your back on the floor.
This is the most deceptive exercise in existence. It looks like a dying insect, but it is the gold standard for teaching your ribcage to stay connected to your pelvis.
- The Setup: Lie on your back with arms extended toward the ceiling and legs in the air, knees bent at 90 degrees.
- The Critical Detail: Press your lower back into the floor. Imagine there is a grape under your lumbar spine and you are trying to crush it. Do not let up on this pressure.
- The Movement: Slowly lower your right arm behind your head and extend your left leg straight out. Exhale hard through pursed lips (like you are blowing up a balloon) as you extend. This activates the transverse abdominis.
- Why it works: It forces you to dissociate hip movement from spine movement. Runners often move their backs when they think they are moving their legs. This exercise breaks that pattern.
2. The Pallof Press (Anti-Rotation)
While usually done with a cable, you can do this with a resistance band tied to a doorframe. This is essential for anyone with asymmetrical pain (pain on one side).
- The Movement: Stand perpendicular to the anchor point. Hold the band with both hands at your chest. Press your hands straight out.
- The Mechanics: The band wants to twist your torso toward the door. Your job is to not let it.
- The Benefit: This targets the Quadratus Lumborum (QL), a deep lower back muscle that often spasms when the core is weak. By strengthening the QL's ability to resist rotation, you stabilize the lumbar vertebrae.
3. The Hollow Body Hold


Muscle group:
Tips
-
Keep Your Lower Back on the Floor: The lower back should remain pressed firmly into the ground at all times to protect your spine and maximize core engagement.
-
Engage the Entire Core: Focus on tightening not just your abs but also your obliques and lower back to maintain full-body tension.
-
Start Small and Progress Gradually: If holding the full position is too challenging, modify it by bending your knees or keeping your arms by your sides.
-
Avoid Straining Your Neck: Keep your neck neutral and avoid pulling it forward; the lift should come from your abs, not your head.
-
Breathe Steadily: Don’t hold your breath; focus on controlled breathing to maintain stability and endurance.
This is a staple of gymnastics, and gymnasts have some of the strongest spines in the world.
- The Movement: Lie on your back. Lift your shoulders off the ground. Lift your legs off the ground. Your body should look like a banana or the bottom of a rocking chair.
- The Key: Your lower back must be glued to the floor. If it arches, lift your legs higher until it flattens.
- Progression: Start with 10-second holds. The goal is to build up to a minute of unshakeable tension. This builds a "brace" that you will unconsciously use when lifting groceries or running.
Pillar 2: Glute Dominance (The Engine Room)
Dr. Stuart McGill, perhaps the world's foremost expert on spinal mechanics, coined the term "gluteal amnesia." Because we sit on our glutes all day, the brain forgets how to fire them. When the glutes don't fire, the lower back takes over the job of hip extension. This is a disaster.
We need to wake them up.
1. The Single-Leg Glute Bridge

Muscle groups:


Tips
-
Core Engagement: Keep your core tight throughout the exercise to prevent your lower back from arching and to stabilize your hips.
-
Drive Through the Heel: Press through the heel of the working leg to activate the glutes and hamstrings more effectively. Avoid pushing through the toes, as this can place strain on the knees.
-
Keep Hips Level: Focus on keeping your hips level throughout the movement. Avoid letting one hip drop or rotate during the lift.
-
Controlled Movement: Perform the exercise slowly and with control, especially during the lowering phase, to maximize muscle engagement.
-
Breathing: Inhale as you lower your hips, and exhale as you lift them. Proper breathing helps maintain core stability and rhythm.
The standard bridge is too easy for most. The single-leg version exposes imbalances immediately.
- The Movement: Lie on your back, one knee bent, foot flat. The other leg is in the air. Drive through the heel of the grounded foot to lift your hips.
- The Diagnostic: If your hamstring cramps, your glutes are asleep. If your back arches, you are using your spine to lift, not your hips.
- The Fix: Squeeze the glute before you lift. Poke it with your finger if you have to. Mind-muscle connection is physically real here.
2. The Bulgarian Split Squat (The King of Support)


Tips
-
Core Engagement: Keep your core engaged throughout the movement to maintain balance and prevent your torso from leaning too far forward.
-
Knee Alignment: Ensure that your front knee tracks in line with your toes and does not extend past your toes. This helps protect your knees and maximizes muscle engagement.
-
Control the Descent: Lower yourself slowly and with control, especially as your back knee approaches the ground. This helps engage your muscles more effectively and reduces the risk of injury.
-
Weight in the Front Heel: Focus on driving through your front heel when you push back up to engage your glutes and hamstrings properly.
-
Breathing: Inhale as you lower into the squat and exhale as you push up. Proper breathing helps you maintain control and stability.
This is superior to the barbell squat for back pain sufferers.
- The Setup: One foot behind you on a bench or chair. The other foot in front. Lower your back knee toward the ground.
- Why it saves the back: It requires almost no spinal load to be effective. Because you are on one leg, the glute medius (side of the hip) has to fire like crazy to keep you from falling over.
- The Secret Sauce: Lean your torso slightly forward (about 15 degrees). This shifts the load from the knee to the glute. A vertical torso loads the quad; a hinged torso loads the glute. We want the glute.
3. The Hip Hinge (Learning to Bow)

Muscle groups:
Tips
-
Back Positioning: Maintain a neutral spine during the entire movement. Avoid arching or rounding your back, as this can lead to strain or injury.
-
Core Engagement: Keep your core tight throughout the exercise to stabilize your spine and prevent your lower back from rounding.
-
Controlled Movement: Perform the movement slowly and with control, focusing on the hip hinge and keeping the motion smooth.
-
Knee Position: Keep a slight bend in your knees, but avoid excessive bending. The movement should come primarily from the hips, not the knees.
-
Breathing: Inhale as you lower your torso and exhale as you return to the starting position, keeping your breath steady to help with control and stabilization.
Before you deadlift, you must hinge. This teaches you to move at the hips, keeping the spine neutral.
- The Drill: Stand a foot away from a wall, facing away. Push your butt back until it touches the wall. Keep your shins vertical. Do not squat; bow.
- The Check: Put one hand on your belly and one on your lower back. As you bow, the distance between your hands should not change. If it does, you moved your spine.
Pillar 3: Thoracic Mobilization (Freeing the Lumbar)
Here is a fact rarely mentioned in fitness magazines: The lower back is not designed to rotate. The lumbar vertebrae are interlocked in a way that allows flexion and extension, but very little twisting (only about 13 degrees total).
Rotation is supposed to happen in the thoracic spine (upper back). But when we hunch over computers, the thoracic spine becomes stiff. When we try to twist (like checking a blind spot or swinging a golf club), the stuck upper back forces the lower back to twist instead. Snap.
To save the lower back, mobilize the upper back.
1. The Cat-Cow (With a Twist)

Muscle groups:

Tips
-
Move slowly and deliberately, aiming to feel each segment of your spine move.
-
Think of starting the movement from the pelvis—tailbone tucks for Cat, tilts up for Cow—then let the rest of the spine follow.
-
Keep shoulders relaxed and away from the ears; don’t let them creep up as you move.
-
If your wrists feel uncomfortable, place your hands slightly in front of your shoulders or use yoga blocks to reduce the wrist angle.
-
Use your breath as your metronome: inhale to open (Cow), exhale to round (Cat).
-
Don’t chase maximal range at all costs. Work in a comfortable, pain-free range and gradually increase over time.
-
If your knees are sensitive, add extra padding with a folded mat or towel.
The standard yoga move is good, but we need to focus on segmenting.
- The Movement: On hands and knees. Instead of just flopping up and down, try to move one vertebrae at a time, starting from the tailbone and rolling up to the neck like a wave.
- The Nuance: Focus on the "Cow" (extension) in the upper back. Most people can extend their lower back easily. Fight to extend the area between your shoulder blades.
2. Thoracic Openers (The Archer)
- The Setup: Lie on your side, knees bent at 90 degrees (fetal position). Keep your knees stacked.
- The Movement: Reach your top arm forward, then pull it back across your body like drawing a bow, trying to touch your shoulder to the floor behind you.
- The Constraint: Your knees must not slide apart. If they do, you are twisting your lower back. Keep them glued to isolate the T-spine.
3. The Dead Hang
This is the simplest, most primitive, and effective traction method available.
- The Action: Find a pull-up bar. Hang. Relax everything except your grip.
- The Benefit: Gravity decompresses the spine, creating space between the discs. It also stretches the lats. Tight lats pull on the pelvis and lower back; stretching them relieves this tension. Aim for 30-60 seconds daily.
Part III: The Routine
You don't need to quit your current sport. You need to sandwich it with this "pre-hab" work. Here are three routines based on your profile.
Routine A: The "Desk Jockey" Reset
Perform this every evening to undo the damage of the chair.
- Dead Hang: 30 seconds.
- Cat-Cow Segmentations: 10 slow reps.
- Dead Bug: 3 sets of 10 reps per side.
- Glute Bridges: 3 sets of 15 reps (focus on the squeeze).
Routine B: The Runner/Cyclist Balancer
Perform this 2-3 times a week on non-long-run days.
- Hip Flexor Stretch (Couch Stretch): 2 mins per side (critical for opening the hips).
- Single-Leg Glute Bridges: 3 sets of 12 per side.
- Pallof Press (Band): 3 sets of 15 seconds hold per side.
- Bulgarian Split Squats: 3 sets of 8 reps (slow tempo).
Routine C: The Lifter’s Warm-up
Perform this before touching a barbell.
- McGill Big 3: (Look this up—it’s the Bird-Dog, Side Plank, and Curl-up). Do 1 set of each to stiffen the core.
- Thoracic Openers: 10 per side.
- Bodyweight Squats with Pause: 10 reps, pausing 3 seconds at the bottom to open hips.
Part IV: The Forbidden Move (Why You Should Round Your Back)
If you perform a deadlift with a rounded back in a commercial gym, a trainer will likely sprint across the room to stop you. We have been indoctrinated with a singular rule: "Never, ever round your spine under load."
This rule is well-intentioned. When lifting maximal loads (like a heavy deadlift), a neutral spine is essential to distribute force and prevent disc herniation. However, treating the spine like a rigid steel rod 24/7 has created a generation of athletes with "fragile" backs that spasm the moment they move out of perfect alignment.
Enter the Jefferson Curl.
The Jefferson Curl is a gymnastics staple where you stand on a box, hold a weight, and deliberately roll your spine down, vertebra by vertebra, into deep flexion, and then roll back up.
The Controversy vs. The Science
The controversy is obvious: It loads the spinal discs in a flexed position.
However, the logic behind it is based on the biological Law of Specific Adaptation to Imposed Demand (SAID). Your spinal discs, ligaments, and fascia are living tissues. Just like muscles, they adapt to stress. If you never expose your spine to flexion, those tissues become weak and brittle in that range.
When you eventually bend over to pick up a pencil or a child—inevitably with a rounded back—that unconditioned tissue fails. Snap.
The Jefferson Curl is not about "lifting heavy." It is about structural remodeling. It strengthens the posterior longitudinal ligament and conditions the discs to handle flexion, effectively "bulletproofing" the back against awkward, real-world movements.
How to Do It Safely (The Rules are Strict)
Warning: If you have an active disc herniation or acute sciatic pain, do NOT do this exercise yet. This is for remodeling healed tissue and preventing future injury, not for acute rehab.
- Start with Zero Load: Do not pick up a weight. Your first few sessions should be bodyweight only.
- The Chin Tuck: Stand on a stable box or bench. Start by tucking your chin to your chest.
- Segmental Rolling: Imagine your spine is a string of pearls. You want to drop one pearl at a time. Roll the neck, then the upper back, then the mid-back, and finally the lower back.
- The Descent: Keep your legs straight (lock the knees if you have the mobility, or keep a "micro-bend" if you are very tight). Reach your fingers down past your toes.
- The Ascent: This is critical. Do not just stand up. Reverse the pearl string. Tuck your tailbone under first, stacking the lower back, then the mid-back, with the head coming up last.
Why It’s a Game Changer
For the stiff weightlifter or the cyclist locked in a hunch, the Jefferson Curl does something stretching cannot: it lengthens the fascia under load. This creates permanent mobility gains.
By slowly introducing light weights (starting with 5-10 lbs and adding only 5 lbs every few months), you build a spine that is resilient in every position, not just the neutral one. We want a spine that acts like a bamboo rod—strong, but capable of bending without breaking.
Part V: Deep Dive - The Fascial Connection
Most articles stop at muscles. We need to talk about fascia—the connective tissue web that wraps everything.
The Thoracolumbar Fascia is a large diamond-shaped sheet of connective tissue in your lower back. It acts as a major anchor point. The latissimus dorsi (lats) pulls it one way, and the opposing glute pulls it the other way.
This creates the "Posterior Oblique Sling."
When you walk or run, your left arm swings forward while your right leg steps back. This stretches the sling, storing elastic energy. If your lats are weak or your glutes are weak, this sling becomes slack. The energy isn't transferred through the fascia; it crashes into the spine.
How Calisthenics Trains the Sling:
Exercises like the Bird-Dog (extending opposite arm and leg while on all fours) train this exact cross-body connection.7 It’s not just about balance; it’s about tensioning that fascial sheet to stabilize the sacroiliac joint.
Advice: When doing a Bird-Dog, make a fist with your extended hand and flex the foot of the extended leg. Push through the heel. This irradiation of tension tightens the fascial sling, protecting the back.
Part V: The Psychological Component of Pain
This is controversial but backed by modern pain science (consult the work of Dr. Lorimer Moseley). Chronic back pain is often a "hypersensitivity" issue.
If you have had pain for a long time, your nervous system becomes like a car alarm that goes off when a leaf falls on the hood. You anticipate pain, so you move stiffly. Moving stiffly causes pain. It’s a loop.
Calisthenics breaks this loop because it is scalable.
You can regress a movement to the point where it is safe and pain-free.
- Can't do a pushup? Do it against a wall.
- Can't do a lunge? Do a shallow split squat.
By finding a "pain-free entry point" and successfully moving, you send a signal to your brain: "See? Movement is safe." Over weeks, the brain dials down the sensitivity of the alarm system.
My Rule of Thumb: If pain during exercise is a 3/10 or less and does not get worse the next day, keep moving. Total avoidance of movement usually leads to atrophy and more pain.
Part VI: Lifestyle Factors That Sabotage Your Gains
You can do all the calisthenics in the world, but you cannot out-train 12 hours of bad posture.
I put together a quick 5-minute routine to mobilize your lower back, which you can easily do even in the office.
1. The "Breath" Check
Check your breathing right now. Are your shoulders rising? If so, you are "chest breathing." This uses the accessory muscles of the neck and upper back, creating tension that radiates downward.
You must practice Diaphragmatic Breathing. When you inhale, your belly should expand 360 degrees—front, sides, and back. This expansion increases intra-abdominal pressure, stabilizing the spine from the inside out.
2. The Standing Desk Trap
I see people switch to standing desks and immediately develop back pain. Why? Because they stand with one hip popped out, or they lean. Standing requires endurance.
- The Fix: If you stand, use a footstool. Alternate resting one foot on the stool every 10 minutes. This unlocks the pelvis and prevents hyperlordosis.
3. Sleep Hygiene for the Spine
Stomach sleeping is generally terrible for back pain sufferers as it forces the neck into rotation and the lower back into extension.11
- The Fix: Try to sleep on your back with a pillow under your knees. This flexes the hips slightly, flattening the lumbar curve and letting the psoas muscles relax.
Conclusion: The Long Game
Building a back that doesn't hurt isn't a 6-week program. It is a change in how you inhabit your body.
When I started prioritizing calisthenics over heavy ego-lifting, my physique changed, but more importantly, my "durability" changed. I stopped worrying about bending over to tie my shoes. I stopped fearing the last mile of a run.
Summary Checklist for a Bulletproof Back:
- Strengthen the Glutes: They are the foundation.
- Solidify the Core: Anti-motion, not crunches.
- Mobilize the Thoracic Spine: Twist the top so the bottom doesn't have to.
- Stretch the Hips: Undo the sitting.
- Breathe with the Belly: Pressurize the spine.
Your spine is the mast of your ship. If the rigging (muscles) is loose on one side and tight on the other, the mast will snap in a storm. Calisthenics is the art of tightening the rigging, evenly, systematically, and permanently.
Start with the Dead Bug. Start today. Your future self—the one who can still run, lift, and play without wincing—will thank you.