
Chest-to-Wall Handstand
How to do Chest-to-Wall Handstand?
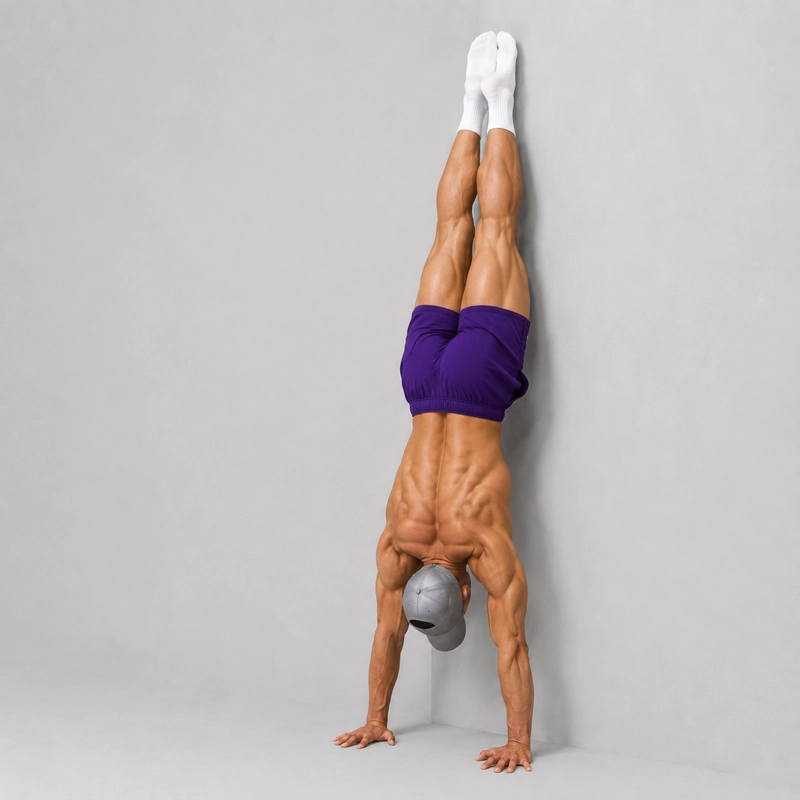
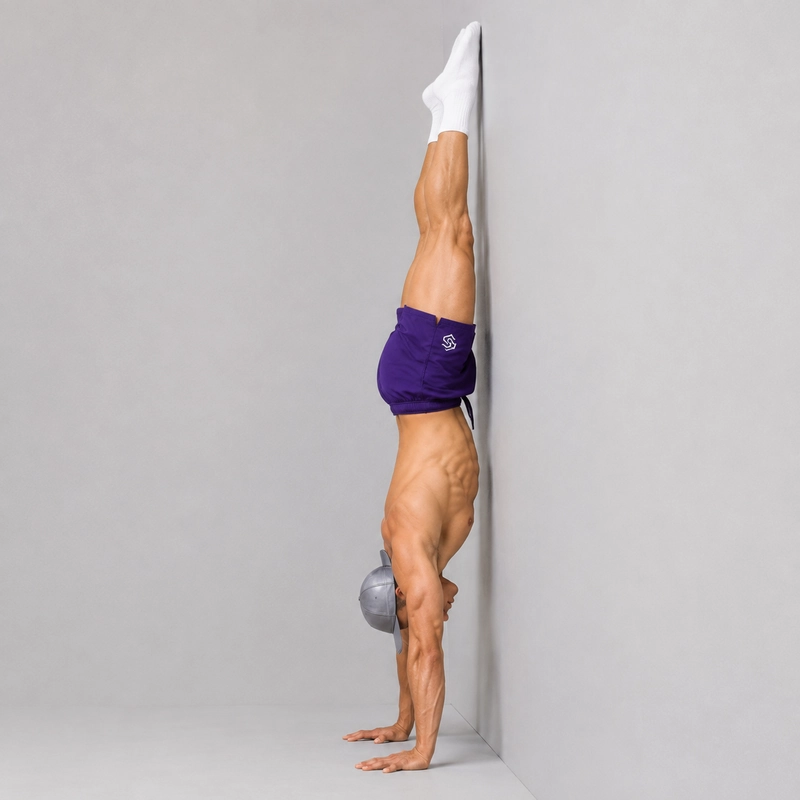
The chest-to-wall handstand, also called a wall-facing or stomach-to-wall handstand, is a supported inversion in which the athlete faces the wall with only the toes resting lightly against it. The wall removes most of the balance demand, allowing you to concentrate on overhead alignment, active shoulders and full-body tension.
This orientation generally makes it easier to practise a straight handstand line than a back-to-wall hold. Because the wall prevents the feet from drifting far behind the body, it discourages the heavily arched “banana” position often seen when beginners kick up with their back facing the wall. The goal is to stack the wrists, shoulders, hips and ankles as closely as your mobility allows—not to press your chest against the wall.
The exercise is normally entered through a controlled wall walk. Before attempting it, you should be able to support your weight through straight arms, maintain active shoulders and reverse the wall walk without collapsing. A wrist warm-up routine and controlled overhead preparation should be completed before each handstand session.
A strong hollow body hold can help you understand the rib, pelvis and leg position used in a well-aligned handstand. For a broader explanation of the movement and its physical demands, read our guide to handstand benefits and muscles worked.
Practise in a clear area and learn how you will exit before moving close to the wall. If you have glaucoma or another medical condition for which you have been advised to avoid strenuous inversions, consult an appropriate healthcare professional first. The American Academy of Ophthalmology recommends modifying or avoiding strenuous inverted positions when elevated eye pressure is a concern.
Tips for the proper execution of Chest-to-Wall Handstand
Spread your fingers and press through the entire hand rather than collapsing into the heels of your palms.
Keep the elbows completely straight throughout the hold.
Push tall through the shoulders as though trying to move your feet farther from the floor.
Bring the ribs toward the pelvis to reduce excessive lower-back arching.
Squeeze the glutes, straighten the knees and keep the legs together.
Point your toes and use only light toe contact with the wall.
Walk closer to the wall gradually; do not sacrifice control to achieve an artificially straight position.
Keep your head neutral and look between or slightly ahead of your hands.
Continue breathing instead of holding your breath during the inversion.
End the hold before your shoulders collapse or your body line deteriorates.
Use the same controlled wall-walk pattern to enter and leave the position.
Train on a non-slip surface in a clear space with a planned exit.
Muscles worked when doing Chest-to-Wall Handstand
The chest-to-wall handstand is an isometric vertical-pushing and bracing exercise. The shoulders and upper back actively support the inverted body while the triceps keep the elbows extended. The core, glutes and legs organize the rest of the body into a stable line.
Primary muscles
- Deltoids: The shoulders stabilize the upper arms and help maintain the overhead weight-bearing position.
- Trapezius: The upper trapezius contributes to scapular elevation and upward rotation as you push tall through the shoulders.
- Serratus anterior: The serratus helps control the shoulder blades and maintain a strong connection between the arms and torso.
- Triceps brachii: The triceps hold the elbows in full extension while supporting bodyweight.
Secondary muscles
- Abdominals and obliques: Brace the torso and help prevent uncontrolled extension or rotation.
- Spinal stabilizers: Maintain trunk position while the body is inverted.
- Forearm and hand muscles: Stabilize the wrists and distribute pressure through the hands and fingers.
- Glutes: Help maintain hip extension and connect the trunk to the legs.
- Quadriceps: Keep the knees extended and contribute to a rigid lower-body line.
The wall supplies balance assistance, but it should not support the entire body. Maintaining only light contact through the toes ensures that the shoulders, arms and trunk continue doing the stabilizing work.
Primary Muscle(s):

Anterior delt

Trapezius
Secondary Muscle(s):

Triceps

Abdominal
Equipment needed for Chest-to-Wall Handstand
No equipment needed for this exercise.
Adjust the difficulty of Chest-to-Wall Handstand
How to make Chest-to-Wall Handstand harder?
How to make Chest-to-Wall Handstand easier?
How to make Chest-to-Wall Handstand harder?
To make Chest-to-Wall Handstand harder:
-
Move Closer to the Wall: Gradually reduce the distance between your hands and the wall while preserving a stacked line and controlled exit.
-
Increase the Hold Duration: Progress from 10–15 seconds toward controlled 30-second holds with calm breathing.
-
Wall-Facing Toe Pulls: Use hand and fingertip pressure to lift the toes briefly from the wall before returning them gently.
-
Handstand Shrugs: Maintain straight elbows while lowering and then actively elevating the shoulders.
-
Wall Handstand Weight Shifts: Transfer slightly more weight onto one hand without twisting the hips or losing shoulder elevation.
-
Alternating Foot Detachment: Remove one foot from the wall at a time and bring it into line above the hips.
-
Freestanding Handstand Practice: Progress to controlled balance attempts only after learning a safe exit and maintaining consistent wall-facing alignment.
How to make Chest-to-Wall Handstand easier?
To make Chest-to-Wall Handstand easier:
-
Partial Wall Walk: Walk only as high as you can while maintaining straight arms and enough strength to descend safely.
-
Feet-Lower Wall Hold: Keep your feet lower on the wall and your body at a diagonal angle to reduce the load on the shoulders.
-
Pike Hold on a Plyo Box: Place your feet or knees on a stable box and stack the hips over the shoulders without becoming fully inverted.
-
Shorter Holds: Perform several 5–10-second holds instead of approaching muscular failure.
-
Spotter-Assisted Hold: Ask a qualified spotter to control your legs and help you maintain a safe distance from the wall.
-
Wider Hand Position: Use a slightly wider hand placement temporarily if shoulder mobility prevents a comfortable shoulder-width position.
