
Iron Cross
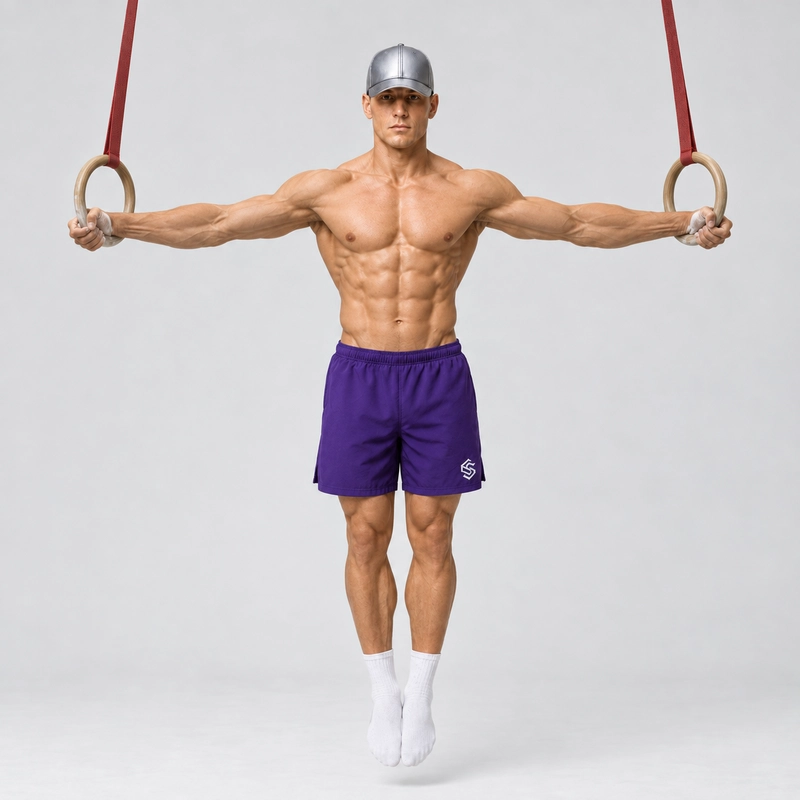
How to do Iron Cross?
The Iron Cross is an elite straight-arm strength skill performed on gymnastics rings. The athlete suspends the body vertically between the rings while extending both arms horizontally to the sides, creating the shape of a cross.
The skill is also called the Cross in competitive gymnastics. It demands exceptional shoulder-adduction strength, straight-arm control and ring stability from the chest, lats, teres major, biceps and surrounding shoulder muscles. Unlike a Ring Support Hold, in which the arms remain beside the torso, the Iron Cross moves the arms approximately 90 degrees away from the body and greatly increases the leverage acting on the shoulders and elbows.
The full Iron Cross is a goal skill rather than an appropriate starting exercise. Most athletes should spend the majority of their cross training on foot-assisted, band-assisted, counterweighted or forearm-supported variations before attempting to support their entire bodyweight in the final position.
Under the current FIG Men’s Artistic Gymnastics rules, a strength hold must show a complete stop for at least two seconds. A strict competitive Cross also uses straight arms and a regular grip with straight wrists rather than a false grip.
Iron Cross quick facts
| Exercise type | Static straight-arm strength skill |
|---|---|
| Primary equipment | Gymnastics rings |
| Difficulty | Elite |
| Main action | Isometric shoulder adduction with straight elbows |
| Strict hold standard | At least two seconds after reaching a complete stop |
| Primary prerequisite | Stable rings-turned-out support with conditioned shoulders and elbows |
Benefits of the Iron Cross
- Develops elite straight-arm strength: The shoulders must resist extremely demanding leverage while the elbows remain fully extended.
- Builds powerful shoulder adduction: The chest, lats and teres major work together to pull the arms toward the body without allowing the rings to move.
- Improves ring stability: Both arms must produce balanced force to keep the rings and straps quiet.
- Strengthens full-body tension: The trunk, glutes and legs keep the suspended body vertical and prevent swinging or twisting.
- Prepares advanced ring skills: Cross strength contributes to more advanced elements such as the L-Cross, Azarian Cross, Inverted Cross and Maltese.
Are you ready to train the Iron Cross?
There is no single strength test that guarantees Iron Cross readiness. The following are practical coaching markers rather than compulsory competition standards:
- You can maintain a stable Ring Support Hold with straight arms and the rings turned out.
- You can perform controlled Ring Shrugs without bending your elbows or losing ring control.
- You are comfortable performing controlled Ring Dips, although dip strength alone does not establish Cross readiness.
- You can hold a heavily assisted Cross at the correct angle without elbow, shoulder or biceps pain.
- You have access to a qualified coach, suitable assistance, a safe dismount and appropriately secured rings.
If you have not yet developed basic ring stability, begin with the Parallel Bar Support Hold before progressing to ring support work.
Equipment and setup
Use properly rated gymnastics rings suspended from a secure overhead structure. Both straps must be the same length, and the anchor must provide enough clearance for your body to hang without your feet touching the floor.
- Inspect the rings, straps, buckles and anchor before every session.
- Place an appropriate gymnastics mat beneath the rings.
- Use a stable step or platform to enter the support position without jumping.
- Arrange a qualified spotter when practising new assistance levels or unassisted attempts.
- Inspect resistance bands before use and replace any band showing cracks, thinning or other damage.
How to warm up for the Iron Cross
Warm up the shoulders, elbows and wrists thoroughly without fatiguing them before the working sets. A practical sequence includes:
- Complete five to ten minutes of easy general movement to raise your body temperature.
- Perform controlled shoulder circles, elbow flexion and extension, and gentle wrist preparation.
- Complete two or three gradually harder Ring Support Holds.
- Perform one or two controlled sets of Ring Shrugs with completely straight arms.
- Practise rings-turned-out support holds or shallow straight-arm support pulses.
- Perform several short Cross holds with substantially more assistance than you will use in your working sets.
How to do the Iron Cross
These instructions describe the full skill and should only be attempted after you have developed the necessary strength through assisted progressions.
- Set both rings to an equal height and place a mat and controlled mounting platform beneath them.
- Take a regular grip with each ring seated securely in your hand and keep your wrists straight.
- Step or press into a stable top support with the rings beside your body and your elbows locked.
- Keep your head neutral, brace your abdomen, tighten your glutes and hold your legs together with straight knees and pointed toes.
- Apply equal downward pressure through both rings and begin moving your straight arms outward to the sides.
- Lower your body between the rings under control while preventing the elbows from softening or the hands from drifting behind your torso.
- Stop when both arms are horizontal, the rings are approximately level with your shoulders and your body remains vertical.
- Press down and inward through the rings as if trying to bring your straight arms back toward your sides without allowing them to move.
- Keep the shoulders active, the neck long and the two sides of your body symmetrical.
- Allow the rings and straps to become still before beginning the timed hold.
- Maintain the position for at least two seconds while continuing to breathe under tension.
- Press back to support only if you have sufficient strength, or lower under control into a hang with assistance from your coach or training system.
Strict Iron Cross form standard
A clean full Iron Cross meets the following standards:
- Your entire bodyweight is supported by your hands without external assistance.
- Both arms extend directly to the sides and remain approximately horizontal.
- Your elbows remain straight at their natural lockout throughout the hold.
- Your wrists remain straight in a regular grip rather than folding into a false grip.
- Your shoulders remain controlled instead of collapsing upward toward your ears.
- Your hands do not drift noticeably behind or in front of your torso.
- Your head, torso, hips and legs form a vertical line.
- Your knees remain straight, your legs remain together and your toes are pointed.
- Your left and right arm positions are symmetrical.
- The rings and straps remain still enough to demonstrate control.
- You hold the completed position for at least two seconds after coming to a full stop.
- You leave the position through a controlled press, assisted exit or descent to hang.
Grip, elbow and shoulder position
For the strict gymnastics version, use a regular grip and keep your wrists straight. A false grip may make some training variations feel easier, but it should be identified as an assisted technique rather than counted as the final standard.
Keep the elbows fully extended without aggressively forcing them beyond your natural lockout. The exact rotation of the upper arms can vary with individual anatomy and the element used to enter or leave the Cross, so avoid twisting the shoulders or elbows into an extreme position merely to imitate another athlete.
Press the rings down and keep your neck long to prevent a passive shrug, but do not force the shoulder blades into a painful degree of depression or retraction. The objective is a strong and stable shoulder position rather than the most exaggerated position possible.
Breathing during the Iron Cross
Take a breath and brace before lowering into the position, then use short, controlled breaths throughout the hold. Do not deliberately relax your trunk between breaths, and end the attempt if breath-holding causes you to lose awareness of your elbow or shoulder position.
Common Iron Cross mistakes
Bending the elbows
Bent elbows shorten the lever and change the exercise, so increase the assistance until you can maintain a natural straight-arm lockout.
Stopping above horizontal
A high Cross is easier because the arms have not reached the full 90-degree position, so treat it as a partial progression rather than a completed Iron Cross.
Using a false grip
Train with straight wrists and a regular grip if your goal is the strict gymnastics standard.
Shrugging or collapsing through the shoulders
Maintain active pressure through the rings and end the attempt when you can no longer control the shoulder girdle.
Letting the hands drift behind the torso
Keep the arms aligned with the sides of your body because drifting backward changes the loading and can hide a weak target position.
Lowering one side faster
Use more assistance and film from the front so you can correct unequal shoulder angles before increasing the load.
Swinging into the position
Enter through a slow, controlled descent because momentum makes the hold harder to judge and control.
Piking or arching the body
Brace your abdomen and glutes while keeping your ribs, pelvis and legs vertically aligned.
Attempting the full skill too early
Use assisted full-angle holds to develop the required position without repeatedly exposing your shoulders and elbows to failed maximal attempts.
Dropping out of the hold
Plan the exit before every attempt and use assistance, a spotter or a controlled descent to hang.
Iron Cross progression
- Parallel Bar Support Hold: Establish basic straight-arm support on stable equipment.
- Ring Support Hold: Learn to control independently moving rings with the arms beside the body.
- Rings-Turned-Out Support Hold: Develop a stronger straight-arm position without forearm contact against the rings.
- Ring Support Pulses: Move the straight arms slightly outward and return without losing elbow or shoulder control.
- Foot-Assisted Cross: Use the floor or a stable platform to reduce the percentage of bodyweight supported by the arms.
- Partial Cross Hold: Stop before the arms reach horizontal and gradually increase the shoulder-abduction angle.
- Forearm-Supported Cross: Use a dedicated Cross trainer that shortens the lever by supporting the forearms.
- Band- or Counterweight-Assisted Cross: Hold the full horizontal-arm position while progressively reducing assistance.
- Assisted Cross Negative: Lower slowly from support through the complete position while assistance preserves straight elbows.
- Iron Cross: Hold the full position without assistance for at least two controlled seconds.
These progressions do not need to be perfectly linear. The best assistance method is the one that allows you to reproduce the final shoulder angle, straight elbows, symmetry and controlled body position while making the load measurable.
How to program Iron Cross training
Train Cross-specific work early in the session after warming up and before fatiguing ring dips, planche work or other heavy straight-arm skills. The following is a conservative starting framework rather than a universal prescription:
- Perform three to five working sets of an assisted variation.
- Hold each repetition for approximately three to eight seconds with strict form.
- Accumulate roughly 15 to 30 seconds of high-quality work at the target position.
- Rest three to five minutes between demanding sets.
- Begin with one or two dedicated sessions per week and allow the elbows and shoulders to recover fully.
- Reduce assistance in small increments rather than simultaneously increasing load, duration and volume.
- End the set when an elbow bends, one side drops, the shoulders collapse or the arms move away from the intended angle.
Assisted holds should make up most of the training. Full unassisted attempts are most useful when your assisted strength indicates that you can enter the final position without an uncontrolled fall.
Safety considerations
The Iron Cross creates exceptionally high demands at the shoulders and elbows. Research describes the Cross as an isometric shoulder-adduction skill requiring the arms to support forces comparable to the athlete’s bodyweight, so it should be approached as a long-term specialist skill rather than a casual ring exercise.
Train with a qualified gymnastics coach whenever possible. Stop immediately if you experience sharp pain, a sudden pulling sensation, joint instability, pain at the front of the shoulder or elbow, numbness, tingling or symptoms that remain after the session. Persistent symptoms should be assessed by an appropriately qualified healthcare professional.
Do not attempt the exercise on damaged straps, questionable anchors or rings without sufficient floor clearance. Never rely on an untested resistance band as your only protection from an uncontrolled fall.
Frequently asked questions
How long must an Iron Cross be held?
The current FIG standard requires a complete static position for at least two seconds, with timing beginning only after the body, shoulders and feet have stopped moving.
Should I use a false grip?
No false grip is permitted for the strict competitive standard, so the canonical exercise should be demonstrated with straight wrists and a regular grip.
Is the Iron Cross a pushing or pulling exercise?
It does not fit perfectly into either category, but it is best classified as a straight-arm pulling skill because the primary action is shoulder adduction produced largely by the lats, chest and teres major.
Are Ring Dips a prerequisite?
Ring Dips demonstrate useful ring control and upper-body strength, but they do not replace the specific straight-arm strength required for the Iron Cross.
Do I need a Ring Muscle-Up first?
A Ring Muscle-Up is not a biomechanical requirement for the Cross, although athletes ready for Cross training should already possess extensive ring experience and support control.
Why do my elbows bend as I lower?
Your current variation is too difficult to perform with the required leverage, so add assistance or stop the descent at a higher angle.
How long does it take to learn the Iron Cross?
There is no reliable universal timeline because progress depends on prior ring experience, strength, body proportions, training quality, recovery and how well the shoulders and elbows tolerate progressive loading.
Is the Iron Cross the same as a Maltese?
No, the body hangs vertically below the rings during an Iron Cross, whereas a Maltese holds the body horizontally at approximately ring height.
Tips for the proper execution of Iron Cross
Build a stable rings-turned-out support before beginning Cross-specific training.
Use a regular grip with straight wrists for the strict Iron Cross standard.
Lock your elbows before lowering and maintain that lockout throughout the attempt.
Move both arms outward at the same speed to keep the position symmetrical.
Keep your hands aligned with your torso rather than allowing them to drift behind you.
Press down and inward through the rings without allowing the arms to leave the horizontal position.
Brace your abdomen and glutes to keep your body vertically aligned.
Keep your legs together with straight knees and pointed toes.
Start the hold time only after your body and the rings have completely stopped moving.
Use enough assistance to reproduce the final position without shaking or bending your arms.
Film from the front to check arm height, symmetry and body alignment.
Plan a controlled exit before beginning every attempt.
Stop the set as soon as your elbow, shoulder or body position begins to change.
Reduce assistance gradually instead of testing your maximum strength every session.
Muscles worked when doing Iron Cross
The Iron Cross primarily trains isometric shoulder adduction. The chest, lats and teres major produce much of the force required to resist the outward pull of the rings, while the biceps and surrounding muscles help stabilize the straight elbows and shoulders.
- Latissimus dorsi: Produces shoulder adduction and helps pull the upper arms toward the body.
- Pectoralis major: Contributes strongly to shoulder adduction and stabilization in the Cross position.
- Teres major: Assists the lats with controlling the upper arms against the rings.
- Biceps brachii: Helps stabilize the elbow and shoulder during the heavily loaded straight-arm position.
- Anterior deltoids: Assist with shoulder positioning and prevent the arms from drifting behind the torso.
- Rotator cuff: Stabilizes the head of the upper-arm bone within the shoulder joint.
- Lower trapezius and serratus anterior: Help control the shoulder blades against the rib cage.
- Triceps: Contribute to maintaining elbow extension and a stable arm position.
- Forearms and hand muscles: Maintain the grip and control the independently moving rings.
- Abdominals, spinal stabilizers and glutes: Keep the suspended body vertical and resist swinging or arching.
- Quadriceps: Maintain straight knees and a clean leg line.
Research examining the still-rings Cross identifies shoulder-adduction strength and shoulder stability as central demands of the skill. See the strength-performance assessment of the still-rings Cross and the kinematic analysis of Cross training.
Primary Muscle(s):

Biceps

Lats

Lower chest
Secondary Muscle(s):

Anterior delt

Trapezius

Triceps
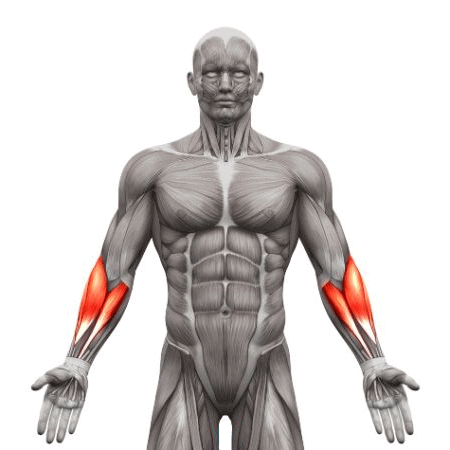
Forearm

Abdominal
Equipment needed for Iron Cross
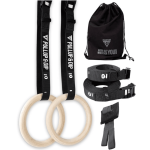
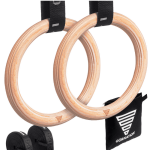
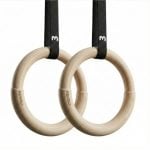
Adjust the difficulty of Iron Cross
How to make Iron Cross harder?
How to make Iron Cross easier?
How to make Iron Cross harder?
To make Iron Cross harder:
-
Reduce band, foot, spotter or counterweight assistance in small increments.
-
Lower your arms progressively closer to the true horizontal Cross position.
-
Hold the unassisted position for at least two seconds after reaching a complete stop.
-
Increase the duration only while preserving straight elbows and symmetrical arm height.
-
Lower from support into the Cross with an increasingly slow and controlled negative.
-
Press from the Iron Cross back into a stable Ring Support Hold.
-
Perform repeated Cross lowers without losing control between repetitions.
-
Progress to an L-Cross while maintaining the same strict upper-body position.
-
Learn an Azarian entry to the Cross under qualified gymnastics coaching.
-
Progress toward the Inverted Cross or Maltese as separate advanced ring-strength skills.
How to make Iron Cross easier?
To make Iron Cross easier:
-
Master the Ring Support Hold before moving the arms away from your body.
-
Practise rings-turned-out support pulses through a small controlled range.
-
Perform a Foot-Assisted Iron Cross with the rings set low enough to unload part of your bodyweight.
-
Hold a Partial Iron Cross with your arms above horizontal and increase the angle gradually.
-
Use a strong resistance band to support part of your bodyweight in the full Cross position.
-
Use a counterweighted pulley system that allows the assistance to be measured and reduced gradually.
-
Use a dedicated forearm-supported Cross trainer to shorten the effective arm lever.
-
Ask a qualified coach to provide balanced assistance at your waist or torso.
-
Perform assisted negatives through only the range in which your elbows remain straight.
-
Use repeated two-to-three-second assisted holds instead of one maximum-duration attempt.
