
Feet-Assisted Parallel Bar Dip
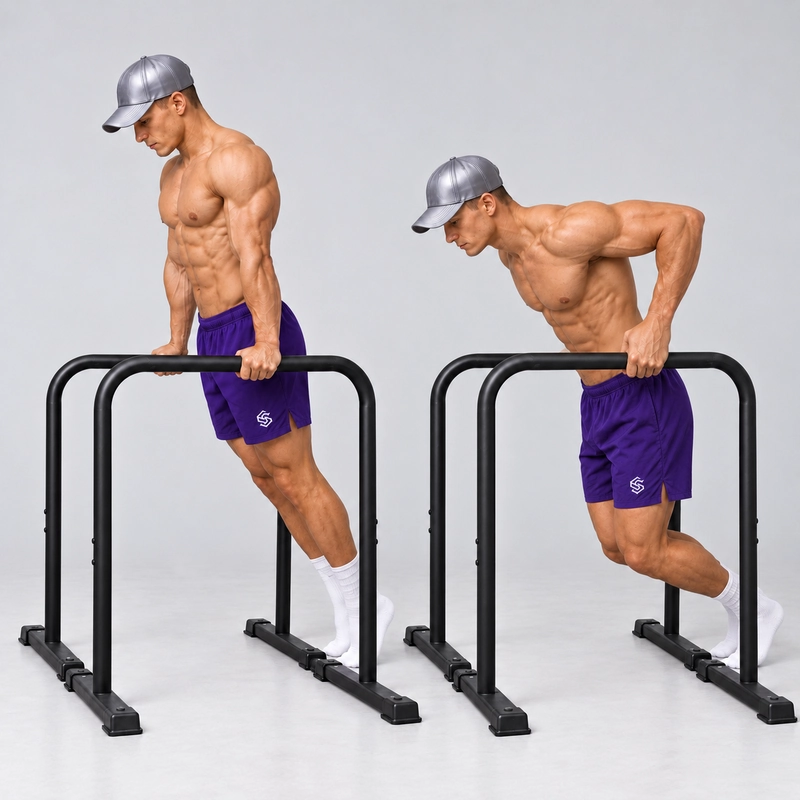
How to do Feet-Assisted Parallel Bar Dip?
The Feet-Assisted Parallel Bar Dip is a beginner dip progression performed with one hand on each fixed rail and both feet supported on the floor or a stable platform. Lower your torso between the bars, then press back to straight arms while your legs share the load. Foot support stays available throughout the repetition.
This variation lets you learn the complete dip movement before you can press your full bodyweight. You choose how much assistance to provide through the legs, including more help at a difficult point. The aim is a controlled upper-body press with useful assistance, rather than a jump or a squat performed while the arms stay still.
How It Differs From Other Dip Exercises
The Parallel Bar Support Hold develops the straight-arm top position. Feet-assisted dips add elbow bending, a controlled bottom position and the return press. You can use foot support to learn both tasks; an unassisted hold is not a compulsory prerequisite for an assisted repetition.
Unlike Feet Assisted Ring Dips, this version uses fixed rails. Your hands do not have to manage two freely moving rings. It is a direct way to learn the dip pattern on a stable station, while ring training remains a separate equipment choice.
A Bench Dip also uses foot support, but the hands are behind the hips and the body lowers in front of a bench. Here, the hands hold rails beside the torso and the body descends between them. Keep that distinction when selecting equipment or comparing repetitions.
A study comparing bench, bar and ring dips found differences in joint motion and muscle activity, including greater shoulder extension in the bench version. It supports treating these configurations separately. It did not test this feet-assisted protocol or establish an injury-prevention benefit.
Compared with a dip negative, this exercise includes both the lowering and pressing phases. Compared with a band-assisted dip, the help comes from the legs rather than an elastic band. These are different ways to practise dips, with different assistance patterns.
Choose Stable Bars and Continuous Foot Support
Use a fixed dip station or a pair of secure dip bars on a firm, level surface. Check that both rails are level and that portable bars do not slide, rock or tip under the intended load. Follow the equipment's installation and loading instructions. Do not substitute two loose chairs for a stable parallel-bar setup.
The right bar height depends on your body and foot support. There is no compulsory height in centimetres or inches. With suitable low bars, keep the feet on the floor. At a higher station, a solid, broad platform can bring your feet within reach without changing the fixed-bar dip into another exercise.
Test foot contact at the top as well as the bottom. If the feet reach the ground only after your elbows bend, the start and finish are unassisted and you cannot use the legs throughout the cycle. Adjust the setup before the working set.
Choose a non-slip foot position that leaves room for the knees, hips and torso to move. A platform should not shift under leg pressure or obstruct your descent. Keep a clear route to stand up and release the bars after the set.
Use rail spacing that lets you grip comfortably beside the torso, with forearms approximately upright when viewed from the front. Extremely wide spacing or rails that squeeze your body can make the path awkward. Do not force a fixed grip width regardless of the station or your proportions.
Readiness and Warm-Up
You do not need to perform an unassisted dip first. You should be able to grip the rails, support part of your weight with straight arms and bend the elbows a little while keeping the feet secure. If that is not yet comfortable, begin with a foot-supported top hold and a smaller amount of hand loading.
Start with the joint warm-up routine or another light general preparation, then practise a few supported top holds and easy shallow dips. Gradually increase the working range without tiring the arms before the main sets.
Stop if the movement causes sharp pain, pinching or a feeling of instability. More foot assistance may reduce the effort, but it does not automatically make an uncomfortable position appropriate. Adjust the range or setup; persistent symptoms need individual assessment.
How to Do a Feet-Assisted Parallel Bar Dip
- Set the support. Stand between the rails and place both feet on the floor or secure platform. Confirm that contact remains available through the intended movement.
- Take a neutral grip. Hold one rail in each hand with palms facing inward. Wrap the thumbs around the rails when their shape allows, and keep the wrists in a comfortable position.
- Establish the top. Straighten the elbows naturally and press into the rails to support the torso. Keep both feet grounded and the knees softly bent rather than hanging from the hands.
- Organize the body. Keep the torso relatively upright or slightly inclined forward, with the abdomen engaged. Place the feet under or slightly ahead of the hips where they can assist without forcing a seated position.
- Lower with control. Bend the elbows as the torso moves down between the rails. Allow the knees to bend and use smooth leg pressure to share the load. Let the elbows travel generally backward along a comfortable path.
- Choose a comfortable bottom. Stop before the shoulders roll forward uncontrollably or the position becomes painful. Upper arms approaching horizontal can be a practical depth target when comfortable; it is not a compulsory angle for every person.
- Press and assist smoothly. Push down through the rails to extend the elbows. Add enough leg assistance to keep the ascent controlled, without jumping or using a sudden kick from the feet.
- Finish and reset. Return to natural full elbow extension and a stable top, with the feet still supported. Settle briefly before the next repetition.
- Leave the bars deliberately. After the last repetition, shift your weight onto the feet, stand securely and then release the hands.
One repetition is a controlled top-to-bottom-to-top cycle using the declared assistance and range. A shallow assisted repetition is valid practice, but record it as partial range. A lowering-only attempt is a negative, and a repetition finished by jumping is a different assisted attempt.
How Much Should the Legs Help?
Use enough assistance to preserve the dip pattern from the first repetition to the last. Beginners may need substantial leg support. Trying to use almost none before you can control the movement can lead to a dropped descent or a sudden push from the floor.
The assistance can vary through the repetition. It is reasonable to give more help where the press is difficult, provided the change is smooth and the arms still perform the lowering and pressing action. Keep the overall approach similar when comparing your own sets.
Foot position does not tell you exactly how much weight the arms carry. Two toes can provide substantial force, while two flat feet can provide very little. Lifting one foot or moving onto the toes does not reliably prove a harder repetition.
A raised platform is primarily a setup solution for high bars. Elevating the feet is not automatically a progression: it changes the geometry and may make it easier to apply leg pressure. Choose it to maintain usable support, not to claim a fixed increase in difficulty.
As control improves, deliberately reduce the push from the legs while keeping the same bars, foot position, depth and tempo. You may feel the arms doing more work, but an exact percentage of bodyweight cannot be assigned without measuring the external support forces.
Depth, Torso Position and Shoulder Control
The bottom should remain a position you can control and leave smoothly. You do not have to lower the shoulders below the elbows to make this exercise worthwhile. If a shorter range is currently comfortable, use it deliberately and expand it gradually rather than chasing depth at the expense of control.
Approximately horizontal upper arms or a bend near 90 degrees at the elbows can provide an easy visual reference. Those references are not identical in every body position, and neither is a universal safety boundary. A deeper range is optional only when you can manage it comfortably.
Keep the torso moving between the rails, with a modest lean if it suits your pressing path. Avoid moving the hips far forward so the hands end up behind the body as in a bench dip. Also avoid an excessive forward dive that turns the lower position into a different leaning press.
At the top, support yourself actively rather than sinking between the shoulders. Straighten the elbows without snapping them backward. During the dip, allow the shoulder blades to move with the arms; do not force them maximally down and pinned together through the entire repetition.
Let the elbows follow a comfortable backward path. Keep them controlled rather than flaring suddenly, but do not glue them tightly to the ribs if that twists the wrists or shoulders. Rail spacing and your proportions influence the movement.
Common Mistakes and Useful Corrections
- Feet lose contact at the top: choose lower rails or a suitable platform so assistance remains available throughout the cycle.
- Jumping out of the bottom: provide more continuous assistance and use a range you can press from smoothly.
- Only the knees move: watch for real elbow bending and extension. The legs assist a dip rather than replacing it with a squat.
- Uncontrolled dropping: increase leg support during the descent and reduce depth until you can lower deliberately.
- Hips drift far in front of the hands: reposition the feet so the torso travels between the rails.
- Chasing a deeper bottom: stop at a repeatable, comfortable position and build control before adding range.
- Shoulders collapse at lockout: restore an active top support and finish the set before that support deteriorates.
- Counting more reps by pushing harder with the legs: record the extra assistance and compare sets using the same setup and intent.
Sets, Repetitions and Progression
A practical starting point is two or three sets of five to eight controlled repetitions, resting approximately 90–120 seconds or long enough to repeat the same quality. Begin with fewer repetitions if you are still learning the path. Lower in roughly two seconds, then press smoothly rather than trying to move explosively.
Use this as one pushing exercise within a balanced program. Twice-weekly practice with recovery between sessions is a reasonable starting option, but consider the other push-ups, presses and dips already in your week. The How to Dip workout plan provides a broader progression; select the fixed-bar version deliberately when a session allows rings or dip bars.
ACSM's 2026 resistance-training guidance emphasizes consistency and tailoring training to the individual. The sets, tempo and rest above are practical coaching suggestions for this drill, rather than an ACSM-tested feet-assisted dip prescription.
Finish the set while you can still reproduce the same range and smooth assistance. Because the legs can keep adding help, a high assisted repetition count does not by itself prove that the upper body is ready for unassisted dips.
First establish a repeatable complete cycle. Then reduce leg help at the same setup. You can also add a brief controlled pause or one additional repetition, changing one element at a time. A pause is a practice option, not a requirement to sink deeper or become motionless in a painful position.
When you can hold the top without feet and manage the full lowering and pressing path with very little assistance, try a separate unassisted repetition on suitable bars with enough foot clearance. Have a controlled way to restore foot support after the attempt. An unsupported descent followed by a foot-assisted press is a useful intermediate task, but it is still an assisted repetition.
There is no guaranteed number of sessions, hold duration or assisted repetition target that produces a first strict dip. Progress depends on the actual load you are carrying, the range you practise and your control through both phases.
Frequently Asked Questions
Should the knees be bent or the legs straight?
Bent knees usually make it easier to provide smooth assistance while the torso moves vertically. This page's main version uses that setup. Straight legs farther in front can change the body position and how you press through the feet; they are not automatically a harder standard.
Can I use a box under my feet?
Yes, if the bars are too high for continuous floor contact. Use a secure, non-slip platform that supports both feet, remains stable under pressure and leaves room for the knees and hips. Verify support at both ends of the repetition.
Is this the same as a bench dip?
No. In this exercise, each hand holds a rail beside the torso and the body lowers between the bars. A bench dip places the hands behind the hips on an edge.
Do assisted reps count as full bodyweight dips?
Record them as assisted dips. Without measuring the help supplied by the legs, you cannot convert the count into an equivalent number of unassisted repetitions.
Should I switch to rings as soon as this feels easy?
That depends on your goal. Reducing assistance on fixed bars is the direct progression toward a strict parallel-bar dip. Ring dips add a separate stabilization task, so introduce their support and assistance setup deliberately rather than assuming they are the same next step.
Tips for the proper execution of Feet-Assisted Parallel Bar Dip
Use secure fixed rails on a firm, level surface. Check that neither bar slides, rocks or tips under your intended load.
Keep both feet supported at the top as well as the bottom. Adjust bar height or use a secure platform if support disappears as the elbows straighten.
Grip one rail in each hand with palms facing inward. Choose comfortable spacing and keep the wrists from collapsing sideways.
Use bent knees and a foot position that lets the torso travel between the rails without shifting the hips far in front of the hands.
Apply smooth leg assistance during both descent and ascent. Use enough help to control the movement instead of jumping out of the bottom.
Look for real elbow bending and extension. The legs assist an upper-body dip rather than performing a squat while the arms remain still.
Choose a comfortable, repeatable depth. Upper arms approaching horizontal can be a useful reference, but do not force a painful or uncontrolled bottom position.
Finish in active support with naturally straight elbows. Allow the shoulder blades to move during the dip rather than pinning them maximally down throughout.
Reduce leg pressure while keeping setup, depth and tempo consistent. Toe contact or lifting one foot does not reliably quantify how much help you are using.
Log repetitions as feet-assisted, and note partial range or changing assistance. Shift onto the feet before releasing the bars at the end of the set.
Muscles worked when doing Feet-Assisted Parallel Bar Dip
Feet-Assisted Parallel Bar Dips train the chest, triceps and front of the shoulders while the legs share part of the load. Muscle effort depends on the assistance, range and torso position; this version does not have a fixed percentage of bodyweight loading.
- Chest: the pectoralis major contributes to pressing the torso upward between the rails. Lower chest is the suggested library term, without implying isolation of one chest region.
- Triceps: extend the elbows during the press and help control elbow bending on the way down.
- Anterior deltoids: contribute to the shoulder action and support the pressing movement.
- Shoulder-girdle stabilizers: including the rotator cuff, serratus anterior and trapezius, help control the shoulder and shoulder-blade position.
- Forearms and grip: maintain contact with the rails and stabilize the wrists.
- Abdominals: help organize the torso and limit unnecessary arching or twisting.
- Legs: supply adjustable external support through the feet. Their assistance is part of this exercise, rather than an error to eliminate before a beginner can practise.
These are functional descriptions, not an activation ranking measured for this exact assisted setup. Less leg pressure generally shifts more support to the hands, but a repetition count or foot shape alone does not establish the upper-body training load.
Primary Muscle(s):

Lower chest
Secondary Muscle(s):

Anterior delt

Triceps
Equipment needed for Feet-Assisted Parallel Bar Dip
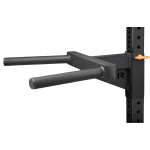
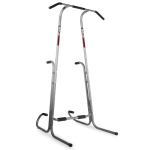
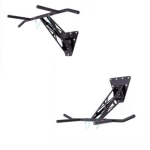
Adjust the difficulty of Feet-Assisted Parallel Bar Dip
Adjust the push from your legs while keeping the fixed rails, foot support and comfortable dip path consistent. Increase assistance or shorten the range when needed; reduce assistance, add controlled pauses or progress to a separate unassisted dip as control improves. Foot elevation, toe contact and one-foot support do not automatically establish a harder load.
How to make Feet-Assisted Parallel Bar Dip harder?
How to make Feet-Assisted Parallel Bar Dip easier?
How to make Feet-Assisted Parallel Bar Dip harder?
To make Feet-Assisted Parallel Bar Dip harder:
-
Deliberately reduce leg pressure while keeping the same foot position, depth and tempo. Keep foot contact available rather than abruptly removing support.
-
Add a brief controlled pause at your comfortable bottom position, preserving smooth assistance and avoiding a deeper unsupported drop.
-
Add a controlled repetition at the same setup and assistance intent, stopping before extra leg drive or reduced range changes the set.
-
Progress to a separate unassisted Parallel Bar Dip when you can support the top and control the complete cycle with very little help. Use suitable foot clearance and a deliberate way to regain support after the attempt.
How to make Feet-Assisted Parallel Bar Dip easier?
To make Feet-Assisted Parallel Bar Dip easier:
-
Use more smooth leg assistance during both lowering and pressing, with both feet secure and the torso still travelling between the rails.
-
Practise a shallower, comfortable dip and gradually increase the range as control improves. Record these repetitions as partial range.
-
Begin with a foot-supported Parallel Bar Support Hold to learn the grip and active top position, then add small controlled elbow bends.
