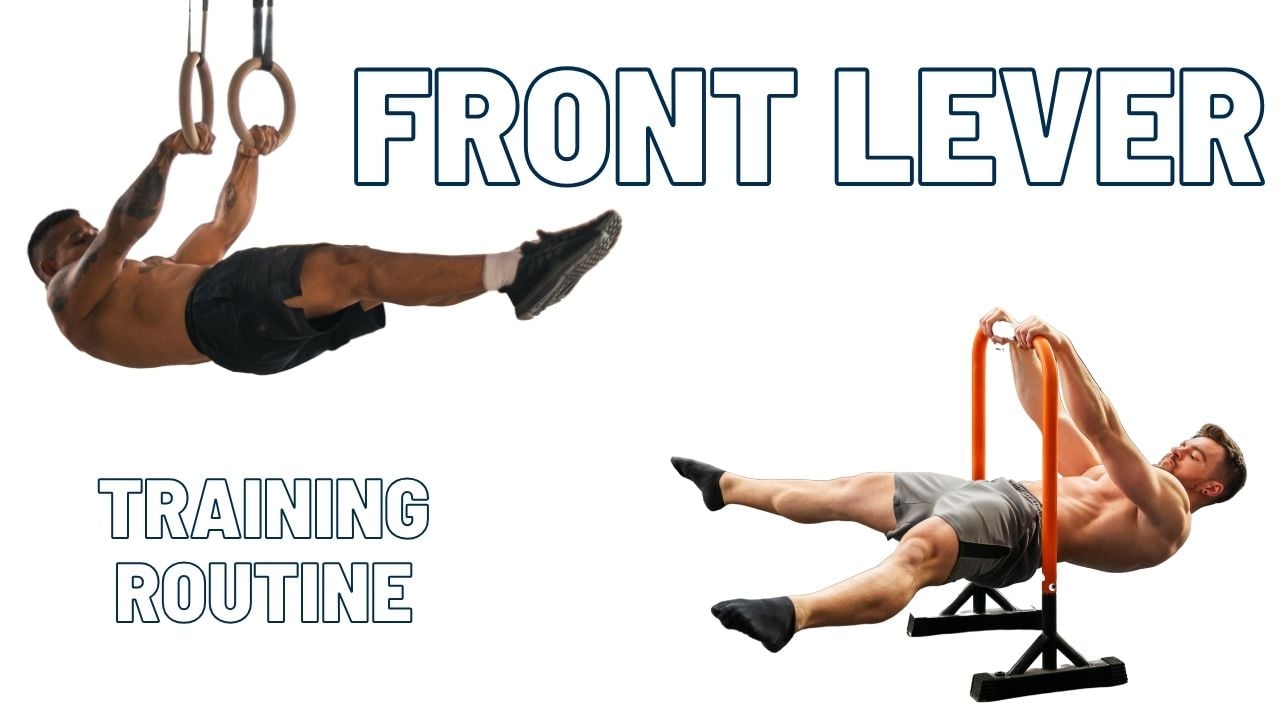
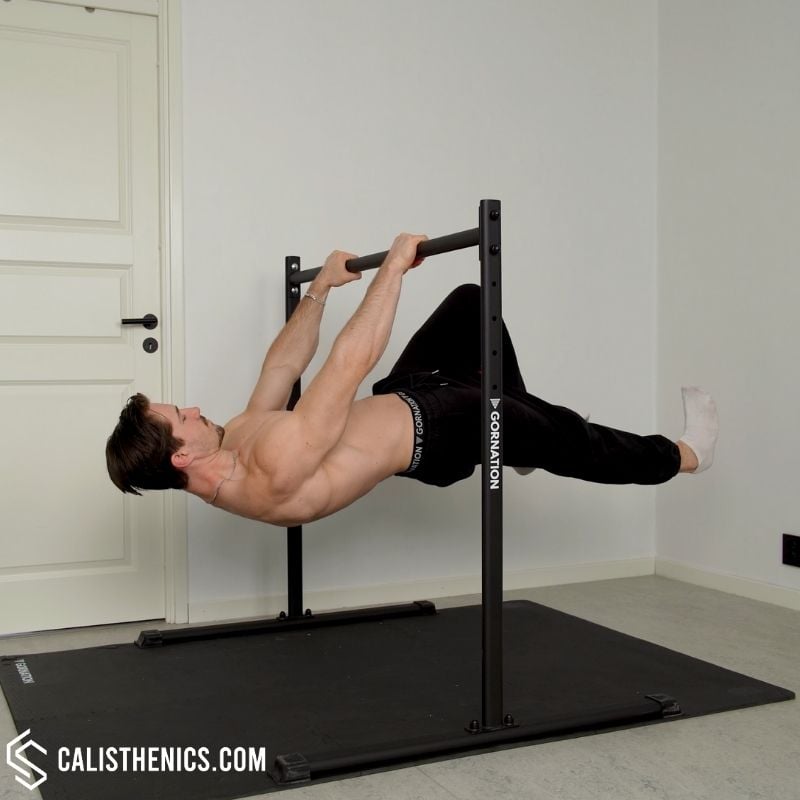
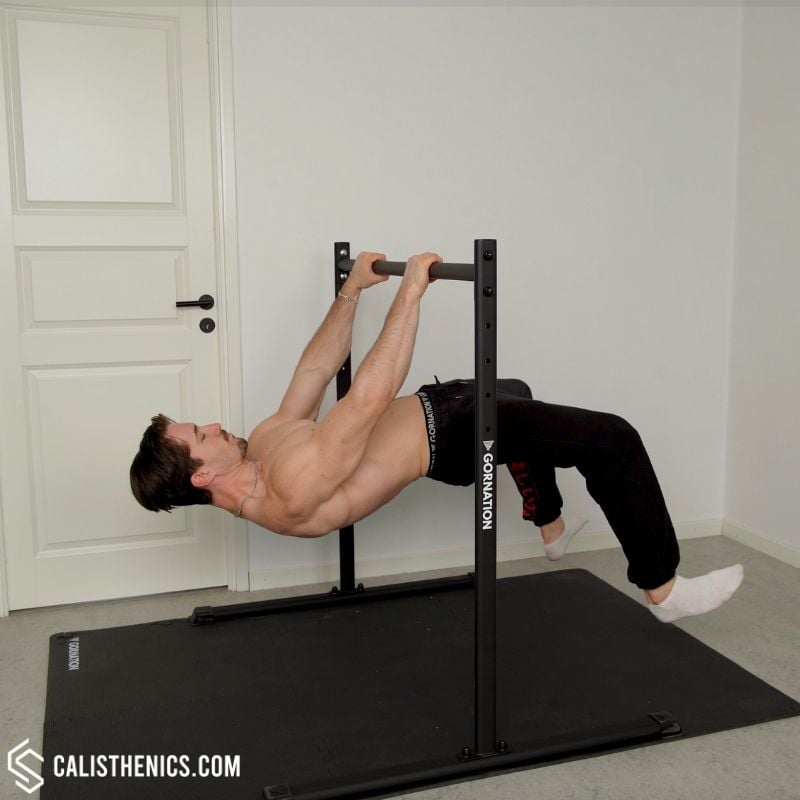
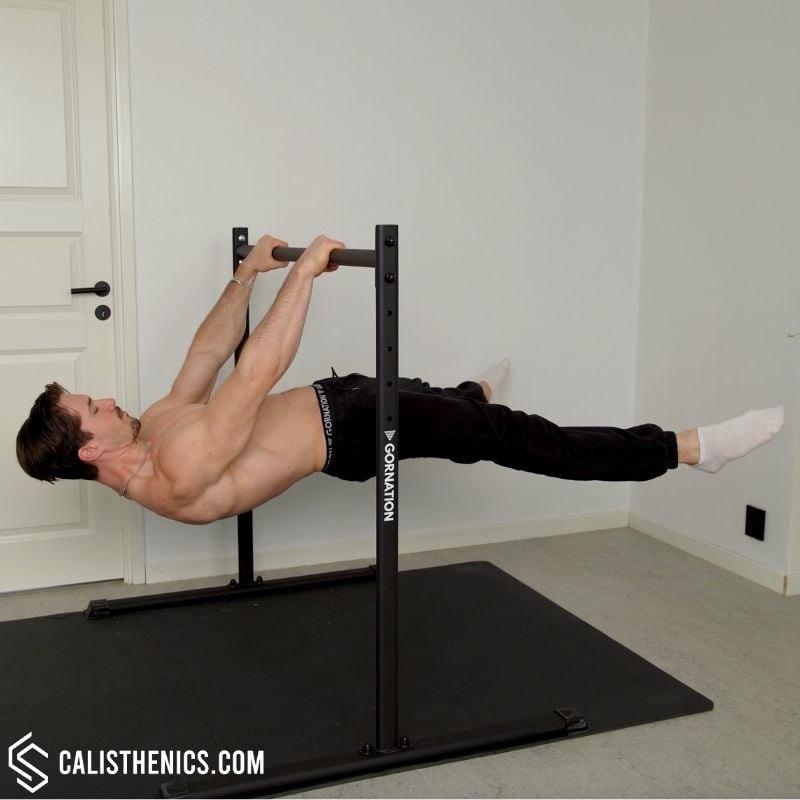
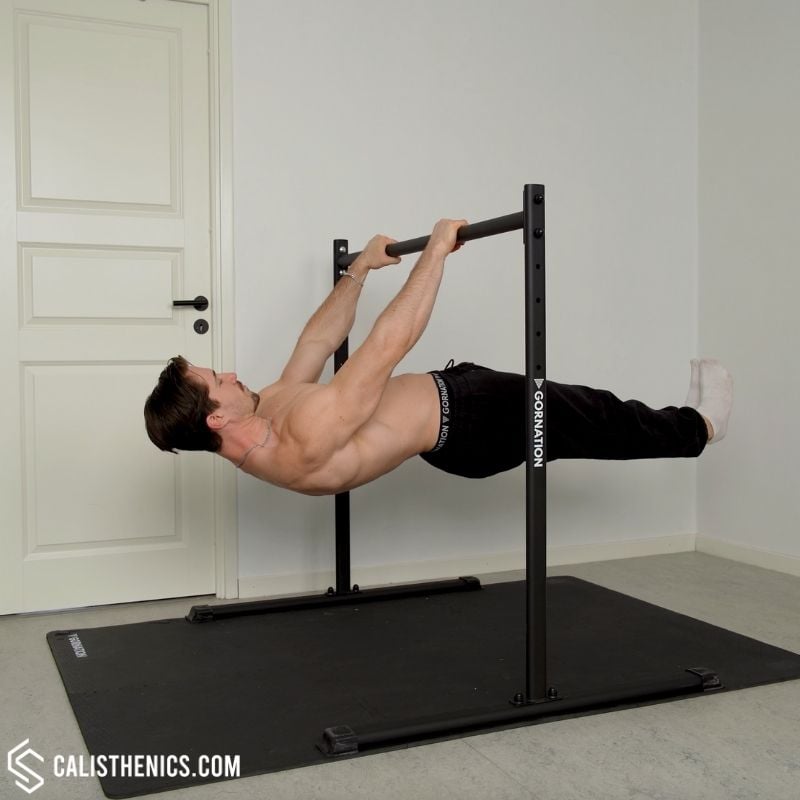
If you’re here, chances are you’ve been captivated by the impressive strength and control it takes to perform a front lever. Trust me, you’re not alone—this calisthenics move is one of the most visually stunning and rewarding exercises you can achieve. The front lever challenges your entire body, requiring incredible core strength, back development, and unwavering focus.
In this guide, I’ll walk you through everything you need to know to conquer the front lever, from building a solid foundation to step-by-step progressions, plus tips, tricks, and common mistakes to avoid. Ready?
Before we dive in make sure to check the best resources for calisthenics 👇
▶️ Best Calisthenics Equipment
What is the front lever equivalent gym exercise?
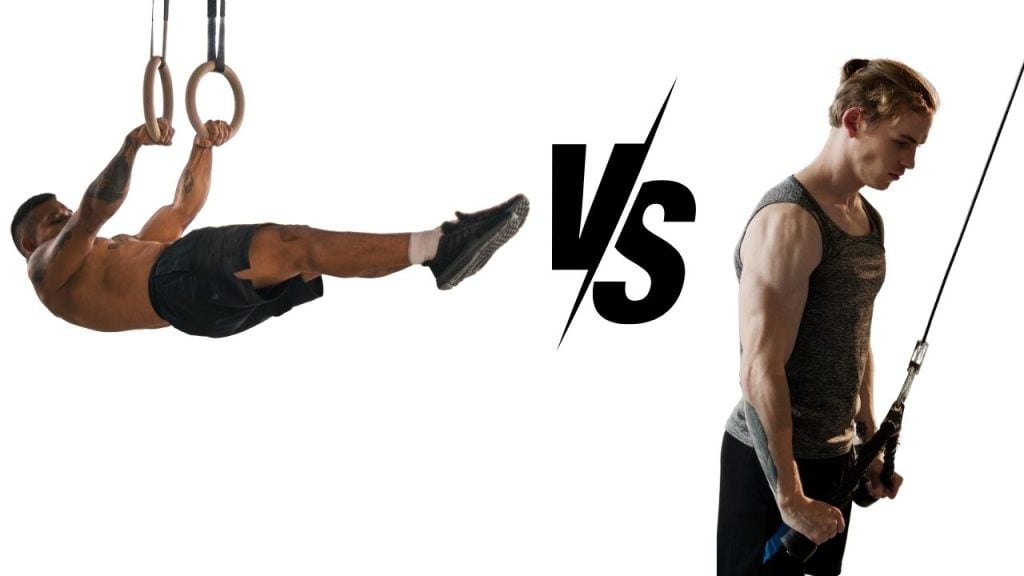
If you’re looking for the gym equivalent of a front lever and want to include the dynamic element of front lever raises, think of it as combining a
lat pulldown, an isometric core hold, and a dynamic straight-arm pullover.
In front lever raises, your arms remain straight and locked out at all times, with no bending at the elbows. The movement involves pulling your entire body up into the horizontal position using your lats and shoulders while engaging your core to keep your body rigid. The dynamic portion of the raise is similar to the motion of a lat pullover with a barbell or cable but amplified by the need to stabilize your full body weight in a straight-arm position.
The eccentric phase—lowering your body back down—adds an extra challenge, as it requires slow, controlled movement to resist gravity and maintain perfect alignment. It’s a dynamic exercise that combines immense pulling strength with unparalleled core stability and control.
The Incredible Strength Needed for the Front Lever
Holding a front lever is often described as a feat of superhuman strength—and for good reason. It’s not just about having a strong back or core; it’s about being able to control your entire body weight in a horizontal position with perfect form. To put this into perspective, let’s break it down with some numbers and compare the strength required to a familiar gym exercise like the lat pulldown.
First, let’s think about what’s happening in a front lever. Your body is acting like a long, horizontal lever, with your shoulders as the pivot point. Gravity is pulling your body downward, and your muscles (mostly your lats, shoulders, and core) need to generate enough force to counteract this pull and keep you stable.
Now, the force gravity applies to your body depends on your weight. For an 85 kg man, gravity pulls with a force of about 833.85 newtons (this is just a fancy way of saying how hard gravity pulls on the mass).
The next piece is how far your center of mass is from your shoulders. For most people, their center of mass is about 55% of their height. If you’re 187 cm tall, this means your center of mass is roughly 1.03 meters away from your shoulders.
In the front lever, your muscles have to resist the pulling force of gravity over this distance, which creates rotational force, or torque. The further your center of mass is from your shoulders, the more torque is created—and the harder it is to hold the position.
For an average man weighing 85 kg (190lbs) and standing 187 cm (6' 2'') tall, the front lever places immense stress on the lats, shoulders, and core. In a full front lever, you’re essentially lifting the entire weight of your body horizontally, requiring your muscles to resist the pull of gravity across a long lever arm. To make this relatable, we can calculate the weight equivalent of each progression (tuck, advanced tuck, straddle, and full front lever) based on the mechanical advantage of the position.
• Tuck Front Lever: In the tuck position, with the knees pulled to the chest, the lever arm is significantly shortened, reducing the load on the lats and core. For an 85 kg individual, the effective weight being “lifted” is about 45–50% of body weight, or around 38–43 kg (83.8–94.8 lbs) . This is similar to a moderate lat pulldown set.
• Advanced Tuck Front Lever: Extending the knees slightly increases the lever arm, requiring more strength. Here, the load rises to about 65–70% of body weight, or approximately 55–60 kg (121-132 lbs). This progression aligns with heavier lat pulldown sets—challenging but still manageable for those with a strong base.
• Straddle Front Lever: The straddle position distributes the weight further away from the center of gravity, increasing the demand on the lats and core. This position corresponds to 85–90% of body weight, or about 72–77 kg (159-170 lbs) for our example athlete. By this stage, the strength requirement exceeds most standard lat pulldown machines’ capacity.
• Full Front Lever: The ultimate goal. In this position, you are effectively lifting your entire body weight horizontally, which for an 85 kg man means exactly 85 kg (187lbs). Holding this position requires not only raw pulling strength but also extraordinary core stability and body control, equivalent to performing lat pulldowns at your full body weight.
So, in summary, holding a full front lever requires the same pulling strength as doing a lat pulldown with your entire body weight, but with the added challenge of keeping your body perfectly straight and stable throughout the hold. It’s a true test of strength, control, and balance!
Build the Foundational Strength for the Front Lever
Before jumping into front lever-specific progressions, we need to focus on foundational strength. These exercises will strengthen your lats, core, grip, and shoulders—key players in achieving that picture-perfect front lever.
Dead Hangs
Dead hangs are a staple, and they’re about much more than just hanging there. They build grip strength (a must for hanging on for dear life in the front lever), activate your shoulders, and even help with spinal decompression. Start small with 10–20 seconds and aim to increase over time. Remember to stay active in your hang—engage your shoulders and core rather than just dangling like a wet noodle.
False Grip
One often-overlooked aspect of front lever training is the false grip. This grip technique involves wrapping your hand around the bar or rings in a way that places your wrist above the surface, giving you more leverage and control. For the front lever, the false grip is incredibly helpful because it reduces strain on your forearms and allows you to engage your lats and shoulders more effectively. It’s particularly useful in the early stages of learning tuck front lever rows or holds. Start practicing the false grip with exercises like dead hangs and skin the cat to build comfort and strength in this position. It might feel awkward at first, but mastering the false grip can make a big difference in your overall stability and control.
Weighted Pull-Ups
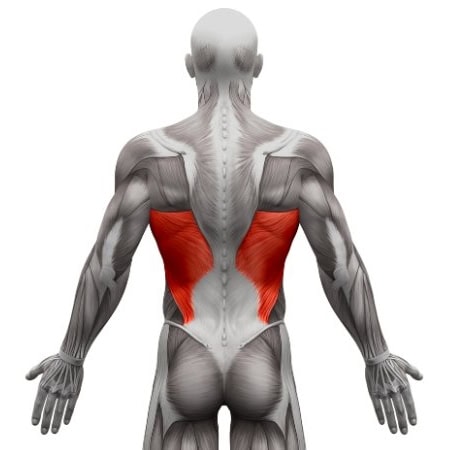
Pull-ups are non-negotiable. They target the lats, which provide the pulling power needed for the front lever. If you can comfortably do pull-ups with 50% of your body weight, you’re on the right track. Focus on form: control the movement, engage your shoulder blades, and avoid swinging or kipping.
Inverted Rows
Inverted rows don’t get the hype they deserve. They teach you how to pull in a horizontal plane, which mimics the body alignment of a front lever. If you’re new, try holding the midpoint of the row for a few seconds—this builds the isometric strength you’ll rely on when holding a front lever.
Skin the Cat
This one’s a favorite for both mobility and strength. Skin the cat trains your shoulders to move through their full range of motion while also building pulling power. Plus, it’s fun (once you get over how awkward it feels at first). Use rings or a bar and control the movement as much as possible, especially on the return.
Dragon Flags
Dragon flags are a killer core exercise. To hold a front lever, you need a rock-solid core to keep your body straight. Start with variations like single-leg dragon flags or negatives if the full version feels too ambitious.
The Magic of Rows: Tuck and Advanced Tuck Front Lever Rows
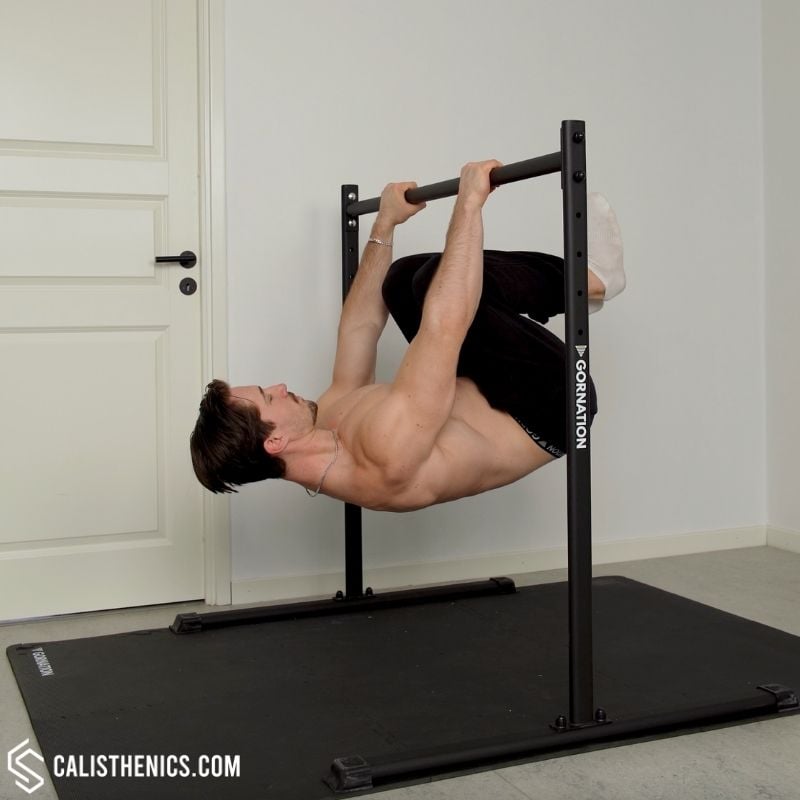
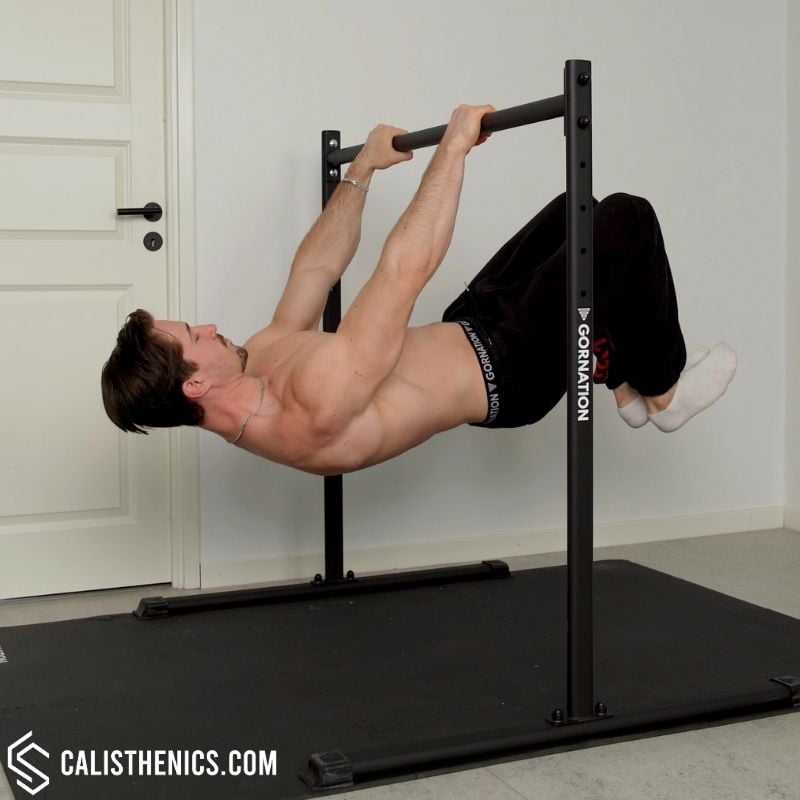
Once you’ve built a solid base, it’s time to dive into specific progressions, and tuck front lever rows are gold. They bridge the gap between static holds and dynamic pulling exercises. Here’s how to do them:
• Tuck Front Lever Rows: Tuck your knees to your chest while holding a bar or rings. From this tucked position, pull your body up and lower yourself back down in control. This builds the lats and teaches your body the position it needs to hold during a front lever.
• Advanced Tuck Front Lever Rows: Once you’ve mastered the basic tuck, extend your legs slightly, so your knees are further from your chest. This increases the difficulty and forces your core and lats to work even harder.
These rows not only build strength but also improve your body awareness in the front lever position, making it easier to transition into static holds later.
In case you prefer to learn via an app I found Die Ringe to be the best app for specific calisthenics skill training.
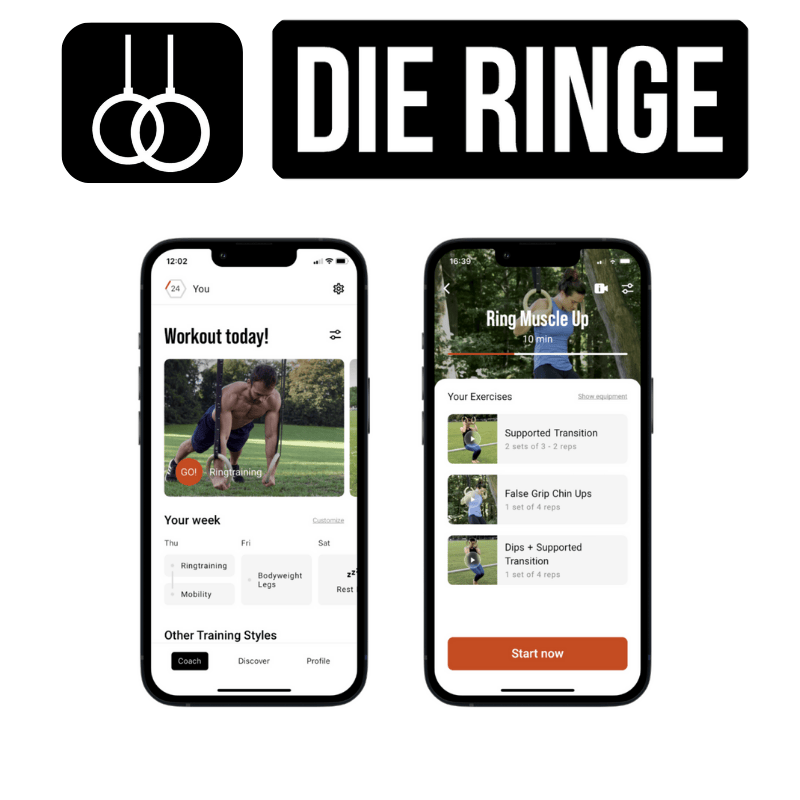
Average Rating: 4.7
Annual Price: €99.00 or €89.10 10% OFF with promo code
Pros & Cons
Pros
- Specialized for ring training: Perfect for mastering gymnastic skills.
- High-quality video tutorials: Clear, professional, and easy to follow.
- Personalized workout plans: Tailored to your goals and fitness level.
- Free gymnastic rings: Included with the one-year subscription.
- Great for home workouts: Minimal equipment needed for full sessions.
Cons
- High shipping costs: Over $50 to the U.S. and Canada.
- Repetitive routines: Long-term users may find plans less varied.
- Lack of manual adjustability of exercise progressions.
Bottom Line
If you’re serious about ring training, this app is a top contender. Read our full Die Ringe review here.
Front Lever Training Routine by Progression Levels
To achieve the front lever, you need a structured workout plan focusing on progressively building the necessary pulling and core strength. The progression typically includes isometric holds and dynamic pulling exercises while addressing supporting mobility and balance requirements.
This routine is structured into levels based on front lever progressions, allowing you to focus on one stage at a time and advance systematically. You should move to the next progression once you can consistently hold the isometric position for 10–15 seconds, perform 3–5 controlled eccentrics, and complete 5–8 dynamic raises with proper form.
Level 1: Tuck Front Lever
Muscle group:
Tips
-
Engage the Entire Body: Keep your core, glutes, and lats engaged throughout the exercise to maintain a stable and compact position.
-
Control Your Breathing: Inhale before initiating the movement, and exhale slowly while holding the tucked position.
-
Focus on Shoulder Engagement: Keep your shoulders down and away from your ears to prevent unnecessary strain.
-
Avoid Swinging: Use strict form and avoid momentum to ensure the exercise targets the intended muscles.
-
Practice Regularly: Gradually increase your hold duration and progress toward more advanced front lever variations.
🎯 Goal: Build foundational strength and scapular control.
1. Warm-Up (10–15 minutes):
• Arm circles: 15 reps each direction, 2 sets.
• Scapular push-ups: 10–12 reps.
• Hollow body hold: 20–30 seconds, 2 sets.
2. Skill Work (25–30 minutes):
• Tuck Front Lever Hold: 10–15 seconds, 3–5 sets.
• Band-Assisted Tuck Front Lever Hold: 10–15 seconds (if struggling unassisted).
• Tuck Front Lever Eccentric: Slowly lower from inverted hang to tuck (5–7 seconds), 3–5 reps.
• Dynamic Tuck Front Lever Raises: Pull into a tuck front lever from a dead hang and return, 5–8 reps.
• Scapular Raises: 10–12 reps.
3. Strength Accessories (15 minutes):
• Weighted pull-ups: 5–8 reps, 3–4 sets.
• Front lever rows (tuck): 5–8 reps, 3–4 sets.
4. Core and Scapular Work (10 minutes):
• Dragon flags: 5–8 reps.
• L-sit holds: 20–30 seconds, 2 sets.
⏭️ Progression Criteria: Advance to Level 2 once you can:
• Hold the tuck front lever for 15 seconds.
• Perform 3–5 slow eccentrics.
• Complete 5–8 dynamic raises with control.
Level 2: Advanced Tuck Front Lever
Muscle group:
Tips
-
Engage the Core Fully: Keep your abs tight to maintain stability and prevent sagging in the lower back.
-
Maintain Scapular Depression: Keep your shoulders down and away from your ears throughout the movement.
-
Focus on Alignment: Ensure your back and thighs form a straight line for proper technique.
-
Controlled Movements: Avoid swinging or using momentum; focus on slow, controlled transitions into and out of the advanced tuck position.
-
Breathe Steadily: Take deep, controlled breaths to stay relaxed and maintain focus during the hold.
🎯 Goal: Develop strength with hips slightly extended.
1. Warm-Up: Same as Level 1.
2. Skill Work:
• Advanced Tuck Front Lever Hold: 10–15 seconds, 3–5 sets.
• Band-Assisted Advanced Tuck Front Lever Hold: 10–15 seconds.
• Advanced Tuck Front Lever Eccentric: Lower into an advanced tuck (5–7 seconds), 3–5 reps.
• Dynamic Advanced Tuck Front Lever Raises: Pull into the position and return, 5–8 reps.
• Scapular Raises: 10–12 reps.
3. Strength Accessories:
• Weighted pull-ups: 5–8 reps.
• Front lever rows (advanced tuck): 5–8 reps.
4. Core and Scapular Work: Same as Level 1.
⏭️ Progression Criteria: Move to Level 3 when you can:
• Hold advanced tuck for 15 seconds.
• Perform 3–5 controlled eccentrics.
• Complete 5–8 dynamic raises.
Level 3: One-Leg Front Lever (Half Layout)
Muscle group:
Tips
-
Engage the Core and Lats: Keep your core tight and lats engaged to maintain a stable and aligned body position.
-
Maintain Shoulder Depression: Keep your shoulders down and away from your ears to stabilize the position and prevent unnecessary strain.
-
Point the Straight Leg: Fully extend your straight leg with toes pointed to create a streamlined and aligned body shape.
-
Focus on Hip Leveling: Ensure your hips remain level to avoid twisting or asymmetry.
-
Controlled Movements: Perform the transitions slowly and avoid using momentum to achieve the position.
🎯 Goal: Extend one leg while keeping the other tucked.
1. Warm-Up: Same as Level 1.
2. Skill Work:
• One-Leg Front Lever Hold: 10–15 seconds per leg, 3–5 sets.
• Band-Assisted One-Leg Front Lever Hold: 10–15 seconds.
• One-Leg Front Lever Eccentric: Slowly lower with one leg extended (5–7 seconds), 3–5 reps.
• Dynamic One-Leg Front Lever Raises: Pull into the position and return, 5–8 reps.
• Scapular Raises: 10–12 reps.
3. Strength Accessories:
• Weighted pull-ups: 5–8 reps.
• Front lever rows (one-leg): 5–8 reps.
4. Core and Scapular Work: Same as Level 1.
⏭️ Progression Criteria: Advance to Level 4 when you can:
• Hold the one-leg front lever for 15 seconds per side.
• Perform 3–5 controlled eccentrics.
• Complete 5–8 dynamic raises.
Level 4: Half-Lay Straddle Front Lever
Muscle group:
Tips
-
Engage the Core and Lats: Keep your core tight and your lats engaged to stabilize your body and maintain proper alignment.
-
Focus on Scapular Depression: Keep your shoulders down and away from your ears to improve shoulder stability and control.
-
Control the Movement: Avoid swinging or jerking into the position; focus on a slow, controlled transition to engage the correct muscles.
-
Breathe Steadily: Maintain steady breathing to stay relaxed and focused during the hold.
🎯 Goal: Transition to a straddle with legs slightly apart.
1. Warm-Up: Same as Level 1.
2. Skill Work:
• Half-Lay Straddle Hold: 10–15 seconds, 3–5 sets.
• Band-Assisted Half-Lay Straddle Hold: 10–15 seconds.
• Half-Lay Straddle Eccentric: Lower with control (5–7 seconds), 3–5 reps.
• Dynamic Half-Lay Straddle Raises: Pull into position and return, 5–8 reps.
• Scapular Raises: 10–12 reps.
3. Strength Accessories: Same as Level 3.
4. Core and Scapular Work: Same as Level 1.
⏭️ Progression Criteria: Move to Level 5 when you can:
• Hold the half-lay straddle for 15 seconds.
• Perform 3–5 controlled eccentrics.
• Complete 5–8 dynamic raises.
Level 5: Straddle Front Lever
Muscle group:
Tips
-
Engage the Entire Body: Keep your core, lats, glutes, and legs tight to maintain a stable position.
-
Scapular Depression: Ensure your shoulders are down and away from your ears to support proper alignment and reduce strain.
-
Point Your Toes: Fully extend your legs and point your toes outward to maintain tension and proper form.
-
Focus on Hip Alignment: Keep your hips level and aligned with your torso to avoid twisting or sagging.
-
Rings vs. Bar: On gymnastics rings, focus on controlling the instability of the rings by keeping your grip firm and pressing inward.
🎯 Goal: Achieve a wide straddle position.
1. Warm-Up: Same as Level 1.
2. Skill Work:
• Straddle Front Lever Hold: 10–15 seconds, 3–5 sets.
• Band-Assisted Straddle Hold: 10–15 seconds.
• Straddle Front Lever Eccentric: Lower with control (5–7 seconds), 3–5 reps.
• Dynamic Straddle Raises: Pull into position and return, 5–8 reps.
• Scapular Raises: 10–12 reps.
3. Strength Accessories: Same as Level 3.
4. Core and Scapular Work: Same as Level 1.
⏭️ Progression Criteria: Move to Level 6 when you can:
• Hold the straddle for 15 seconds.
• Perform 3–5 controlled eccentrics.
• Complete 5–8 dynamic raises.
Level 6: Full Front Lever
Muscle group:
Tips
-
Engage Your Entire Body: Keep your core, lats, glutes, and legs tight to maintain stability and alignment.
-
Scapular Depression: Keep your shoulders down and away from your ears to support proper alignment and avoid strain.
-
Point Your Toes: Fully extend your legs and point your toes to maintain tension and proper form.
-
Controlled Movements: Avoid swinging or using momentum; focus on slow, deliberate transitions into and out of the front lever.
-
Breathe Steadily: Maintain steady breathing to stay relaxed and focused during the hold.
🎯 Goal: Achieve a fully extended, straight-line front lever.
1. Warm-Up: Same as Level 1.
2. Skill Work:
• Full Front Lever Hold: 10–15 seconds, 3–5 sets.
• Band-Assisted Full Lever Hold: 10–15 seconds.
• Full Front Lever Eccentric: Lower with control (5–7 seconds), 3–5 reps.
• Dynamic Full Lever Raises: Pull into position and return, 5–8 reps.
• Scapular Raises: 10–12 reps.
3. Strength Accessories: Same as Level 3.
4. Core and Scapular Work: Same as Level 1.
Tips for Faster Progress
When I first started working on the front lever, I quickly realized it wasn’t just about brute strength—it was about mastering full-body coordination and understanding the nuances of the movement. Let me share with you some key strategies that helped me progress through the stages and eventually achieve the full front lever.
Body Positioning is Everything
One of the most critical aspects of the front lever is learning how to engage your entire body. This isn’t just a back exercise—your glutes, quads, abs, lats, and even your forearms play a role in creating that solid, straight-line hold. Always keep your shoulder blades retracted and depressed—think about pulling them down and back to activate your lats and stabilize your upper body. This will prevent your chest from pulling forward and keep your spine aligned.
Another game-changer for me was driving my hips upward. When your hips sag, you lose that straight-line position and put unnecessary stress on your lower back. To combat this, squeeze your glutes as hard as you can and focus on maintaining a posterior pelvic tilt. And don’t underestimate the small details: pointing your toes not only improves the aesthetics of the hold but also helps you fully engage your legs, creating a stronger, more stable position.
Eccentric and Dynamic Movements
In addition to isometric holds, eccentric movements were a huge part of my training. Slowly lowering yourself from an inverted hang into the target position builds incredible strength and control. It’s also a great way to identify weak points in your form. Pair this with dynamic raises, where you pull into your front lever progression and return to a dead hang. This type of movement strengthens the mechanics needed for the front lever while reinforcing scapular and core engagement.
I highly recommend training on a lower bar, especially when working on eccentrics and dynamic raises. A bar closer to the ground reduces the lifting distance into position, letting you focus entirely on form and control without exhausting yourself unnecessarily.
Using Resistance Bands
When I struggled with a particular progression, resistance bands became my best friend. By looping the band around my waist and attaching it to the bar, I was able to practice each hold with proper form while gradually building strength. It’s crucial to avoid placing the band around your feet, as this shifts the balance point and can activate the wrong muscles. Keeping the band around your hips or lower back provides assistance in the correct direction and mimics the actual lever mechanics.
Common Mistakes to Avoid
Let’s talk about the pitfalls that I’ve seen time and time again. First, don’t arch your back. Engage your core and glutes to keep your body flat throughout the movement. Arching not only disrupts your form but can also strain your lower back. Second, keep your arms straight. Bending them reduces lat engagement and places unnecessary stress on your elbows. Straight arms ensure you’re targeting the right muscles and building the strength needed for the hold.
Another common issue is letting your hips sag. Always drive them up by squeezing your glutes and maintaining a straight line from your shoulders to your toes. Avoid using momentum or swinging—the front lever is about control, and developing that control is what leads to true strength. Finally, pay attention to band placement. Incorrectly placed bands, especially around your feet, can throw off your balance and hinder proper muscle activation. Keep the band around your hips for optimal assistance.
Bottom Line
The front lever is not something you achieve overnight. Consistency is everything—practice 2–3 times a week, incorporating isometric holds, eccentric movements, and dynamic raises. Track your progress, celebrate small victories, and focus on improving just a little bit every session. Trust the process, and eventually, you’ll find yourself holding a perfect front lever with confidence. Stay disciplined, and don’t forget to enjoy the journey!

