
Ring Rows Feet Elevated
How to do Ring Rows Feet Elevated?
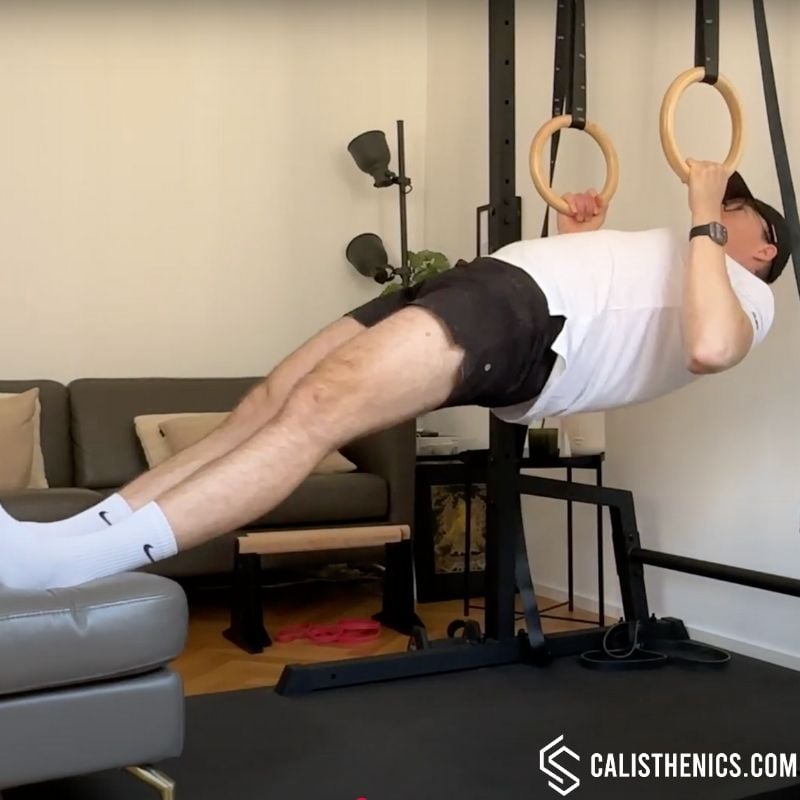
The feet-elevated ring row is a progression of the standard ring row, designed to increase difficulty by shifting more body weight into the pulling movement. By elevating the feet on a plyo box, bench, or other sturdy surface, the athlete places their body in a more horizontal position, increasing the resistance and making the exercise more challenging. This movement effectively strengthens the upper back, rear delts, and arms, while also engaging the core and stabilizing muscles to maintain proper body alignment.
Feet-elevated ring rows are an essential exercise for building pulling strength, especially for athletes working toward strict pull-ups, front lever rows, or explosive pulling movements like muscle-ups. Before attempting this variation, it’s recommended to be comfortable with at least 10 controlled standard ring rows with good form. Strong scapular control and core engagement will also help ensure proper execution and avoid compensatory movements.
To perform this exercise, you will need a set of gymnastics rings securely attached to a stable overhead structure, and an elevated surface such as a plyo box, a chair, or another piece of sturdy furniture. Chalk can help improve grip, and adjusting the ring height will allow for further modifications to the difficulty level.
How to Perform Feet-Elevated Ring Rows
1. Set Up the Rings & Foot Elevation: Adjust the gymnastic rings to a height where your body will be almost parallel to the ground when your feet are placed on the elevated surface. Position a plyo box, chair, or bench behind you to rest your feet on.
2. Position Yourself Under the Rings: Lie beneath the rings and grip them with an overhand (pronated) or neutral grip (palms facing each other). Fully extend your arms, keeping your body in a straight line from head to heels.
3. Engage Your Core: Brace your abs and glutes to maintain a rigid plank-like position throughout the movement. Avoid sagging at the hips or arching your lower back.
4. Initiate the Row: Pull your chest toward the rings by engaging your lats, rhomboids, and rear delts. Keep your elbows close to your body as you pull.
5. Top Position: Reach the highest possible position while keeping control. The rings should be close to your chest, and your shoulder blades should be fully retracted (squeezed together).
6. Lower with Control: Slowly extend your arms to return to the starting position while keeping your body in a straight line. Do not let your shoulders round forward at the bottom.
7. Repeat for Repetitions: Perform the desired number of reps, ensuring controlled movements throughout each phase of the exercise.
Benefits of Feet-Elevated Ring Rows
• Increases Pulling Strength: Elevating the feet increases resistance, making the movement a closer progression toward pull-ups.
• Improves Scapular Control: Reinforces proper scapular retraction and depression, essential for efficient pulling mechanics.
• Builds Upper Back and Arm Strength: Targets the lats, rhomboids, traps, and biceps for a stronger pulling motion.
• Engages Core and Stability Muscles: Requires full-body tension to maintain a straight, rigid position.
• Enhances Grip Strength: Holding the unstable rings strengthens the forearms and grip muscles.
• Transfers to Advanced Pulling Exercises: Serves as a stepping stone for front lever training, explosive pull-ups, and muscle-ups.
Common Mistakes to Avoid
• Sagging Hips or Overarching the Lower Back: Keep your body in a straight line to prevent compensatory movements.
• Letting the Shoulders Round Forward: At the bottom of the movement, avoid losing tension by allowing your scapulae to protract excessively.
• Not Pulling Through Full Range of Motion: Aim to bring your chest to the rings and retract your shoulder blades fully.
• Flaring the Elbows Out Too Wide: Keep the elbows close to your body (around 30-45 degrees) to maximize lat and rhomboid activation.
• Losing Control During the Eccentric Phase: Slowly lower yourself back down instead of dropping quickly.
• Gripping Too Tightly & Fatiguing Prematurely: Keep a firm but relaxed grip to avoid over-fatiguing the forearms before your back muscles reach failure.
Gym Equivalent Exercises
• Inverted Rows on a Bar (Feet Elevated) – Similar movement but with a fixed surface instead of unstable rings.
• Lat Pulldown (Slow Tempo) – Provides a controlled pulling movement that mimics the mechanics of a ring row.
• Seated Cable Rows – Trains the same pulling pattern while allowing for adjustable resistance.
• Pull-Up Isometric Holds – Builds strength in similar muscle groups while developing pulling endurance.
• Dumbbell or Barbell Bent-Over Rows – Develops upper back strength in a horizontal pulling plane.
Tips for the proper execution of Ring Rows Feet Elevated
Engage the Core Throughout the Movement: Keep a hollow body position to maintain stability.
Adjust the Ring Height to Modify Difficulty: Lower rings = harder (more horizontal position), higher rings = easier.
Use a Controlled Tempo: 3-4 second eccentric (lowering) phases will increase time under tension for strength gains.
Focus on Scapular Retraction: Squeeze your shoulder blades together at the top of each rep.
Keep Wrists Neutral: Avoid excessive wrist bending by maintaining a strong, aligned grip.
Breathe Properly: Inhale during the eccentric phase (lowering) and exhale as you pull up.
Muscles worked when doing Ring Rows Feet Elevated
The primary muscles engaged in feet-elevated ring rows include:
•Latissimus dorsi (lats) – The primary pulling muscle, responsible for bringing the chest to the rings.
• Rhomboids & Middle Trapezius – Retracts the shoulder blades, promoting proper scapular control.
•Biceps brachii – Assists in elbow flexion during the pulling movement.
The secondary muscles involved include:
•Rear deltoids – Works to stabilize the shoulders during the pulling phase.
•Forearms & Grip Muscles – Engages to maintain a firm hold on the rings.
• Core muscles (rectus abdominis, obliques, transverse abdominis) – Helps stabilize the body in a plank position.
•Lower Trapezius & Serratus Anterior – Supports proper shoulder mechanics.
Primary Muscle(s):
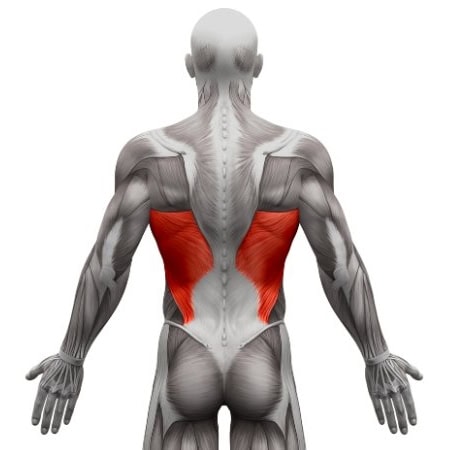
Lats
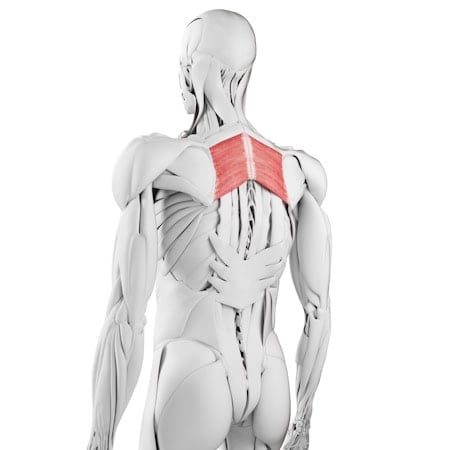
Rhomboid
Secondary Muscle(s):
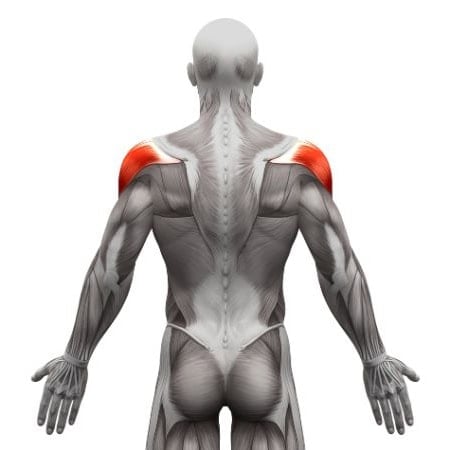
Rear delt
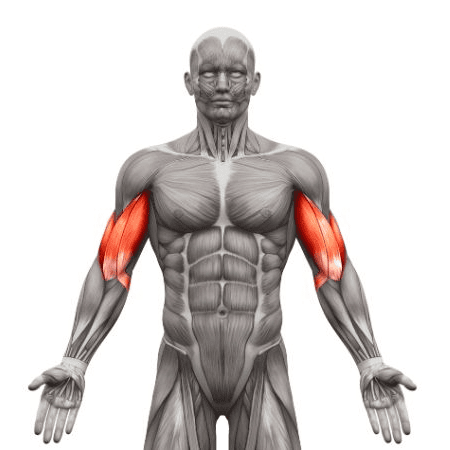
Biceps
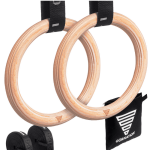
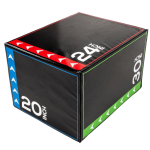
Equipment needed for Ring Rows Feet Elevated

Adjust the difficulty of Ring Rows Feet Elevated
Feet-elevated ring rows are highly adjustable, making them a valuable progression tool toward pull-ups, front lever progressions, and explosive pulling movements. By modifying foot elevation, ring height, tempo, and resistance, athletes can continually challenge themselves and progress toward more advanced calisthenics pulling exercises.
How to make Ring Rows Feet Elevated harder?
How to make Ring Rows Feet Elevated easier?
How to make Ring Rows Feet Elevated harder?
To make Ring Rows Feet Elevated harder:
-
Elevate the Feet Higher: Raising the feet higher shifts more body weight onto the arms, making the row more challenging.
-
Slow Down the Eccentric Phase: Take 5-6 seconds to lower yourself to increase time under tension.
-
Pause at the Top: Hold the top contraction for 3-5 seconds to improve pulling endurance.
-
Perform One-Arm Ring Rows: Unilateral training increases difficulty and builds strength for one-arm pull-up progressions.
-
Add a Weighted Vest: Increasing external resistance makes the exercise harder.
-
Combine with Isometric Holds: Holding at different points during the pull enhances strength at various ranges of motion.
How to make Ring Rows Feet Elevated easier?
To make Ring Rows Feet Elevated easier:
-
Lower the Feet to Reduce Difficulty: Keep your feet on the ground or on a lower surface to decrease body weight resistance.
-
Increase the Ring Height: Higher rings place your body in a more upright position, making the movement easier.
-
Use a Resistance Band for Assistance: Loop a band around the rings and use it for extra support.
-
Perform Partial Reps: If full reps are too challenging, start with a smaller range of motion and progress gradually.
-
Maintain a Slight Knee Bend: Keeping knees slightly bent reduces leverage difficulty.