
Back-to-Wall Handstand
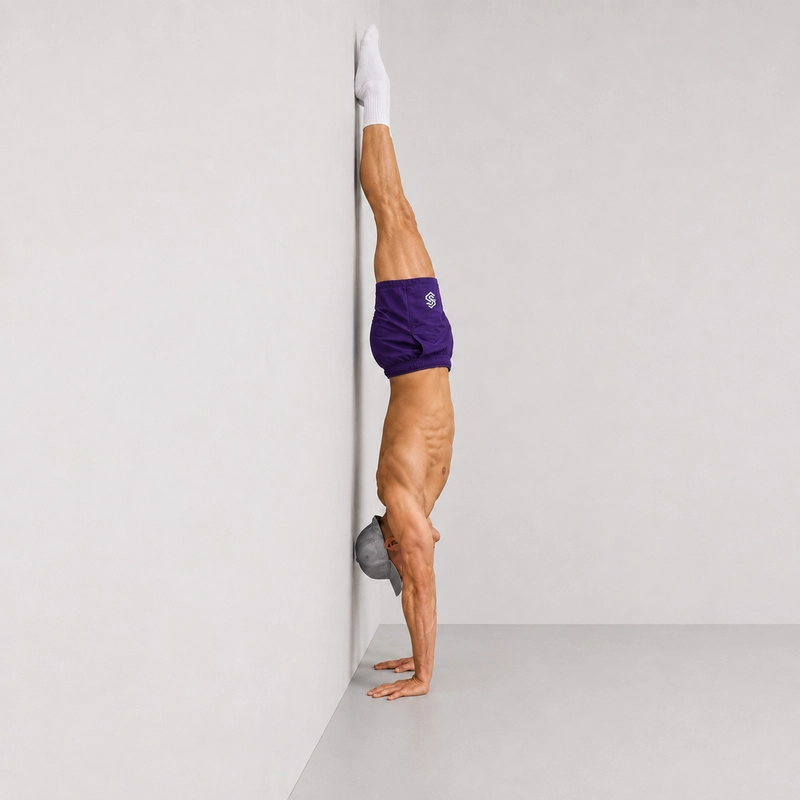
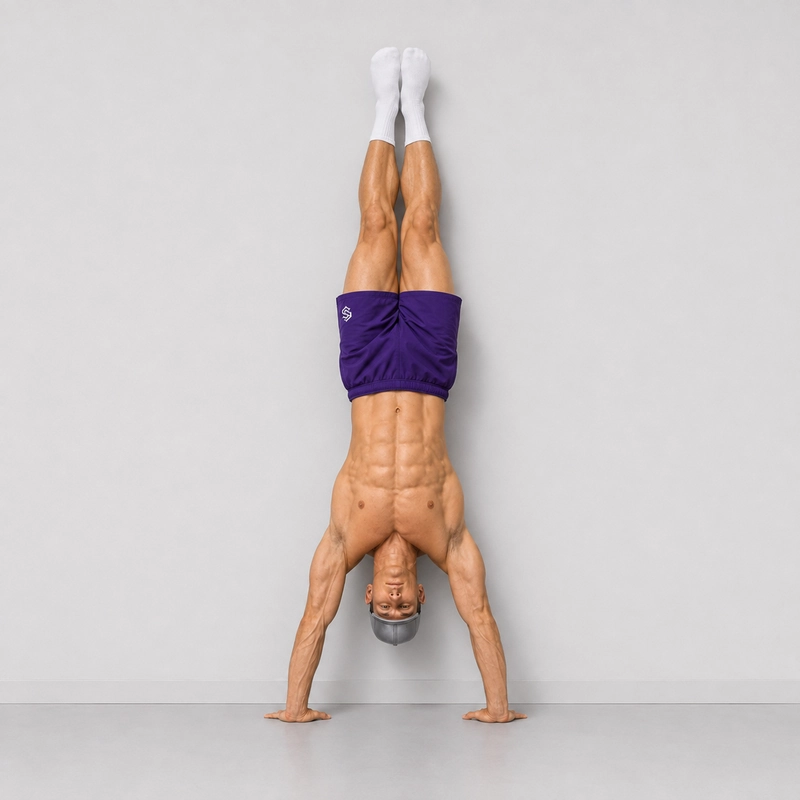
How to do Back-to-Wall Handstand?
The back-to-wall handstand is a wall-supported handstand in which you kick up with your back facing the wall and allow your heels to make light contact behind you. The wall acts as a safety net while you practise the entry used for a freestanding handstand, build overhead endurance and learn to control your balance through your hands.
This variation has a different purpose from the wall walk. A wall walk brings you into a chest-to-wall position and is particularly useful for developing inversion confidence and overhead strength. The back-to-wall handstand places greater emphasis on controlling the kick-up and gradually taking your feet away from the wall.
Before practising, prepare your hands and forearms with the wrist warm-up routine. If supporting your full bodyweight overhead is still difficult, first develop the required shoulder strength with pike push-ups and elevated-feet pike push-ups.
The wall should function as a guardrail, not a backrest. In a controlled repetition, your elbows remain straight, your shoulders push actively away from the floor and only your heels touch the wall. As your balance improves, you can use fingertip pressure to bring one or both feet away from it.
Readiness: Practise on a non-slip surface with a clear wall and enough open space to step down safely. You should be able to support yourself with straight arms without shoulder, elbow or wrist pain. Stop if you experience pain, dizziness, numbness or unusual visual symptoms.
Tips for the proper execution of Back-to-Wall Handstand
Spread your fingers and maintain pressure through the entire hand, including the fingertips.
Keep your elbows locked from the moment your hands accept your weight.
Push the floor away and keep the shoulders actively elevated.
Use a split-leg kick so the leading heel reaches the wall before the second leg.
Keep heel contact light—the wall is a safety net, not the main source of support.
Brace your abdomen and squeeze your glutes to limit excessive lower-back arching.
Look between your hands without lifting or turning your head.
Practise lifting one heel before attempting to float both feet from the wall.
Breathe steadily instead of holding your breath throughout the inversion.
Step down while you still have enough strength to control the exit.
Muscles worked when doing Back-to-Wall Handstand
The back-to-wall handstand is primarily an isometric shoulder and full-body stabilization exercise. Although no pressing repetition occurs during the hold, the upper body must continuously resist gravity while the trunk and lower body maintain alignment.
Primary Muscles
- Anterior deltoids: Maintain the arms in an overhead position and help stabilize the shoulders while the body is inverted.
- Upper trapezius and serratus anterior: Work together to elevate and stabilize the shoulder blades as you actively push the floor away.
- Abdominal muscles: The rectus abdominis and deeper trunk muscles help control the ribcage and limit excessive extension through the lower back.
Secondary Muscles
- Triceps: Maintain elbow extension and prevent the arms from bending under your bodyweight.
- Forearms, wrist flexors and finger flexors: Stabilize the hands and regulate balance through changes in palm and fingertip pressure.
- Obliques: Resist unwanted rotation and side-to-side movement during the kick-up and hold.
- Glutes: Help extend and stabilize the hips, contributing to a straighter handstand line.
- Quadriceps and inner thighs: Keep the knees straight and the legs together.
- Rotator cuff muscles: Stabilize the shoulder joints while the arms support the body overhead.
- Chest and upper-back muscles: Co-contract to control the position of the shoulders and torso.
Moving the heels away from the wall does not substantially change the muscles involved, but it increases the balance and coordination required from the hands, forearms, shoulders and trunk.
Primary Muscle(s):

Abdominal

Anterior delt
Secondary Muscle(s):
Equipment needed for Back-to-Wall Handstand
No equipment needed for this exercise.
Adjust the difficulty of Back-to-Wall Handstand
How to make Back-to-Wall Handstand harder?
How to make Back-to-Wall Handstand easier?
How to make Back-to-Wall Handstand harder?
To make Back-to-Wall Handstand harder:
-
Move your hands gradually closer to the wall while preserving a controlled entry.
-
Maintain contact with only one heel and alternate the supporting leg.
-
Perform controlled heel pull-offs by pressing through the fingertips.
-
Float both feet away from the wall for progressively longer intervals.
-
Use the wall only as a safety net and attempt to kick up without touching it.
-
Progress to controlled freestanding handstand attempts.
-
Add slow weight shifts from one hand to the other before attempting shoulder taps.
How to make Back-to-Wall Handstand easier?
To make Back-to-Wall Handstand easier:
-
Practise an elevated pike hold with your feet supported on a sturdy box or bench.
-
Perform a partial wall walk and stop before reaching a fully vertical position.
-
Keep both heels on the wall and use shorter 5–10-second holds.
-
Practise only the first part of the kick-up, gradually increasing its height.
-
Ask a qualified coach or experienced training partner to spot your hips or legs.
-
Begin with your hands already on the floor to remove the standing entry.
