
Standing Ring Rollout
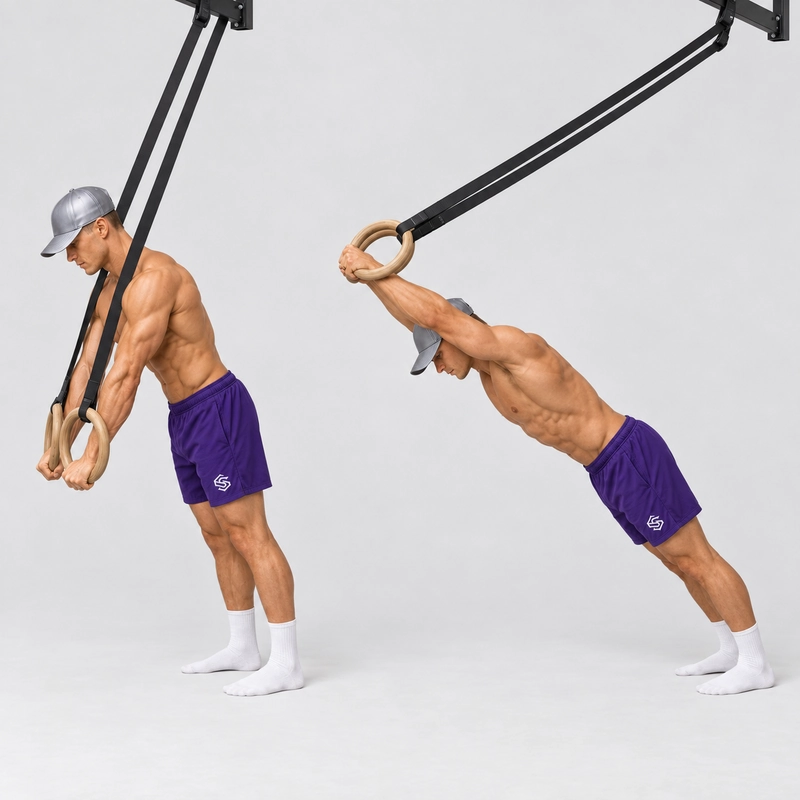
How to do Standing Ring Rollout?
The Standing Ring Rollout is a dynamic bodyweight core exercise performed by holding two gymnastics rings, leaning forward from the feet and allowing the straight arms to travel forward and overhead. It is also known as a Ring Rollout, Ring Ab Rollout or Ring Fallout.
The primary purpose of the exercise is to develop anti-extension strength: the ability of the abdominal muscles to prevent the ribs, pelvis and lower back from losing position as the arms move farther from the body. Rather than repeatedly flexing the spine like a crunch, the athlete attempts to preserve a rigid, neutral-to-slightly-hollow body line while rotating forward around the feet.
The shoulder movement also distinguishes the Standing Ring Rollout from similarly positioned exercises. During a Ring Triceps Extension, the elbows bend while the upper arms remain comparatively still. During a Standing Ring Rollout, the elbows remain straight while the shoulders flex and the rings travel overhead. A Ring Push-Up bends both the shoulders and elbows and moves the chest between the handles.
Rollouts place meaningful demands on more than the visible abdominal muscles. The obliques resist rotation, the lats and chest help bring the arms back down, the triceps maintain elbow extension and the shoulder-blade muscles control the overhead position. A controlled laboratory study indexed by PubMed found high rectus-abdominis and oblique activation during a Swiss-ball rollout compared with most of the other exercises tested. That study examined a Swiss-ball variation rather than rings and measured short-term muscle activation, so it demonstrates the potential muscular demand of the rollout pattern rather than proving superior strength or muscle growth.
The rings make the movement particularly scalable. Raising the handles, shortening the range or standing closer to their resting position makes the exercise easier, while lowering the rings, moving the feet farther away or bringing the body closer to horizontal makes it harder.
How to Perform a Standing Ring Rollout
1. Secure and Adjust the Rings
Attach both straps to a sturdy overhead structure designed to support bodyweight. Inspect the anchor, straps, buckles and rings, then weight-test the setup before committing to the exercise.
Space the straps approximately shoulder-width apart and adjust both rings to the same height. Rings around hip or waist height provide a manageable starting setup for many athletes, while lower rings create a considerably harder lever.
Make sure there is clear space in the direction of the rollout and use a dry, non-slip surface. If the straps are attached to a horizontal bar, stand perpendicular to the bar so both rings can swing forward along parallel paths.
2. Establish the Starting Position
Grip the rings with your palms facing one another and your thumbs wrapped around the handles. Stand so the rings are in front of your thighs, the straps are taut and your arms can begin fully extended.
Place your feet approximately hip-width apart with the knees straight or softly unlocked. Keep the wrists neutral, lengthen through the crown of your head and establish a tall line through the shoulders, hips and heels.
3. Brace Before Moving
Bring your ribs over your pelvis, tighten your abdominals and squeeze your glutes and quadriceps. A small posterior pelvic tilt can help prevent the lower back from arching, but avoid beginning in an exaggerated spinal crunch.
Keep the elbows at full active extension without aggressively forcing them backward. A very small fixed elbow bend is acceptable when necessary for joint comfort, but the elbow angle should not continue changing during the repetition.
4. Roll Forward From the Feet
Inhale gently, maintain your brace and shift your weight toward the balls of your feet. Pivot forward around the ankles as the rings travel away from your thighs and your straight arms rise in front of you.
Allow the shoulder blades to move naturally as the arms approach overhead. The scapulae must upwardly rotate during shoulder flexion, so do not force the shoulders aggressively down and back while trying to reach farther.
Your head, torso, hips and legs should travel as one connected unit. Avoid initiating the movement by pushing the hips forward independently or allowing the abdomen and lower back to sag between the shoulders and feet.
5. Reach the Deepest Controlled Position
Continue until your biceps approach your ears or you reach the deepest position in which the ribs, pelvis and lower back remain controlled. At the bottom, the arms should be straight, the neck neutral and the rings approximately level with one another.
A full advanced rollout may bring the body close to horizontal, but this is not required for every training repetition. Your usable range ends immediately before the lower back arches, the ribs flare, the hips drop or the shoulders become uncomfortable.
6. Return Without Hinging
Exhale and drive the rings down and back by extending the shoulders while maintaining abdominal and glute tension. The lats, chest and other shoulder muscles actively move the arms, while the abdominal muscles prevent the trunk from extending under the long lever.
Pivot back from the ankles until the rings return in front of your thighs. Do not sit the hips backward, bend the elbows or step forward to make the return easier.
7. Reset the Rings
Pause until both rings are still, restore your breathing and confirm that your ribs remain stacked over your pelvis. Begin the next repetition only when you can reproduce the same range and body position.
What Counts as a Complete Repetition?
- Both rings begin level and stable with the straps under tension.
- The arms remain at full active extension or maintain one fixed slight bend.
- The athlete pivots forward from the feet while the body remains rigid.
- The shoulders flex until the biceps approach the ears or the athlete reaches a predetermined controlled depth.
- The ribs and pelvis remain connected without visible lumbar hyperextension.
- The hips do not sag during the descent or move backward during the return.
- Both rings follow symmetrical paths without swinging or drifting excessively apart.
- The athlete returns to the starting position without stepping, bouncing or bending the elbows.
The correct depth is individual and depends on ring height, foot position, shoulder mobility and core strength. For useful performance tracking, every repetition in a set should reach approximately the same position.
How Ring Height and Foot Position Change the Difficulty
The Standing Ring Rollout can change from an accessible leaning drill to an advanced near-horizontal strength exercise with a relatively small setup adjustment.
- Higher rings: Higher handles create a more upright bottom position and reduce the leverage acting on the trunk and shoulders.
- Lower rings: Lowering the handles increases the available range and usually brings the body closer to horizontal.
- Feet closer to the resting rings: A shorter horizontal distance generally makes the movement easier to control.
- Feet farther away: Increasing the distance can lengthen the lever and place more bodyweight behind the rings.
- Longer range: Allowing the arms to travel farther overhead increases the demand even when ring height remains unchanged.
Change only one variable at a time and record the ring height, foot position and bottom landmark. Without these measurements, two sets labelled “Standing Ring Rollout” may represent very different difficulty levels.
Correct Pelvic and Spinal Position
The goal is not to flatten or round the spine as much as possible. Instead, maintain a controlled neutral-to-slightly-hollow position in which the ribs do not flare away from the pelvis as the arms move overhead.
Think about shortening the distance between the lower ribs and the front of the pelvis without performing a visible crunch. Your glutes should remain active so the pelvis does not tip forward and create excessive lower-back extension.
If the lower back begins arching before the arms reach your intended depth, that is a strength or range limit rather than a signal to brace harder indefinitely. Raise the rings or shorten the rollout until the body position becomes repeatable.
Should Your Arms Be Completely Straight?
The canonical variation uses straight arms because this creates the longest lever and clearly separates the exercise from a Ring Triceps Extension. Reach active elbow extension without snapping or forcing hypermobile elbows beyond their natural position.
A small fixed bend can be used as a temporary regression or to accommodate sensitive elbows, but allowing the elbows to bend progressively during the return shortens the lever and changes the exercise. Record bent-arm repetitions separately if you use them intentionally.
Common Standing Ring Rollout Mistakes
- Allowing the lower back to sag: Raise the rings or shorten the range as soon as the ribs flare and the pelvis tips forward.
- Pushing the hips forward independently: Move the shoulders, hips and heels together rather than folding through the middle of the body.
- Sitting the hips backward on the return: Pull the rings down while pivoting around the feet instead of converting the exercise into a hip hinge.
- Bending the elbows: Maintain one elbow angle so the movement remains a straight-arm rollout rather than a pullover or triceps extension.
- Forcing the shoulders down overhead: Allow natural scapular upward rotation while keeping the rings controlled and the neck relaxed.
- Using excessive range too soon: Stop before losing spinal or shoulder position instead of treating maximum depth as mandatory.
- Starting with rings that are too low: A small reduction in handle height can produce a large increase in difficulty.
- Reaching with the head: Keep the neck aligned and allow the head to move between the arms as the entire body travels forward.
- Letting one ring lead: Reduce the difficulty if the handles repeatedly reach different heights or distances.
- Allowing the rings to swing: Pause between repetitions and keep the descent smooth enough to control both handles.
- Bouncing out of the bottom: Reverse the movement using muscular control rather than elastic momentum.
- Holding the breath throughout long repetitions: Maintain the brace while using small controlled breaths instead of creating unnecessary pressure.
Benefits of Standing Ring Rollouts
- Progressive anti-extension strength: The abdominals resist increasing leverage as the arms travel farther from the torso.
- Dynamic core control: The trunk must remain stable while the shoulders and entire body change position.
- Adjustable resistance: Ring height, foot position, range, tempo and external load can all be progressed gradually.
- Shoulder strength: The shoulder flexors control the descent while the lats and chest help return the arms.
- Scapular control: The shoulder blades must move and stabilize appropriately as the arms travel overhead.
- Left-to-right stability: Independent rings expose asymmetrical force and require the obliques to resist rotation.
- Full-body tension: The glutes, quadriceps and trunk maintain one connected body line from the head to the feet.
- Calisthenics carryover: The exercise reinforces the braced, arms-overhead position developed in the Hollow Body Hold.
Standing Ring Rollouts can strengthen and develop the abdominal muscles, but they cannot selectively reduce abdominal fat or guarantee visible abs. Body composition is primarily influenced by overall energy balance, nutrition, activity and individual fat distribution.
Readiness and Safety
Before attempting the standing version, develop basic bracing endurance with the Elbow Plank and Hollow Body Hold. You should also be able to reach overhead without shoulder pain or compensating with substantial rib flare.
A useful practical readiness check is a controlled 20-to-30-second plank and several partial high-ring rollouts without lumbar extension, although these are guidelines rather than mandatory universal standards. The top position of an incline Ring Push-Up can also help develop familiarity with controlling two independent handles.
Warm up the shoulders, elbows and wrists before demanding sets; the 6-Minute Joint Warm-Up Routine provides a suitable general starting point. Begin with higher rings than you think you need and perform the first repetition through a deliberately short range.
Keep the area in front of you clear and avoid training the rollout to uncontrolled muscular failure because losing the bottom position can result in a fall. Stop if you experience sharp or increasing pain, numbness, tingling or a feeling of instability in the shoulders or lower back.
How to Program Standing Ring Rollouts
Standing Ring Rollouts are generally best performed after the main skill or compound-strength work because fatigue in the shoulders and trunk can affect handstands, planches, pressing and heavy pulling. Place them earlier only when improving the rollout is the session’s primary objective.
- Technique practice: Perform 2 to 3 sets of 4 to 6 repetitions with high rings and a controlled range.
- Core strength: Perform 3 to 5 sets of 3 to 8 challenging repetitions while maintaining identical body alignment.
- Muscle development: Perform 3 to 4 sets of 6 to 12 repetitions at an angle that leaves approximately 1 to 3 technically sound repetitions in reserve.
- Tempo: Use a three-to-five-second descent, a controlled reversal and a smooth return.
- Rest: Rest approximately 90 seconds to three minutes between demanding sets.
One to three weekly exposures are sufficient for most programs depending on existing core, straight-arm and shoulder volume. Stop the set at technical failure, which occurs when the lower back arches, the elbows bend, the hips hinge or the rings can no longer follow symmetrical paths.
Once you can complete every planned set at the top of your repetition range with consistent depth and repetitions remaining in reserve, lower the rings slightly or move the feet a small distance farther away. Avoid simultaneously changing height, foot position and range because this makes progress difficult to measure.
Suggested Progression
- Learn rib and pelvic control with the Elbow Plank and Hollow Body Hold.
- Perform kneeling Ring Rollouts with high handles and a limited range.
- Practise short-range Standing Ring Rollouts with the rings around waist height.
- Increase the shoulder-flexion range until the biceps approach the ears.
- Lower the rings gradually while preserving the same body line.
- Move the feet farther from the resting rings to increase the lever.
- Build toward a near-horizontal bottom position with straight arms.
- Add pauses, slow eccentrics, foot elevation or external resistance only after mastering the unweighted bilateral version.
Frequently Asked Questions
Is a Ring Fallout the same as a Standing Ring Rollout?
Yes. Ring Fallout is another common name for the same straight-arm suspension rollout and does not require a separate canonical exercise page.
Is the kneeling Ring Rollout a separate exercise?
The kneeling variation is a useful regression, but it uses the same equipment, movement and training intent. It should remain on this page unless future search or engagement data demonstrate a strong need for a dedicated progression page.
How is a Standing Ring Rollout different from an ab-wheel rollout?
Both train a similar anti-extension pattern, but rings permit adjustable handle height and independent arm movement. An ab wheel remains close to the floor and follows one shared rolling path, so it can justify a separate equipment-specific exercise page.
How high should the rings be?
Beginners can start around waist height or higher, while stronger athletes can progressively lower the handles. The correct height is the lowest position that still permits controlled repetitions without lumbar extension or bent elbows.
How far should I roll forward?
Roll until the biceps approach the ears or until you reach the final position before your ribs flare, hips sag or lower back arches. Consistent controlled depth matters more than reaching the floor.
Should I keep my shoulder blades down?
No. The shoulder blades should upwardly rotate naturally as the arms move overhead, although the shoulders and rings must remain actively controlled.
Is it normal to feel the lats and shoulders?
Yes. The shoulders control the outward phase, and the lats and chest help bring the arms back toward the body while the abdominal muscles stabilize the trunk.
Why do I feel the exercise mainly in my lower back?
The rings are probably too low, the range is too long or the abdominal and glute brace is being lost. Raise the handles and stop each repetition before the pelvis tips forward.
Should the elbows be locked?
Use full active elbow extension without snapping or forcing the joints backward. A small fixed bend is acceptable for comfort, but the elbow angle should not change during the repetition.
Can beginners perform Standing Ring Rollouts?
Beginners should first use high rings, partial repetitions or the kneeling variation. The standard standing version is an intermediate exercise despite being highly adjustable.
Why do the rings shake or separate?
The selected height, range or repetition target may exceed your present control, or one arm may be applying more force. Raise the rings, widen your stance and pause between repetitions.
Will Ring Rollouts give me visible abs?
They can strengthen and develop the abdominal muscles, but visible definition also depends on body-fat level, nutrition, genetics and overall training.
Tips for the proper execution of Standing Ring Rollout
Adjust both rings to the same height and space the straps approximately shoulder-width apart.
Use a neutral grip with your thumbs wrapped securely around the handles.
Stand on a non-slip surface with clear space in the rollout direction.
Brace your abdominals before allowing the rings to move away from your body.
Squeeze your glutes and quadriceps to keep the pelvis connected to the torso.
Maintain a neutral-to-slightly-hollow body line throughout the repetition.
Pivot forward from the ankles instead of pushing the hips ahead independently.
Keep the elbows straight without aggressively forcing them into hyperextension.
Allow the shoulder blades to upwardly rotate as the arms travel overhead.
Keep both rings level and moving along symmetrical paths.
Stop the descent immediately before your ribs flare or lower back arches.
Let your head travel naturally between your arms without reaching the chin forward.
Use the lats and chest to bring the rings down while the abdominals stabilize the spine.
Return by pivoting around the feet rather than sitting the hips backward.
Use a slow lowering phase and avoid bouncing out of the bottom position.
Pause until the rings are still before beginning the next repetition.
End the set when the elbows bend, the hips hinge or your controlled range becomes shorter.
Record ring height, foot position and bottom depth when tracking progress.
Muscles worked when doing Standing Ring Rollout
The Standing Ring Rollout combines isometric trunk stabilization with dynamic shoulder movement. The abdominal muscles resist spinal extension while several upper-body muscles move and stabilize the rings.
Primary Muscles
- Rectus abdominis: The rectus abdominis resists rib flare and lumbar extension as the arms travel farther from the torso.
- Transverse abdominis: The deeper abdominal wall contributes to maintaining pressure and controlling the relationship between the ribs and pelvis.
Secondary Muscles
- Internal and external obliques: The obliques assist with anti-extension and resist rotation when the rings move unevenly.
- Latissimus dorsi: The lats help extend the shoulders and bring the rings back toward the starting position.
- Pectoralis major: The chest can assist shoulder extension from the flexed overhead position.
- Anterior deltoids: The front shoulders control the arms as they travel forward and overhead.
- Serratus anterior: The serratus helps control the shoulder blades against the rib cage as the arms move.
- Trapezius: The upper and lower trapezius contribute to scapular upward rotation and overhead stability.
- Rotator cuff: The rotator-cuff muscles stabilize the upper-arm bones while the rings move independently.
- Triceps brachii: The triceps work isometrically to maintain straight elbows throughout the rollout.
- Forearms and hand muscles: These muscles secure the grip and control the orientation of each ring.
- Glutes and quadriceps: The lower body remains active so the athlete moves as one rigid unit.
- Spinal stabilizers: The back muscles co-contract to maintain alignment but should not dominate the exercise.
If the lower back becomes the main area of effort, shorten the range or raise the rings rather than attempting to tolerate increasing lumbar extension.
Primary Muscle(s):

Abdominal
Secondary Muscle(s):

Anterior delt

Triceps

Oblique
Equipment needed for Standing Ring Rollout
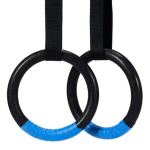
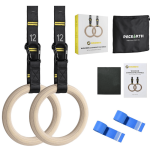
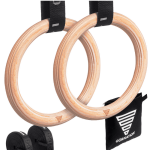
Adjust the difficulty of Standing Ring Rollout
How to make Standing Ring Rollout harder?
How to make Standing Ring Rollout easier?
How to make Standing Ring Rollout harder?
To make Standing Ring Rollout harder:
-
Lower the rings gradually to bring the body closer to horizontal.
-
Move your feet farther from the resting rings to increase the leverage demand.
-
Increase the range until your biceps reach your ears without lumbar extension.
-
Bring your feet together to increase the balance and anti-rotation demands.
-
Use a four-to-six-second lowering phase on every repetition.
-
Pause for two to three seconds in the deepest controlled position.
-
Perform one-and-a-half repetitions by adding a second partial rollout before returning upright.
-
Elevate your feet on a stable box to create a decline Standing Ring Rollout.
-
Wear a weighted vest after mastering full-range unweighted repetitions.
-
Shift progressively more weight toward one ring to perform an archer-style rollout.
-
Progress to a Single-Arm Ring Rollout while preventing the torso from rotating.
How to make Standing Ring Rollout easier?
To make Standing Ring Rollout easier:
-
Raise the rings to create a more upright bottom position.
-
Stand closer to the resting rings to shorten the horizontal lever.
-
Reduce the range and extend the arms farther only as your control improves.
-
Use a wall or padded box as a repeatable range limiter.
-
Widen your stance to create a more stable base.
-
Use a staggered stance while learning to control the forward lean.
-
Perform Kneeling Ring Rollouts before progressing to the standing variation.
-
Maintain a small fixed elbow bend to shorten the lever temporarily.
-
Perform eccentric-only repetitions and step forward carefully to reset.
-
Build foundational bracing strength with Elbow Planks and Hollow Body Holds.
-
Use shorter sets and stop well before technical failure.
