
Chair Stand
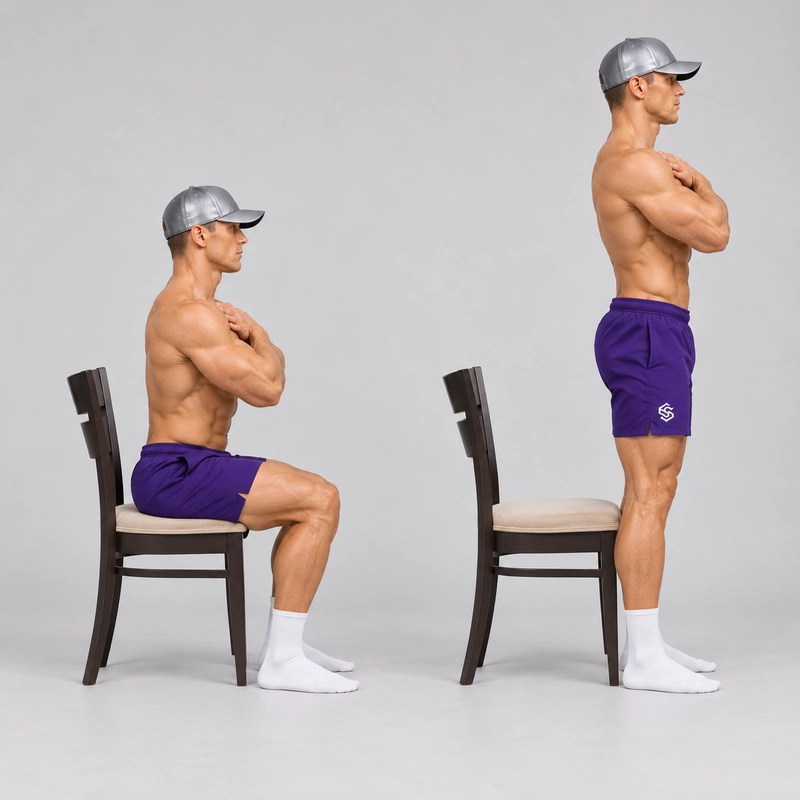
How to do Chair Stand?
The Chair Stand, also called the sit-to-stand or chair rise, is a lower-body exercise that begins seated on a stable chair. Bring your weight forward over your feet, extend your hips and knees to stand upright, then lower yourself back onto the seat. Settle briefly before the next rise.
This seated start distinguishes it from the bench-assisted squat. In that exercise, you start standing and use a light seat touch to judge squat depth. In a chair stand, the seat supports you between repetitions, so each ascent includes the task of getting up from sitting. You can use the same suitable chair for both movements, but the repetition standards differ.
The exercise provides a practical way to train the leg strength used when getting out of a chair. The NHS home strength-exercise guide includes sit-to-stand practice using a solid, stable chair. Chair stands can suit new exercisers as well as older adults; the setup and assistance should match the person rather than their age alone. Our calisthenics guide for seniors offers broader training context.
Choose a Stable Chair and Suitable Seat Height
Use a firm chair that can support your body weight without sliding, rocking or folding. Place it on a level, non-slip surface. A suitable wall behind the chair can help prevent backward movement, but it does not fix a slippery floor, weak frame or tipping chair.
Avoid wheeled office chairs, unstable folding chairs and soft sofas that let you sink deeply into the seat. Clear space in front for standing and around your feet for repositioning. Wear footwear with reliable grip, or use another secure foot-to-floor contact appropriate to your training surface; avoid slippery socks.
Choose a seat that allows both feet to rest fully on the floor. Around knee height is a useful starting reference: when seated, the knees are roughly at a right angle and the hips are around knee level or slightly higher. Your proportions matter more than a fixed chair measurement.
If rising is too difficult, a firmer, slightly higher suitable seat may help, provided your feet still reach the floor. Change to appropriate furniture or purpose-built secure seating rather than balancing the chair legs on objects or adding loose cushions. Record the actual seat height if you want to compare sessions.
Set the Feet and Choose the Hand Position
Sit toward the front portion of the seat, with enough of the pelvis supported to remain stable. You should be able to lean forward without being held against the backrest. Do not perch so close to the edge that you could slide off.
Place the feet about hip-width apart, with the heels approximately beneath the knees or slightly behind them, as comfortable. Keep the heels and forefeet in contact with the floor. Feet placed far in front can make it harder to bring your weight over them; pulling them too far back can also create an uncomfortable position.
For the standard version shown here, cross the arms comfortably over the chest and keep them there. You may instead reach both arms forward as a no-hand-assistance variation if that improves balance. Record which position you use because it changes the setup.
If you need help, use firm, secure armrests to push as much as necessary. This is a hand-assisted chair stand and remains useful practice. Avoid pulling on a loose chair back or pressing against furniture that could tip. If you cannot stand and return safely even with suitable support, arrange individual help before practising alone.
How to Do a Chair Stand
- Begin seated. Let the seat support your pelvis, place both feet securely and choose the planned arm position. Start from stillness rather than bouncing straight out of the previous descent.
- Bring your weight forward. Lean the trunk forward from the hips until your weight moves toward the feet. Let the head follow the torso naturally. A completely vertical torso throughout the rise is not required.
- Push through both feet. Extend the knees and hips to lift the pelvis from the chair. Keep the feet planted and allow the knees to move in the same general direction as the toes.
- Finish standing. Come to a comfortable upright position with the hips and knees extended. Balance over both feet without forcefully locking the knees or leaning backward.
- Lower back toward the seat. Bend the hips and knees, let the torso incline naturally and guide the pelvis back onto the chair. Keep the chair behind you and control the final part of the descent.
- Sit, settle and reset. Fully support the pelvis on the seat again. Check the feet and arm position before beginning the next rise.
Breathe throughout the movement. Exhaling as you rise and inhaling as you sit can provide a simple rhythm. Use a manageable pace that lets you control both directions, without holding your breath or turning the exercise into a race.
What Counts as a Complete Training Repetition?
- Start seated with the pelvis supported, rather than hovering above the chair.
- Rise to a comfortable full standing position using both planted feet.
- Use no hand push for the standard version; identify any assisted repetitions separately.
- Return to the seat under control and finish seated before the next rise.
- Keep the chair stationary and avoid rocking repeatedly to launch the ascent.
For the practice sets on this page, one complete seated-to-standing-to-seated cycle counts as one repetition. Keep the seat height, arm position and assistance consistent when comparing results. A rise from a higher chair or with stronger hand support can represent useful progress, but it is a different configuration.
Start With a Manageable Practice Set
A practical coaching starting point is one set of three to five controlled repetitions at a suitable seat height. If several consecutive repetitions are not yet available, practise one to three individual rises with rest between them. Use hand assistance when needed and record it rather than forcing an unsupported attempt.
Rest long enough to recover comfortable breathing and control; around one to two minutes is a useful starting option between sets. Gradually build toward two sets of five to eight repetitions, and later eight to twelve if those repetitions remain controlled. These ranges are adjustable practice suggestions, not a clinical protocol or a required progression deadline.
Two nonconsecutive strength sessions per week can be a manageable starting schedule. Rehearse an easier version before working sets. End a set when the return becomes a drop, the feet start moving unexpectedly or you need more assistance than planned. Stop for sharp pain, dizziness or an unexpected loss of balance.
You can use chair stands as an appropriately scaled lower-body option when following our beginner full-body home workout plan. Adjust the plan's squat prescription to your ability rather than assuming its listed volume is suitable immediately. Standing calf raises can provide a separate lower-leg exercise when you can stand securely; they are an accessory, not a prerequisite for chair stands.
Progress From Supported Rising to Independent Repetitions
First establish a repeatable rise and a controlled return. If using armrests, gradually reduce the push while keeping the same chair and foot position. You can use the hands for the ascent and less support for the descent, provided both directions remain secure. Record that assistance pattern.
Once no-hand repetitions are comfortable, add a small number of repetitions or another set before changing several variables at once. A slower return, such as about three seconds, adds a control challenge. Continue to sit fully between repetitions rather than changing into a touch-and-go squat.
A slightly lower suitable chair may increase the challenge, but only use it if you can still rise and sit with control. Keep the feet supported and establish a new baseline at the new height. There is no need to choose the lowest available seat.
To practise squatting without a seated reset, explore the half squat at a manageable standing range or the straight-arm bodyweight squat when ready for a larger controlled range. These change the movement task rather than simply adding chair-stand repetitions. Athletes who already control independent chair stands and free squats can later consider external resistance, such as the dumbbell goblet squat; added weight is not the first progression for someone still needing hand assistance.
Common Mistakes and Useful Corrections
- Trying to rise with the trunk completely upright: allow a controlled forward lean to bring your weight over the feet before leaving the seat.
- Launching with repeated rocking: choose more assistance or a more suitable seat and begin each rise from a settled position.
- Pushing only through the heels: keep the whole foot in contact so the forefoot can also contribute to a stable base.
- Dropping into the last part of the sit: reduce repetitions, add appropriate hand support or use a more suitable chair until the return is controlled.
- Stopping at a crouched position: finish standing comfortably upright before starting the return.
- Changing assistance halfway through a comparison set: finish safely, then record the changed assistance instead of treating all repetitions as identical.
Is This the Same as the 30-Second Chair-Stand Test?
The movement is related, but the practice sets on this page are not a standardized test. The CDC STEADI 30-second chair-stand assessment specifies a straight-backed chair without armrests, a 17-inch (43.2 cm) seat, crossed arms and its own timing and scoring instructions. It is used to assess leg strength and endurance in an older-adult assessment context.
Follow the actual assessment instructions if a professional is administering that test. Do not compare an assisted set, a different chair height or the unhurried practice cycles here with its reference scores. Needing hand assistance during training identifies an exercise modification; it does not make the completed practice useless or provide a diagnosis.
Can I Use a Bench Instead of a Chair?
Yes, if the bench is firm, stable, at a suitable height and allows a secure seated start. The name describes the seated-to-standing task, not an exclusive furniture requirement. Fully sit and reset for a chair stand. If you start standing and only touch the bench without settling onto it, you are using the bench-assisted squat standard instead.
Tips for the proper execution of Chair Stand
Begin each rise with the pelvis supported by the seat. A light touch followed by an immediate rebound changes the exercise.
Choose a firm seat that lets both feet rest fully on the floor. A fixed chair measurement is less useful than a setup that fits your proportions.
Place the feet roughly beneath the knees, then adjust slightly for a comfortable rise without lifting the heels.
Lean forward from the hips to move your weight over the feet. You do not need to keep the torso vertical while leaving the chair.
Keep both the heel and forefoot in contact. Avoid deliberately unloading the toes or rising onto the balls of the feet.
Let the knees travel in the same general direction as the toes without forcing an identical stance for every person.
Finish comfortably upright before sitting again. Avoid ending the rise in a crouch or leaning backward at the top.
Control the final few centimetres of the return. If you drop onto the seat, reduce the set or add suitable support.
Use secure armrests when assistance is needed, and record the hand support. Reduce it gradually rather than forcing an unsupported rise.
Keep seat height, foot position and arm position consistent when tracking progress. Change one variable at a time.
Muscles worked when doing Chair Stand
Primary muscles
- Quadriceps: extend the knees as you rise and help control knee bending as you sit down.
- Gluteus maximus: extends the hips to bring you into standing and contributes to controlling the return.
Supporting muscles
- Hamstrings: assist hip extension and contribute to lower-body control alongside the other leg muscles.
- Abdominals and spinal stabilizers: help control the trunk during the forward lean, rise and return.
- Hip stabilizers: help manage pelvic position and side-to-side alignment.
- Calf and foot muscles: help control the ankle and maintain stable foot contact as weight shifts from the seat to the floor.
The relative demands change with seat height, body proportions, foot position and hand assistance. The standard exercise trains a coordinated rise and return; it does not isolate one muscle or establish a fixed percentage of muscle activation. Pushing through armrests adds upper-body assistance and reduces the unsupported leg task.
Primary Muscle(s):
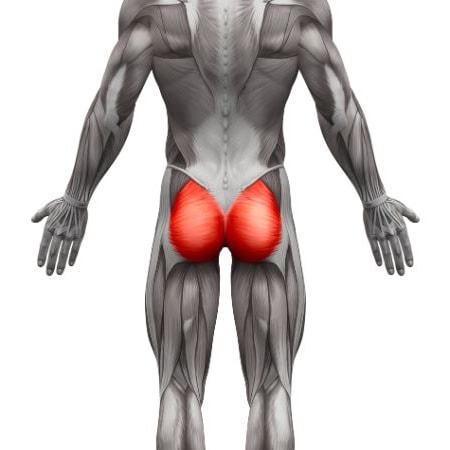
Glutes
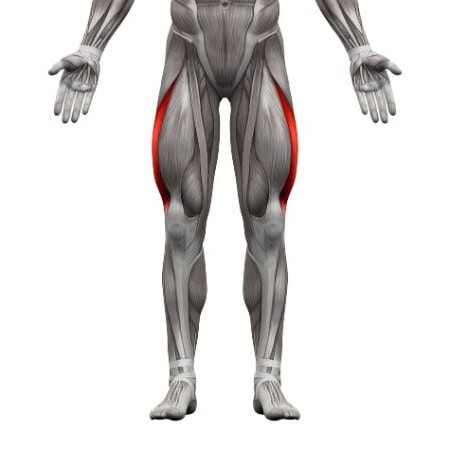
Quads
Secondary Muscle(s):
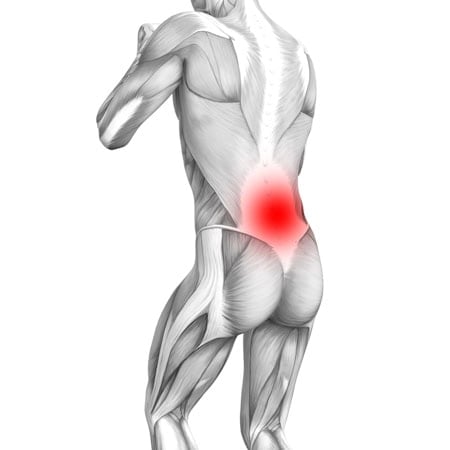
Lower back

Abdominal
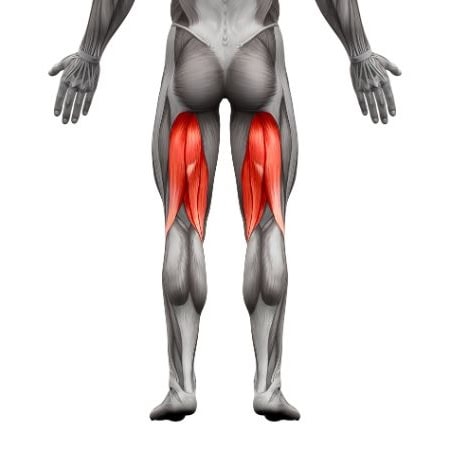
Hamstring
Equipment needed for Chair Stand
No equipment needed for this exercise.
Adjust the difficulty of Chair Stand
Scale the chair stand with seat height, hand assistance, repetitions and return tempo. Begin with a stable setup that allows a controlled rise and sit. Reduce hand support before adding external load. Keep the seated reset in every version, and record changes in seat height or arm position so different configurations are not treated as identical results.
How to make Chair Stand harder?
How to make Chair Stand easier?
How to make Chair Stand harder?
To make Chair Stand harder:
-
Reduce the push from the armrests at the same seat height until you can complete both directions without hand assistance. Keep assisted and independent results separate.
-
Take about three seconds to sit down while preserving a normal controlled rise and a fully seated reset. Avoid replacing the final part of the descent with a drop.
-
Use a slightly lower stable seat only when you can rise and return securely without extra assistance. Keep both feet supported and establish a new baseline at the new height.
How to make Chair Stand easier?
To make Chair Stand easier:
-
Push through firm, secure armrests as needed for the rise and return. Record this as a hand-assisted chair stand and gradually reduce the assistance at the same seat height.
-
Use a suitable firmer, slightly higher seat while keeping both feet fully on the floor. Use secure furniture or purpose-built seating rather than loose cushions or improvised chair-leg risers.
-
Practise one to three individual rises with rest between them instead of a continuous set. Keep the same safe assistance and complete a controlled seated reset each time.
