
Elbow Lever
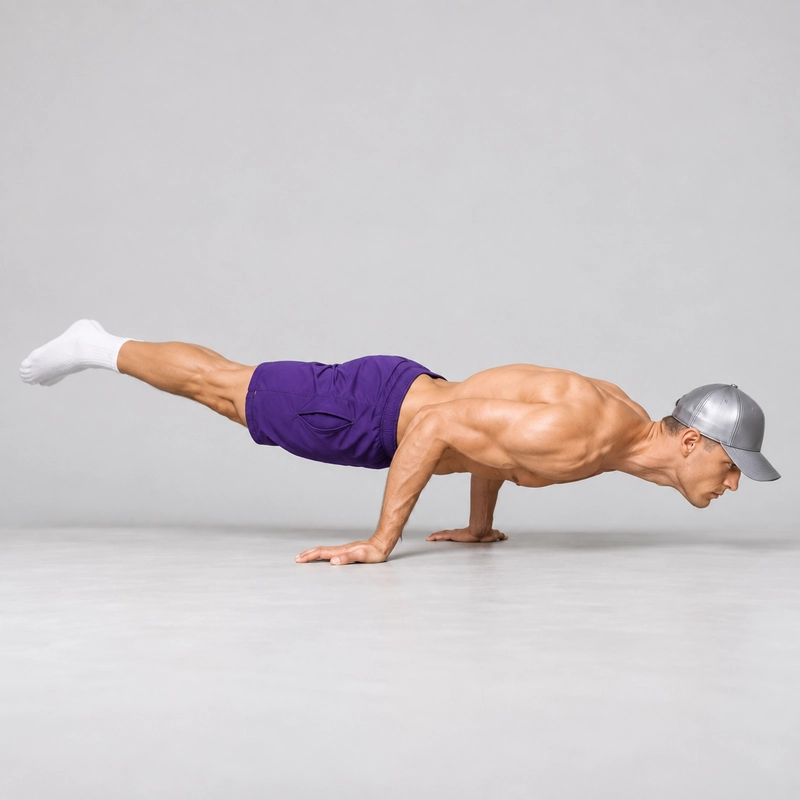
How to do Elbow Lever?
The elbow lever is a two-arm, bent-arm floor balance in which your hands support you while your elbows press into the lower abdomen to create a shelf beneath the torso. You then shift your center of mass forward until both feet leave the floor and extend the legs behind you, ideally forming a controlled line that is approximately parallel to the ground.
Although the finished position looks strength-intensive, the main challenge is finding the correct relationship between your hands, elbows, torso, and center of mass. Trying to lift the legs through force alone usually leaves the feet stuck to the floor; the feet become light only after the shoulders and head move far enough forward to counterbalance them.
The elbow lever is sometimes described as a bent-arm planche, but the two skills should not be treated as equivalent. In an elbow lever, the elbows physically support the torso and the arms remain bent, whereas a tuck planche supports the entire body through straight arms without the torso resting on them. The elbow lever can develop hand-balancing confidence, full-body tension, and wrist tolerance, but athletes pursuing a planche should also train planche-specific exercises such as planche leans.
This page covers the standard two-arm elbow lever performed on the floor. Tucked, straddle, single-leg, and foot-assisted versions are difficulty adjustments, while the one-arm elbow lever is a separate advanced variation with substantially different balance and anti-rotation demands. The yoga peacock pose, or Mayurasana, is closely related, but hand position, entry technique, and accepted form can differ between yoga traditions.
What counts as a clean elbow lever?
Use the following points as the completion standard for the full exercise:
- Both palms remain planted and are the only parts of the body touching the floor.
- Both elbows remain securely and symmetrically positioned against the lower abdomen.
- Both feet are off the floor without jumping or kicking into the position.
- The knees are straight, the legs are together, and the toes are pointed.
- The shoulders, hips, and heels form a mostly straight line that is approximately parallel to the floor.
- The position is held without the elbows sliding, the hips collapsing, or the face touching the floor.
- The feet return to the floor under control before the supporting position fails.
A slightly elevated head and chest are acceptable because they help counterbalance the legs, but lifting the chest excessively while allowing the feet and hips to hang low produces a seesaw position rather than a full horizontal lever.
Equipment and training area
The standard elbow lever requires no equipment, but the surface and surrounding space matter:
- Use a firm, level, nonslip floor that allows the palms and fingertips to grip.
- Clear at least one full body length behind you so the feet cannot strike furniture or equipment.
- Place a folded towel or cushion in front of your face while learning, but keep it away from the hands so it does not make the base unstable.
- Avoid loose or slippery clothing around the abdomen because it can allow the elbows to slide.
- Low, stable parallettes can be used as a neutral-wrist variation, but they change the setup and should not be used to continue training through wrist pain.
Readiness and wrist preparation
You do not need a particular push-up total or a fixed hold time before trying the elbow lever. You should, however, be able to place weight through your palms, maintain a controlled bent-arm support, and lean forward without wrist, elbow, or shoulder pain. If balancing on your hands is completely new, learning the frog stand first provides a more compact and forgiving introduction.
Prepare the wrists, elbows, and shoulders before your first full attempt, especially if you have spent most of the day without loading your hands. The site’s wrist warm-up routine provides a suitable starting sequence, but a warm-up is preparation rather than permission to train through pain.
A 2025 cross-sectional study of adult handstand practitioners found that chronic wrist pain was common among people who regularly trained hand-supported skills. The study did not investigate elbow levers or prove that any particular warm-up prevents pain, but it supports taking recurring wrist symptoms seriously and increasing weight-bearing exposure gradually.
How to do an elbow lever step by step
- Prepare the training area: Warm up your wrists, elbows, and shoulders, check that the floor is not slippery, and position a folded towel or cushion in front of your face if you are still learning the balance.
- Set your hands: Begin in a kneeling or low-squat position and place your palms approximately shoulder-width apart, or slightly wider if that gives your torso more room.
- Choose a comfortable hand angle: Spread your fingers and turn them outward toward the sides or slightly backward until you can keep the palms flat while directing the elbows toward your abdomen.
- Create the elbow shelf: Bend your arms and bring the elbows toward one another before pressing them symmetrically into the lower abdomen, usually just inside the front of the hip bones.
- Adjust the contact points: Move the elbows slightly inward, upward, or downward until the torso feels supported by firm muscular pressure rather than sharp pressure against the ribs, hip bones, or another sensitive area.
- Extend the legs behind you: Keep the toes on the floor while walking or sliding the feet backward until the knees are nearly straight and the torso begins resting on the elbows.
- Shift your weight forward: Move your shoulders and head gradually past your hands while keeping the palms down, the elbows planted, and your gaze slightly ahead of the fingertips.
- Test the balance with one foot: When the feet begin to feel light, float one foot a few centimeters from the floor while the other toes remain available to catch your balance.
- Lift the second foot without kicking: Continue shifting forward and pressing through the fingers until the second foot floats naturally from the floor.
- Finish the body line: Straighten both knees, bring the legs together, point the toes, and contract the glutes, thighs, and trunk until the shoulders, hips, and heels form a mostly straight horizontal line.
- Stabilize the hold: Maintain steady pressure through the palms and use the fingertips to stop yourself tipping toward the head while making small shoulder and wrist adjustments as necessary.
- Exit under control: Lower one or both feet gently to the floor, shift the hips backward, remove the elbows from the abdomen, and then release the hands.
Breathing and tempo
Move into the balance over several controlled seconds instead of dropping the torso onto the elbows or kicking the feet upward. The pressure of the elbows against the abdomen may make large breaths uncomfortable, so use small, steady breaths and avoid holding your breath for the entire attempt. Exit as deliberately as you entered rather than waiting until your arms collapse or the elbows slip.
Common elbow lever problems and how to fix them
- Your feet will not leave the floor: The usual cause is insufficient forward weight shift, so keep the toes lightly grounded and move the shoulders and head farther ahead of the hands before trying to lift.
- You fall backward toward your feet: Extend the legs fully and lean farther forward instead of trying to pull the feet upward with the lower back.
- You fall toward your face: Press the fingertips firmly into the floor, lift the gaze slightly, and return one foot to the ground before attempting a smaller weight shift.
- Your elbows slide apart: Reset them closer together, dry any slippery fabric or skin, and make sure both contact points are at the same height.
- The elbows press painfully into bone: Move each elbow slightly inward or vertically until it contacts a more comfortable area of the lower abdomen.
- Your hips and legs sag: Straighten the knees and contract the glutes, hamstrings, thighs, and abdominal muscles before trying to increase the hold time.
- Your palms lift from the floor: Reduce the forward lean and experiment with a slightly different finger angle that allows the whole hand to remain planted.
- Your wrists hurt rather than simply feeling loaded: End the attempt, reduce the accumulated volume, and regain comfortable weight-bearing before retrying the exercise.
- You can enter but cannot exit safely: Keep one foot close to the floor and practise controlled step-downs before attempting longer holds.
- You keep jumping into the balance: Return to a foot-assisted version and learn to make the feet light through a gradual forward shift.
How should the elbow lever feel?
You should feel firm, symmetrical pressure where the elbows contact the lower abdomen together with muscular effort through the shoulders, chest, upper arms, forearms, trunk, glutes, and backs of the legs. The fingertips may work noticeably as they regulate your forward balance.
Stop if you experience sharp or increasing pain in the wrists, elbows, shoulders, ribs, or abdomen, or if you develop tingling, numbness, swelling, or pain that persists after training. Because the elbows compress the abdomen, avoid practising immediately after a large meal if the pressure feels uncomfortable, and obtain appropriate clinical guidance before attempting the exercise if you have a relevant injury, medical condition, or recent surgery.
How to include the elbow lever in your training
Practise the elbow lever near the beginning of a session, after warming up but before push exercises have heavily fatigued your wrists and arms. A reasonable starting example is three to five sets of short, controlled attempts lasting approximately 3–10 seconds, with 60–120 seconds of rest, but the correct volume depends on your current wrist tolerance and ability to maintain the completion standard.
Use a regression when the elbows repeatedly slide, the feet must be kicked up, or the position cannot be exited deliberately. Add time or extend the legs farther only after you can reproduce the same setup and balance across several attempts; a longer hold with sagging legs is not a better repetition.
Elbow lever compared with similar skills
- Frog Stand: The knees rest on the arms and the body remains tucked, making it a useful introduction to balancing on the hands.
- Advanced Frog Stand: The knees move higher on the arms, but the legs remain tucked rather than extending behind the body.
- Elbow Lever: The elbows support the abdomen while the legs extend behind the body, creating a longer horizontal balance.
- Tuck Planche: The torso does not rest on the arms and the elbows remain straight, creating a much greater straight-arm shoulder demand.
- One-Arm Elbow Lever: One arm supports the torso while the body resists rotation, making it a distinct advanced unilateral progression.
If your main goal is the planche, use the elbow lever as an additional balance skill rather than replacing the progressions in the planche training guide.
Tips for the proper execution of Elbow Lever
Warm up your wrists, elbows, and shoulders before every elbow lever session.
Place both elbows at the same height in the lower abdomen so the torso rests on a level shelf.
Turn your fingers outward or slightly backward only as far as your wrists tolerate comfortably.
Keep the whole palm down and use fingertip pressure to brake a forward fall.
Lean the shoulders and head forward before trying to float the feet.
Lift the feet through a gradual weight shift instead of kicking them off the floor.
Squeeze the glutes, thighs, and ankles to keep the legs together and the body rigid.
Look slightly ahead of the hands so the head helps counterbalance the legs.
End the hold as soon as the elbows slip, the hips sag, or the exit stops being controlled.
Muscles worked when doing Elbow Lever
The elbow lever is a full-body isometric balance, but the load is not distributed in the same way as a planche because the elbows provide a physical support point beneath the torso.
Primary muscles:
- Anterior deltoids: Stabilize the shoulders as the upper body shifts forward over the hands.
- Pectoralis major: Helps keep the upper arms positioned against the torso and supports the bent-arm base.
- Triceps: Work isometrically with the surrounding elbow musculature to maintain a stable arm angle.
Secondary muscles:
- Forearms and hand muscles: Stabilize the wrists and use pressure through the fingers to control forward and backward balance.
- Abdominals and obliques: Brace the torso and limit unwanted movement between the rib cage and pelvis.
- Glutes: Extend the hips and help prevent the legs from hanging below the torso.
- Hamstrings: Assist hip extension and help maintain straight legs behind the body.
- Lower-back muscles: Support the horizontal trunk and leg position without excessive sagging.
The exercise can improve balance-specific strength and control, but its supported torso position means it should not replace progressive push-up or straight-arm planche strength training.
Primary Muscle(s):

Anterior delt

Middle chest

Triceps
Secondary Muscle(s):
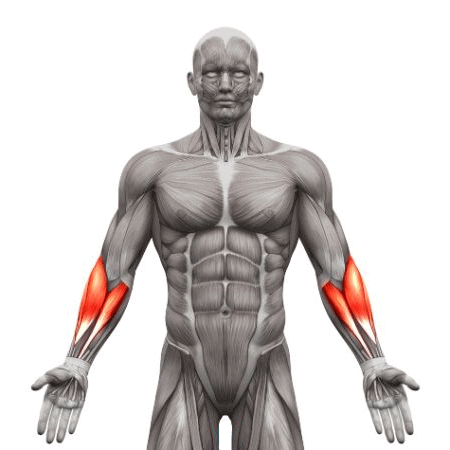
Forearm
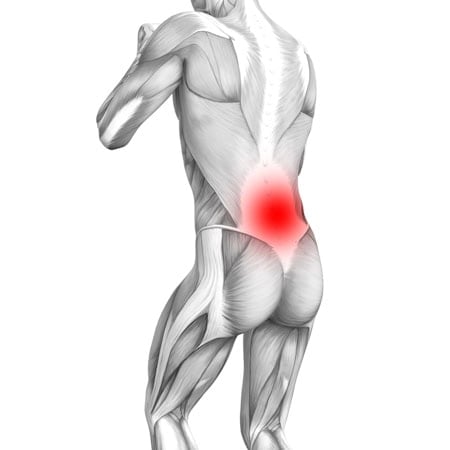
Lower back

Abdominal

Oblique
Equipment needed for Elbow Lever
No equipment needed for this exercise.
Adjust the difficulty of Elbow Lever
How to make Elbow Lever harder?
How to make Elbow Lever easier?
How to make Elbow Lever harder?
To make Elbow Lever harder:
-
Bring the legs together and fully straighten the knees if you initially learned the exercise in a tuck or straddle.
-
Extend both legs slowly from a tucked elbow lever without allowing the feet to touch the floor.
-
Increase the hold time only while preserving a straight body line and controlled dismount.
-
Move deliberately between straddle, single-leg, and legs-together positions during the same hold.
-
Enter and exit the full position without hopping, sliding, or repositioning the hands.
-
Progress to a one-arm elbow lever only after the two-arm version is repeatable because the unilateral variation adds substantial balance and anti-rotation demands.
How to make Elbow Lever easier?
To make Elbow Lever easier:
-
Learn the Frog Stand first to become comfortable balancing your bodyweight on your hands.
-
Keep both sets of toes on the floor while practising the forward weight shift and elbow placement.
-
Float one foot at a time while the other foot remains lightly available for balance.
-
Use a tucked elbow lever with the knees bent to shorten the lever created by the legs.
-
Open the legs into a comfortable straddle to reduce the effective leverage if your hip mobility allows it.
-
Practise very short holds and step down before the elbows or body line begin to move.
