
Feet Assisted Pull-up
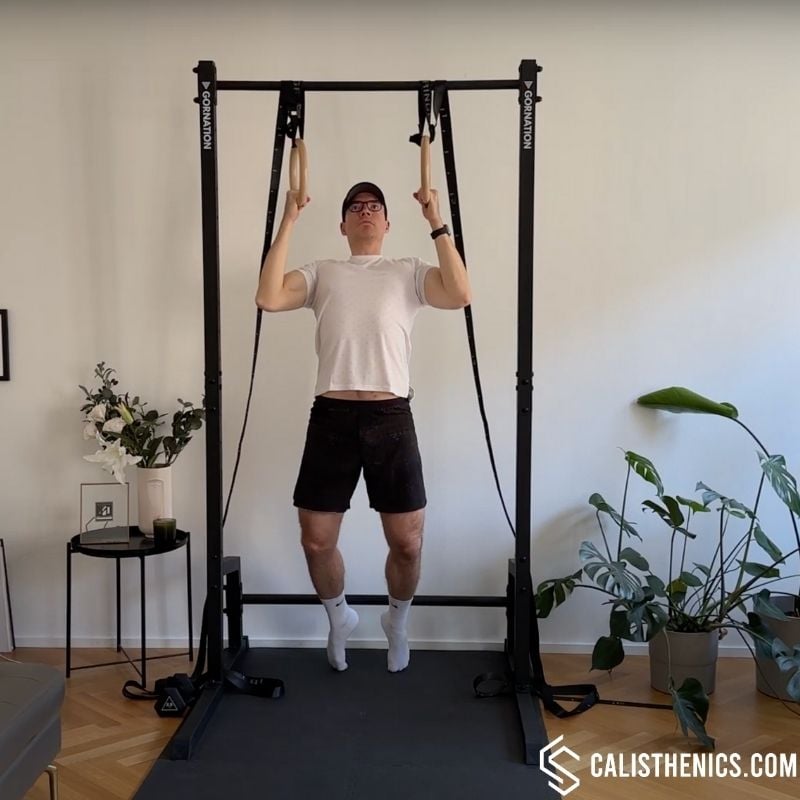
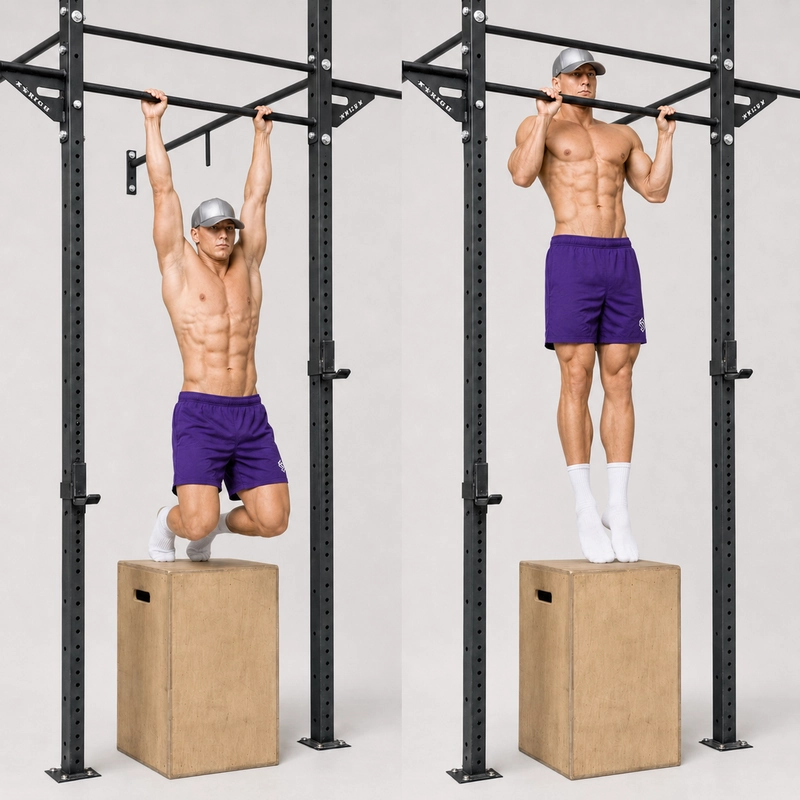
How to do Feet Assisted Pull-up?
The feet-assisted pull-up is a beginner pulling exercise in which your feet remain supported on the floor or a stable box while your upper body performs a vertical pull. The legs reduce the amount of bodyweight you must lift, allowing you to practice the full range used in a strict pull-up.
You can perform the exercise on gymnastics rings or a regular pull-up bar. Rings use a neutral, naturally rotating grip, while a bar uses a fixed overhand grip. In both versions, the goal is the same: pull primarily with your back and arms and use your feet only as much as necessary. If you are building your first pull-up, include this exercise within our 6-week pull-up workout plan.
Equipment and Setup
Gymnastics Ring Setup
- Attach both straps to a secure overhead anchor and set them to equal lengths.
- Adjust the rings high enough to create a vertical pull while still allowing your feet to remain supported through the full repetition.
- Use the floor or a non-slip box as foot support.
- Stand or sit directly below the anchor rather than leaning far backward into a row.
Pull-Up Bar Setup
- Use a securely fixed bar with enough clearance for your head to pass it.
- Position a stable plyo box or platform beneath or slightly in front of the bar.
- Choose a box height that lets you begin with straight arms while both feet remain supported.
- Confirm that the box cannot slide when you press through your feet.
How to Do a Feet-Assisted Pull-Up
- Set your foot support. Place both feet securely on the floor or box. Keep them in the same position for the entire set so your assistance remains as consistent as possible.
- Take the correct grip. On rings, begin with a neutral grip with your palms facing each other. On a bar, use an overhand shoulder-width grip with your thumbs wrapped.
- Move into the bottom position. Bend your knees as needed and lower until your elbows are fully straight. Keep your torso close to vertical and your shoulders controlled.
- Brace before pulling. Tighten your abs and keep your ribs controlled. Set your shoulder blades down without turning the movement into a shrug.
- Pull with the upper body first. Drive your elbows down and lift your chest. Press through your feet only enough to continue the pull with clean form.
- Complete the top position. On a bar, pull until your chin clearly passes above it. On rings, bring the rings beside your upper chest and finish with your chin above your hands.
- Lower under control. Gradually straighten your elbows while using the feet only to control the descent. Return to full elbow extension before starting the next rep.
Exhale as you pull and inhale as you lower. Avoid suddenly increasing leg pressure at the sticking point; use enough assistance from the start to keep the entire repetition smooth.
What Counts as a Full Feet-Assisted Pull-Up?
A valid repetition begins with straight elbows and finishes at the same height as the corresponding unassisted movement. Your feet stay supported in one position, but the upper body leads the exercise rather than the legs.
- Begin with full elbow extension and controlled shoulders.
- Keep both feet on the same support and in the same position.
- Maintain a mostly vertical pulling path.
- Use no jump, bounce, kip or sudden knee extension.
- On a bar, bring the chin clearly above the bar.
- On rings, bring the rings beside the upper chest with the chin above the hands.
- Lower smoothly to straight elbows before the next repetition.
Because foot pressure cannot be measured precisely, the feet-assisted pull-up is best treated as a technique and strength-building progression rather than a standardized strength test. Keep the equipment height, box height and foot position consistent when comparing sessions.
Feet-Assisted Pull-Up Benefits
- Practises the complete pull-up range: You can train from straight elbows to the full top position before you can lift your entire bodyweight.
- Provides adjustable assistance: You can immediately add or remove foot pressure to match your current strength.
- Builds vertical pulling strength: The lats, biceps, upper back and grip still perform the main pulling action.
- Develops controlled lowering: Foot support lets you practice a smooth eccentric phase instead of dropping from the top.
- Works with common equipment: The movement can be trained on adjustable rings or a bar with a stable box.
Common Feet-Assisted Pull-Up Mistakes
Turning the Exercise Into a Squat
If the knees extend forcefully and the torso rises before the elbows bend, the legs are doing most of the work. Begin the pull by driving your elbows down, then add only enough foot pressure to keep moving.
Using an Unstable Box
A sliding or tipping box makes assistance inconsistent and can leave you without support. Use a firm platform on a non-slip surface and test it before gripping the bar or rings.
Changing Foot Position During the Set
Moving the feet closer, farther away or onto a different part of the box changes the assistance. Mark or remember your setup and keep both feet still until the set is finished.
Leaning Back Into a Row
Placing the feet too far forward can turn the movement into a horizontal row. Keep your torso close to vertical and pull the elbows down rather than straight behind you.
Starting With Bent Elbows
A partial bottom position avoids the weakest part of the pull. Lower until both elbows are straight while keeping enough pressure through the feet to control the shoulders.
Reaching With the Chin
Throwing the head backward can make an incomplete rep look higher. Keep the neck neutral and lift the entire body until the bar or ring finish standard is met.
Using Too Little Assistance
If you must kick, twist or shorten the range, increase foot support. The purpose is to practice clean repetitions, not to make the exercise look almost unassisted.
Using Too Much Assistance
If the movement feels like standing up while merely holding the equipment, reduce foot pressure or use a slightly less supportive setup.
Allowing the Rings to Separate
On rings, keep both hands moving evenly and bring the rings beside the upper chest. Do not let one ring drift outward or finish lower than the other.
Dropping Through the Descent
Do not relax after reaching the top. Use your back and arms to control the lowering phase, with the feet providing only the assistance needed to reach straight elbows smoothly.
How Many Feet-Assisted Pull-Ups Should You Do?
A practical starting point is 3–4 sets of 5–10 controlled repetitions with 90–150 seconds of rest. Choose enough assistance to complete the full range while finishing the set before your legs begin doing most of the work.
Progress when you can perform 3 sets of 8–10 repeatable reps with light, consistent foot pressure. This is a coaching guideline rather than a universal test. The quality of the pull and the amount of leg help matter more than the number alone.
How to Reduce Foot Assistance
- Keep the same ring or bar height, box and foot position for several sessions.
- Pull with the upper body first and gradually press less through both feet.
- When the current setup feels controlled, slightly lower the foot support or raise the rings.
- Continue using full-range reps rather than reducing assistance and losing the top or bottom position.
- Progress to a band-assisted pull-up, controlled negative or strict pull-up when the feet contribute only lightly.
Easier Feet-Assisted Pull-Up Variations
- More-supported feet-assisted pull-up: Keep both feet flat and allow more pressure through the legs.
- Lower-ring pull-up: Lower the rings so you can begin from a more supported seated or squat position.
- Higher-box bar pull-up: Use a taller stable box so the legs can support more bodyweight.
- Sitting pull-up: Begin from a seated position beneath a low bar or rings. See the sitting pull-up.
Harder Feet-Assisted Pull-Up Progressions
- Reduced foot assistance: Keep the same setup but press more lightly through both feet.
- Lower foot support: Use a slightly lower box while preserving full elbow extension and the top standard.
- Paused feet-assisted pull-up: Hold the top for two to three seconds without increasing leg drive.
- Slow-eccentric feet-assisted pull-up: Take three to five seconds to return to straight elbows.
- Resistance band pull-up: Remove foot contact and use a band for assistance. See the resistance band pull-up.
- Negative pull-up: Begin above the bar and lower your full bodyweight under control. See the negative pull-up.
Feet-Assisted Pull-Up FAQ
Are feet-assisted pull-ups good for beginners?
Yes. Foot support lets beginners adjust the load while practising the full vertical pulling range. The exercise is most useful when the upper body leads and the legs provide only the assistance required for clean repetitions.
Should I use gymnastics rings or a pull-up bar?
Use whichever secure setup is available. Rings are easy to adjust and allow the hands to rotate during the pull. A bar provides a fixed overhand grip and more closely matches a standard bar pull-up. Both can develop the same basic vertical pulling pattern.
Where should my feet be?
Place both feet on a stable surface where they remain supported at the bottom and top of the repetition. Keep the feet in the same position and the torso mostly vertical. If the feet are far in front and the body leans backward, the exercise becomes more like a row.
How much should I push with my legs?
Use the minimum pressure needed to complete the full range without kicking, twisting or stalling. The pull should begin from the shoulder blades and elbows, with the legs assisting rather than initiating the movement.
What is the difference between a feet-assisted and band-assisted pull-up?
Foot assistance can be adjusted instantly during the rep but is difficult to measure precisely. A resistance band removes foot contact and provides assistance according to how far the band is stretched, usually helping more near the bottom. Both are useful, but keep each setup consistent when tracking progress.
What is the difference between a feet-assisted pull-up and an inverted row?
The feet-assisted pull-up keeps the torso mostly vertical and trains a vertical pulling path. An inverted row keeps the body angled or horizontal beneath a low bar and pulls the chest toward it horizontally.
When should I progress to unassisted pull-ups?
Begin testing unassisted reps when you can complete full feet-assisted sets with only light foot pressure and control the entire descent. You can also use band-assisted and negative pull-ups to bridge the remaining strength gap.
Tips for the proper execution of Feet Assisted Pull-up
Use the Least Assistance Necessary – Rely on your upper body first, using your legs only as needed.
Keep Rings Close to Your Body – Prevent the rings from drifting outward for better control.
Engage Your Core to Avoid Swinging – Keep your torso tight and stable.
Control the Lowering Phase – Avoid dropping quickly, focus on a slow eccentric movement.
Breathe Properly – Inhale before pulling, and exhale at the top.
Muscles worked when doing Feet Assisted Pull-up
The feet-assisted pull-up trains the same main upper-body pulling muscles as an unassisted pull-up. Foot support reduces how much bodyweight those muscles must move, while the legs contribute a variable amount of assistance.
Primary Muscles
- Latissimus dorsi: Pulls the upper arms down and helps lift the torso toward the bar or rings.
- Biceps brachii and brachialis: Flex the elbows during the upward phase.
- Middle and lower trapezius: Help control and position the shoulder blades.
- Rhomboids: Assist with upper-back control as you approach the top.
Secondary Muscles
- Forearms and grip muscles: Maintain your hold on the bar or rings.
- Rear deltoids: Assist the upper arms during the pull.
- Abdominals and spinal stabilizers: Keep the torso controlled and limit swinging or excessive arching.
- Quadriceps, glutes and calves: Provide the chosen amount of assistance through the feet.
The legs should not become the primary movers. If the exercise feels like a squat or calf raise, adjust the setup and reduce leg drive so the back and arms continue to lead.
Primary Muscle(s):

Lats
Secondary Muscle(s):

Biceps
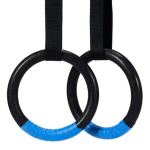
Equipment needed for Feet Assisted Pull-up
Adjust the difficulty of Feet Assisted Pull-up
How to make Feet Assisted Pull-up harder?
How to make Feet Assisted Pull-up easier?
How to make Feet Assisted Pull-up harder?
To make Feet Assisted Pull-up harder:
-
Reduce Foot Contact • Use only your toes or place your feet further away for less assistance.
-
Place Feet on an Elevated Surface • This forces the upper body to do more work, making the movement more challenging.
-
Perform Paused Reps • Hold at the top and mid-position for 2-5 seconds per rep.
-
Perform Slow Eccentrics • Lower yourself as slowly as possible (5-10 seconds) to increase time under tension.
-
Add Weight • Use a weighted vest or hold a dumbbell between your legs to increase resistance.
How to make Feet Assisted Pull-up easier?
To make Feet Assisted Pull-up easier:
-
Increase Foot Contact with the Ground • Keep your feet flat for maximum assistance.
-
Perform Only Negative Reps • Focus on lowering yourself slowly, skipping the pull-up phase.
-
Use a Higher Ring Position • Set the rings higher so you can push with your legs more effectively.
-
Use a Resistance Band for Additional Assistance • Loop a resistance band around the rings and place a foot inside for extra support.
-
Adjust the Tempo • Start with faster reps, then slow them down as you gain strength.
