
Strict Pull-Up
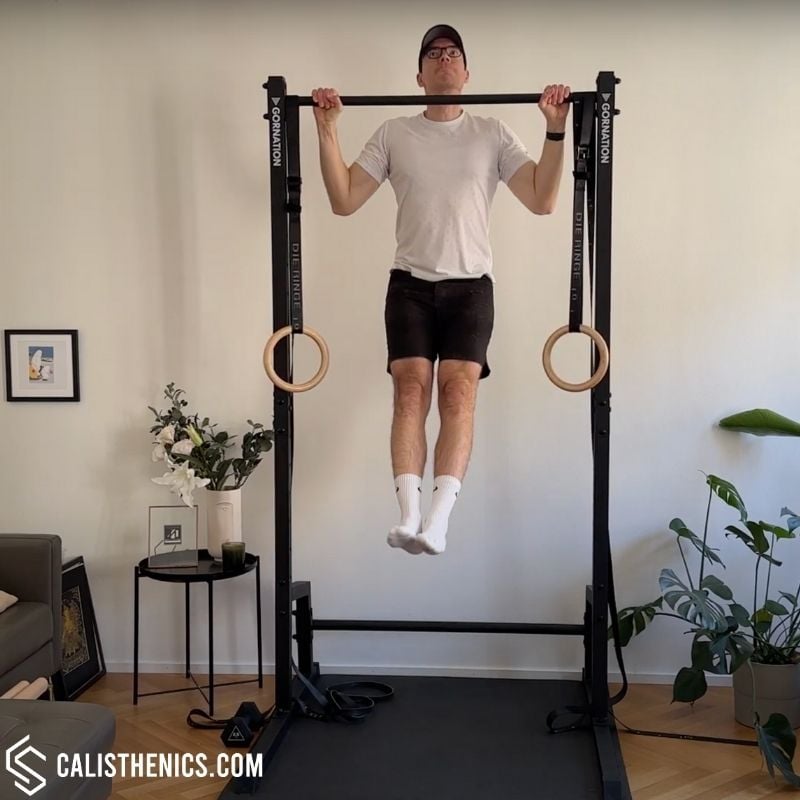
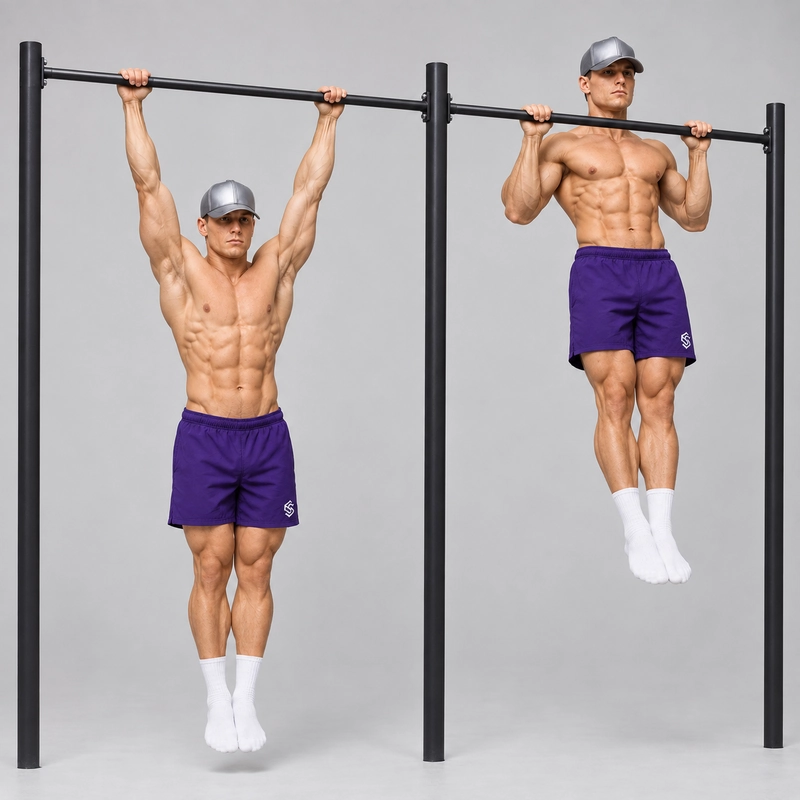
How to do Strict Pull-Up?
The strict pull-up is one of the signature movements of calisthenics: you lift your body from a straight-arm hang until your chin is clearly above a pull-up bar, then lower under control. This version uses an overhand grip, with your palms facing away from you, and is performed without kipping, kicking or swinging to generate momentum. Your feet remain off the floor throughout the repetition.
Its value comes from a simple challenge: moving your own bodyweight through a repeatable range using your back and arms. The strict pull-up develops vertical pulling strength and gives you a practical way to track improvement through cleaner repetitions, more repetitions or added resistance. It is also a foundation for more demanding pulling variations, although advanced skills require their own specific preparation.
The lats help draw your upper arms toward your torso, while the biceps, brachialis and other elbow flexors bend your arms. Your upper back controls the shoulder blades, your forearms maintain the grip, and your trunk helps limit unwanted movement. An ACE-sponsored study comparing back exercises found high lat activation during pull-ups. That finding supports their use as a lat-focused exercise, but muscle activation alone does not establish which movement produces the greatest long-term muscle growth.
For this exercise, chin above the bar is the finishing standard. Your chest does not need to touch the bar. A chin-up uses an underhand grip, with the palms facing toward you; chest-to-bar pull-ups use a higher finishing position. Keep these variations separate when recording your results so that improvements reflect the same movement standard.
You do not need to achieve an arbitrary hanging time before beginning pull-up training. You do need a secure grip, a comfortable overhead position and enough control for the variation you choose. If you cannot yet complete an unassisted repetition, feet-assisted pull-ups on a bar or rings and band-assisted pull-ups let you practise the full movement with less load. Our beginner pull-up workout plan provides a structured route toward your first strict repetitions.
How to Do a Strict Pull-Up
Equipment and Setup
- A secure pull-up bar: Check the mounting, fixings and manufacturer's load rating. The bar should not shift or rotate under your weight.
- Enough clearance: Leave room for your head above the bar and your feet below it. If the bar is low, bend your knees and keep that position still throughout the set.
- A stable step if needed: Use it to reach the bar and return to the floor without a large jump. Position it so it does not obstruct your legs during the pull.
- A reliable grip: Keep the bar and your hands dry. Chalk is optional where permitted; it does not replace a secure hand position.
Prepare Before Your Working Sets
Begin with the joint warm-up routine or another comfortable general warm-up, then prepare the pulling movement specifically. Perform a few easy assisted pull-ups and, if comfortable, small straight-arm scapular pulls: hang with straight elbows, gently lift your body a little through shoulder-blade movement, then return under control. Keep the preparation easy enough that your grip and arms are not already fatigued before the main sets.
If hanging or pulling causes sharp shoulder, elbow or wrist pain, stop rather than forcing the movement. Use a tolerable regression and seek assessment from a qualified healthcare professional if symptoms persist. Stop for tingling or numbness as well.
Step-by-Step Technique
- Grip the bar. Take an overhand grip approximately shoulder-width apart, with your palms facing away from you and your thumbs wrapped around the bar. Place both hands evenly. Start with a width that lets you pull comfortably rather than assuming a very wide grip is better.
- Settle into a still hang. Lift your feet clear of the floor and fully straighten your elbows. Keep your head aligned with your torso. Your legs can remain straight or your knees can be bent for clearance, but establish the position before pulling and keep it consistent.
- Create body tension. Brace your abdomen and gently tighten your glutes to limit swinging and excessive lower-back arching. Keep your ribs controlled without forcing an exaggerated hollow-body shape. A full grip, trunk bracing and a steady body are also emphasized in ACE's pull-up technique guidance.
- Start smoothly from straight arms. Take up tension through your shoulders and back, then bend your elbows to raise your body. Think about drawing your elbows down toward your sides. Do not bounce out of the hang or use a sudden knee lift to start the repetition.
- Continue the pull with a steady torso. Let your elbows travel downward as your upper arms approach your body. A small, natural torso lean is acceptable; keep your hips and legs from producing the lift. Allow your shoulder blades to move with the exercise rather than trying to hold them rigidly pinched together.
- Clear the bar with your chin. Raise your body until your chin is clearly above the top of the bar. Keep your neck relatively neutral instead of throwing your head backward to make an incomplete pull appear higher. Pause briefly if you can maintain the position. Chest contact is not required.
- Lower under control. Gradually extend your elbows and return to the bottom position. A descent of about two seconds is a useful practice cue, not a compulsory rep standard. Avoid dropping abruptly or relaxing your grip as you approach the bottom.
- Finish at full elbow extension. Return to straight arms before the next repetition. Let your shoulders move naturally as your arms return overhead; do not force them down throughout the entire range. Maintain control and settle any swing before pulling again.
- Repeat while the standard holds. Exhale during the pull and inhale during the descent if that rhythm feels comfortable. End the set when you can no longer clear the bar and return to straight arms without kicking, swinging or shortening the movement.
What Counts as a Clean Strict Pull-Up?
Use the following standard for training logs and repeat tests:
- Start each repetition with both elbows fully extended.
- Keep your feet off the floor and external supports.
- Use no jump, kip, deliberate swing or leg drive to assist the pull.
- Finish with your chin clearly above the bar without excessive neck extension.
- Lower under control and return to full elbow extension.
A slightly different leg position does not automatically invalidate a repetition. The important distinction is whether the legs remain controlled or generate assistance. When comparing sessions, keep your grip width, leg position, equipment and finishing standard as consistent as possible.
Common Mistakes and How to Correct Them
- Starting the next rep with bent elbows: Finish the descent before pulling again. If you cannot control the bottom range, reduce the load with assistance.
- Reaching with your chin: Keep your head aligned with your torso and pull your body higher. If the last part repeatedly stalls, practise an assisted finish or a pull-up top hold.
- Kicking through the sticking point: Keep the leg position still and end the set before the next rep requires a kick. Use assistance to practise the full movement.
- Dropping from the top: Lower deliberately. If you cannot control your bodyweight, use foot or band support rather than repeatedly falling into the hang.
- Overarching to reach the bar: Brace your trunk and let your elbows drive the pull. A modest torso lean is normal; a large change in body shape to finish the repetition is a cue to reduce the difficulty.
- Forcing the shoulders into one fixed position: Maintain muscular control while allowing the shoulder blades to move. Straight elbows at the bottom do not require a completely relaxed, uncontrolled hang.
- Using a grip that feels uncomfortable: Adjust your hand spacing slightly. Persistent discomfort is a reason to stop and reassess, rather than widen the grip or push through it.
If You Cannot Complete the Full Movement Yet
Choose the regression that lets you practise the missing part of the movement with control. These observations help guide exercise selection; they do not diagnose a particular weak muscle or injury.
- You cannot begin from straight arms: Use assisted full-range repetitions and gentle straight-arm scapular pulls. Choose enough help to start smoothly without bouncing.
- You stall halfway up: Add enough foot or band assistance to pass through the middle range while keeping the same body position.
- You nearly reach the top: Practise assisted full repetitions and brief top holds. Continue training the whole movement rather than replacing every repetition with a partial pull.
- You can hold the top but cannot pull up: Negative pull-ups let you step into the top and practise the descent. Use assistance if you cannot lower smoothly, and build the dose gradually because unfamiliar negatives can cause substantial soreness.
A resistance band usually helps more when stretched farther, near the bottom of the movement. Foot assistance can be adjusted throughout the repetition but is difficult to measure precisely. Record the band and setup, or the foot-support arrangement, rather than treating assisted rep counts as directly equivalent to unassisted pull-ups.
How Many Sets and Repetitions Should You Do?
For an otherwise healthy trainee, a practical starting point is two pulling sessions per week, with a rest day between them. Choose a version that allows controlled repetitions and start with two or three working sets, resting roughly two to three minutes between demanding sets. These are coaching starting points to adjust to your current ability, recovery and other training.
- No strict repetitions yet: Choose assistance that lets you perform about five to eight full-range repetitions per set without kicking or losing control.
- Only one or two strict repetitions: Practise occasional clean single repetitions while fresh, then use assistance for the remaining work instead of repeatedly attempting failed reps.
- Several strict repetitions: Choose a set size that leaves approximately one or two clean repetitions in reserve. For example, if your current maximum is eight, three sets of four may be a sensible starting session; adjust if later sets lose quality.
When all planned sets meet the same standard, gradually add repetitions or reduce assistance. Increase one variable at a time. The ACSM resistance-training guidance supports consistent, individualized training and recognizes bodyweight and band exercises as useful options. It does not prescribe this exact pull-up routine, and you do not need to take every set to failure.
When to Progress Beyond Standard Pull-Ups
Progress when you can repeat your planned sets with full range, a steady body and a controlled descent. First add repetitions, a brief top pause or a slower lowering phase. For a different challenge, the L-sit pull-up adds a sustained leg-position demand, while the archer pull-up shifts more of the pulling work toward one arm. Added resistance is another option once your technique is repeatable. These are different progression routes, not a compulsory sequence.
Check Your Technique and Track Progress
Film a set from a slight side angle with the bar, head, elbows, hips and feet visible. Check whether each rep begins with straight elbows, clears the bar without reaching with the neck, and finishes with a controlled return. Review the last repetition as carefully as the first. Record clean reps for each set, rest intervals and any assistance or added load. Improving from six inconsistent repetitions to six repetitions that meet every standard is meaningful progress, even before the number increases.
Strict Pull-Up Questions
Should my chest touch the bar?
No. For this variation, your chin must clearly pass above the bar. Chest-to-bar is a higher-range variation and should be recorded separately.
Can I bend my knees?
Yes, especially when the bar is too low for straight legs. Set the knee position before pulling and keep it still; lifting or kicking your legs to help complete a rep changes the movement.
Is a strict pull-up a complete strength assessment?
No. It measures a specific vertical pulling task relative to your bodyweight. It does not assess pushing strength, leg strength, mobility or every aspect of fitness, and people with different bodyweights and proportions face different demands.
How long will my first pull-up take?
There is no reliable universal timeline. Starting strength, bodyweight, training consistency, recovery and previous experience all affect progress. Track improvements in full-range assisted repetitions and control rather than judging success only by a deadline.
Tips for the proper execution of Strict Pull-Up
Keep your wrists neutral to avoid unnecessary strain.
Squeeze your glutes and engage your core to maintain body control.
Try a slight pause at the top to increase time under tension and improve muscle engagement.
Start the pulling motion by first engaging your scapulas before bending your arms.
Wrap your thumbs around the bar and use chalk or gloves for better hold.
If struggling with full reps, focus on negative pull-ups to build strength.
Muscles worked when doing Strict Pull-Up
The strict pull-up primarily targets the upper body and core, with different muscles activating in each phase of the movement.
Primary muscles:
•Latissimus dorsi (lats) – The main pulling muscle responsible for the movement.
•Biceps brachii – Assists in elbow flexion.
•Trapezius and rhomboids – Help with scapular retraction and stabilization.
Secondary muscles:
•Forearms and grip muscles – Necessary for holding onto the bar.
• Core muscles (rectus abdominis, transverse abdominis, obliques) – Maintain body alignment and prevent swinging.
•Rear deltoids – Assist in stabilizing the shoulders during the movement.
Primary Muscle(s):

Lats
Secondary Muscle(s):
Equipment needed for Strict Pull-Up
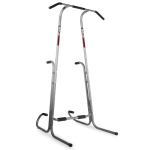
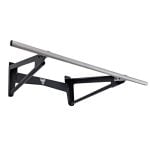
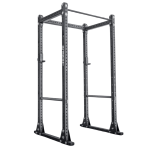
Adjust the difficulty of Strict Pull-Up
The strict pull-up is a highly versatile exercise, suitable for all fitness levels. Beginners can start with assisted variations, focusing on negatives or resistance bands to build strength. As strength improves, athletes can transition to strict bodyweight reps, then progress to weighted pull-ups or advanced variations like archer or one-arm pull-ups. By adjusting grip, tempo, and resistance, the strict pull-up remains an effective tool for progressive strength development.
How to make Strict Pull-Up harder?
How to make Strict Pull-Up easier?
How to make Strict Pull-Up harder?
To make Strict Pull-Up harder:
-
Add a weighted vest or dip belt to increase resistance.
-
Perform slow negatives, lowering over 5-10 seconds per rep.
-
Increase repetition volume to enhance endurance.
-
Incorporate pause reps, holding at the top for 2-3 seconds before lowering.
-
Perform explosive pull-ups, pulling yourself higher until your chest reaches the bar.
-
Try one-arm pull-up progressions, reducing assistance from one arm over time.
How to make Strict Pull-Up easier?
To make Strict Pull-Up easier:
-
Use a resistance band looped around the bar and your foot for assistance.
-
Perform negative pull-ups, focusing on the eccentric (lowering) phase.
-
Start with scapular pull-ups to strengthen the shoulders before progressing to full reps.
-
Reduce range of motion slightly before progressing to full repetitions.
