
Frog Stand
How to do Frog Stand?
The frog stand is a fundamental calisthenics skill and an essential regression exercise for building the strength, balance, and coordination necessary for the full planche. It effectively develops shoulder, wrist, and core strength, serving as an accessible entry point for athletes working toward advanced static holds like the tuck planche, straddle planche, and ultimately the full planche.
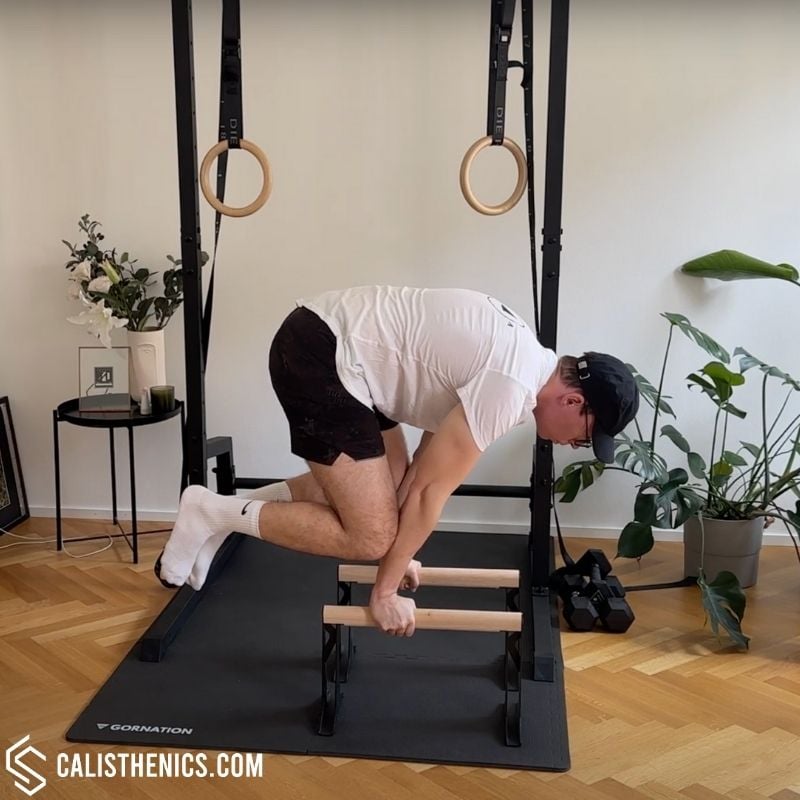
The frog stand begins from a tucked squat position. You’ll place your knees onto your forearms approximately halfway between your wrists and elbows, creating a stable support point. By gradually leaning forward, your body weight shifts onto your hands, allowing your feet to lift off the ground as you find balance. Initially, you may lightly rest your toe tips on the ground for extra support until you can comfortably hold the position for at least five seconds.
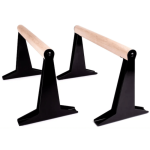
This exercise can be performed directly on the ground, where finger and wrist strength are emphasized, or on a set of parallettes, which offer a neutral grip, reducing wrist stress and improving comfort during practice.
How to Perform a Frog Stand (On Ground or Parallettes)
1. Set Up Your Hands:
• On the ground: Place your hands flat on the floor, shoulder-width apart, spreading your fingers wide for stability.
• On parallettes: Grip parallettes with a neutral grip (palms facing inward), hands shoulder-width apart.
2. Enter the Tucked Position:
• Begin in a deep squat or tucked stance.
• Place your knees onto your forearms, approximately halfway between your wrists and elbows. Ensure a secure connection.
3. Lean Forward Gradually:
• Gently shift your weight forward, loading your arms and shoulders.
• Maintain a slight bend in your elbows to provide stable support as you transfer weight.
4. Find Your Balance:
• As your weight shifts onto your hands, allow your feet to gradually lift off the ground.
• Initially, keep your toe tips lightly touching the ground to help balance and gain confidence.
5. Maintain the Hold:
• Engage your core, keeping your back slightly rounded (scapular protraction) to increase stability.
• Hold the position, aiming first for short durations of 3-5 seconds, progressively increasing the length as your strength and control improve.
6. Controlled Dismount:
• Slowly shift your weight backward, gently placing your feet back onto the ground, avoiding sudden movements.
7. Repetitions & Sets:
• Perform 3-5 sets, holding each repetition for 5-20 seconds as strength develops.
Benefits of the Frog Stand
• Foundational Strength for Planche: Builds essential shoulder and scapular strength required for more advanced static holds.
• Improves Wrist Mobility & Strength: Safely conditions wrists, especially when using parallettes, preparing you for increased loads in advanced calisthenics.
• Enhances Core Stability: Develops strong abdominal and lower-back muscles necessary for maintaining rigid positions.
• Teaches Balance and Coordination: Increases body awareness and balance, essential for advanced gymnastics and calisthenics movements.
• Accessible Regression: Provides a safe and effective starting point for athletes of all levels to enter the journey toward advanced static holds.
Common Mistakes to Avoid
• Incorrect Knee Placement: Knees should rest securely halfway between the wrists and elbows, not directly on elbows or wrists, to maintain proper balance.
• Arching the Lower Back: Engage your core and slightly round your upper back to maintain stability.
• Rushing the Lift-Off: Gradually shift your weight forward to safely find your balance.
• Neglecting Finger and Wrist Engagement: Actively grip the ground or parallettes to improve balance and reduce wrist discomfort.
• Holding Your Breath: Breathe calmly and steadily to avoid tension and improve balance.
Gym Equivalents for the Frog Stand
• Yoga Crow Pose (Bakasana)
• Plank Holds (for core stability)
• Tuck Planche Holds with Feet Supported
• Handstand Wall Holds (for shoulder endurance and balance)
Tips for the proper execution of Frog Stand
Spread your fingers wide (on the ground) for greater balance and control.
Turn your biceps externally so it's facing forward.
Keep your gaze slightly forward rather than directly down to help with balance.
Start with brief holds and slowly increase the duration as confidence builds.
Use parallettes if wrist discomfort occurs, to place your wrists in a more neutral and comfortable position.
Practice regularly, even daily, with short and frequent attempts to accelerate progress.
Muscles worked when doing Frog Stand
The frog stand primarily engages:
•Primary: Shoulders (anterior deltoids), wrists, forearms, core stabilizers (rectus abdominis and obliques).
•Secondary: Serratus anterior, scapular stabilizers (rhomboids, trapezius), triceps, hip flexors.
In holding the frog stand, the shoulders and wrists stabilize and support your bodyweight, while the core keeps your body tightly controlled, balanced, and steady.
Primary Muscle(s):
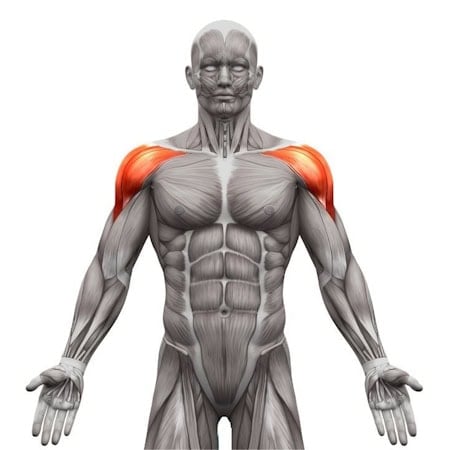
Anterior delt
Secondary Muscle(s):
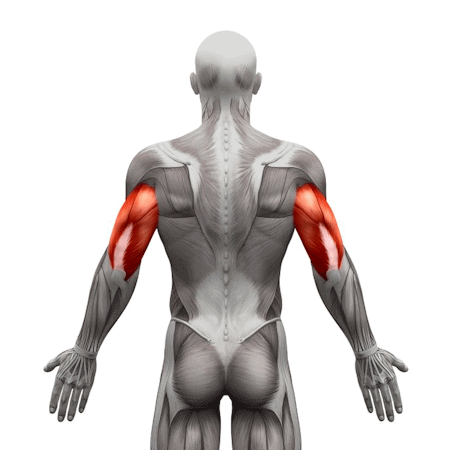
Triceps
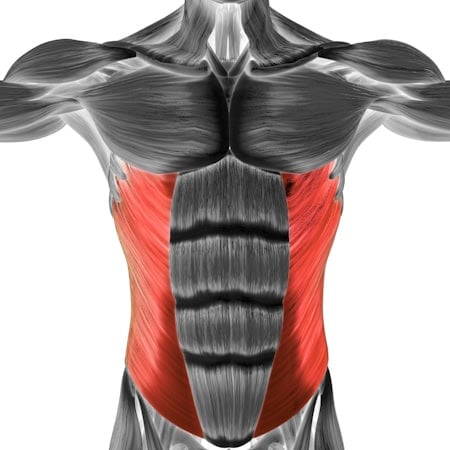
Oblique
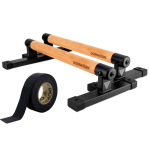
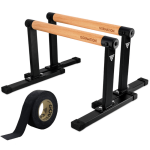
Equipment needed for Frog Stand
Adjust the difficulty of Frog Stand
The frog stand provides an essential progression pathway toward mastering the full planche. By beginning with support at your mid-forearms, you systematically strengthen the shoulders, wrists, and core required for more demanding variations. Over time, reducing support (by lifting feet fully, straightening arms, and raising knees higher) increases strength and prepares you for advanced planche variations. Regular practice combined with controlled progression in position, hold duration, and balance will steadily advance your calisthenics capabilities.
How to make Frog Stand harder?
How to make Frog Stand easier?
How to make Frog Stand harder?
To make Frog Stand harder:
-
Lift one foot at a time fully off the forearms, testing single-leg stability and strength.
-
Slowly move into tuck planche holds by removing knee support completely.
-
Add dynamic transitions, moving between frog stand and handstand or tuck planche positions to increase challenge.
How to make Frog Stand easier?
To make Frog Stand easier:
-
Keep your toe tips lightly on the ground initially, reducing their support gradually over time.
-
Use parallettes to reduce wrist discomfort and provide easier wrist positioning.
-
Place knees closer to wrists initially for reduced leverage, moving them toward the mid-forearm position as you progress.
-
Perform shorter duration holds frequently until you build strength.