
Ring Row with Bent Knees

How to do Ring Row with Bent Knees?
The Ring Row with Bent Knees is a beginner-friendly horizontal pulling exercise that strengthens the upper back, biceps, and core while reinforcing proper scapular control. This movement is performed using gymnastic rings or a suspension trainer, with the feet flat on the ground and knees bent at approximately 90 degrees. By shortening the lever length compared to a straight-leg ring row, this variation reduces difficulty, making it an excellent choice for those building foundational pulling strength.
This exercise requires basic pulling strength and core engagement to maintain body alignment. It is accessible to those who can support their weight in an inclined position but may not yet have the strength for a full-body horizontal pull. A solid foundation in scapular retraction (pulling the shoulder blades together) is beneficial, as is some grip endurance to hold onto the rings.
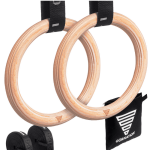
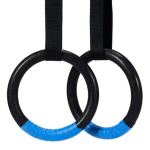
For equipment, you’ll need a pair of gymnastic rings or a suspension trainer, anchored at an overhead point. The height of the rings can be adjusted to change the difficulty. No additional weights are required, though progression options can be added later to increase the challenge.
How to Perform the Ring Row with Bent Knees
1. Setup
• Adjust the rings to waist or chest height. The lower the rings, the more challenging the movement.
• Sit on the ground with your knees bent at roughly 90 degrees and feet flat on the floor.
• Grab the rings with a neutral grip (palms facing each other) or an overhand grip (palms facing downward).
2. Starting Position
• Lean back so your torso is at an incline, arms fully extended, and body forming a straight line from shoulders to knees.
• Engage your core and glutes to maintain a solid posture and prevent sagging hips.
• Retract your shoulder blades slightly to initiate proper scapular control.
3. Pulling Phase
• Drive your elbows back while pulling your chest toward the rings.
• Focus on squeezing your shoulder blades together at the top of the movement.
• Keep your neck neutral and avoid shrugging your shoulders.
4. Top Position
• Your chest should reach or nearly touch the rings.
• Hold briefly, emphasizing muscle contraction in the upper back and arms.
5. Lowering Phase
• Slowly extend your arms, returning to the starting position with control.
• Avoid letting your shoulders roll forward—maintain scapular engagement throughout the descent.
6. Repeat
• Perform the desired number of reps while maintaining good form.
Benefits of the Ring Row with Bent Knees
• Strengthens the upper back (rhomboids, traps, lats) and biceps without excessive joint strain.
• Improves scapular control, crucial for posture, pull-ups, and injury prevention.
• More accessible than straight-leg ring rows, making it a great starting point for beginners.
• Develops grip strength without overloading the hands and forearms.
• Engages the core as the athlete must stabilize the body throughout the movement.
• Customizable difficulty by adjusting the ring height or foot positioning.
Common Mistakes to Avoid
🚫 Flaring the elbows out – Keep elbows at roughly a 45-degree angle to engage the back effectively.
🚫 Shrugging shoulders – Avoid excessive tension in the traps; focus on scapular retraction.
🚫 Arching or sagging the hips – Maintain a straight line from shoulders to knees.
🚫 Rushing the movement – Use a controlled tempo to maximize muscle engagement.
🚫 Not pulling through a full range of motion – Ensure the chest reaches the rings for proper activation.
Tips for the proper execution of Ring Row with Bent Knees
Brace your core throughout the movement to avoid unwanted torso movement.
Adjust the rings’ height to modify difficulty—lowering the rings increases challenge.
Use a slight pause at the top for better mind-muscle connection.
Focus on scapular movement by initiating the pull with your shoulder blades.
Keep your wrists in line with your forearms to avoid unnecessary strain.
Experiment with grip variations (neutral, overhand, underhand) to target different muscles.
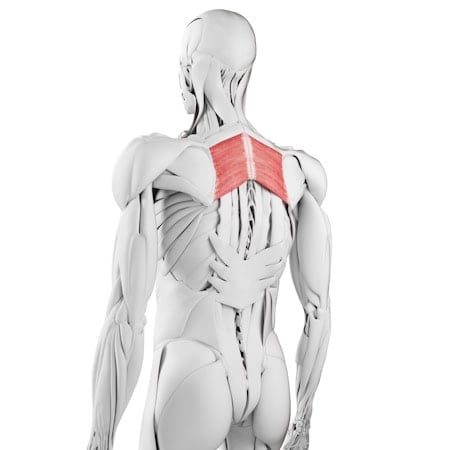
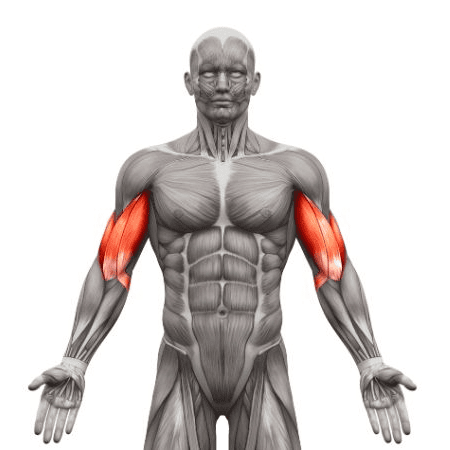
Muscles worked when doing Ring Row with Bent Knees
Throughout the Ring Row with Bent Knees, the upper body and core engage dynamically:
Primary Muscles:
•Latissimus dorsi (engaged during the pulling phase)
•Rhomboids & middle trapezius (active in scapular retraction)
•Biceps brachii (engaged as the arms flex during the row)
Secondary Muscles:
•Rear deltoids (assist in the pulling motion)
•Forearms & grip muscles (stabilize the hands on the rings)
•Core (abs & obliques) (engaged to maintain body stability)
•Glutes & hamstrings (subtly activated to support hip positioning)
Primary Muscle(s):
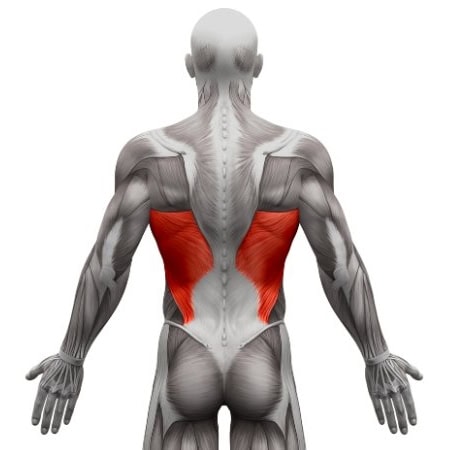
Lats
Rhomboid
Secondary Muscle(s):
Rhomboid
Biceps
Equipment needed for Ring Row with Bent Knees
Adjust the difficulty of Ring Row with Bent Knees
How to make Ring Row with Bent Knees harder?
How to make Ring Row with Bent Knees easier?
How to make Ring Row with Bent Knees harder?
To make Ring Row with Bent Knees harder:
-
Lower the rings – A lower starting position increases resistance.
-
Straighten the legs – Removing knee support makes the movement more challenging.
-
Elevate the feet – Placing feet on a box shifts more weight into the pull.
-
Pause at the top – Adding a 2-3 second hold increases muscle tension.
-
Perform slower negatives – Control the lowering phase for greater muscle engagement.
-
Use weighted resistance – Add a weight vest or hold a plate on your chest for extra challenge.
-
Try one-arm ring rows – Progressing to unilateral work significantly increases difficulty.
How to make Ring Row with Bent Knees easier?
To make Ring Row with Bent Knees easier:
-
Increase ring height – A higher starting position reduces resistance.
-
Adjust foot placement – Bring feet closer to the rings to decrease difficulty.
-
Use a box or elevated surface – Placing feet on an elevated platform can create a more upright pulling angle.
-
Perform assisted reps – Push lightly with the legs to assist in the pulling phase.
-
Limit range of motion at first – Start with partial reps and progress to full rows.