
Ring Typewriter Pull-Up
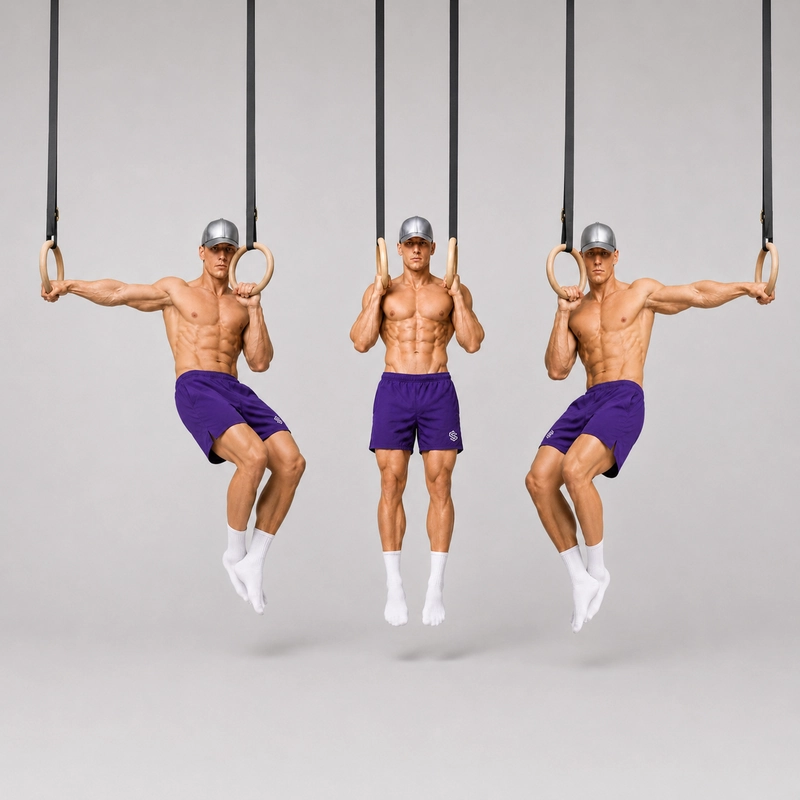
How to do Ring Typewriter Pull-Up?
The ring typewriter pull-up, also called the typewriter pull-up on rings, is an advanced unilateral pulling exercise performed on gymnastics rings. You begin with a strict pull-up, remain in the top position and move laterally from one ring to the other as the arm you are moving away from extends to the side.
Unlike the fixed-bar Typewriter Pull-Up, the rings can move and rotate independently. This allows your hands to follow a more natural path, but it also requires greater control from your shoulders, upper back, grip and core. Each ring must remain stable while the load shifts from one arm to the other.
The exercise builds on the basic Ring Pull-Up. It also combines elements of a ring archer pull-up with a prolonged top-position hold: instead of pulling toward one side and lowering immediately, you remain elevated and transition across to the opposite ring.
The ring typewriter pull-up can help develop the asymmetrical pulling strength required for assisted one-arm pull-ups and other advanced ring exercises. It also increases time under tension because the initial pull, lateral transfer and controlled descent form one extended repetition.
For help selecting and safely setting up the equipment, see our guide to gymnastics rings for calisthenics. The complete side-to-side sequence is also described in this external ring typewriter pull-up exercise reference.
Equipment and Setup
Use a securely mounted pair of gymnastics rings with both straps adjusted to exactly the same length. The rings should hang high enough for your arms and legs to extend fully without your feet touching the floor. Set the rings approximately shoulder-width apart at rest. They must have enough lateral freedom to move outward during the typewriter transition without striking a wall, rack or another object. Inspect both straps, buckles, rings and anchor points before training. Make sure the straps are not twisted and that each buckle is properly locked. Complete a general warm-up followed by shoulder, elbow and wrist preparation. Use the Ring Scapula Pull-Up and several controlled Ring Pull-Ups as exercise-specific preparation.
Step-by-Step Instructions
- Grip the rings in a comfortable neutral position with your palms facing each other.
- Hang beneath the rings with your elbows fully extended, legs together and feet clear of the floor.
- Brace your abdominals, squeeze your glutes and allow the body to become completely still.
- Engage your shoulder blades and perform a strict ring pull-up without kicking or swinging.
- Pull high enough that the rings approach your upper chest or armpits.
- Hold the top position with both shoulders active and your chest lifted.
- Shift your torso toward the right ring while keeping the right elbow strongly flexed.
- Move the left ring outward and gradually straighten the left arm to the side without relaxing the shoulder.
- Keep your body high as you pull the left ring back toward you and begin transferring across the center.
- Continue moving toward the left ring while gradually extending the right arm laterally.
- Finish the opposite-side position with the left elbow flexed and the right arm nearly straight.
- Pull the extended ring back toward your body and return to a centered top position.
- Lower from the rings slowly until both elbows are completely extended.
- Allow the body to become still before beginning the next repetition.
Ring Typewriter Pull-Up Completion Standard
- The repetition begins and ends with both elbows fully extended.
- The athlete performs a strict pull-up without kicking or swinging.
- The rings reach approximately upper-chest or armpit height before the lateral transfer begins.
- The torso moves from one ring to the other while remaining near the top position.
- The arm opposite the direction of travel becomes nearly straight without the shoulder relaxing.
- Both rings remain actively controlled rather than swinging freely.
- The chest and pelvis remain facing forward without excessive rotation.
- The athlete completes both sides before returning to the center and lowering.
- The descent is controlled through the full range of motion.
Common Mistakes
- Setting the rings at different heights: Match the strap lengths before training so one side is not artificially higher.
- Starting the transition too low: Pull the rings toward your upper chest before moving laterally.
- Dropping between sides: Maintain top-position tension as you transfer your body across the rings.
- Moving only the arms: Shift your torso toward each working ring rather than simply pushing the handles apart.
- Relaxing the extended shoulder: Keep the straighter arm active even when it carries less of the load.
- Forcing the extended elbow: Straighten the arm gradually and stop before losing control of the shoulder.
- Allowing the rings to swing: Move slowly and guide both handles throughout the entire transition.
- Letting the rings move behind the torso: Keep the handles beside or slightly in front of the upper body.
- Resting the forearms against the straps: Keep the arms clear of the straps so the rings remain the only hand contact points.
- Forcing a fixed grip: Allow the rings to rotate naturally instead of locking the wrists into an uncomfortable position.
- Twisting the hips: Brace your core and keep the chest, pelvis and knees facing forward.
- Using a kip: Keep your legs quiet and initiate the repetition through the back and arms.
- Lowering from one side: Return to a balanced center position before beginning the descent.
- Counting half a transfer as a full repetition: Complete both lateral positions before lowering.
Benefits of the Ring Typewriter Pull-Up
- Builds asymmetrical pulling strength while both hands remain connected to the equipment.
- Strengthens the lats, biceps, brachialis and upper back.
- Develops controlled weight transfer between the left and right arms.
- Increases top-position pulling strength and endurance.
- Challenges shoulder stability through independently moving handles.
- Allows the wrists and forearms to rotate naturally during the movement.
- Builds grip strength and ring-specific coordination.
- Strengthens the core against swinging and rotation.
- Provides a progression from ring archer pull-ups toward assisted one-arm pulling.
- Creates substantial time under tension within each repetition.
- Helps identify and train side-to-side strength differences.
Readiness and Safety
Before attempting the complete movement, develop repeatable Ring Pull-Ups, controlled top-position holds and the ability to shift some of your weight toward either arm without losing shoulder control. The Banded Archer Pull-Up on Gymnastics Rings can be used to practise asymmetrical loading with assistance. If you cannot maintain sufficient height during the lateral transfer, use the Resistance Band Ring Pull-Up or lower the rings and provide light assistance with your feet. Progress by reducing assistance while preserving the same movement path. Inspect the rings and anchors before every session and make sure there is enough clearance for the handles to move laterally. Stop the exercise if you experience sharp shoulder, elbow or wrist pain, instability, numbness or tingling.
Frequently Asked Questions
Is a ring typewriter pull-up different from a bar typewriter pull-up?
Yes. The bar variation uses fixed hand positions and moves the body laterally beneath one bar. On rings, the handles can move apart and rotate independently, increasing stabilization demands and changing the path of the hands.
What is the difference between a ring archer pull-up and a ring typewriter pull-up?
A ring archer pull-up normally finishes after you pull toward one ring and extend the opposite arm. A ring typewriter pull-up keeps the body near the top while you transfer from the first side to the second before lowering.
What grip should I use?
Begin with a neutral grip, with your palms facing each other. Allow the rings to rotate naturally during the pull and lateral transition. You do not need a false grip for this exercise.
Should the extended arm become completely straight?
A nearly straight arm creates the intended unilateral loading, but you should not force the elbow into extension if doing so causes the shoulder to collapse or the body to drop. Increase the extension gradually as your strength improves.
How far apart should the rings be?
Begin with the rings approximately shoulder-width apart when hanging. During the transition, the extended arm moves its ring outward. The exact width depends on your arm length and ability to control the shoulders.
How high should I pull before moving sideways?
Pull until the rings approach your upper chest or armpits. Beginning the transition from a low position makes it difficult to keep the body elevated as the opposite arm straightens.
What counts as one repetition?
One repetition consists of pulling from a full hang, moving into one side position, transferring across to the opposite side, returning to the center and lowering under control.
How many ring typewriter pull-ups should I perform?
Begin with three to five sets of one to four complete cycles. Rest for two to three minutes between demanding sets and stop when you can no longer maintain height or control the rings.
Why do the rings keep swinging?
The transition may be too fast, your body may not be fully braced or the rings may be positioned too far apart. Reduce the lateral range and pause briefly in each position until you can control both handles.
Can I use a resistance band?
Yes. A band can support your feet or knees while you practise the complete transition. Use enough assistance to remain high between the rings, then reduce the band tension gradually.
Is the ring typewriter pull-up a one-arm pull-up progression?
Yes, it can help develop unilateral pulling strength and top-position control. However, the extended arm continues to provide assistance, so the exercise is not equivalent to a true one-arm pull-up.
Tips for the proper execution of Ring Typewriter Pull-Up
Adjust both ring straps to exactly the same length before training.
Begin with the rings approximately shoulder-width apart.
Use a comfortable neutral grip and allow the rings to rotate naturally.
Establish a motionless active hang before beginning the pull.
Pull the rings toward your upper chest before moving laterally.
Keep your chest elevated throughout the side-to-side transition.
Shift your torso toward each ring instead of only moving the handles.
Gradually straighten the arm you are moving away from.
Keep the shoulder of the extended arm active and stable.
Guide both rings continuously instead of allowing either handle to swing freely.
Keep the rings beside or slightly in front of your torso.
Keep the rings beside or slightly in front of your torso.
Brace your abdominals and glutes to prevent rotation or swinging.
Keep your legs together and avoid using a kip.
Move across the rings smoothly without dropping between sides.
Return to a centered top position before lowering.
Alternate which side you approach first across your sets.
End the set when you can no longer maintain height or control the rings.
Muscles worked when doing Ring Typewriter Pull-Up
The ring typewriter pull-up combines a concentric vertical pull, an isometric top-position hold, a lateral weight transfer and a controlled eccentric descent. Both arms remain active, but the load shifts toward the arm nearest the torso at each end of the movement.
Primary Muscles
- Latissimus dorsi: The lats produce much of the vertical pulling force and control the body as it moves between the rings.
- Biceps brachii: The biceps flex the elbows and work particularly hard in the arm toward which the body is moving.
- Brachialis and brachioradialis: These elbow flexors assist during the initial pull and lateral transfer.
- Trapezius and rhomboids: The upper-back muscles control the shoulder blades and help keep the chest elevated.
Secondary Muscles
- Teres major: Assists the lats during the pull and changing upper-arm positions.
- Posterior deltoids: Contribute to shoulder extension and control of the rings.
- Rotator-cuff muscles: Stabilize the shoulders as the handles move and the load changes sides.
- Forearms and hand muscles: Maintain grip while controlling the position and rotation of each ring.
- Rectus abdominis and transverse abdominis: Brace the torso and help prevent swinging or excessive arching.
- Obliques: Resist rotation during the asymmetrical loading.
- Glutes and quadriceps: Maintain lower-body tension throughout the extended repetition.
Compared with the fixed-bar Typewriter Pull-Up, the ring variation requires additional stabilization because each hand controls an independently moving handle. The basic vertical pull should first be developed with the Ring Pull-Up.
Primary Muscle(s):

Lats
Secondary Muscle(s):
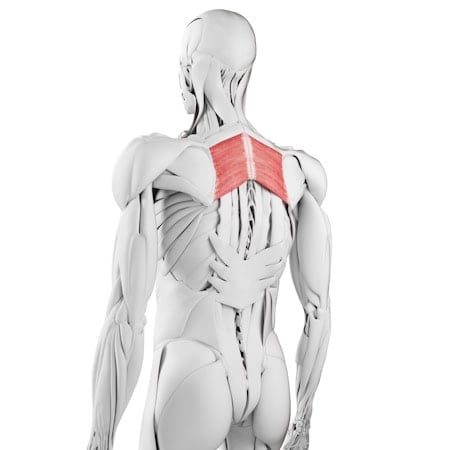
Rhomboid

Biceps
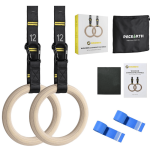
Equipment needed for Ring Typewriter Pull-Up
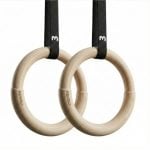
Adjust the difficulty of Ring Typewriter Pull-Up
How to make Ring Typewriter Pull-Up harder?
How to make Ring Typewriter Pull-Up easier?
How to make Ring Typewriter Pull-Up harder?
To make Ring Typewriter Pull-Up harder:
-
Slow the lateral transition while keeping your chest at the same height.
-
Pause for two to five seconds near each ring.
-
Straighten the assisting arm more completely at each side.
-
Move the extended ring farther away while maintaining shoulder control.
-
Perform multiple side-to-side cycles before lowering.
-
Use a slow five-second eccentric after completing the transition.
-
Perform consecutive repetitions without resting in a passive hang.
-
Hold an L-sit throughout the complete typewriter cycle.
-
Add a small amount of external resistance after mastering strict bodyweight repetitions.
-
Progress to assisted one-arm ring pull-ups.
-
Progress to one-arm ring pull-up holds and controlled negatives.
How to make Ring Typewriter Pull-Up easier?
To make Ring Typewriter Pull-Up easier:
-
Build controlled ring pull-ups before adding lateral movement.
-
Practise holding the top of a ring pull-up with both rings close to your chest.
-
Perform small side-to-side weight shifts without straightening either arm fully.
-
Move from one side back to the center before attempting the complete transfer.
-
Perform one ring archer pull-up at a time and lower between sides.
-
Keep the assisting arm more bent to reduce the unilateral load.
-
Use a resistance band under your feet or knees.
-
Lower the rings and provide light assistance with your feet.
-
Use a plyometric box to enter the top position and practise only the lateral transition.
-
Perform slow typewriter negatives from a supported top position.
