
Tuck Front Lever
How to do Tuck Front Lever?
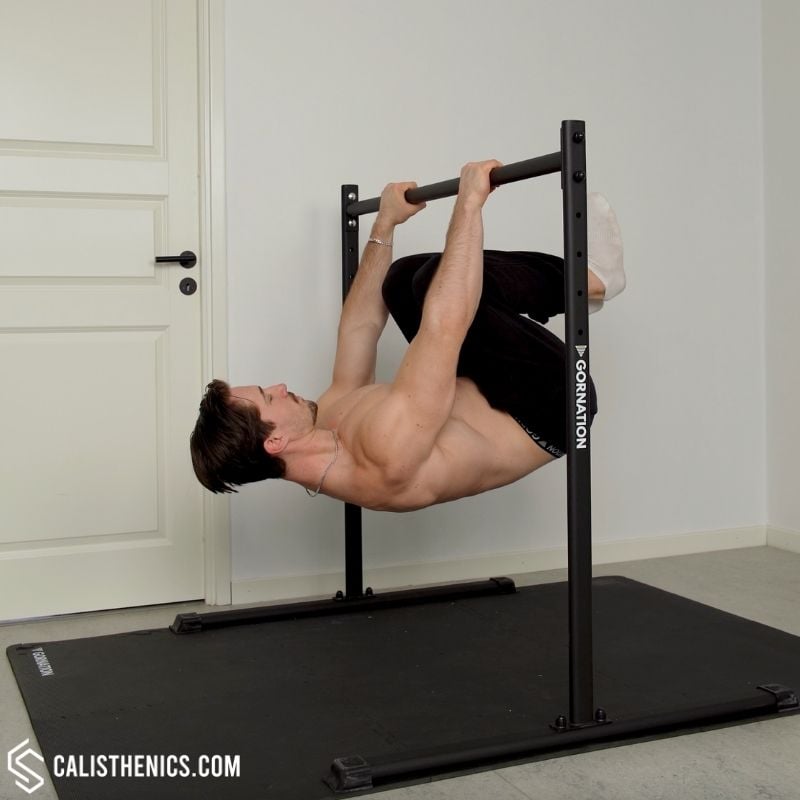
The tuck front lever is a challenging calisthenics exercise that targets the core, back, and shoulder muscles. It involves hanging from a pull-up bar and holding your body parallel to the ground with your knees tucked toward your chest. This movement builds tremendous strength in the posterior chain and core while improving body control and stability. It’s an excellent progression exercise for those working toward a full front lever.
Check out our ▶️ front lever training routine to unlock the full front lever!
The equipment used is the ▶️ Static Bar from GORNATION --> For 10% off use code CS10.
CREDIT: This video was prepared in collaboration with calisthenics athlete Simon Imhäuser who was performing the exercise in the video and calisthenics coach Daniel Flefil who shot and edited the video.
Steps to Perform a Proper Tuck Front Lever:
1. Set Up on a Pull-Up Bar:
• Hang from a pull-up bar with a shoulder-width grip, using an overhand (pronated) grip.
• Keep your arms fully extended and engage your shoulders by pulling them down and away from your ears (scapular depression).
2. Engage Your Core and Tuck Your Knees:
• Pull your knees toward your chest, creating a tucked position. Your thighs should be close to your torso, and your shins parallel to the ground.
• Engage your core and glutes to stabilize your lower body.
3. Lift into the Tuck Front Lever Position:
• Lean back slightly while keeping your arms straight and locked. Aim to bring your back parallel to the ground.
• Your body should form a compact “C” shape, with your lower back slightly rounded and your core fully engaged.
4. Hold the Position:
• Maintain the tucked position for as long as you can, focusing on keeping your body still and aligned.
• Avoid bending your elbows or letting your shoulders shrug upward.
5. Lower Back to the Starting Position:
• When finished, slowly lower your legs and return to a hanging position, maintaining control to avoid swinging.
6. Repeat the Movement:
• Gradually increase the hold time or the number of repetitions as your strength improves.
Benefits of the Tuck Front Lever
• Strengthens the Posterior Chain: Engages the lats, rhomboids, and erector spinae, building strength in the back and improving posture.
• Enhances Core Stability: The tuck front lever challenges the core, improving stability and control.
• Improves Shoulder Health: Promotes scapular depression and shoulder stability, reducing the risk of shoulder injuries.
• Progression Toward the Full Front Lever: Acts as an intermediate progression, helping you build the strength and control needed for more advanced calisthenics skills.
• Low Equipment Requirement: Requires only a pull-up bar, making it accessible for home workouts or outdoor calisthenics training.
• Functional Strength Development: Builds strength in a way that translates to improved performance in other calisthenics and athletic movements.
Common Mistakes to Avoid
• Bending the Elbows: Keep your arms straight to properly engage the lats and avoid overloading the biceps.
• Shrugging Shoulders: Avoid letting your shoulders rise toward your ears; maintain scapular depression for proper form.
• Swinging: Use controlled movements to prevent momentum from taking over, which reduces the effectiveness of the exercise.
• Arching the Back: Avoid excessive lower back arching; focus on keeping a slightly rounded back to maintain proper alignment.
• Holding Your Breath: Breathe steadily to stay relaxed and maintain control during the hold.
Tips for the proper execution of Tuck Front Lever
Engage the Entire Body: Keep your core, glutes, and lats engaged throughout the exercise to maintain a stable and compact position.
Control Your Breathing: Inhale before initiating the movement, and exhale slowly while holding the tucked position.
Focus on Shoulder Engagement: Keep your shoulders down and away from your ears to prevent unnecessary strain.
Avoid Swinging: Use strict form and avoid momentum to ensure the exercise targets the intended muscles.
Practice Regularly: Gradually increase your hold duration and progress toward more advanced front lever variations.
Muscles worked when doing Tuck Front Lever
Primary Muscles:
•Latissimus Dorsi (Lats): Engage to pull the torso into position and stabilize the body during the hold.
•Core Muscles: The rectus abdominis and obliques work to stabilize the torso and hold the tucked position.
Secondary Muscles:
•Rhomboids and Trapezius: Assist in shoulder stabilization and scapular depression.
•Biceps: Engage isometrically to stabilize the arms during the hold.
•Erector Spinae: Supports the lower back and helps maintain spinal alignment.
•Glutes: Engage to maintain a compact position and support the hips.
Primary Muscle(s):
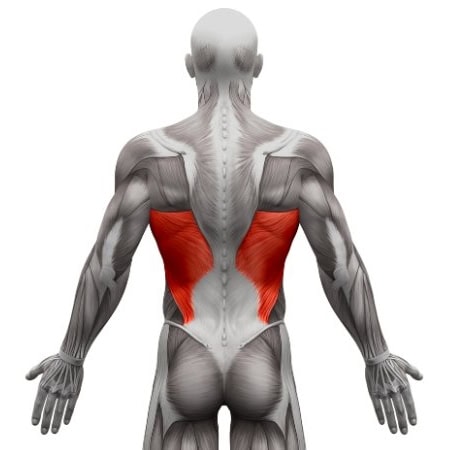
Lats
Secondary Muscle(s):
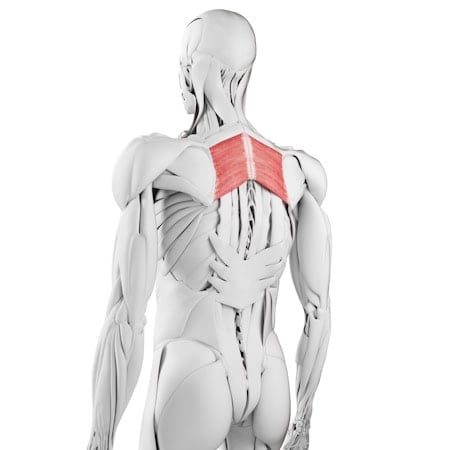
Rhomboid
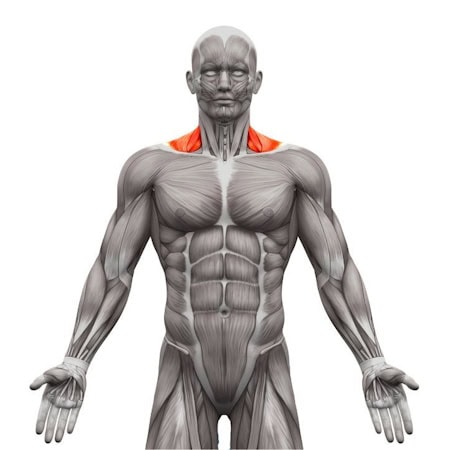
Trapezius
Equipment needed for Tuck Front Lever

Adjust the difficulty of Tuck Front Lever
How to make Tuck Front Lever harder?
How to make Tuck Front Lever easier?
How to make Tuck Front Lever harder?
To make Tuck Front Lever harder:
-
Hold for Longer Durations: Gradually increase the time you hold the tucked position, aiming for 10-15 seconds or longer.
-
Progress to Advanced Tuck: Move from a tight tuck to an advanced tuck, where your knees are further away from your chest, increasing the difficulty.
-
Add Repetitions: Perform multiple sets of raising into and lowering out of the tucked front lever to build strength and endurance.
-
Transition to a Straddle or Full Front Lever: Extend one leg at a time into a straddle or fully straight position as a progression toward the full front lever.
How to make Tuck Front Lever easier?
To make Tuck Front Lever easier:
-
Use a Resistance Band: Loop a resistance band around the pull-up bar and under your hips to reduce the load on your core and back.
-
Perform a Partial Hold: Instead of holding the full tucked position, work on pulling your knees up partially and lowering them back down.
-
Start with Knee Raises: Practice hanging knee raises to strengthen the core and back muscles needed for the tucked front lever.