
Pike Push-Up Elevated Feet
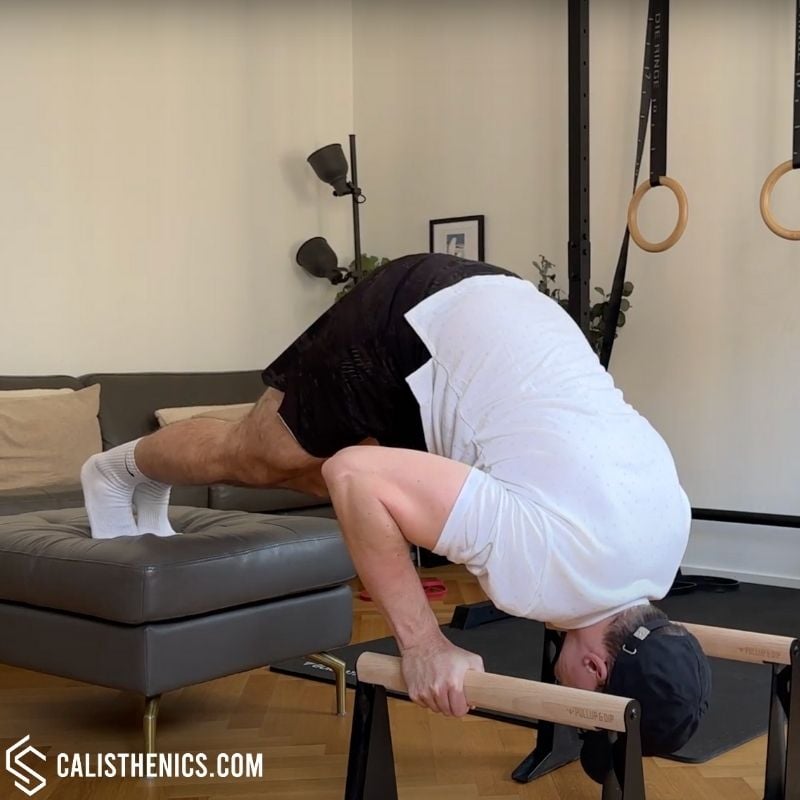
How to do Pike Push-Up Elevated Feet?
The elevated feet pike push-up is an advanced calisthenics exercise designed to significantly enhance upper body strength, specifically targeting the shoulders, triceps, and upper chest. By placing your feet on an elevated surface such as a plyo box, bench, or sturdy furniture, you increase the vertical pressing angle, thus making the exercise more challenging and effective for building overhead pressing strength. Performing this exercise on parallettes further increases its difficulty by allowing a greater range of motion, deeply engaging the shoulders, and promoting enhanced mobility and strength.
This elevated variation serves as an important progression toward advanced skills like handstand push-ups, handstand holds, and planche progressions. Before attempting elevated-feet pike push-ups on parallettes, you should be comfortable performing at least 8-10 reps of regular floor-based or parallette pike push-ups. Having solid foundational strength in standard push-ups, regular pike push-ups, and the ability to hold a stable plank position will also ensure safer execution. Good shoulder mobility and scapular strength are necessary prerequisites to effectively perform the exercise without unnecessary strain.
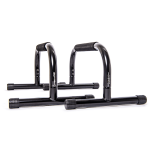
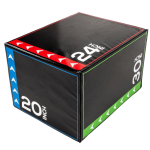
To perform elevated feet pike push-ups, you will need a sturdy plyometric box, chair, or bench to elevate your feet, and a set of parallettes placed firmly on a non-slip surface. Chalk can improve your grip on the parallettes, especially when performing slow, controlled repetitions. If parallettes aren’t available, the exercise can also be performed with hands placed directly on the floor, although this will reduce the range of motion slightly.
How to Perform Pike Push-Ups (Elevated Feet)
1. Set Up the Equipment: Position your parallettes shoulder-width apart on a flat, stable surface. Place your feet on a sturdy elevated object such as a plyo box, bench, or chair behind you.
2. Get into Pike Position: With your hands gripping the parallettes, assume a high pike position by walking your feet toward your hands until your hips are positioned directly above your shoulders or close to it. Your body should resemble an inverted “V” shape.
3. Establish a Stable Base: Brace your core, engage your shoulders, and keep your head neutral between your arms. Your weight should be primarily distributed on your hands.
4. Initiate the Lowering Phase: Slowly lower your head forward and downward toward the floor, creating a “tripod” position where your hands form the bottom two points of the triangle and your head reaches the top.
5. Full Range of Motion: Lower until your head gently touches or comes close to touching the floor, achieving maximum depth. Maintain control and stability throughout the descent.
6. Pause at the Bottom: Briefly pause at the bottom position to build greater strength and control.
7. Press Back Up: Engage your shoulders, chest, and triceps to press strongly back up to the starting position, fully extending your elbows, and pressing your head through your arms at the top.
8. Repeat for Repetitions: Perform the desired number of reps while maintaining controlled, deliberate movements.
Benefits of Elevated Feet Pike Push-Ups
• Enhanced Shoulder Strength: Increased vertical angle places greater load on the shoulders, effectively building overhead pressing power.
• Greater Range of Motion: Using parallettes allows you to move through a deeper range, significantly increasing strength and mobility gains.
• Increased Core Stability: The elevated position demands significant core engagement to maintain the proper pike position.
• Prepares for Handstand Push-Ups: Offers a more challenging progression towards full vertical pressing movements.
• Improves Scapular Control: Strengthens stabilizing muscles in the shoulders, enhancing posture and injury resilience.
• Builds Coordination and Body Awareness: Enhances proprioception and balance required for advanced gymnastic and calisthenics movements.
Common Mistakes to Avoid
• Incorrect Head Positioning: Your head should form a clear tripod shape (triangle) with your hands; avoid letting your head move too far forward or backward.
• Lowering Too Quickly: Control the descent phase to maximize muscle recruitment and minimize injury risk.
• Excessive Elbow Flare: Keep elbows at roughly a 45-degree angle—not flaring too far outward or tightly hugging the torso.
• Dropping Hips Too Low: Keep your hips elevated throughout to maintain a pike position, avoiding turning the exercise into a standard decline push-up.
• Not Pressing Fully Through: At the top, press your head fully through your arms to maximize shoulder activation.
• Inadequate Core Engagement: Maintain a strong hollow body position, avoiding a sagging or overly arched lower back.
Gym Equivalent Exercises
• Elevated Feet Pike Push-Ups on the Floor – Similar exercise with slightly less range of motion, serving as an intermediate step.
• Barbell Overhead Press – Trains overhead pressing strength and shoulder stabilization.
• Dumbbell Shoulder Press – Provides a similar vertical pressing movement with adjustable resistance.
• Handstand Push-Up Negatives – Prepares the body for full handstand push-ups through eccentric loading.
• Machine Shoulder Press – Provides controlled overhead pressing strength with less stability required.
Tips for the proper execution of Pike Push-Up Elevated Feet
Keep your hips high and stacked over your shoulders to maximize vertical pressing mechanics.
Slow down the eccentric (lowering) phase, aiming for at least 3-5 seconds per repetition.
Maintain external rotation at the shoulders, actively pressing into the parallettes for better stability.
Engage your core throughout the entire movement to avoid unnecessary swinging or instability.
Gradually increase the elevation height of your feet as strength improves.
Pause at the bottom for 1-2 seconds to enhance strength development and improve control.
Aim to fully press your head through your arms at the top position, achieving proper overhead alignment.
Muscles worked when doing Pike Push-Up Elevated Feet
The primary muscles engaged during elevated feet pike push-ups include:
•Deltoids (especially anterior and lateral heads) – Main muscle group responsible for overhead pressing strength.
•Triceps brachii – Extends the elbows and assists with pushing the body upward.
•Pectoralis major (upper fibers) – Supports pressing movements and provides additional power during the press-up phase.
The secondary muscles involved include:
•Upper trapezius and scapular stabilizers – Important for stabilizing the shoulders and maintaining proper alignment.
• Core muscles (rectus abdominis, obliques, transverse abdominis) – Maintain a stable pike position throughout the exercise.
•Forearm and grip muscles – Keep a firm grasp on the parallettes, providing stability and control.
Primary Muscle(s):
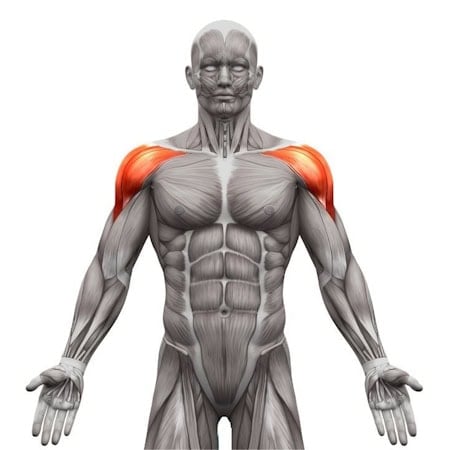
Anterior delt
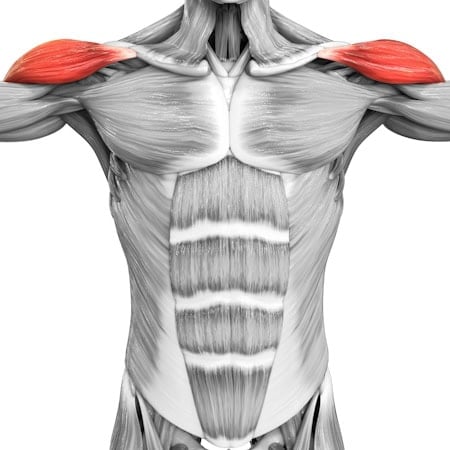
Lateral delt
Secondary Muscle(s):
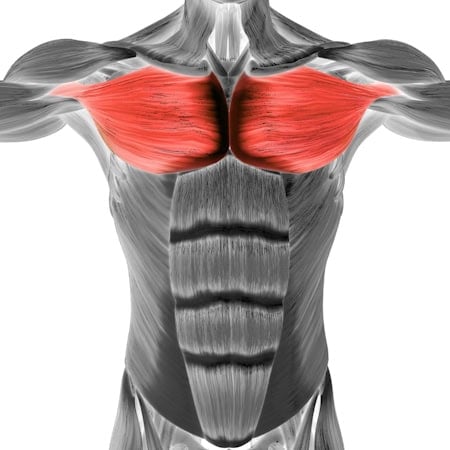
Upper chest
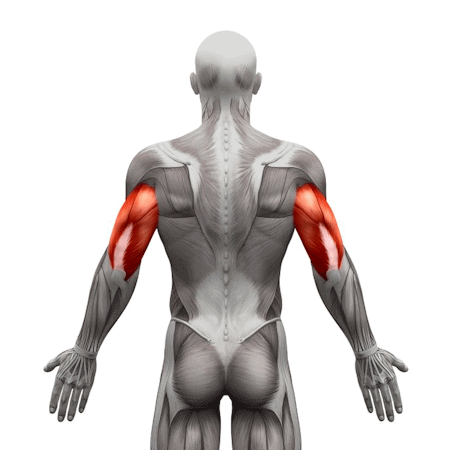
Triceps
Equipment needed for Pike Push-Up Elevated Feet
Adjust the difficulty of Pike Push-Up Elevated Feet
Elevated feet pike push-ups on parallettes offer significant versatility, accommodating a wide range of skill and strength levels. Beginners can start by performing the exercise with minimal elevation or reduced range of motion. More advanced athletes can progressively elevate the feet higher, slow the tempo, add pauses, or transition into unilateral variations. This scalability allows continuous progression toward the ultimate goal of performing full handstand push-ups, front lever push-ups, or other challenging vertical pressing movements.
How to make Pike Push-Up Elevated Feet harder?
How to make Pike Push-Up Elevated Feet easier?
How to make Pike Push-Up Elevated Feet harder?
To make Pike Push-Up Elevated Feet harder:
-
Increase Elevation Height: Place feet on a higher surface to achieve a more vertical pressing position.
-
Slow Tempo Reps: Extend the lowering phase to 6-8 seconds per repetition, enhancing time under tension.
-
Pause at the Bottom Position: Hold the bottom tripod position for 2-3 seconds for increased muscle activation.
-
Add Weight: Use a weighted vest to increase resistance.
-
One-Leg Pike Push-Up: Lift one leg off the elevated surface, increasing core demand and difficulty.
-
Progress to Handstand Push-Up: Gradually move closer to a vertical position to build towards full handstand push-ups.
How to make Pike Push-Up Elevated Feet easier?
To make Pike Push-Up Elevated Feet easier:
-
Reduce Elevation Height: Use a lower box or remove elevation completely to decrease the difficulty.
-
Perform Pike Push-Ups on the Floor: Reducing the range of motion helps athletes gradually build strength.
-
Bend Your Knees Slightly: Reduces the lever length, making the exercise less demanding.
-
Perform Partial Range of Motion: Initially lower only partway until strength and control improve.
-
Increase Base of Support: Place feet slightly wider apart for improved stability.