
Ring Archer Pull-Up
How to do Ring Archer Pull-Up?
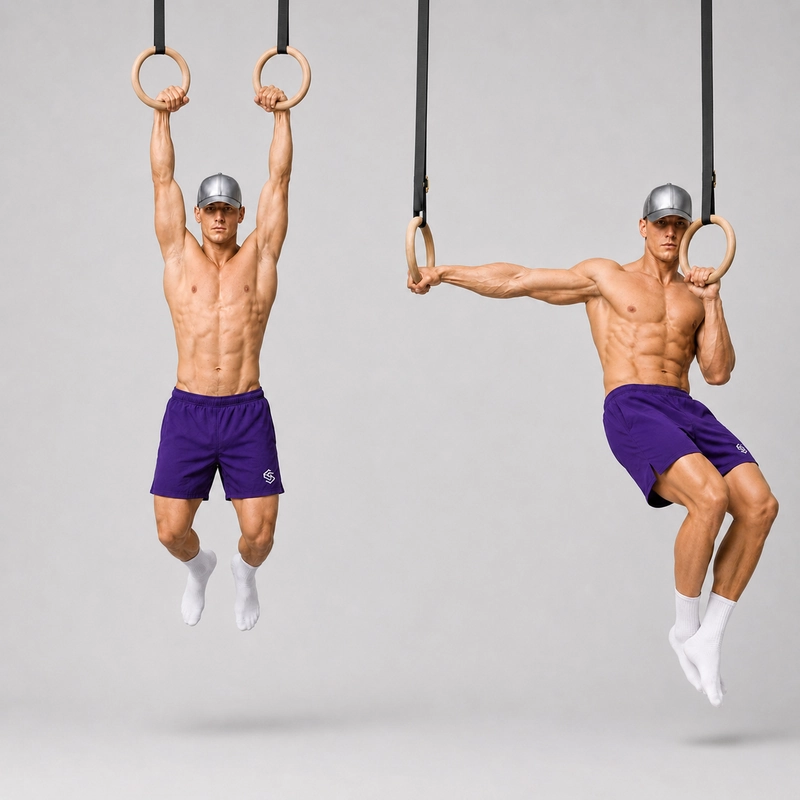
The ring archer pull-up is an advanced asymmetrical pulling exercise performed on gymnastics rings. From a controlled hang, you pull one ring toward your upper chest while moving the opposite ring outward and straightening that arm. The bent arm carries more of the load, while the extended arm continues to provide assistance and control.
This exercise builds on the ring pull-up and provides a progression toward the ring typewriter pull-up and assisted one-arm ring pulling. Athletes who are not yet ready for the unassisted movement can use the banded archer pull-up on gymnastics rings or the more accessible ring archer row.
Unlike the bar archer pull-up, your hands are not fixed in one wide position. Each ring can move laterally and rotate independently, allowing the working ring to approach your chest while the assisting ring travels away from your body. This freedom creates a different movement path and requires you to stabilize both handles throughout the repetition.
The ability of the rings to rotate also allows your hands and forearms to find a comfortable orientation during the pull. You can begin with your palms approximately facing each other and allow the working ring to rotate naturally as it approaches your chest. Do not force an exact grip angle if another controlled position feels more natural.
Because both the athlete and the rings move, the equipment setup is an essential part of the exercise. Adjust both straps to the same length, use a secure structure that can comfortably support your bodyweight and leave enough lateral space for the assisting ring to travel outward. See our guide to choosing and setting up gymnastics rings for calisthenics and GMB’s external guide on hanging gymnastics rings securely.
How to Perform a Ring Archer Pull-Up
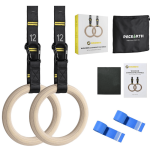
Use a pair of securely mounted gymnastics rings with adjustable straps. Before beginning, inspect the anchor, straps, buckles and rings for damage or movement. The rings should hang high enough for your elbows and legs to extend without your feet touching the floor.
Ring and Strap Setup
- Attach both straps to a secure structure that is designed to support dynamic bodyweight loading.
- Adjust the straps to exactly the same length so that both rings hang level.
- Position the rings approximately shoulder-width apart when hanging freely.
- Leave enough open space beside both rings for one arm to extend laterally without hitting a wall, rack or other object.
- Check that the straps are not twisted and that both buckles are closed and loaded correctly.
- Pull firmly on each ring before hanging to confirm that neither strap slips through its buckle.
Ring archer pull-ups happen below the rings, but they still need considerable lateral clearance. GMB’s gymnastics-ring setup guide recommends using a secure bodyweight-rated structure and allowing sufficient space around the athlete.
Starting Position
- Grip each ring with a regular closed grip and wrap your thumbs around the handles.
- Begin with your palms facing each other or turned slightly forward.
- Hang beneath the rings with both elbows completely extended and your feet clear of the floor.
- Bring your legs together and brace your abdominals and glutes.
- Wait until your body and both rings are still before beginning the repetition.
- Create controlled shoulder tension without bending your elbows or aggressively pulling the shoulder blades together.
If you cannot stabilize the starting position, practise the ring scapula pull-up and regular ring pull-ups before adding the asymmetrical movement.
Pulling Phase
- Choose the ring toward which you will pull; this becomes the working side.
- Drive the working elbow downward and pull that ring toward your upper chest or armpit.
- At the same time, move the opposite ring laterally away from your torso.
- Gradually straighten the assisting elbow as the ring travels outward.
- Allow both rings to rotate naturally rather than forcing them to remain in one fixed orientation.
- Keep the working ring close to your body and maintain active tension through the extended arm.
- Continue until the working ring reaches your upper chest and the assisting elbow is straight or nearly straight.
The two ring paths happen simultaneously: one ring approaches the chest while the other moves outward. This distinguishes a complete ring archer pull-up from a regular ring pull-up followed by an uncontrolled arm extension. A similar movement standard is described in this external ring archer pull-up exercise reference.
Lowering Phase
- Begin lowering from the archer position without releasing tension in either shoulder.
- Move the extended ring inward as the working ring travels away from your chest.
- Gradually bend the assisting elbow so that both rings return beneath their anchor points.
- Control the descent until both elbows are fully extended.
- Allow the rings to return to their centered starting position without colliding or swinging.
- Pause until your body and the rings are still.
- Repeat toward the opposite ring and perform equal repetitions on both sides.
Exhale as you pull and inhale during the controlled descent. Do not rush the return: independently moving handles can amplify a small uncontrolled movement into substantial swinging on the next repetition.
Completion Standard
A complete ring archer pull-up begins from a stable hang with both elbows extended and both feet off the floor. At the top, one ring reaches the upper chest or armpit, the working elbow is deeply bent and the opposite ring has moved laterally until its elbow is straight or nearly straight. The repetition finishes with a controlled return to a centered full hang without kicking, kipping, gripping the straps or using the feet.
How the Rings Should Move
The working and assisting rings perform different but coordinated paths:
- Working ring: Travels downward and inward toward the upper chest or armpit as the elbow bends.
- Assisting ring: Travels laterally away from the torso as the elbow straightens.
- Return: Both rings move back toward a centered position as the athlete lowers.
The assisting ring does not need to move perfectly horizontally. Its exact arc depends on your strap length, anchor spacing, shoulder width and arm length. The important standard is that the arm straightens under control while the ring moves clearly away from the torso.
Grip Rotation During the Ring Archer Pull-Up
A false grip is not required for the standard ring archer pull-up. Begin with a regular grip and allow the handles to rotate in response to your arm position.
Many athletes begin with the palms approximately facing each other. As you pull, the working hand may rotate slightly toward you while the assisting hand remains neutral or turns slightly forward. The exact orientation can vary, but the wrists should remain controlled rather than collapsing over the rings.
Research comparing pull-up grips has found that several major pulling muscles remain active across pronated, neutral and supinated grip variations. However, this research does not specifically establish one ideal grip for ring archer pull-ups. Use the ring rotation to find a controlled position that does not cause wrist, elbow or shoulder discomfort. See the peer-reviewed electromyographic comparison of pull-up grips.
Ring Archer Pull-Up vs Bar Archer Pull-Up
- Handle movement: A bar fixes both hands in place, while each ring can move independently.
- Starting width: The bar version requires a wide grip; the ring version normally begins around shoulder width before one ring travels outward.
- Grip orientation: A pull-up bar holds the hands in a fixed pronated position, while the rings can rotate during the repetition.
- Assisting-arm path: On the bar, the hand remains fixed as the elbow straightens; on rings, both the elbow and handle move laterally.
- Stability: The athlete must control the position and rotation of two independent rings.
- Equipment setup: Ring strap length, anchor security and lateral clearance affect the movement directly.
The two versions train a similar asymmetrical pulling concept, but their setup, hand path and execution standards are sufficiently different to justify separate exercise pages.
Ring Archer Pull-Up vs Ring Typewriter Pull-Up
During a ring archer pull-up, you pull toward one ring and then lower from that same side. During a ring typewriter pull-up, you remain elevated and transfer laterally from one ring to the other before descending.
The typewriter variation normally requires more prolonged top-position control because the athlete must reverse the working and assisting arms without first returning to the bottom.
Common Ring Archer Pull-Up Mistakes
Using Unequal Strap Lengths
Uneven rings create an unintended difference between the two sides before the repetition begins. Use strap markings or compare the hanging rings directly and correct their height before training.
Using an Unstable Anchor
The lateral movement can cause the straps to shift across an unsuitable anchor. Use a structure and attachment method that keep both straps secure when they are loaded vertically and slightly sideways.
Beginning While the Rings Are Swinging
Starting from moving rings makes the exercise harder to control and encourages compensation. Establish a quiet hang before every repetition.
Performing a Regular Pull-Up Before Extending the Arm
Pulling both rings to the chest and only then extending one arm separates the exercise into two movements. For a complete archer pull-up, the working ring approaches your chest while the opposite ring moves outward simultaneously.
Moving the Assisting Ring Forward
The assisting ring should travel primarily outward rather than far in front of your body. Excessive forward movement can cause the torso to rotate and makes the position difficult to stabilize.
Keeping the Assisting Elbow Too Bent
A bent assisting arm provides more help and keeps the exercise close to a regular ring pull-up. Retain enough bend to control the movement initially, then gradually work toward a straighter arm.
Relaxing the Extended-Arm Shoulder
The straighter arm continues to carry load and stabilize its ring. Do not allow the shoulder to collapse or the ring to pull the arm passively away from your body.
Gripping the Strap
Keep the entire hand on the ring. Holding the strap changes the assistance and turns the repetition into a different assisted one-arm variation.
Bracing the Arm Against the Strap
Do not deliberately press the wrist or forearm into the strap for support. Control the ring through your hand and shoulder instead.
Forcing Both Rings to Face the Same Direction
The rings are designed to rotate independently. Allow each handle to find a controlled orientation instead of twisting your wrists to keep them visually identical.
Allowing the Rings to Collide
Bring the rings back toward the center smoothly during the descent. If they repeatedly collide, slow the return and stabilize the bottom position before the next repetition.
Turning the Exercise Into a Ring Typewriter
Moving from one ring to the other while remaining at the top changes the exercise into a ring typewriter pull-up. A ring archer repetition descends after reaching one side.
Benefits of Ring Archer Pull-Ups
- Develop asymmetrical pulling strength while both hands remain on independent handles.
- Teach coordinated inward and outward ring movement.
- Develop control of natural grip rotation under load.
- Prepare the athlete for ring typewriter pull-ups.
- Provide a progression toward assisted one-arm ring pulling.
- Challenge the shoulders and upper back to stabilize rings moving in different directions.
- Train the abdominals and obliques to control unwanted rotation and swinging.
- Help identify differences in strength and coordination between sides.
- Provide a distinct equipment alternative to the fixed bar archer pull-up.
Before Attempting Ring Archer Pull-Ups
You should first be able to perform controlled ring pull-ups through a full range and remain stable while the handles rotate. As a practical guideline, approximately 6–10 clean ring pull-ups, a controlled top hold and several ring archer rows provide a reasonable foundation, but these numbers are not universal requirements.
Being able to perform the bar archer pull-up can help develop the necessary pulling strength, but it does not automatically provide the independent ring control required for this version.
Warm up with ring scapula pull-ups, regular ring pull-ups and small side-to-side weight shifts. Introduce the exercise with low volume because one elbow and shoulder carry considerably more load at a time.
Stop the exercise if you experience sharp pain, tingling, sudden weakness or persistent discomfort in the fingers, wrists, elbows or shoulders. Use a foot-assisted, band-assisted or row variation rather than forcing the extended-arm position.
Ring Archer Pull-Up Progression
- Develop stable ring hangs and ring scapula pull-ups.
- Build repeatable strict ring pull-ups.
- Practise ring archer rows with a progressively more horizontal body.
- Perform small side-biased shifts during ring pull-ups.
- Use foot-assisted ring archer pull-ups with the rings set lower.
- Perform banded archer pull-ups on gymnastics rings.
- Perform partial ring archer pull-ups while retaining some bend in the assisting arm.
- Straighten the assisting arm fully during unassisted repetitions.
- Add controlled top pauses and slower descents.
- Progress to ring typewriter pull-ups.
- Use progressively less assistance during one-arm ring pull-ups.
Programming Ring Archer Pull-Ups
Perform ring archer pull-ups near the beginning of a pulling workout while your grip, elbows and shoulders are fresh. Start with 3–5 sets of 2–5 controlled repetitions per side and rest approximately two to three minutes between sets.
End each set before ring wobble, assisting-arm bend or body rotation increases substantially. Improving the ring path and straightening the assisting arm are better initial progression targets than adding repetitions quickly.
One or two sessions per week may be sufficient when the exercise is combined with bilateral ring pull-ups or other heavy pulling. Keep the number of technically demanding unilateral exercises manageable within the same session.
Frequently Asked Questions
What is a ring archer pull-up?
It is an asymmetrical ring pull-up in which one ring is pulled toward the upper chest while the opposite ring moves outward and that elbow straightens. The straight arm continues to provide assistance.
Is the ring archer pull-up harder than the bar version?
Not universally. The rings require additional handle control but allow freer hand movement and rotation. Some athletes find that freedom more comfortable, while others find the moving rings substantially harder to stabilize.
Should the rings start wide apart?
No. The rings normally begin approximately shoulder-width apart. The assisting ring then travels outward during the repetition, unlike the bar version where the hands begin in a wide fixed position.
Which ring should touch my chest?
The ring on the working side should approach your upper chest or armpit. The opposite ring moves laterally as its arm straightens.
Should the assisting arm be completely straight?
A strong complete repetition has the assisting elbow straight or nearly straight. When learning the movement, retain enough elbow bend to maintain shoulder control and a smooth ring path.
Should my palms face forward or inward?
A neutral starting grip with the palms facing each other is usually practical. Allow the rings to rotate naturally as you pull rather than forcing both hands to maintain the same angle.
Do I need a false grip?
No. The standard exercise uses a regular closed grip. A false-grip archer pull-up is an optional variation for athletes who specifically want to develop false-grip pulling strength.
Is a ring archer pull-up a one-arm pull-up?
No. The extended arm remains connected to its ring and continues to provide assistance. The exercise increases the load on one side without removing the second arm completely.
What is the difference between a ring archer and ring typewriter pull-up?
The ring archer pull-up moves toward one side and then descends. The ring typewriter pull-up remains elevated and transfers from one ring to the other before lowering.
Tips for the proper execution of Ring Archer Pull-Up
Adjust both ring straps to exactly the same length before beginning the exercise.
Leave enough lateral clearance for either ring to travel outward without hitting an obstacle.
Begin every repetition from a stable hang with both rings completely still.
Use a closed grip with your thumbs wrapped securely around the rings.
Pull the working ring toward your upper chest while moving the opposite ring outward.
Straighten the assisting elbow gradually rather than throwing the ring to the side.
Keep the extended-arm shoulder active and controlled throughout the repetition.
Allow each ring to rotate naturally instead of forcing both handles into an identical position.
Keep your entire hand on the ring rather than gripping or leaning against the strap.
Brace your abdominals and glutes to limit swinging and excessive torso rotation.
Return both rings smoothly to the center as you lower to full elbow extension.
Wait for the rings to become still before beginning the next repetition.
Perform equal repetitions with the right and left arms as the working side.
End the set when you can no longer control the outward-moving ring.
Muscles worked when doing Ring Archer Pull-Up
The ring archer pull-up combines vertical pulling with asymmetrical handle control. The working arm produces most of the pulling force, while the straighter arm continues to support part of the bodyweight and controls the outward-moving ring.
Primary Muscles
- Latissimus dorsi: Pulls the working upper arm downward and helps move the torso toward the ring.
- Biceps brachii: Contributes strongly to elbow flexion in the working arm and assists with forearm control as the ring rotates.
- Brachialis: Produces elbow flexion regardless of the changing hand orientation.
- Brachioradialis: Assists elbow flexion and helps control the forearm during the rotating grip.
The latissimus dorsi contributes to shoulder extension and adduction and can help move the trunk upward when the arms are fixed overhead, as explained in this NCBI anatomy overview of the latissimus dorsi.
Secondary and Stabilizing Muscles
- Rhomboids and trapezius: Control the shoulder blades as the two arms move through different positions.
- Teres major: Assists the working latissimus dorsi during shoulder extension and adduction.
- Rear deltoids: Help move and stabilize the working upper arm.
- Rotator-cuff muscles: Stabilize the shoulder joints while the handles move and rotate independently.
- Forearm and hand muscles: Maintain the grip and control ring rotation throughout the repetition.
- Abdominals and obliques: Resist uncontrolled extension, swinging and rotation toward the working side.
- Glutes and spinal stabilizers: Help maintain a controlled lower-body position beneath the rings.
The extended arm is not resting. Its shoulder, arm and grip muscles continue to stabilize the ring and provide assistance, even when the elbow appears completely straight.
Primary Muscle(s):

Biceps

Lats
Secondary Muscle(s):
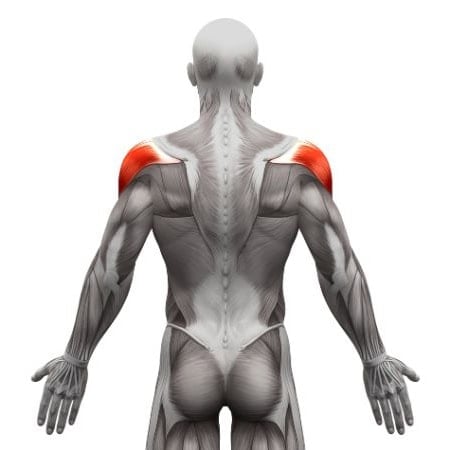
Rear delt
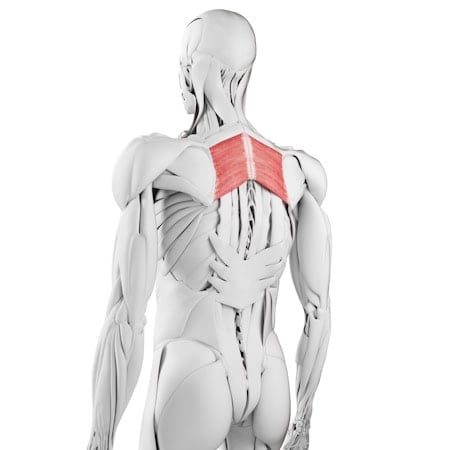
Rhomboid

Abdominal
Equipment needed for Ring Archer Pull-Up
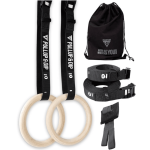
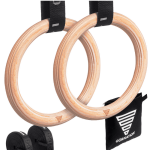
Adjust the difficulty of Ring Archer Pull-Up
How to make Ring Archer Pull-Up harder?
How to make Ring Archer Pull-Up easier?
How to make Ring Archer Pull-Up harder?
To make Ring Archer Pull-Up harder:
-
Straighten the assisting elbow completely at the top of every repetition.
-
Move the assisting ring farther laterally while maintaining shoulder control.
-
Pause in the complete archer position for two to three seconds.
-
Lower from each side over four to six seconds.
-
Add isometric pauses at several positions during the descent.
-
Perform consecutive repetitions toward one ring before switching sides.
-
Perform ring typewriter pull-ups by transferring between the rings at the top.
-
Perform ring archer pull-ups with an L-sit leg position.
-
Use a false grip throughout the repetition for ring-muscle-up-specific grip practice.
-
Grip the assisting ring with fewer fingers only after mastering the regular version.
-
Progress to assisted one-arm ring pull-ups with the free hand holding the strap lower down.
-
Progress to controlled one-arm ring pull-up holds and negatives.
-
Add light external resistance only after mastering repeatable repetitions on both sides.
How to make Ring Archer Pull-Up easier?
To make Ring Archer Pull-Up easier:
-
Perform regular ring pull-ups to build bilateral pulling strength and handle control.
-
Perform ring archer rows with the feet on the floor to reduce the vertical load.
-
Use a more upright body position during ring archer rows to make them easier.
-
Perform small side-biased ring pull-ups without fully straightening the assisting arm.
-
Keep the assisting elbow moderately bent throughout the repetition.
-
Lower the rings and use light foot assistance from the floor.
-
Use a plyo box beneath the rings for controlled leg assistance.
-
Perform banded archer pull-ups on gymnastics rings.
-
Step into the top position and perform controlled ring archer negatives.
-
Practise short isometric holds with one ring near the chest and the other arm partially extended.
