
Ring Triceps Extension
How to do Ring Triceps Extension?
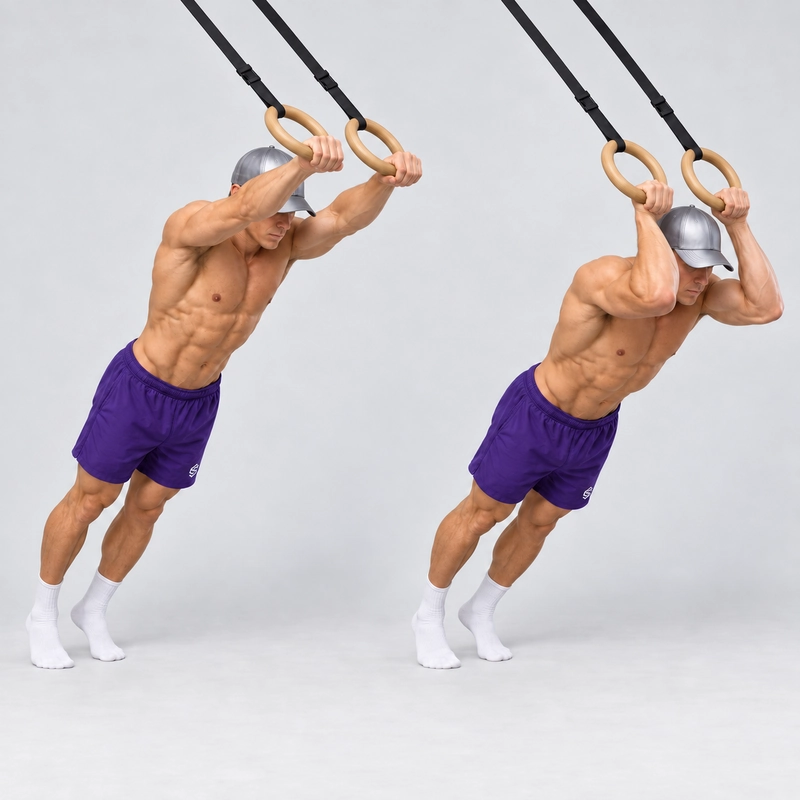
The Ring Triceps Extension is a bodyweight elbow-extension exercise performed while facing the ring anchor and leaning forward with the feet on the floor. It is also commonly called a Ring Tricep Extension or Ring Skull Crusher. From a straight-arm starting position, you bend your elbows until your hands approach the sides of your forehead and then extend your elbows to push your body back to the start.
Unlike a Ring Push-Up, in which the shoulders and elbows work together to press the chest between the rings, a strict Ring Triceps Extension keeps the upper arms comparatively still and makes elbow extension the primary action. It also differs from Ring Dips, which support the entire body above the rings and use a more vertical pressing pattern.
Holding the upper arms flexed in front of the head places the long head of the triceps at a longer muscle length than pressing exercises performed with the arms beside the torso. A 12-week cable elbow-extension study indexed by PubMed found greater triceps growth when training in an overhead rather than neutral arm position, particularly in the long head. That study used cables rather than rings, so it supports the rationale for training elbow extension at longer muscle lengths but does not prove that rings are superior to other equipment.
The main advantage of the rings is adjustability. Raising the handles and keeping the body relatively upright can make the exercise accessible, while lowering the rings or increasing the forward lean makes the same movement considerably harder. The independent handles also allow the wrists to find a comfortable orientation, although they require more control than a fixed bar.
How to Perform a Ring Triceps Extension
1. Inspect and Adjust the Rings
Attach both straps to a sturdy overhead structure designed to support bodyweight and check that the anchor, straps, buckles and rings are undamaged. Weight-test the setup before leaning into it and make sure your feet are on a dry, non-slip surface.
Set both rings to the same height and approximately shoulder-width apart. Upper-chest or shoulder height is a sensible starting point because it allows you to learn the movement with a relatively upright body position.
2. Face the Anchor and Take Your Grip
Stand facing the anchor and grip one ring in each hand with your palms facing one another. Keep the handles across the base of your palms, your thumbs wrapped around the rings and your wrists in a neutral position rather than allowing them to fold backward.
Step away from the point beneath the anchor until the straps are taut and your arms are extended in front of you. Begin with your feet approximately hip-width apart; a wider or staggered stance can provide additional stability while you learn.
3. Establish a Rigid Starting Position
Lean forward into the rings until your body forms one controlled line from your head through your shoulders, hips and heels. Brace your abdominals, squeeze your glutes and tighten your quadriceps so your body moves as one unit rather than bending at the hips or lower back.
Begin with your elbows fully extended without aggressively forcing them backward. Hold the rings approximately shoulder-width apart, keep your shoulders stable and point your elbows generally forward toward the anchor.
4. Lower Toward Your Forehead
Inhale and slowly bend your elbows while allowing your entire straight body to move toward the rings. Keep the upper arms mostly fixed relative to your torso so the motion comes primarily from elbow flexion rather than turning into a push-up.
Guide the rings toward the sides of your forehead or temples while keeping your wrists neutral and your elbows approximately shoulder-width apart. Do not push the elbows directly sideways or force them tightly together if either position feels unnatural.
5. Control the Bottom Position
Lower until your hands reach the sides of your forehead or travel slightly behind your head, provided the position remains controlled and pain-free. Your forearms may approach your biceps, but maximum depth is not required for a valid repetition.
Stop the descent if your hips sag, your lower back arches, your shoulders shift substantially, the rings begin swinging or you feel joint pain. The hands should approach the head under control without the handles striking your face.
6. Extend Your Elbows
Exhale and press through both rings by extending your elbows evenly. Maintain the same shoulder angle, body line and foot position as you push yourself away from the handles.
Finish at controlled elbow extension without snapping into lockout or forcing hypermobile elbows beyond their active end range. Stabilize the rings and reset your abdominal and glute tension before beginning the next repetition.
What Counts as a Complete Repetition?
- Both rings begin level, still and approximately shoulder-width apart.
- The athlete maintains a straight line through the head, shoulders, hips and heels.
- The upper arms remain comparatively still while the elbows bend and extend.
- The hands travel toward the forehead or slightly behind the head through a consistent pain-free range.
- The elbows remain generally forward instead of flaring uncontrollably to the sides.
- The wrists remain neutral and the straps do not provide support against the arms.
- The athlete returns to controlled elbow extension without bouncing, stepping or using hip movement.
- The repetition ends if body alignment or ring control can no longer be maintained.
Choosing the Correct Ring Height and Body Angle
Ring height and foot position determine how much bodyweight the arms must control. Start with high rings and a relatively upright torso, then adjust only one variable at a time.
- High rings and a small forward lean: This is the easiest position and the best place to learn the elbow path.
- Moderate forward lean: This produces a useful standard variation for controlled strength and hypertrophy sets.
- Low rings and a larger forward lean: This increases the lever and places substantially more load on the triceps.
- Feet elevated: Placing the feet on a stable box can create a nearly horizontal body position and should be reserved for athletes with strong ring control.
Record the ring height, foot position, repetition range and tempo when tracking progress. Performing more repetitions at a much easier angle is not necessarily an improvement over fewer repetitions at your previous angle.
Should You Lock Your Elbows?
A standard full-range repetition finishes with the elbows extended under control. This provides a clear and repeatable endpoint, but it does not mean accelerating into the joint or forcing the elbow beyond its natural position.
A continuous-tension variation that reverses direction just before full extension can also be used for hypertrophy-focused sets, but it deliberately removes part of the range and should be recorded separately. Athletes with naturally hypermobile elbows should reach active extension without trying to exaggerate the visible lockout.
Common Ring Triceps Extension Mistakes
- Turning the movement into a Ring Push-Up: If the shoulders travel substantially and the chest moves between the rings, raise the handles and focus on moving at the elbows.
- Starting at an angle that is too difficult: Excessive forward lean commonly causes flared elbows, shoulder movement and loss of body alignment.
- Flaring the elbows directly sideways: Keep them generally forward and close to shoulder width without forcing an uncomfortable position.
- Allowing the wrists to collapse: Keep the knuckles, wrist and forearm aligned so the ring does not roll toward the fingertips or deep into the palm.
- Sagging through the hips: Brace the abdominals and squeeze the glutes, or reduce the forward lean until a straight body line is possible.
- Piking to escape the bottom: Raising the hips shortens the lever and indicates that the selected angle or range is too demanding.
- Reaching with the head: Keep the neck aligned with the torso and bring the whole body toward the rings rather than jutting the chin forward.
- Forcing unnecessary depth: Progress the range gradually instead of dropping the hands behind the head before the elbows and shoulders are prepared.
- Using the straps for stability: Adjust the ring spacing so the straps remain clear of your arms rather than bracing against them.
- Pressing unevenly: End the set or make the angle easier if one ring consistently moves faster or farther than the other.
- Continuing while the rings swing: Allow the handles to settle before the next repetition.
- Snapping into lockout: Finish each repetition smoothly instead of driving the elbows aggressively beyond their normal position.
Benefits of Ring Triceps Extensions
- Direct triceps training: Keeping the upper arms comparatively still makes elbow extension the principal movement.
- Long-length triceps loading: Bringing the hands beside or behind the head trains the triceps from a position that is not emphasized as strongly by ordinary push-ups or dips.
- Highly adjustable resistance: Ring height, body angle, range of motion, tempo and external load can all be changed gradually.
- Independent ring control: Each arm must stabilize its own handle and contribute evenly to the repetition.
- Natural wrist rotation: The rings can rotate slightly to accommodate a comfortable wrist and elbow path.
- Trunk stability: The abdominals, obliques, spinal stabilizers, glutes and quadriceps maintain the rigid leaning position.
- Pressing assistance: Stronger elbow extension may support the lockout portion of push-ups, dips and other pressing exercises.
- Portable training: The exercise can be performed anywhere that the rings can be attached to a suitable anchor.
The rings change the stabilization and setup demands, but they are not universally better than a fixed bar, cables or free weights. Use the variation that allows progressive, pain-free loading and consistent technique.
Readiness and Safety
You do not need to master Ring Dips or an unsupported Ring Support Hold before learning this exercise because your feet remain on the ground. However, you should be able to maintain a rigid incline-plank position, control the rings with straight arms and move your elbows and shoulders through the intended range without pain.
Controlled Regular Push-Ups provide useful general pressing preparation. If you are unfamiliar with suspended equipment, begin with high rings and review how to select and adjust gymnastics rings before progressing the angle.
Warm up the shoulders, elbows and wrists before demanding sets; the 6-Minute Joint Warm-Up Routine provides a suitable general starting point. Begin with a conservative range and stop if you experience sharp or increasing pain, instability, numbness or tingling.
Muscular effort in the triceps is expected, but joint pain is not a progression target. If elbow or shoulder discomfort continues after reducing the angle, range and training volume, pause the exercise and seek assessment from a qualified healthcare professional.
How to Program Ring Triceps Extensions
When the exercise is being used as accessory work, perform it after your main push-ups, dips or overhead pressing. If improving this movement is the primary goal, place it earlier in the session after completing an appropriate warm-up.
- Learning the movement: Perform 2 to 3 sets of 6 to 10 controlled repetitions at an easy angle.
- Muscle development: Perform 3 to 4 sets of 8 to 15 repetitions while finishing most sets with approximately 1 to 3 technically sound repetitions in reserve.
- Strength emphasis: Use a more demanding angle for 3 to 5 sets of 5 to 8 repetitions without sacrificing elbow position or body alignment.
- Tempo: Lower for approximately two to four seconds and extend smoothly without bouncing out of the bottom.
- Rest: Rest approximately 60 to 120 seconds after moderate sets and longer when using demanding low-ring, weighted or unilateral variations.
One to three weekly exposures can work depending on your experience and the amount of push-up, dip and pressing volume already in your program. Count those compound exercises when estimating total triceps work rather than treating every exercise as unrelated volume.
Once you can complete all planned sets at the top of your repetition range with consistent depth and repetitions remaining in reserve, lower the rings slightly or increase the forward lean. Small setup changes are preferable because the difficulty can rise rapidly as the body becomes more horizontal.
Suggested Progression
- Develop general pressing control with Regular Push-Ups or incline push-ups.
- Learn partial Ring Triceps Extensions with high rings and an upright body.
- Increase the range until the hands reach the sides of the forehead.
- Build full-range repetitions while keeping the upper arms stable.
- Lower the rings or move the feet farther from the point beneath the anchor.
- Add pauses, slower eccentrics or feet elevation.
- Use a weighted vest, archer loading or single-arm repetitions only after mastering the bilateral version.
Frequently Asked Questions
Is a Ring Triceps Extension the same as a Ring Skull Crusher?
Yes. Ring Skull Crusher is an informal name for the same general elbow-extension movement and does not need a separate exercise page.
Should I face toward or away from the anchor?
For the canonical version described on this page, face the anchor, extend your arms toward the rings and lean forward. Face-away suspension extensions exist, but they should be treated as a setup variation rather than mixed into the primary demonstration.
How high should the rings be?
Start around upper-chest or shoulder height and adjust the handles until you can complete the desired range without losing your body line. The ideal measurement varies with strap location, arm length and foot position, so body angle is more useful than one universal height.
Should the rings touch my forehead?
No. Bring the handles close to the sides of your forehead or temples, but maintain enough clearance to avoid striking your face if the rings move unexpectedly.
How far should I bend my elbows?
Use the deepest range in which your wrists remain neutral, the elbows stay controlled and the shoulders and spine maintain their position. Hands beside the forehead provide a practical initial target, while hands slightly behind the head are a progression.
Should the elbows remain completely tucked?
Keep the elbows generally forward and close to shoulder width, but do not force them into a narrow position that causes wrist, elbow or shoulder discomfort. A small amount of natural movement is acceptable as long as the upper arms do not flare uncontrollably.
Does the exercise train all three heads of the triceps?
All three heads contribute to elbow extension. The long head also crosses the shoulder and is placed at a comparatively longer length when the upper arm is held in front of or beside the head.
Why do I feel the exercise mainly in my chest or shoulders?
The rings may be too low or the upper arms may be moving too much, turning the repetition into a pressing movement. Raise the handles, reduce the forward lean and practise bending only at the elbows.
Are Ring Triceps Extensions suitable for beginners?
Beginners can use them if the rings are set high enough to create a manageable angle. Athletes who cannot yet control the handles can begin with incline close-grip push-ups or fixed-bar bodyweight triceps extensions.
Are rings better than a fixed bar?
Neither variation is universally better. Rings permit independent movement and natural rotation, while a fixed bar provides greater stability and may make progressive force production easier.
Can Ring Triceps Extensions replace Ring Dips?
They can provide direct triceps work but do not reproduce the supported vertical pressing pattern or chest and shoulder demands of Ring Dips. The exercises are better used as complementary movements.
Why do my elbows hurt during the exercise?
The body angle, depth, weekly volume or lowering speed may exceed your current tolerance. Raise the rings, reduce the range, avoid snapping into lockout and stop training through persistent joint pain.
Tips for the proper execution of Ring Triceps Extension
Inspect the anchor, straps, buckles and rings before placing your bodyweight into the setup.
Set both rings to the same height and approximately shoulder-width apart.
Face the anchor and begin with the rings around upper-chest or shoulder height.
Use a neutral grip with your palms facing one another and your thumbs wrapped around the handles.
Keep your wrists aligned with your forearms throughout the repetition.
Brace your abdominals, glutes and quadriceps before beginning the descent.
Maintain one controlled line from your head through your hips and heels.
Point your elbows generally forward instead of allowing them to flare directly sideways.
Keep your upper arms comparatively still so elbow extension remains the primary action.
Bring the rings toward the sides of your forehead rather than reaching your head forward.
Lower only as deeply as your elbows and shoulders can control comfortably.
Use a slow eccentric phase instead of dropping toward the rings.
Extend both elbows at the same speed to prevent one ring from leading.
Reach full active elbow extension without snapping or forcing the joints backward.
Allow the rings to rotate slightly if that produces a more comfortable wrist and elbow path.
Pause briefly before the next repetition if the rings begin swinging.
End the set when your hips sag, your shoulders shift or your range becomes inconsistent.
Record your ring height and foot position so future sets can be compared accurately.
Muscles worked when doing Ring Triceps Extension
The Ring Triceps Extension is primarily an elbow-extension exercise, while the shoulders, forearms, trunk and lower body stabilize the upper arms, rings and leaning body position.
Primary Muscles
- Triceps brachii: The long, lateral and medial heads extend the elbow as the athlete pushes away from the rings.
- Long head of the triceps: Because this head also crosses the shoulder, holding the arms flexed in front of the head places it at a comparatively longer muscle length.
Secondary Muscles
- Anterior deltoids: The front shoulders help maintain the upper-arm position against the pull of the rings.
- Rotator cuff: The rotator-cuff muscles help control the upper-arm bones while each ring moves independently.
- Serratus anterior and trapezius: These muscles contribute to maintaining controlled shoulder-blade positioning.
- Forearms and hand muscles: The grip and forearms stabilize the handles and keep the wrists neutral.
- Rectus abdominis and transverse abdominis: The abdominal muscles resist lower-back extension as the body leans forward.
- Obliques: The obliques resist rotation when the two arms apply unequal force.
- Spinal stabilizers: These muscles help preserve the rigid torso position throughout the set.
- Glutes and quadriceps: The lower body remains contracted so the athlete moves as one connected unit.
The chest may contribute slightly to stabilizing the shoulder, but substantial chest movement usually indicates that the repetition is becoming a Ring Push-Up rather than a strict Ring Triceps Extension.
Primary Muscle(s):

Triceps
Secondary Muscle(s):

Anterior delt

Abdominal

Oblique
Equipment needed for Ring Triceps Extension
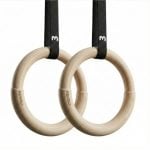
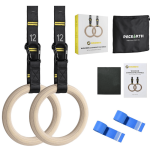
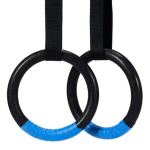
Adjust the difficulty of Ring Triceps Extension
How to make Ring Triceps Extension harder?
How to make Ring Triceps Extension easier?
How to make Ring Triceps Extension harder?
To make Ring Triceps Extension harder:
-
Lower the rings to increase the percentage of bodyweight supported by the arms.
-
Move your feet farther from the point beneath the anchor to create a greater forward lean.
-
Bring your feet together to increase the balance and anti-rotation demands.
-
Elevate your feet on a stable box to create a more horizontal body position.
-
Use a three-to-five-second lowering phase on every repetition.
-
Pause for two to three seconds with the hands beside the forehead.
-
Increase the range by allowing the hands to travel slightly behind the head while maintaining control.
-
Perform one-and-a-half repetitions by adding a second partial descent before each lockout.
-
Wear a weighted vest after mastering the unweighted movement.
-
Shift progressively more weight toward one ring to perform an archer-style extension.
-
Progress to single-arm Ring Triceps Extensions while resisting torso rotation.
How to make Ring Triceps Extension easier?
To make Ring Triceps Extension easier:
-
Raise the rings to create a more upright body position.
-
Move your feet closer to the point beneath the anchor to reduce the forward lean.
-
Widen your stance to create a more stable base.
-
Use a staggered stance while learning to control the rings.
-
Reduce the elbow-flexion range and increase it gradually over subsequent sessions.
-
Perform the exercise from the knees on a padded surface while maintaining a straight line from the knees to the head.
-
Use slow eccentric repetitions and step forward to reset instead of pressing back up.
-
Practise bodyweight triceps extensions against a stable waist-high bar before returning to the rings.
-
Use shorter sets and stop before ring control or elbow position deteriorates.
