
Weighted Back-to-Wall Deficit Handstand Push-Up
How to do Weighted Back-to-Wall Deficit Handstand Push-Up?
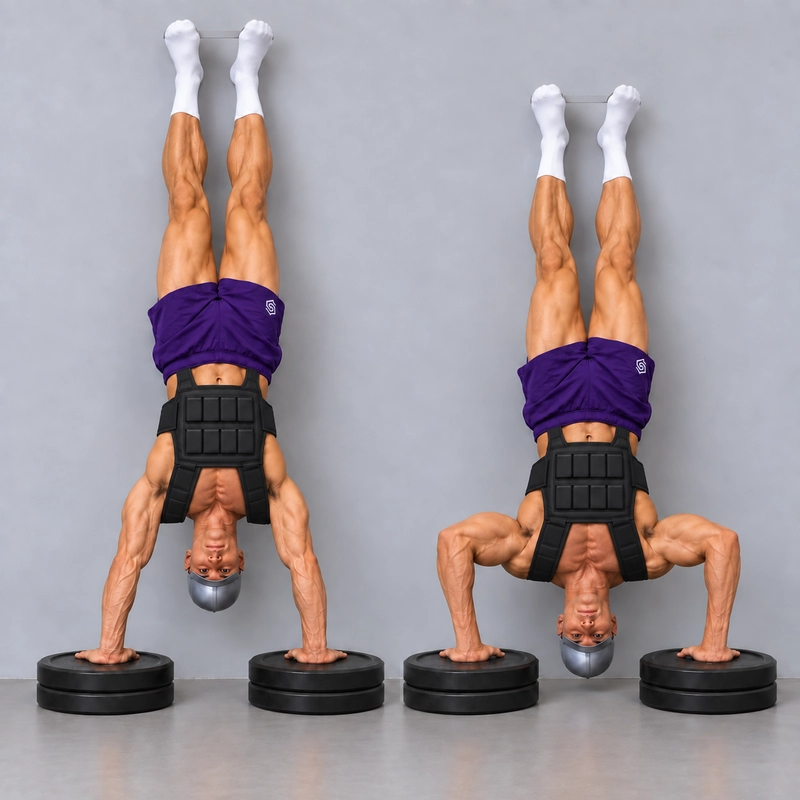
The Weighted Back-to-Wall Deficit Handstand Push-Up is a strict wall-assisted handstand press performed with the hands elevated and a weighted vest secured to the torso. Keep your back facing the wall and your heels in light contact, lower the head to a selected endpoint below hand level, then press back to straight elbows and active shoulders.
It combines two progression variables: below-hand range and external load. Establish the unweighted deficit first, then add vest resistance while keeping the depth consistent. The floor back-to-wall handstand push-up provides the baseline wall-pressing pattern; this weighted deficit adds a different setup and loading task.
The ACSM's 2026 resistance-training guidance emphasizes tailoring load and volume to individual goals and circumstances. That is useful context for choosing a manageable vest load rather than copying a fixed number. The guidance does not prescribe a weighted deficit handstand push-up protocol or establish readiness for inverted pressing.
Establish the Unweighted Version First
Before adding a vest, practise the actual supports, head path and selected deficit without external load. You should be able to control the descent, reverse the endpoint, finish at straight arms and leave the setup without relying on heel drive.
A controlled back-to-wall handstand establishes the wall-supported position, but a hold alone does not demonstrate pressing strength. The vest also changes entry and support demands, so first test loaded support separately from the loaded descent.
If overhead support or complete pressing is not yet available, use foot-supported work such as the floor pike push-up. This weighted variation is an advanced progression rather than a way to make an incomplete unweighted press successful.
Choose a Vest That Can Remain Secure When Inverted
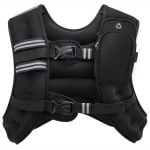
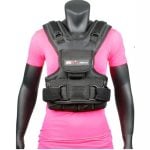
Use a compact, close-fitting vest whose intended use and retention system are suitable for handstand pressing. Its weights must remain enclosed, and the vest must not slide toward the neck or head when you turn upside down. A comfortable walking fit is not enough to establish this.
Check the instructions for your exact model, including weight retention, permitted loading and any restrictions on inverted use. For example, the Pullup & Dip weight-vest manual includes fitting and fastening instructions and warns against hanging upside down from a bar because the vest or weights may shift. Do not generalize one model's permitted use to another vest.
A manufacturer's handstand-use claim is useful product information, not a guarantee that the model fits your body or remains stable at your chosen load. If the design cannot retain its weights and position without restricting you, choose an appropriate different vest rather than relying on improvised restraints.
The weighted-vest comparison guide can help assess fit, adjustability and loading options. It contains affiliate links; its recommendations do not replace your model's instructions or the movement-specific fit check below.
How to Put On and Secure the Vest
Make all loading and fastening changes while upright and stable. Follow your model's order for loading and putting it on; some vests are easier to fit with weights removed before the chosen load is installed. Ask for help if handling the loaded vest would require an awkward lift.
- Inspect the retention system. Check seams, pockets, straps, buckles and hook-and-loop areas for wear or incomplete fastening. Use the vest only when its intended closures work properly.
- Choose and secure the load. Use compatible weights in their intended compartments. Keep left and right loading balanced and follow the manufacturer's front-to-back arrangement. Seat each weight fully and close every pocket or retaining flap.
- Place the vest correctly. Put it on with the designated front and back oriented correctly. Centre it on the torso according to its intended cut, with the collar clear of the neck and the weight sections lying close to the body.
- Set the shoulder fit. If adjustable, make the two shoulder straps even and untwisted. Use the intended padding and position the vest so it does not hang loosely, dig into the neck or block your arms overhead.
- Close the body fastening. Secure the belt, side straps or cummerbund as instructed. Remove slack so the vest hugs the torso, without compressing the ribs so much that breathing or bracing becomes restricted.
- Secure loose ends. Place strap tails in their intended keepers. Close all flaps completely and remove unnecessary pocket contents that could move or interfere with the press.
- Check comfort and movement. Take several comfortable breaths, raise the arms overhead and move through active shoulder elevation. Confirm that there is no pinching, hard pressure point or forced change in your usual overhead position.
- Check movement before inversion. Hinge forward with control and test an easy supported position. Recheck the closures if the vest gaps, twists or moves relative to the torso.
The manufacturer's Ergorilla vest fitting guide also describes a close fit that allows breathing and movement. Its specific strap assembly applies to that model; use the equivalent intended adjustments on your own vest rather than copying a different fastening system.
A thin comfortable exercise shirt can help with skin contact if appropriate for your vest. Adjust the intended padding and position to resolve rubbing. Adding bulky improvised padding can change the fit and does not solve an unsuitable size or closure.
Test the Vest in a Wall-Supported Hold Before Pressing
After the upright checks, use a light controllable load and your established wall entry to perform a brief straight-arm hold on the actual supports. Use competent assistance for the first fit check if you need help entering or observing the vest. Keep enough reserve for an immediate controlled exit.
The vest should remain close to the torso without migrating toward the chin, twisting, sagging away from the body or releasing a weight. Raise the shoulders actively and confirm that the vest does not block the lockout or change breathing comfort.
If the fit moves or becomes uncomfortable, come down before adjusting it. Refit upright and repeat the support check. If stable retention requires uncomfortable compression, the vest is unsuitable for this configuration; do not add a press to find out whether it will stay in place.
Only add the selected deficit repetition after entry, top support and exit are controlled with the vest. Recheck fit whenever you change its load or weight arrangement.
Set the Hand Supports and Head Endpoint
Prepare for hand loading with the wrist warm-up routine and progressively loaded shoulder preparation. Keep the first vest session manageable rather than using the warm-up to test maximum resistance.
Use low matched supports suitable for the combined body-and-vest load and the forward pressure of the press. Suitable stationary handles, broad flat blocks or properly stable plate supports can work. Check equal heights, grip, non-slip contact and resistance to tipping.
With handles, use a secure wrapped-thumb grip. With flat supports, give the whole palm and fingers a firm contact area; avoid a hole, rim or overhang that compromises the hand. Reject loose stacks and rotating or rocking bars.
Place the supports at a comfortable symmetrical width and leave room for the head to move slightly forward and down, away from the wall. A broad vest may also require torso clearance between support faces. Check the chosen bottom without assuming the unweighted clearance is unchanged.
Use a firm secured endpoint if a target is needed. Touch it lightly without resting or rebounding from the head. Keep the target and support bases out of your step-down route.
Record Load and Deficit as Separate Variables
Vest load means the total mass worn in the vest, including the carrier itself. The number of removable blocks alone can understate the added mass.
For example, a 1 kg (2.2 lb) carrier with 4 kg (8.8 lb) of inserts gives a 5 kg (11.0 lb) vest load. This is an arithmetic example, not a recommended starting weight. If a product label already includes the carrier, do not count it twice.
Achieved head deficit = hand-contact height minus bottom head height. Measure both from the same floor reference. Use the actual gripping surface for handles and the top under the palms for flat supports. Bottom head height means the lowest head point at the selected endpoint with the neck position consistent.
| Hand-contact height | Head endpoint | Achieved deficit |
|---|---|---|
| 8 cm (3.1 in) | 3 cm (1.2 in) above floor | 5 cm (2.0 in) |
| 8 cm (3.1 in) | Floor level | 8 cm (3.1 in) |
| 8 cm (3.1 in) | 8 cm (3.1 in) above floor | No positive deficit |
These are geometry examples, not compulsory support dimensions. If you turn around above the selected endpoint, record the smaller achieved range. A raised target at or above hand level does not demonstrate a deficit.
Log body mass, total vest mass, hand and target heights, grip, wall distance and heel assistance. Body mass plus vest mass is nominal system mass, not an exact measure of shoulder joint force or the load transmitted through the hands. Wall assistance and movement geometry affect the task.
How to Do a Weighted Back-to-Wall Deficit Handstand Push-Up
- Fit and test the vest. Complete the upright fitting sequence and brief inverted hold check before the working press.
- Confirm the setup. Check support stability, chosen positive deficit, clear head path and step-down space. Make all adjustments while upright.
- Establish the hands. Use a comfortable symmetrical width and the grip appropriate to the supports. Leave enough wall distance for the head and shoulders to move without collision.
- Enter under control. Use the loaded entry you have established, bringing the heels lightly to the wall without a forceful kick or crash.
- Set the top. Straighten both elbows, elevate the shoulders and organize the ribs and pelvis. Keep the knees straight and legs together. Confirm that the vest remains in its fitted position.
- Lower to the recorded endpoint. Bend the elbows smoothly and let the head move forward and down below hand level. Keep the vest stable, hand pressure even and heel contact light.
- Reverse under arm support. Use only a gentle target touch if one is selected. Do not rest on the head, bounce from the target or push the vest against the wall for support.
- Press to lockout. Extend the elbows without knee bend, hip drive or heel pushing. Return to active straight-arm support with the vest still stable.
- Finish before control deteriorates. Use your practised step-down while enough pressing reserve remains. Do not adjust straps or weights while inverted.
Use a controlled lowering pace and breathe steadily as practical. The exact elbow path depends on your proportions, hand spacing and apparatus; avoid forcing a rigid angle or changing the hand width to compensate for a shifting vest.
Completion Standard
- The total vest mass and selected deficit are recorded.
- The vest and its weights remain securely retained throughout entry, pressing and exit.
- Both hands stay on matched stationary supports.
- Each repetition begins and ends with straight elbows and active shoulder elevation.
- The head reaches the predetermined below-hand endpoint under control.
- Only light heel contact provides wall balance assistance; the torso and vest do not rest against the wall.
- No head bearing, rebound, knee-driven kip, hip drive or forceful heel push contributes to the press.
- The athlete retains control to leave the setup.
A heavier repetition at a smaller unrecorded deficit is not the same standard. Neither is a rep that finishes only because the heels push harder or the vest braces against the wall. If a spotter supports the body, record the repetition as assisted.
A controlled descent without an upward press is separate negative work. The negative handstand push-up explains that descent-and-reset task; it should not be counted as a complete weighted deficit repetition.
Progress the Load Without Changing the Depth
Choose the smallest practical vest load that preserves the established deficit, controlled return and loaded exit. The carrier itself may already be meaningful resistance. Use the smallest compatible increase that allows the intended balanced weight arrangement rather than adding a block asymmetrically just to create a smaller step.
First repeat that load at the same depth. A coaching checkpoint might be three sets of three strict repetitions across two sessions, with no vest migration or extra heel assistance. Use it as a decision aid, not a guarantee or mandatory threshold. Test the next load with a controlled single before restoring the previous volume.
Increase external load or deficit depth one at a time. If you choose to work deeper, hold the vest mass steady or reduce it and establish a new baseline. There is no need to progress every session or move to a fixed 10 kg vest.
The wall-facing handstand push-up is a separate orientation with a different entry and wall-contact pattern. Do not change orientation, depth and load together and treat the result as an equivalent progression.
Programming and a Useful Training Log
For an athlete already prepared for this setup, begin with a few controlled singles to confirm fit and pressing. A conservative coaching starting point is 3 sets of 1–3 repetitions with around 3 minutes of rest, initially in one weekly session alongside easier pressing practice. Adjust to recovery and performance rather than treating the dose as a validated protocol.
Stop before the shoulders or triceps lose the ability to control the bottom and exit. If the vest shifts, breathing becomes restricted, support moves or the selected depth cannot be reversed, end the attempt and regress the relevant variable.
Record the vest model and total worn mass, insert arrangement, deficit, grip, wall spacing, repetitions and whether each finish remained strict. A useful next-session goal is to repeat the same load and depth without vest adjustment or increased heel pressure before adding resistance.
Common Vest and Pressing Problems
- Vest slides toward the head: come down and refit using the intended adjustments. If it still migrates, choose a suitable different fit or model.
- Breathing or shoulder motion feels restricted: adjust position and fastening upright. Stable retention should not require painful or movement-limiting compression.
- A hard edge presses into the collarbone or chest: correct the intended padding and placement, or choose a different fit. Do not mask an unsuitable shape with improvised bulky padding.
- Weights rattle or pockets open: stop and secure compatible inserts and closures before another attempt.
- More heel drive appears as load rises: reduce the vest mass and restore the previous assistance standard.
- The bottom becomes shallower: keep the endpoint fixed and reduce load or repetitions instead of claiming an equivalent heavier result.
- The vest catches the wall or equipment: reassess fit and clearance without using that contact to support the press.
- Entry requires a much harder kick: reduce the load and establish loaded support control separately before pressing.
Stop for sharp pain, numbness, dizziness, unusual visual symptoms, chest pressure or marked breathing difficulty. Persistent or recurring symptoms need appropriate professional assessment. A secure vest and wall support do not remove the demands of loaded inversion.
Questions About Vest Stability
How tight should the vest be?
Close enough to remain in position through the tested handstand and press, while allowing comfortable breaths, bracing and active overhead shoulder movement. If you must restrict those functions to stop slipping, the fit or model is unsuitable.
Should the weights be equal in front and back?
Follow the loading layout for the specific vest. For conventional multi-pocket designs, balanced left-right loading and an appropriate front-back arrangement help keep the vest centred. Plate-carrier or other designs may have their own permitted combinations; do not override the instructions.
Can I tighten it while upside down?
No. Exit under control, adjust upright and repeat the support check before pressing again.
Does a 5 kg vest mean 5 kg of removable weights?
Not necessarily. Record the complete worn mass, including the carrier, and check whether the product's stated mass already includes it.
Can I use a vest that works well for running?
Only if its intended use and retention system suit this movement and it passes the specific fitted inverted check. Upright comfort alone does not show that the vest or inserts will remain secure upside down.
Tips for the proper execution of Weighted Back-to-Wall Deficit Handstand Push-Up
Establish the unweighted deficit press on the actual supports before adding a vest load.
Follow the exact vest's instructions, balance compatible inserts as intended and close every weight-retention flap.
Fit shoulder and body fastenings upright so the vest stays close without neck pressure, restricted breathing or blocked overhead movement.
Test a brief controlled wall-supported hold with the chosen load before pressing; exit if the vest migrates, twists or releases a weight.
Record the complete worn vest mass, including its carrier, separately from the achieved below-hand deficit.
Use matched stationary hand supports suitable for combined loading, with room for the head, vest and practised exit.
Keep heel contact light, knees straight and ribs and pelvis controlled without resting the vest or torso against the wall.
Reach the recorded positive deficit under arm support and press back to straight elbows without head bearing, rebound or leg drive.
Increase vest load or deficit depth one at a time, keeping grip, target and wall assistance consistent.
Stop with enough reserve to leave the setup; make all strap, weight and apparatus adjustments upright.
Muscles worked when doing Weighted Back-to-Wall Deficit Handstand Push-Up
The Weighted Back-to-Wall Deficit Handstand Push-Up loads the shoulders and triceps during a wall-assisted press below hand level. The vest adds external resistance, while the hands, shoulder blades and trunk control the inverted body. The wall assists balance through light heel contact rather than producing the upward press.
Main Pressing Muscles
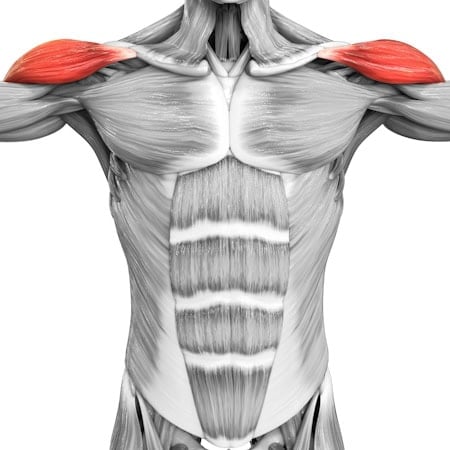
- Anterior deltoids: contribute strongly to the loaded shoulder action during lowering and pressing.
- Triceps brachii: control elbow flexion and extend the elbows against the loaded movement.
- Lateral deltoids: assist shoulder movement and upper-arm control.
Assisting and Stabilizing Muscles
- Upper pectoralis major: assists pressing according to arm and torso position.
- Serratus anterior and trapezius: coordinate shoulder-blade movement and the active overhead finish.
- Rotator-cuff muscles: stabilize the shoulders through the selected range.
- Forearm and hand muscles: stabilize flat-palm contact or maintain a secure handle grip.
- Abdominals, obliques and spinal stabilizers: control the trunk beneath the fitted vest and limit unwanted arching or rotation.
- Glutes, quadriceps and other leg stabilizers: maintain a controlled lower body without contributing a kip or heel push.
External load does not establish a precise percentage increase in muscle activation or joint force. Keep the actual vest mass, range and wall assistance consistent when judging progress, and avoid shifting pressure through the vest against the wall.
Primary Muscle(s):

Anterior delt
Secondary Muscle(s):
Lateral delt

Trapezius

Triceps
Equipment needed for Weighted Back-to-Wall Deficit Handstand Push-Up
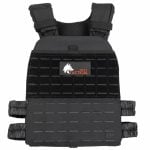
Adjust the difficulty of Weighted Back-to-Wall Deficit Handstand Push-Up
Adjust external vest load and achieved deficit separately. First keep depth, grip and light heel contact fixed while introducing a small controllable vest load. Recheck retention, breathing, shoulder movement and loaded entry/exit whenever the weight arrangement changes. Reduce or remove load before using extra heel assistance or losing depth. Changing wall orientation or grip creates a different recorded configuration.
How to make Weighted Back-to-Wall Deficit Handstand Push-Up harder?
How to make Weighted Back-to-Wall Deficit Handstand Push-Up easier?
How to make Weighted Back-to-Wall Deficit Handstand Push-Up harder?
To make Weighted Back-to-Wall Deficit Handstand Push-Up harder:
-
Add the smallest compatible balanced load increase while keeping the deficit, grip, wall spacing and heel assistance unchanged.
-
Add one strict repetition at the same recorded vest mass and depth while preserving the loaded exit.
-
Use a controlled three-second descent at the same load and endpoint without allowing vest migration or increased heel pressure.
-
Increase the achieved deficit slightly at a fixed or reduced vest load, then establish a new baseline before adding weight again.
How to make Weighted Back-to-Wall Deficit Handstand Push-Up easier?
To make Weighted Back-to-Wall Deficit Handstand Push-Up easier:
-
Reduce the complete vest load using the manufacturer's permitted balanced arrangement, then recheck fit and inverted stability.
-
Remove the vest and restore complete unweighted repetitions through the same recorded deficit.
-
Reduce the selected positive deficit or return to floor-range wall pressing, recording the change rather than mixing it with the previous loaded result.
