
Single-Leg Box Squat
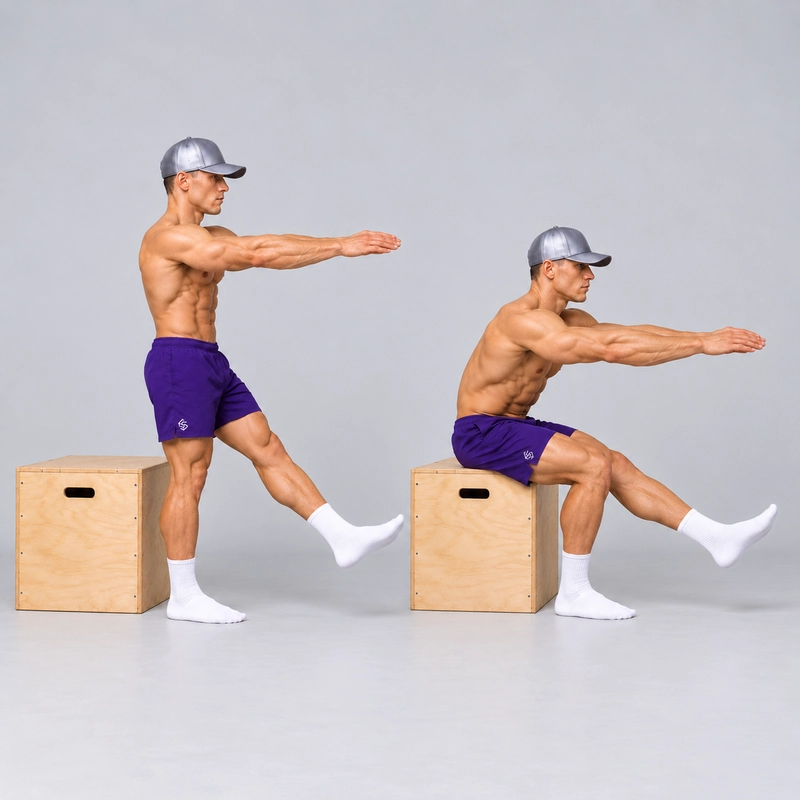
How to do Single-Leg Box Squat?
The Single-Leg Box Squat is a bodyweight squat performed with one foot on the floor and a stable box behind you. Lower on the working leg until you sit on the box, pause briefly without rocking, then stand using the same leg. Keep the free foot clear of the floor and use no hand assistance.
How This Version Differs From Other Single-Leg Squats
The defining combination is a floor-supported working foot, a fully seated pause at a chosen height, and an unassisted single-leg rise. The box lets you practise the upward phase at a repeatable depth before attempting a deeper unsupported squat.
| Related exercise | What changes? |
|---|---|
| Bench-assisted single-leg squat negatives | Lower on one leg and use both legs to reset. Here, one leg also completes the ascent. |
| Bench-assisted pistol squat with heel support | The current variation uses a light seat touch and allows assistance on the return. Here, briefly sit and rise without hand or free-foot help. |
| Hand-assisted pistol squat | A fixed upright provides adjustable hand support. Here, the box sets depth and the hands remain free. |
| Single-leg squat off a box | Stand on top of the platform and let the free leg hang beside it. Here, stand on the floor and sit onto the box behind you. |
| Full pistol squat | Descend into a deep squat without a seat. Here, box height limits the range and each rise follows a seated pause. |
You may also hear this exercise called a box pistol squat or pistol squat to a box. Those names can describe the same task. The movement standard matters more than whether the seat is called a box or a bench.
The exercise trains the working leg through both lowering and rising while making depth easy to reproduce. It can be useful when a full pistol is not yet available, but it remains demanding single-leg work. The ACSM's resistance-training guidance emphasizes tailoring load and volume to the individual. Apply that principle by choosing a box height and practice volume you can control, rather than copying another athlete's setup.
Readiness: Control the Rise as Well as the Descent
First build a comfortable two-leg squat and reliable single-leg balance. The narrow-stance squat offers a bilateral squat option, but no fixed number of repetitions proves that you are ready for this exercise.
At your chosen box height, you need enough strength to stand on the working leg after the seated pause. Being able to lower onto the box does not establish that you can get back up without help.
Rehearse the setup with both feet available, then try a controlled single-leg repetition at a manageable height. Keep the free foot ready to plant if you need a safe two-leg reset. If the ascent requires that reset, record negative or assisted work and choose an appropriate regression for the next attempt.
Stop the set for sharp pain, dizziness, repeated loss of balance or an uncontrolled landing onto the box. Persistent pain or an unexplained change in ability warrants individual assessment rather than forcing the next progression.
Set Up the Box Behind You
Use a rigid, stable plyometric box with a firm top that can support seated loading. Place it on a level, non-slip surface and test for sliding or tipping. A firm stable bench can perform the same role; a soft sofa, rolling chair or loose stack of objects is unsuitable.
Keep the working foot on the floor. Position the box behind the pelvis, close enough that you can sit onto its top without reaching backward or dropping onto the front edge. Leave sufficient top area for a secure seated position and space in front for the free leg.
Check the foot-to-box distance before the working set. Once seated, the working heel should be in a position that allows you to bring your weight over the foot and rise smoothly. Do not adopt a vertical-shin powerlifting-box-squat setup if it leaves the foot too far forward for this single-leg rise.
Keep the same foot placement through the descent, pause and ascent. Use reliable floor grip and ensure the box stays stationary. Do not change box orientation during a set or turn a soft cover into an unrecorded seat-height change.
Choose and Record the Box Height
Start with a height from which you can complete the seated pause and same-leg rise without pushing with the hands, planting the free heel or launching with momentum. Around knee height can be a practical reference, but a higher appropriate box may be needed initially.
A 45 cm (17.7 in) box is one possible equipment dimension, not a universal starting requirement. The same box can create different hip and knee positions for athletes with different leg lengths. A lower box generally increases the squat range; establish each new height through controlled practice.
Measure from the floor to the seated contact surface. Record the actual height, arm position, free-leg position and any assistance. A set at 55 cm (21.7 in) is not equivalent to the same count at 45 cm (17.7 in). The 10 cm (3.9 in) difference changes the task; these measurements are examples, not required progression steps.
How to Do a Single-Leg Box Squat
- Start standing in front of the box. Confirm the seat position, working-foot placement and clear space for the free leg.
- Lift the free leg forward. Keep it approximately straight, with the heel clear of the floor. Reach the arms forward as a steady counterbalance without gripping a support.
- Lower on the working leg. Bend the knee and hip while guiding the pelvis toward the box. Keep the heel and forefoot planted, and let the trunk lean forward naturally to stay balanced.
- Sit with control. Place the pelvis securely onto the box without dropping, bouncing or letting the free foot land.
- Pause briefly seated. Allow the seat to support the pelvis for about one second while maintaining an organized trunk and working-foot position. Keep the hands away from the thigh and box.
- Stand on the same leg. Bring your weight over the working foot with a controlled forward lean and extend the hip and knee. Avoid rocking backward and forward, swinging the free leg or pushing from the box.
- Finish upright. Return to comfortable hip and knee extension, regain balance and keep the free foot clear until the repetition is complete.
- Reset and repeat. Preserve the same setup for the next repetition. At the end of the set, place the free foot down safely before changing sides.
Use a smooth lowering pace; about two to three seconds can help you practise control. The one-second seated pause is this page's coaching standard, not a clinical test. Keep breathing: an inhale on the descent and exhale as you rise provides a simple rhythm.
Why Pause on the Box?
The pause makes the bottom position reproducible and prevents an immediate touch-and-go return. You briefly transfer support to the seat, then have to organize the rise from that position. Stay controlled rather than relaxing into a slump or rocking backward.
Research comparing loaded squats and box squats has examined the change from a continuous reversal to a box-supported transition. That study involved two-leg barbell squats in trained men; it does not establish that this single-leg exercise is superior or validate our pause duration. Here, the pause serves a clear coaching and repetition-standard purpose.
Completion Standard
- The working foot remains on the floor with the heel and forefoot planted.
- The same leg controls both the descent and the unassisted return.
- The pelvis is supported on the box during a brief seated pause.
- The free foot remains clear of the floor during the working repetition.
- The hands do not push on the thigh, box or another support.
- There is no bounce, repeated rocking or forceful arm/free-leg swing.
- The repetition finishes upright at comfortable hip and knee extension.
One standing-to-seated-to-standing cycle counts as one complete repetition. A one-leg descent followed by a two-leg rise is negative work. A repetition with hand support or free-foot help is assisted work. A light box touch without the seated pause is a different version; record it separately.
Training Volume and Progression
A practical starting option is two sets of three to five controlled repetitions per leg, with around two minutes of rest between demanding sets. If that is too much, use controlled singles with rest, a higher suitable box or an assisted variation. These are adjustable coaching suggestions, not a researched prescription for this exact exercise.
Start with the side that needs more attention and initially match its clean count on the other side. Avoid adding extra repetitions to a fatigued side simply to reach a target. Two nonconsecutive sessions per week can provide a manageable starting schedule alongside the rest of your leg training.
Build repeatability at one height before lowering the box. For example, two sets of five controlled repetitions per leg across two sessions can serve as a coaching checkpoint. Check the pause, free-foot clearance and unassisted ascent, not just the count. Meeting that checkpoint is not a guarantee that a much lower box will be manageable.
Use the smallest practical height change supported by stable equipment, then test a controlled repetition before rebuilding volume. If you need assistance or lose the pause, return to the previous setup. Change height, tempo or load one at a time.
If deeper squatting reveals limits in ankle movement or free-leg clearance, use the squat mobility guide for relevant preparation and keep strength practice within the range you can control. You can also train a deeper assisted pistol separately; depth with hand assistance and independent strength at a higher box answer different training needs.
A full pistol squat is an optional next goal, not a required destination. If you want more resistance at the same box height, add a small controllable load only after bodyweight repetitions are consistent. A securely fitted weighted vest can preserve the free hands; a weight held forward also changes the counterbalance. Record the loading method and do not assume that every added weight makes balance harder.
Common Mistakes and Corrections
- Dropping onto the seat: use a higher suitable box or an assisted negative until the final part of the descent is controlled.
- Only brushing the box: sit briefly and reset so the repetition matches this paused version.
- Planting the free heel to escape the bottom: finish safely, record the assistance and choose a higher box or regression next time.
- Rocking to launch the rise: keep a settled seated pause, then use a controlled forward lean without repeated backward-forward motion.
- Forcing a vertical torso: allow a natural lean while keeping the trunk controlled. The exact angle depends on your proportions and setup.
- Letting the working knee collapse inward: guide it in the same general direction as the toes and reduce the challenge if alignment deteriorates.
- Changing the foot position while seated: adjust the setup between attempts and repeat with consistent placement.
Does the Free Leg Have to Stay Completely Straight?
The standard demonstration keeps the free leg forward and approximately straight, with the heel clear throughout. You do not need to force the knee into hyperextension. A bent-free-knee version can help with clearance, but record that modification and keep it consistent when comparing sessions.
Is a Box Squat Always Easier Than a Pistol Squat?
A higher seat reduces the depth you must complete, which can make single-leg rising accessible before a full pistol. The seated pause also changes the transition, so there is no fixed difficulty ratio. Compare height, assistance, leg position and completion standard rather than relying on the exercise name alone.
Tips for the proper execution of Single-Leg Box Squat
Keep the working foot on the floor. The box supports the pelvis at the bottom; you do not stand on top of it.
Choose a height from which you can stand on the same leg after pausing seated. Lowering control alone is not enough for the complete repetition.
Place the box close enough for a secure landing onto its top, without reaching backward or catching only its front edge.
Maintain contact through the working heel and forefoot. Avoid shifting entirely onto the heel or lifting it as you rise.
Allow a controlled forward torso lean. Forcing the trunk upright can make it harder to balance and initiate the rise.
Keep the free leg forward with its heel clear. Record a bent-knee modification rather than changing its position between repetitions.
Sit briefly with the pelvis supported and the trunk organized. Avoid a light touch-and-go reversal or a relaxed slump.
Keep the arms available for steady counterbalance, without pushing on the thigh or box or swinging to launch the ascent.
If you need the free foot to help, use it to finish safely and record assisted or negative work. Choose a suitable regression for the next attempt.
Track box height, foot placement, pause, free-leg position and load. Progress one variable while keeping the others consistent.
Muscles worked when doing Single-Leg Box Squat
Primary muscles
- Quadriceps: control knee bending during the descent and extend the working knee as you stand.
- Gluteus maximus: contributes to controlling hip flexion and extends the working hip during the rise.
Supporting muscles
- Gluteus medius and minimus: help control the pelvis and working thigh during single-leg support.
- Hamstrings and adductors: contribute to hip control and coordinated lower-body support.
- Calf and foot muscles: help control the ankle and maintain the planted foot as the body moves over it.
- Abdominals, obliques and spinal stabilizers: help manage trunk position and resist unwanted rotation.
- Hip flexors and quadriceps of the free leg: help hold the leg forward and keep the heel clear of the floor.
The brief seated phase changes the support condition before the rise. Relative muscular demands depend on box height, foot placement, trunk position and assistance. Do not treat the box-squat research as proof of greater muscle activation, injury prevention or a particular strength improvement in this single-leg variation.
Primary Muscle(s):
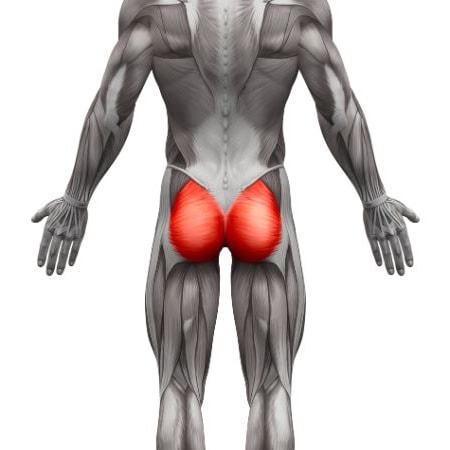
Glutes
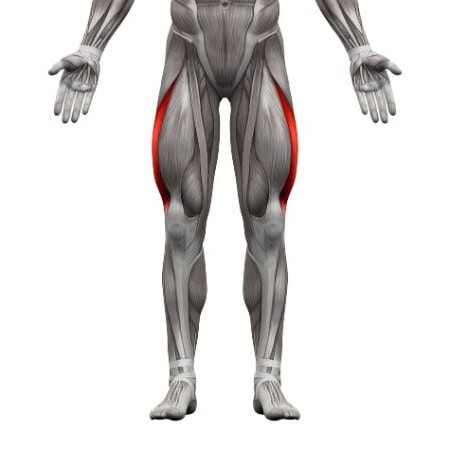
Quads
Secondary Muscle(s):
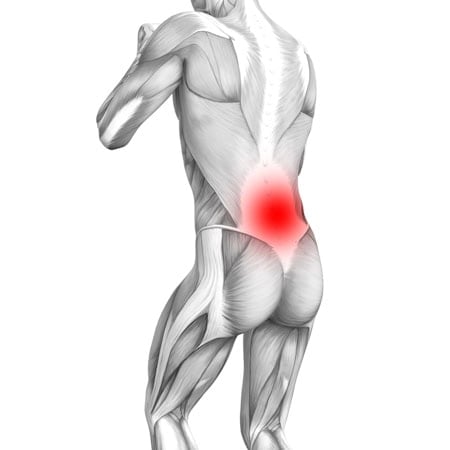
Lower back

Abdominal
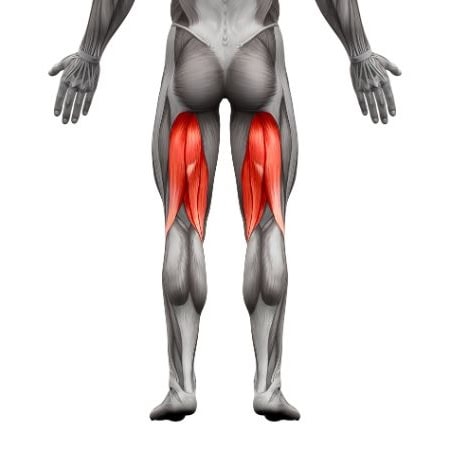
Hamstring
Equipment needed for Single-Leg Box Squat
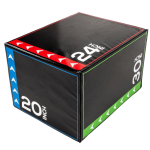
Adjust the difficulty of Single-Leg Box Squat
Adjust box height first so the same working leg can lower, pause seated and stand without help. A higher suitable seat reduces the required range; a lower seat increases it. Use assistance or a two-leg reset when needed, and identify that work separately. Once complete bodyweight repetitions are repeatable, progress depth, repetitions, tempo or load one variable at a time.
How to make Single-Leg Box Squat harder?
How to make Single-Leg Box Squat easier?
How to make Single-Leg Box Squat harder?
To make Single-Leg Box Squat harder:
-
Use a slightly lower stable box while preserving the seated pause, free-foot clearance and same-leg unassisted rise. Establish a new baseline at that height.
-
Add a controlled repetition or another set at the same height and assistance standard without losing the pause or final standing position.
-
Take about three to five seconds to lower onto the same box, then maintain the brief seated pause and smooth unassisted rise.
-
Add a small controllable external load only after the bodyweight version is repeatable. Keep box height fixed and record the load and its position; a forward-held weight also changes counterbalance.
How to make Single-Leg Box Squat easier?
To make Single-Leg Box Squat easier:
-
Use a higher rigid, stable box that permits a secure seated position and an unassisted rise with the working foot planted. Record the new height.
-
Hold a securely anchored upright and use enough hand assistance to control both directions. Record this as an assisted single-leg squat to a box, then reduce support gradually.
-
Lower onto the box on one leg, then plant both feet to stand. This is the single-leg squat negative regression, not a complete unassisted repetition.
