
Back Bridge
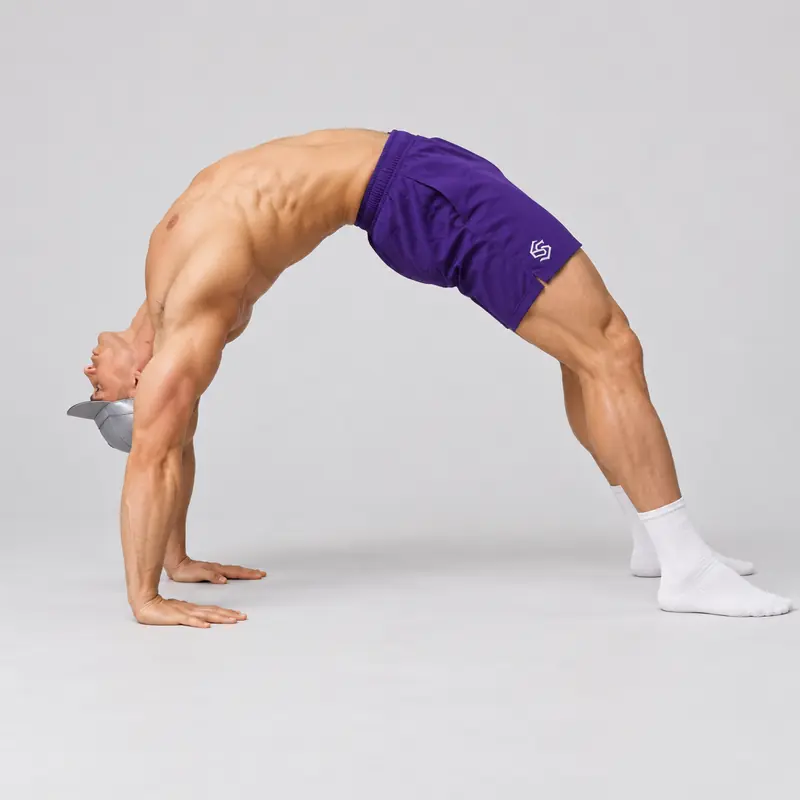
How to do Back Bridge?
The back bridge is a bodyweight mobility and strength exercise in which the hands and feet remain on the floor while the chest, hips and abdomen rise into an arched position. It is commonly called a gymnastics bridge, full bridge or wheel pose.
Unlike the glute bridge, the back bridge lifts the shoulders from the floor and places weight through the hands. This requires substantially more wrist extension, overhead shoulder mobility, spinal extension and full-body coordination. The tabletop hold is a useful starting point for athletes who are not ready to support themselves in a full backbend.
The aim is not simply to bend as far as possible through the lower back. A controlled bridge distributes the position across the shoulders, upper back, hips and spine while the hands, feet and supporting muscles remain active.
Because the exercise combines strength with a deep end-range position, it should be trained progressively after warming up. Mayo Clinic’s flexibility guidance recommends warming the body before stretching, moving smoothly rather than bouncing and reducing the range if a stretch becomes painful.
Equipment and Setup
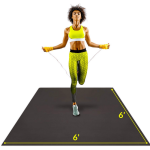
Perform the back bridge on a firm, level and non-slip surface. An exercise mat can improve comfort, but it should not be so thick or soft that your hands and feet become unstable.
- Remove objects that could interfere with your hands, head or feet.
- Make sure the mat cannot slide across the floor.
- Train barefoot or wear shoes with reliable floor grip.
- Avoid attempting the exercise on a bed, sofa or other unstable surface.
Prepare your shoulders, elbows, wrists and spine with the joint warm-up routine. The wrist warm-up routine is particularly useful because the full bridge places the wrists in considerable extension.
General flexibility guidance from Mayo Clinic recommends warming up before stretching, using smooth movements and treating tension—not pain—as the appropriate limit.
Starting Position
- Lie on your back with your knees bent and your feet flat on the floor.
- Place your feet approximately hip-width apart, with your heels reasonably close to your glutes.
- Place your palms beside your ears with your fingers pointing toward your shoulders and feet.
- Position your hands approximately shoulder-width apart.
- Point your elbows upward rather than allowing them to spread widely to the sides.
- Keep your knees tracking in approximately the same direction as your toes.
How to Perform the Back Bridge
- Brace before pressing. Tighten your legs, glutes and trunk without holding your breath.
- Press through your feet. Begin lifting your hips while keeping both feet flat and stable.
- Push firmly through both palms. Extend your elbows and raise your shoulders and head away from the floor.
- Lift your chest. Direct your chest toward the wall behind your head rather than concentrating the entire bend in your lower back.
- Open the shoulders. Continue pressing the floor away until your arms are as straight as your current mobility allows.
- Maintain lower-body alignment. Keep your feet planted and prevent your knees from collapsing inward or spreading excessively.
- Hold the position. Maintain an even, controlled arch while breathing normally.
- Exit slowly. Bend your elbows and knees and lower your upper back, hips and body to the floor without dropping onto your head or neck.
Do not use the top or back of your head as a weight-bearing support. If you cannot lift your head clear of the floor, use a hands-elevated bridge or another regression instead of forcing the full position.
Breathing
Inhale before initiating the press and exhale gradually as you lift into the bridge. Once stable, take slow breaths without relaxing your arms or legs. Exhale as you lower under control.
What Counts as a Full Back Bridge?
A strict back bridge should meet the following standards:
- Both palms remain flat and securely planted.
- Both feet remain flat without sliding.
- The head is completely clear of the floor.
- The hips and chest are elevated into a continuous arch.
- The elbows are straight or very close to straight.
- The knees remain aligned with the feet.
- The position can be held without sharp pain, uncontrolled shaking or breath-holding.
- The athlete can return to the floor under control.
The depth and shape of the bridge will vary with limb length and individual mobility. A higher arch is not automatically better if it is achieved by forcing the lower back, allowing the hands to slide or losing control of the shoulders.
Common Mistakes
Concentrating the Entire Bend in the Lower Back
Pushing only the hips upward can create a sharp hinge through the lumbar spine. Press your chest toward the wall behind your head and work on shoulder and upper-back mobility alongside the bridge.
Allowing the Elbows to Flare
Wide elbows make it more difficult to press through the arms and can reduce shoulder stability. Begin with the elbows pointing upward and keep the forearms approximately parallel.
Letting the Knees Fall Outward
Excessive knee separation often accompanies poor foot pressure or reduced hip control. Keep the knees tracking in the same general direction as the second and third toes.
Resting on the Head
The head should not support your bodyweight. If you become stuck with your head on the floor, lower completely and use an easier hands-elevated variation.
Turning the Head While Loaded
Do not look from side to side while holding the bridge. Keep your neck comfortable and your gaze generally between your hands.
Forcing Straight Arms
Straight elbows are the eventual standard, but forcing them before you have sufficient shoulder mobility can shift stress into the wrists or lower back. Use an elevated regression and gradually improve the position.
Placing the Feet Too Far Away
Feet positioned too far from the hips can make it difficult to lift the pelvis. Bring your heels closer while maintaining full-foot contact.
Standing on the Toes
Rising onto the toes may temporarily create a higher arch but reduces the stability of the strict floor bridge. Keep the heels down for the standard variation.
Bouncing Into a Deeper Position
Do not bounce or repeatedly force the chest past its controlled range. Increase the bridge gradually through steady practice.
Dropping Out of the Bridge
Fatigue can make the exit less controlled than the entry. End the hold while you still have enough strength to lower yourself smoothly.
Benefits of the Back Bridge
- Develops backbend mobility: The exercise challenges shoulder flexion, spinal extension and hip extension in one integrated position.
- Strengthens the supporting muscles: The shoulders, triceps, spinal extensors, glutes and legs work together to hold the body above the floor.
- Improves overhead positioning: Pressing the chest through the arms develops control in an overhead shoulder position.
- Builds end-range strength: Unlike a passive stretch, the bridge requires you to support and control your body in the extended position.
- Develops full-body coordination: The hands, shoulders, spine, hips and feet must produce and distribute force simultaneously.
- Provides a foundation for advanced skills: A strong bridge can support later training for bridge push-ups, wall walks, kickovers and gymnastics backbending skills.
These benefits depend on gradual, pain-free practice. The back bridge should not be presented as a treatment for back pain or as a guaranteed method of preventing injuries.
Readiness and Safety
Useful preparation exercises include the tabletop hold, cobra push-up and cat-cow thoracic mobilization.
As a practical coaching guideline, you should be able to hold a tabletop for approximately 20 seconds, tolerate the hand position without wrist pain and press into a hands-elevated bridge without loading your head before attempting the full floor variation. These are useful checks rather than universal requirements.
Stop immediately if you experience sharp wrist, shoulder, neck or back pain; numbness or tingling; pressure through the head or neck; dizziness; or loss of control. Anyone with a current spinal, shoulder, elbow or wrist injury should obtain appropriate professional guidance before training a deep backbend.
Do not attempt a standing drop-back simply because you can hold a bridge from the floor. Entering from standing is a separate advanced skill with a greater risk of falling and should be learned progressively, preferably with qualified supervision.
Back Bridge Progression
- Glute bridge
- Tabletop hold
- Cobra push-up
- Hands-elevated back bridge
- Back bridge with partially bent elbows
- Full back bridge
- Bridge rocks
- Bridge push-ups
- Single-leg back bridge
- Wall walk to bridge
- Bridge kickover or standing drop-back
Programming Recommendations
After warming up, perform two to four sets of 10 to 30 seconds with approximately 60 to 90 seconds of rest. Choose a hold duration that allows a controlled exit and does not produce pain or pressure through the head.
Practice two or three times per week while the body is warm. If the bridge is primarily a mobility goal, it usually fits better later in a workout or in a dedicated mobility session than as the first exercise performed while cold.
Progress by improving one quality at a time: smoother entry, longer pain-free hold, straighter elbows, better shoulder opening or a slightly smaller distance between the hands and feet. Do not chase a deeper arch at the expense of control.
Frequently Asked Questions
Is a back bridge the same as a glute bridge?
No. A glute bridge keeps the shoulders and arms on the floor and primarily trains hip extension. A back bridge supports the body on the hands and feet and requires substantially more wrist, shoulder and spinal mobility.
Is a back bridge the same as Wheel Pose?
The full floor positions are generally equivalent. Back bridge or gymnastics bridge is more common in gymnastics and calisthenics, while Wheel Pose, Chakrasana and Upward Bow Pose are common yoga terms.
Do the arms have to be completely straight?
Straight arms are the standard for a full back bridge. However, a controlled bridge with slightly bent elbows can be used as a progression while shoulder mobility and pressing strength improve.
Why do I feel the bridge mainly in my lower back?
You may be relying on lumbar extension because your shoulders, upper back or hips are not contributing enough to the position. Use an elevated regression, press your chest through the arms and continue working on shoulder and thoracic mobility.
Should the feet and hands be close together?
Not initially. Use a distance that allows stable hands and feet, clear head position and controlled breathing. Gradually bringing the hands and feet closer makes the arch more demanding.
Can I practice the back bridge every day?
Gentle mobility preparation may be performed frequently, but full bridges load the wrists, shoulders and spine at end range. Begin with two or three sessions per week and adjust according to recovery and joint comfort.
Tips for the proper execution of Back Bridge
Warm up your wrists, shoulders, hips and spine before attempting the back bridge.
Place your palms beside your ears with your fingers pointing toward your shoulders.
Press evenly through both hands and both feet.
Keep your knees tracking in the same general direction as your toes.
Direct your chest toward the wall behind your head to involve the shoulders and upper back.
Keep your head completely clear of the floor throughout the hold.
Do not turn your head while your bodyweight is supported by your hands and feet.
Breathe steadily instead of holding your breath in the deepest position.
Finish the hold while you still have enough strength to lower under control.
Muscles worked when doing Back Bridge
The back bridge combines an isometric full-body hold with a deep backbend. Its muscular demands change depending on the athlete’s proportions, mobility and bridge shape.
Primary Muscles
- Spinal extensors: The erector spinae and deeper back muscles help maintain the extended spinal position. The different layers and functions of the back musculature are summarized in the NCBI overview of back-muscle anatomy.
- Shoulders: The anterior deltoids and surrounding shoulder muscles help support the arms in an overhead position.
- Glutes: The gluteus maximus contributes to hip extension and helps maintain the elevated pelvis.
- Triceps: The triceps maintain elbow extension and prevent the upper body from lowering toward the floor.
Secondary and Stabilizing Muscles
- Trapezius and serratus anterior: Help control the shoulder blades while the arms support the upper body.
- Forearms: Stabilize the wrists and maintain pressure through the palms.
- Hamstrings: Assist the glutes with hip extension and help stabilize the legs.
- Quadriceps: Control knee position and contribute to lower-body stability.
- Abdominals and obliques: Help control the shape and prevent the backbend from collapsing into an uncontrolled lumbar hinge.
- Chest and hip flexors: These muscles are placed in a lengthened position as the chest and hips open.
Primary Muscle(s):

Anterior delt
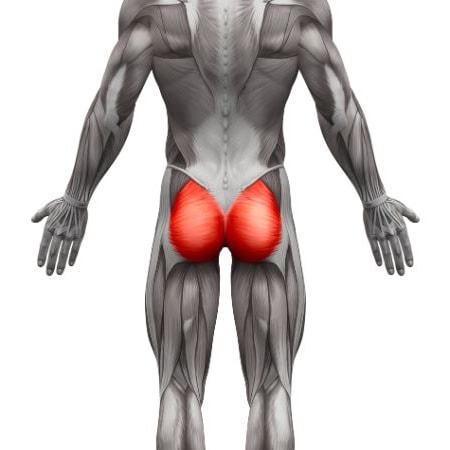
Glutes
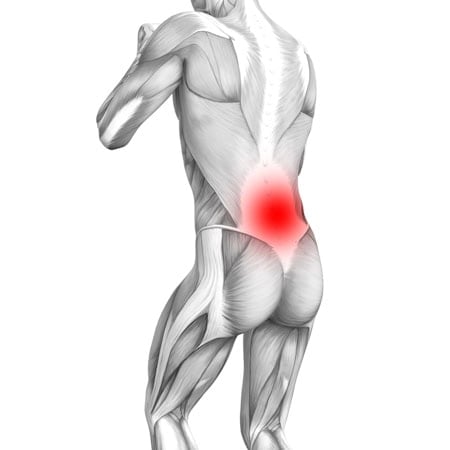
Lower back
Secondary Muscle(s):

Triceps
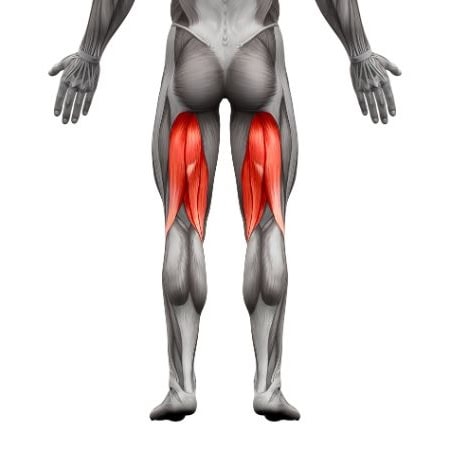
Hamstring
Equipment needed for Back Bridge
Adjust the difficulty of Back Bridge
How to make Back Bridge harder?
How to make Back Bridge easier?
How to make Back Bridge harder?
To make Back Bridge harder:
-
Increase the hold gradually while maintaining steady breathing and a controlled exit.
-
Bring your hands and feet slightly closer together without allowing either to slide.
-
Perform controlled bridge rocks by shifting your chest toward and away from your hands.
-
Perform bridge push-ups by bending and straightening your elbows under control.
-
Lift one foot into a single-leg back bridge while keeping the pelvis level.
-
Progress to a supervised wall walk, bridge kickover or standing drop-back.
How to make Back Bridge easier?
To make Back Bridge easier:
-
Build hip-extension strength with glute bridges.
-
Practice the tabletop hold to develop basic shoulder, wrist and posterior-chain strength.
-
Use cobra push-ups to practice a smaller and more controlled backbend.
-
Place your hands on a stable elevated platform to reduce the required range of motion.
-
Use a wider distance between your hands and feet rather than forcing a compact bridge.
-
Hold the elevated bridge for five to ten seconds before progressing to the floor.
