
One-Arm Elbow Lever
How to do One-Arm Elbow Lever?
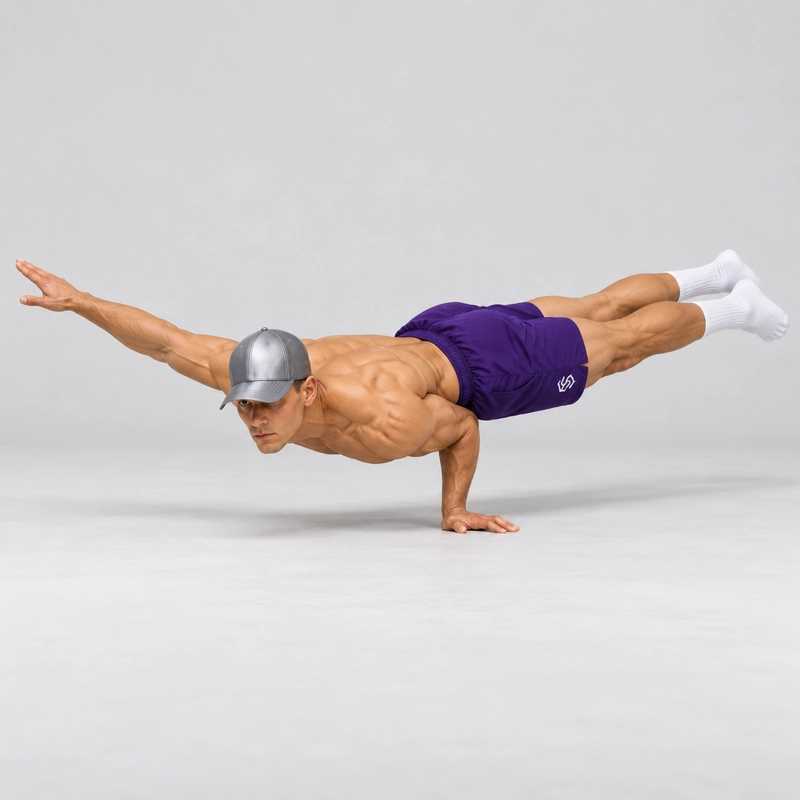
The One-Arm Elbow Lever is a hand-balancing skill in which one bent arm supports your body close to horizontal. The supporting elbow presses into the abdomen, both feet leave the floor and the spare hand lifts clear. This version is performed on the floor with straight legs together; the free arm can extend outward to help counterbalance.
It builds on the two-arm elbow lever, but removing a hand changes more than the amount of weight each arm carries. You must position the torso over one support point and control tipping and rotation while keeping the legs suspended.
The skill is also called a one-arm crocodile or one-arm peacock. Coach Bachmann's one-arm elbow lever guide describes the bent-arm abdominal support and outward-facing hand position. Those technique details help identify the movement; a one-arm elbow lever is a different task from a vertical one-arm handstand.
How This Differs From Other Floor Balances
In a two-arm elbow lever, the torso has two elbow support points. Here, the supporting elbow sits closer to the body's midline and the assisting hand becomes progressively lighter before leaving the floor. A slight controlled turn of the torso can help organize the single-arm support; the finished position does not require perfectly level shoulders and hips.
A frog stand keeps the legs compact and rests the knees on the arms. It can introduce hand balance, but it does not teach this elbow-to-abdomen contact by itself.
In a tuck planche, the arms stay straight and the torso is not resting on an elbow shelf. Likewise, planche leans train straight-arm loading with the feet supported. These are related through hand support, not interchangeable exercise standards.
If your goal is the planche, keep following the planche progression guide alongside any elbow-lever practice. A clean one-arm elbow lever does not establish planche readiness.
Readiness: Develop the Support Before Removing Assistance
Be comfortable loading the palms, maintaining bent-arm support and entering and leaving a two-arm elbow lever under control. Then practise the specific one-arm elbow placement with the spare hand and feet available. Do not assume that a long two-arm hold or a particular push-up count guarantees single-arm balance.
The immediate readiness check is practical: can you hold the chosen assisted position without the supporting elbow sliding, the palm peeling or the shoulder collapsing? Can you reduce assistance gradually and replace it calmly? If not, stay with supported practice.
Prepare the wrists, elbows and shoulders with the joint warm-up routine, followed by gentle palm loading at the hand angle you will use. GMB's wrist preparation resource provides examples of graded weight-bearing and hand-angle adjustments. Preparation should match the load you can currently tolerate.
Stop for sharp or increasing joint or abdominal pain, numbness or a slipping support. If symptoms persist or recur, seek appropriate professional guidance. A different hand angle or implement should not be used to force practice through pain.
Set Up Close to the Floor
Use a firm, level, non-slip surface with space for the legs and free arm. Keep the floor beneath the supporting palm stable. If you use a small cushion near the face while learning, place it clear of the hand and planned foot landing; it is a precaution, not part of the hold.
Dry the hands and use clothing that allows predictable elbow contact. Loose or slippery fabric can obscure the contact point. Check the position with assistance before loading it fully.
Begin in a kneeling or low crouched position. Place the intended supporting palm on the floor and the other hand nearby where it can help you enter and step down. Keep the knees or toes supported while organizing the arm.
Choose the Hand Angle and Elbow Contact
Turn the supporting hand outward toward its own side: the right fingers generally point toward your right and the left fingers toward your left. A comfortable slight adjustment forward or backward is acceptable. Spread the fingers and keep the whole palm supported; do not force an exact angle.
Bend the supporting arm and bring its elbow against the abdomen near the midline, often near or slightly below the navel. Adjust the contact while the feet and spare hand remain grounded. Seek a secure pressure point rather than driving the elbow onto a rib or hip bone.
There is no universal elbow angle or anatomical landmark that fits everyone. Body proportions, soft tissue and the chosen hand orientation affect the support. If the position causes sharp pressure or repeatedly slips, reset instead of trying to hold it through extra tension.
The arm remains bent throughout the skill. Straightening it removes the intended elbow shelf and changes the exercise.
Shift Onto One Arm Without Throwing the Free Hand
Summer Fun Fitness's single-arm elbow lever tutorial shows a gradual unloading of the assisting hand and explains that torso rotation can differ from the symmetrical two-arm position.
Use the assisting palm and grounded feet to arrange the torso over the supporting elbow. Move slowly enough to pause. Let the spare hand become lighter before lifting it; throwing it outward does not establish balance.
Some roll of the torso is expected in this unilateral shape. The free shoulder may sit higher. Keep that position organized and repeatable rather than insisting on exact symmetry or allowing the body to spiral out of control.
Keep the pelvis and legs connected to the torso. Avoid trying to correct every wobble with a large leg swing. The free arm is available as a counterbalance and as a nearby recovery support.
How to Do a One-Arm Elbow Lever
- Prepare the support. Set the outward-facing palm, bend the arm and establish comfortable elbow-to-abdomen contact while the other hand and feet remain grounded.
- Extend the legs behind you. Keep the toes available on the floor and build a connected torso-and-leg shape.
- Shift forward and toward the supporting arm. Move the upper body enough to make the feet light, while organizing the body's weight over the single elbow shelf.
- Float the feet with assistance. Use the spare hand to control the transition. A one-foot lift or a straddle can help you explore the position before attempting the full shape.
- Unload the spare hand. Reduce its pressure gradually. If it is still carrying meaningful weight, continue the assisted hold rather than removing it abruptly.
- Lift the free hand. Raise it only after the support is stable. Extend the free arm outward if useful, keeping it clear of the floor.
- Establish the full shape. Straighten both knees and bring the legs together, with both feet clear. Aim for an elongated body close to horizontal, not a high chest with hanging legs.
- Hold with small corrections. Keep the elbow contact secure, palm grounded and shoulder actively supporting. Use responsive hand pressure and modest body adjustments.
- Exit before control deteriorates. Replace the free hand if needed, lower the feet gently and release the elbow contact only after support is secure.
A staged assisted entry is acceptable. Only the established unsupported phase counts as the one-arm hold. Jumping into position or catching a brief falling shape is not the target.
Hold the Shape and Keep Breathing
Keep the supporting shoulder engaged so the torso does not drop toward the floor. You need a stable bent-arm base; forcing maximal shoulder elevation or pulling the shoulder blade back rigidly is not the aim.
Look slightly ahead on the floor with a comfortable neck position. Avoid throwing the head back to counterbalance low feet. Engage the trunk, glutes and legs enough to preserve the shape without creating a large lumbar arch.
Maintain pressure through the palm and fingers rather than balancing on the edge of the hand. With the hand turned sideways, the relationship between finger pressure and body movement differs from a forward-facing handstand; avoid applying a single “grip harder” cue to every tipping direction.
Take small, steady breaths. Abdominal contact may make a large breath awkward, but a breath-held maximal effort should not be the default. Keep attempts short enough to control the support and exit.
What Counts as a Full One-Arm Elbow Lever?
- Only the supporting hand contacts the floor during the measured hold.
- The supporting arm remains bent and its elbow stays braced against the abdomen.
- The free hand, both feet and the rest of the body remain clear of external support.
- Both knees are straight and the legs are together for this full-version standard.
- The body forms a recognizable elongated, approximately horizontal balance.
- Controlled torso roll and small corrections are acceptable; uncontrolled twisting, hopping or leg swinging are not.
- The hold finishes with a deliberate return to support.
Start timing after assistance has ended and the intended shape is established. Stop when the free hand or a foot touches, the elbow loses contact or the body position breaks down. Keep assisted setup time out of the result.
Record each side separately. A straddle, tucked or elevated hold is useful training, but it should not be merged with a floor-based legs-together result. The free arm may remain extended; moving it against the body is an additional challenge, not a requirement for every hold.
Regressions and Progression
Use the two-arm elbow lever for the basic shelf and horizontal shape. For specific unilateral practice, retain toe contact while positioning the single elbow, then use the spare hand for controlled foot lifts. Make that assistance gradually lighter rather than chasing a particular number of fingers.
A comfortable straddle can make early balancing more manageable and change the projected leg leverage. It does not reduce the suspended bodyweight. When that shape is repeatable, gradually narrow the legs without losing the support.
Shorter-lever practice is another option, but floor clearance can limit a tucked entry. Do not force the knees into an unstable position merely to use a named progression. If an elevated setup is used, choose equipment designed for stable hand support and rehearse its dismount.
Once you can hold the full floor version consistently, add a little hold time, improve the entry and exit, or move the free arm slightly closer to the body. Change one variable at a time and restore assistance when the contact or balance becomes unreliable.
Sets, Rest and Practice Frequency
For an athlete ready for specific unilateral practice, start with two or three short attempts per side after warming up. A controlled two-to-five-second free hold can be useful; if that is unavailable, use a manageable assisted hold. Rest around one to two minutes, or longer when support has not recovered.
These are coaching examples rather than validated thresholds. Stop before repeated slips or falls replace useful practice. Two nonconsecutive practice days can be a starting arrangement, adjusted for your wrist response and other hand-supported training.
Practise both sides at their appropriate level. The less consistent side may need more assistance, not forced equal unassisted time. Log the surface, leg shape and assistance so improved numbers represent the same task.
Common Mistakes and Corrections
- Keeping the elbow far out to the side: reset the contact toward the abdominal midline with the feet and spare hand supported.
- Removing the free hand abruptly: lighten it first and pause before the lift.
- Forcing square hips and shoulders: allow the controlled torso position needed for single-arm support.
- Letting the torso keep rotating: restore the assisting hand and rebuild a repeatable shape.
- Trying to lift heavy feet through a back arch: improve the supported weight shift or use a shorter lever.
- Peeling the palm: reduce the load and reconsider the hand angle between attempts.
- Hiding assistance: label free-finger or toe contact instead of counting it as an unassisted hold.
- Waiting for collapse: replace the free hand and lower the feet while the support is still secure.
Frequently Asked Questions
Is this a one-arm planche?
No. The elbow lever uses a bent arm and physical elbow support beneath the torso. A planche uses straight-arm support without that shelf. Similar body orientation does not make the strength task equivalent.
Must the elbow sit exactly in the belly button?
No. Use the navel area as a starting reference, then find secure and tolerable contact near the midline. Do not force pressure onto a painful spot to match an exact cue.
Do I need a one-arm push-up first?
No fixed push-up milestone establishes readiness. This balance needs its own elbow placement, wrist-loading tolerance and assistance-removal practice.
Can the free arm extend to the side?
Yes. It remains unsupported and can help counterbalance. Keep its position consistent when comparing holds; moving it closer to the body changes the task.
Can I use a block or parallette?
A purpose-built stable support can change wrist orientation and provide clearance, but it also changes the grip and landing height. Check resistance to tipping and sliding, rehearse the exit and record the setup separately from the floor standard. Avoid loose stacks or unstable furniture.
Tips for the proper execution of One-Arm Elbow Lever
Prepare the wrists and shoulders gradually, then test the actual hand angle with the feet and assisting hand supported.
Turn the supporting hand outward toward its own side and keep the whole palm grounded.
Find secure elbow contact near the abdominal midline without pressing painfully into a rib, hip bone or sensitive spot.
Keep the supporting arm bent and the shoulder engaged throughout the hold.
Make the feet light through a gradual weight shift instead of kicking or lifting them with a large back arch.
Reduce pressure through the assisting hand before lifting it; do not throw the free arm to manufacture balance.
Allow controlled torso roll over the single support rather than forcing both shoulders and hips perfectly level.
Keep both legs straight and together for the full version, with the free arm clear and available for counterbalance.
Look slightly ahead with a comfortable neck and breathe steadily during short controlled holds.
Replace the free hand and lower the feet before the elbow slides or the support collapses; record each side separately.
Muscles worked when doing One-Arm Elbow Lever
The One-Arm Elbow Lever is predominantly an isometric support and balance skill. The supporting elbow provides a physical shelf beneath the torso, while the hand, shoulder and trunk coordinate the suspended body. It is not a dynamic pulling exercise.
Primary muscles
- Anterior deltoid and pectoralis major: help position and stabilize the supporting upper arm and shoulder relative to the torso.
- Triceps and other elbow stabilizers: help maintain the bent-arm support angle rather than repeatedly extending the elbow.
Secondary muscles
- Forearm and hand muscles: stabilize the wrist and regulate pressure through the supporting palm and fingers.
- Abdominals and obliques: organize the torso around the elbow contact and control unwanted rotation and side bending.
- Spinal stabilizers and hip extensors: help maintain the elongated trunk-and-leg position.
- Glutes and hamstrings: contribute to hip extension and keeping the legs from sagging.
- Quadriceps and inner thighs: maintain straight knees and the legs-together configuration.
- Rotator cuff and shoulder-blade muscles: contribute to active shoulder control under unilateral support.
The spare arm can act as a counterbalance without touching the floor. Removing a hand concentrates external support through the remaining hand, but the elbow shelf changes the task substantially compared with a one-arm planche or handstand. Muscle roles here are functional descriptions, not measured activation rankings.
Primary Muscle(s):

Anterior delt

Middle chest

Triceps
Secondary Muscle(s):
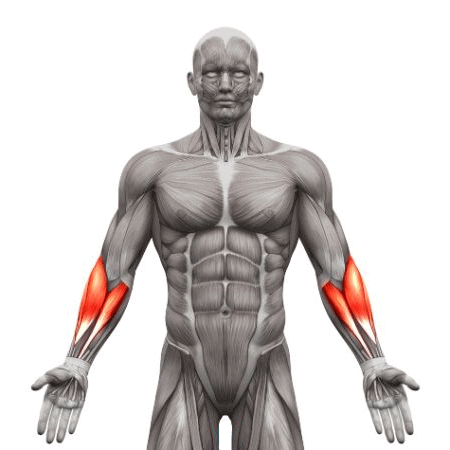
Forearm
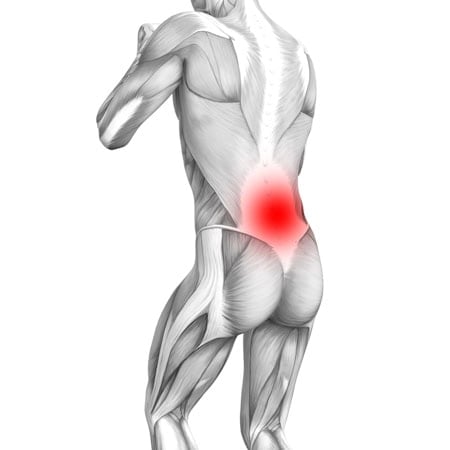
Lower back

Abdominal

Oblique
Equipment needed for One-Arm Elbow Lever
No equipment needed for this exercise.
Adjust the difficulty of One-Arm Elbow Lever
Develop the single-elbow support with the feet and spare hand available before removing assistance. Use a manageable straddle or shorter lever, then progress to a floor hold with straight legs together. Add time or change the free-arm position only while preserving secure contact and a controlled exit.
How to make One-Arm Elbow Lever harder?
How to make One-Arm Elbow Lever easier?
How to make One-Arm Elbow Lever harder?
To make One-Arm Elbow Lever harder:
-
Extend the full hold slightly while keeping the legs straight together, the supporting palm planted and the exit controlled.
-
Add another short controlled attempt per side at the same configuration, stopping before the contact or support deteriorates.
-
Move the free arm gradually closer to the body instead of keeping it fully extended as a counterbalance. Record the arm position and restore it if balance becomes unreliable.
-
Practise a slower assisted entry, clean hand release and deliberate return while preserving the same full hold. Remove hopping or unnecessary hand repositioning rather than adding unstable equipment.
How to make One-Arm Elbow Lever easier?
To make One-Arm Elbow Lever easier:
-
Practise the two-arm Elbow Lever first to develop the elbow shelf, horizontal body shape and deliberate feet-to-floor exit.
-
Use the spare hand and light toe contact while learning single-elbow placement. Float the feet with assistance, then gradually lighten the spare hand; record all support.
-
Use a comfortable straddle and extend the free arm for counterbalance. If needed, shorten the leg lever in an appropriate stable setup; keep this result separate from a full legs-together floor hold.
