
One-Leg Planche
How to do One-Leg Planche?
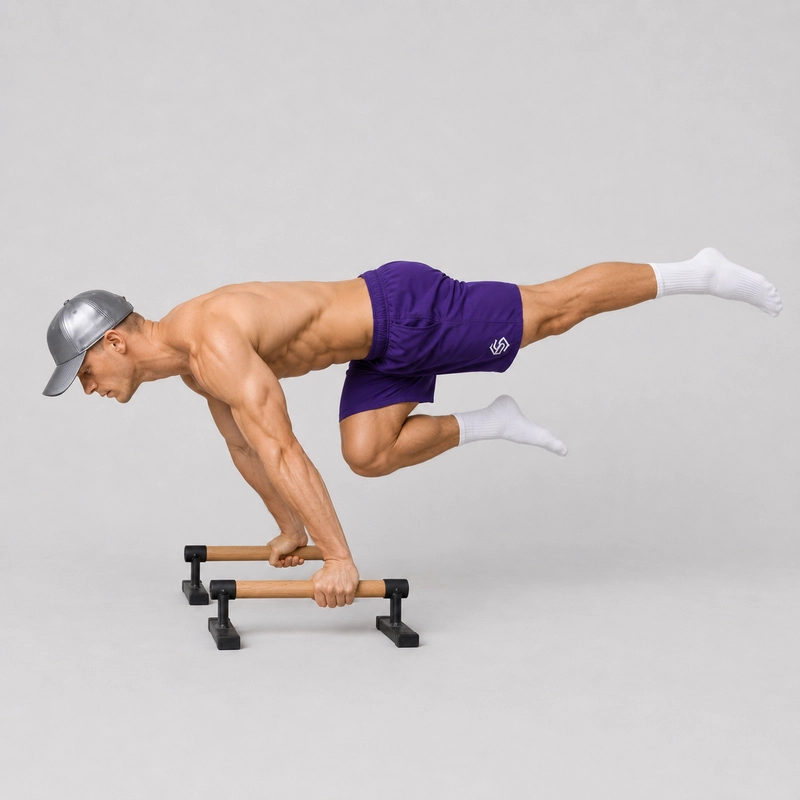
The One-Leg Planche is an advanced straight-arm calisthenics hold in which your entire body is supported by your hands, one leg extends fully behind you and the opposite knee remains tucked toward your torso. Your shoulders stay in front of your hands while your torso, hips and extended leg form an approximately horizontal line.
This exercise is also called the Single-Leg Planche or One-Leg Tucked Planche. It introduces the leverage of one completely straight leg without requiring both legs to be extended as they are during the Straddle Planche or full Planche.
This page uses parallettes for the primary demonstration. Parallettes provide a neutral grip, additional clearance and a secure handle to squeeze, but they do not create a different canonical exercise from a floor One-Leg Planche. The same body-position and completion standards apply on both surfaces, so a separate floor page is not necessary.
The defining detail is the position of the bent leg. Its knee should remain drawn toward the torso while the other leg extends backward. If both thighs extend behind the hips and only one knee remains bent, the movement is better described as a One-Leg Half-Lay Planche rather than the variation covered here.
| Exercise type | Static straight-arm strength and skill exercise |
|---|---|
| Recommended level | Advanced |
| Primary equipment | Parallettes |
| Alternative equipment | Floor or parallel bars |
| Extended leg | Straight, active and approximately level with the torso |
| Bent leg | Knee actively tucked toward the torso |
| Defining standard | Straight arms, protracted shoulder blades and no contact between the feet and floor |
On this page: progression, variant comparison, benefits, readiness, equipment setup, mechanics, instructions, form standard, common mistakes, limiting factors, programming, safety and frequently asked questions.
Where the One-Leg Planche fits in the planche progression
The One-Leg Planche is best treated as one possible bridge between compact planche positions and variations with two straight legs. A practical progression path is:
- Planche Leans: Develop straight-arm strength and learn to move the shoulders in front of the hands.
- Tuck Planche: Support your full bodyweight while keeping both knees close to the torso.
- Advanced Tuck Planche: Open the hips and move both knees farther from the chest.
- One-Leg Planche: Extend one leg fully while keeping the opposite knee tucked.
- Straddle Planche: Extend both legs while using a wide straddle to shorten the effective lever.
- Planche: Extend both legs together into the longest standard planche position.
This sequence is not universally linear. Some athletes find the Straddle Planche more accessible than the One-Leg Planche because their straddle flexibility shortens the lever without introducing the same rotational asymmetry. The complete planche progression and training guide should therefore present these positions as related options rather than mandatory levels that everyone must complete in exactly the same order.
One-Leg Planche versus related planche variations
| Variation | Leg position | Key distinction |
|---|---|---|
| Advanced Tuck Planche | Both knees bent and moved away from the chest | Neither leg is fully extended |
| One-Leg Planche | One leg straight and one knee tucked | Introduces one complete long leg lever |
| One-Leg Half-Lay Planche | Both thighs extend behind the hips but one knee bends | The bent leg is not tucked under the torso |
| Straddle Planche | Both legs straight and spread apart | Uses a symmetrical wide-leg position |
| Full Planche | Both legs straight and together | Creates the longest standard symmetrical lever |
Benefits of the One-Leg Planche
- Introduces the leverage of one fully extended leg before attempting two straight legs.
- Develops advanced straight-arm shoulder and scapular strength.
- Trains the abdominals, obliques and hips to resist rotation caused by the asymmetrical leg position.
- Reveals side-to-side differences that can remain hidden during symmetrical planche variations.
- Teaches you to adjust the forward shoulder lean as the leg lever becomes longer.
- Provides a progression option for athletes whose mobility or body proportions make the Straddle Planche less accessible.
- Builds positional control that can transfer to planche transitions and harder static holds.
Are you ready to train the One-Leg Planche?
This is not a beginner planche exercise. Before attempting full holds, you should be able to:
- Perform pain-free Planche Leans with straight elbows and controlled shoulder-blade protraction.
- Hold a Tuck Planche without resting the knees on the arms.
- Maintain an Advanced Tuck Planche without allowing the hips to drop.
- Extend either leg partially while keeping the support position stable.
- Maintain a controlled hollow-body position with the ribs and pelvis connected.
- Lower safely by returning to a tuck rather than collapsing onto the floor.
Several clean Advanced Tuck Planche holds lasting approximately five to ten seconds are a useful practical readiness sign, but no hold duration guarantees that you are ready. Your elbows, shoulder position, bodyline and ability to extend both sides matter more than one maximum time.
How to set up the parallettes
- Place both parallettes on a firm, level and non-slip surface.
- Position the handles parallel to each other and approximately shoulder-width apart.
- Confirm that both parallettes are the same height and do not rock when loaded.
- Leave enough space behind you for the extended leg and enough space in front for a controlled exit.
- Grip the handles with the palms facing inward and wrap the thumbs securely around them.
- Keep the wrists approximately neutral and aligned with the forearms.
Parallettes may make the wrist position more comfortable than the floor, but they do not remove the substantial loading placed on the elbows and shoulders. Grip comfort should not be mistaken for readiness to use a longer planche lever.
Why the One-Leg Planche is difficult
Extending one leg moves more body mass farther from the hands and increases the moment that the shoulders must resist. The tucked leg keeps part of the lower-body mass closer to the hands, which normally makes this a shorter lever than a Full Planche.
The asymmetrical leg position also creates a tendency for the pelvis to rotate or tilt. The obliques, glutes and hip stabilizers must keep the hips level while the shoulders distribute pressure evenly between both hands.
Your exact shoulder position will depend partly on your proportions. A biomechanical modelling study of the planche found that body dimensions and mass distribution influence the shoulder and wrist geometry required to balance the skill, supporting an individualized approach instead of universal lean or hold targets.
A 2025 electromyography study of the gymnastics planche also found coordinated activation across the anterior deltoid, pectoralis major, serratus anterior, biceps, triceps and other shoulder muscles. The study examined high-level gymnasts and not this exact parallette variation, so it supports the general muscle roles more strongly than any one-leg-specific training prescription.
Warm-up before One-Leg Planche training
Begin with a general upper-body warm-up followed by controlled preparation for the wrists, elbows, shoulders and shoulder blades. The Wrist Warm-Up Routine remains useful even when using parallettes because the hands and forearms must still produce considerable gripping and stabilizing force.
Continue with scapular push-ups, progressive Planche Leans, short Tuck Planche holds and one or two submaximal Advanced Tuck Planche sets. A Hollow Body Hold can reinforce the rib and pelvic position used to prevent the lower back from arching.
How to perform a One-Leg Planche on parallettes
- Grip the parallettes. Hold both handles firmly with a neutral grip and keep the wrists aligned with the forearms.
- Establish straight arms. Fully extend the elbows and rotate the upper arms so the elbow pits face mostly forward without forcing the joints.
- Lean the shoulders forward. Move the shoulders beyond the hands until enough bodyweight is supported through the parallettes.
- Protract the shoulder blades. Push the upper back broadly toward the ceiling instead of allowing the chest to sink between the arms.
- Enter an Advanced Tuck Planche. Lift both feet, move the knees away from the chest and stabilize the hips at approximately shoulder height.
- Create trunk tension. Keep the ribs controlled, use a slight posterior pelvic tilt and contract the abdominals and glutes.
- Choose the first working leg. Keep the opposite knee actively drawn toward the torso while preparing to extend the working leg.
- Extend one leg slowly. Straighten the hip and knee behind you without kicking, twisting the pelvis or losing shoulder protraction.
- Adjust the shoulder lean. Move slightly farther forward if necessary to counterbalance the longer leg lever.
- Complete the bodyline. Keep the torso, hips and extended leg approximately parallel to the floor with the knee straight and toes pointed.
- Keep the hips level. Resist turning toward the extended leg or allowing either side of the pelvis to drop.
- Hold the position. Maintain even pressure through both hands and take small controlled breaths.
- Return to the tuck. Bend the extended leg and bring it back under the body before lowering the feet.
- Repeat on the opposite side. Match the hold quality and training volume instead of practising only your preferred leg.
Breathing during the One-Leg Planche
Brace before extending the leg, then use small controlled breaths while maintaining abdominal and pelvic tension. Avoid turning every attempt into a prolonged breath hold, particularly during longer working sets.
What counts as a proper One-Leg Planche hold?
A valid hold begins when the extended leg reaches its final position and the body becomes visibly stationary. The following standards should remain present:
- Both parallettes remain stationary and both feet remain off the floor.
- Both elbows remain fully extended without the knees resting on the arms.
- The shoulder blades remain actively protracted and the upper back stays broad.
- The shoulders remain sufficiently far in front of the hands to balance the body.
- The torso, hips and extended leg remain approximately parallel to the floor.
- The extended knee remains straight and the toes remain deliberately pointed.
- The opposite knee remains clearly tucked toward the torso.
- The pelvis remains approximately level without excessive rotation.
- The lower back does not sag into a pronounced arch.
- The final position is controlled for at least two seconds.
Right-leg and left-leg holds are two sides of the same canonical exercise. Record the hold time for each side separately, and do not use the stronger side’s time as the result for both.
Common mistakes and corrections
| Mistake | Correction |
|---|---|
| Bending the elbows as the leg extends | Return to an Advanced Tuck or use assistance that allows the elbows to remain straight. |
| Losing shoulder-blade protraction | Push the parallettes away and keep the upper back broad throughout the hold. |
| Extending the leg with a kick | Straighten the leg gradually while maintaining the same shoulder and hip position. |
| Allowing the hips to drop below the shoulders | Shorten the leg extension and reinforce the posterior pelvic tilt and glute tension. |
| Piking excessively at the hips | Extend the hip of the straight leg until it forms one line with the torso. |
| Leaving the extended knee bent | Contract the quadriceps before extending and use a shorter range until the knee stays straight. |
| Allowing the tucked knee to drift backward | Actively pull the bent knee toward the chest so the exercise remains a One-Leg Planche. |
| Rotating the pelvis toward the extended leg | Reduce the extension and press evenly through both parallettes while keeping the hips level. |
| Keeping the shoulders too far behind the hands | Increase the forward lean gradually before attempting to extend the leg farther. |
| Practising only the stronger side | Begin with the weaker side and match its successful volume on the stronger side. |
| Using unstable or uneven parallettes | Stop and reposition the equipment on a level non-slip surface before continuing. |
| Holding until the position collapses | End the attempt while you can still return the extended leg to a controlled tuck. |
How to identify your limiting factor
| What happens | Likely limitation | Training emphasis |
|---|---|---|
| Your elbows bend immediately | Straight-arm shoulder or elbow-support strength | Planche Leans, Tuck Planche holds and band-assisted work |
| Your shoulders stay stable but the hips fall | Trunk, pelvic or hip-extension control | Advanced Tuck holds, hollow-body work and partial leg extensions |
| You cannot counterbalance the extended leg | Insufficient forward lean or shoulder torque | Measured Planche Leans and assisted One-Leg Planche holds |
| Your pelvis twists as soon as the leg straightens | Anti-rotation control or side-to-side imbalance | Shorter extensions, alternating holds and video feedback |
| Your knee remains bent | Quadriceps tension or excessive progression length | Partial straight-leg extensions with a fully locked knee |
| One side is consistently much stronger | Asymmetrical shoulder, trunk or hip control | Start with the weaker side and match rather than exceed its volume |
Sets, hold times and training frequency
Train the One-Leg Planche near the beginning of your session after warming up but before heavy pushing fatigue. A practical starting structure is:
- Frequency: Two or three planche sessions per week when the elbows and shoulders recover comfortably.
- Working sets: Three to six sets on each side.
- Hold duration: Approximately three to eight seconds of clean position per attempt.
- Rest: Approximately two to three minutes between demanding sets.
- Assisted volume: Two to four additional sets using a band or partial leg extension.
- Fallback exercise: Use Advanced Tuck Planche holds when the full One-Leg position is no longer technically repeatable.
Begin each bilateral set with the weaker side and match its successful duration on the stronger side. Stop accumulating One-Leg Planche time when the elbows bend, the shoulder blades retract, the hips drop or you can no longer exit through a controlled tuck.
A reasonable advancement sign is the ability to produce several repeatable five-to-eight-second holds on both sides with comparable bodylines. This is a coaching guideline rather than a universal requirement, and you may test Straddle Planche work earlier if that body shape suits you better.
Safety and discomfort
The One-Leg Planche places high loads through straight elbows and flexed shoulders. Muscular effort in the shoulders, chest, upper arms, forearms, abdominals and hips is expected, but sharp joint pain is not.
Stop the exercise if you experience sharp pain at the front of the shoulder, pain near the biceps tendon or inner elbow, wrist pain, numbness, tingling, a sudden pop or an unexpected loss of strength. Reduce the leverage or pause planche training rather than attempting to hold through these symptoms.
Do not use parallettes that slide, wobble or differ in height. End every attempt by returning the extended leg to a tuck and lowering deliberately instead of allowing the body to fall between the handles.
Frequently asked questions
Do the floor and parallette versions need separate exercise pages?
No. They use the same defining body position and progression intent, so the floor variation should remain on this canonical page. Parallettes change the wrist position and grip but do not create a different exercise entity.
Is One-Leg Planche harder than Straddle Planche?
It depends on the athlete. A wide Straddle Planche may create a shorter and more symmetrical lever, while the One-Leg Planche may be more accessible for someone with limited straddle mobility but strong anti-rotation control.
What is the difference between One-Leg Planche and One-Leg Half-Lay Planche?
During the One-Leg Planche, the bent knee remains tucked toward the torso. During a One-Leg Half-Lay variation, the bent leg’s thigh extends behind the hips and only the knee remains flexed, producing a longer lever.
Should I alternate which leg is extended?
Yes. Train both sides and record their hold times separately because the asymmetrical position can reveal differences in shoulder, trunk and hip control.
Should my shoulders be in front of the parallettes?
Yes. The shoulders must move far enough forward to counterbalance the lower body, although the precise distance depends on your proportions and leg position.
Should the shoulder blades be protracted or retracted?
Maintain active protraction by pushing the upper back broadly toward the ceiling. Do not pinch the shoulder blades together or allow the chest to sink passively between the arms.
Are the biceps or triceps working during the hold?
Both contribute to stabilizing the straight elbow and shoulder, while the anterior deltoids, pectorals and serratus anterior control much of the demanding shoulder and scapular position.
Do I need a fifteen-second Advanced Tuck Planche first?
No fixed duration is mandatory. Several repeatable Advanced Tuck holds with straight elbows, stable shoulders and level hips are more useful than one long but deteriorating attempt.
Can I use a resistance band?
Yes. Anchor the band securely above you and place it beneath the pelvis so it reduces load without changing the tucked-leg and extended-leg positions.
Tips for the proper execution of One-Leg Planche
Place both parallettes parallel to each other on a firm non-slip surface.
Grip each handle firmly with the thumb wrapped securely around it.
Keep the wrists neutral and aligned with the forearms.
Move the shoulders sufficiently far in front of the hands before extending the leg.
Keep both elbows fully extended without passively jamming the joints.
Rotate the upper arms so the elbow pits face mostly forward.
Push the upper back broadly toward the ceiling to maintain scapular protraction.
Keep the neck long instead of collapsing the shoulders toward the ears.
Control the ribs and use a slight posterior pelvic tilt to prevent lower-back sagging.
Extend the working leg slowly without kicking or changing the shoulder position.
Pull the opposite knee actively toward the torso throughout the hold.
Keep both sides of the pelvis approximately level.
Contract the quadriceps and point the toes of the extended leg.
Maintain even pressure through both parallettes to resist rotation.
Train both leg positions and begin each set with the weaker side.
Return to a stable tuck before lowering the feet to the floor.
End the set when the elbows bend, shoulder blades retract or hips drop.
Muscles worked when doing One-Leg Planche
The primary muscles used during the One-Leg Planche are the anterior deltoids, upper chest and serratus anterior. These muscles help produce the demanding forward shoulder position, support the bodyweight and maintain scapular protraction.
The biceps and triceps co-contract around the straight elbow while the forearm and hand muscles maintain a secure grip on the parallettes. The rotator-cuff and other shoulder stabilizers help control the upper-arm position under load.
The abdominals, obliques and deeper trunk muscles connect the rib cage and pelvis while resisting the rotation created by extending only one leg. The spinal stabilizers, glutes and hamstrings help align the torso, hips and extended leg, while the quadriceps maintain the straight knee.
The hip flexors keep the opposite knee tucked toward the torso, and the lateral hip muscles help prevent the pelvis from tilting or rotating toward the extended side.
Primary Muscle(s):

Anterior delt

Upper chest
Secondary Muscle(s):

Biceps

Triceps
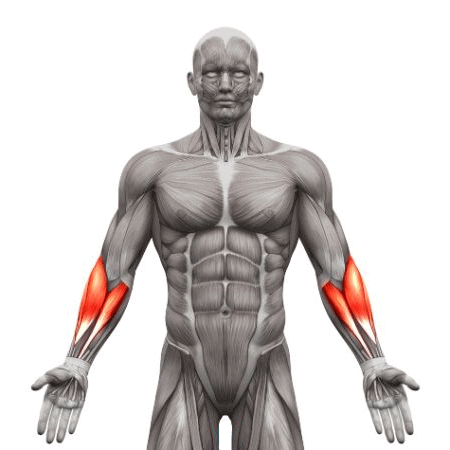
Forearm
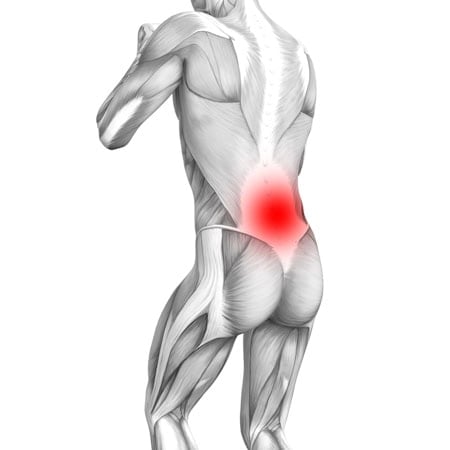
Lower back

Abdominal
Equipment needed for One-Leg Planche
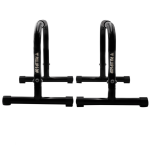
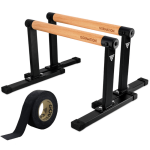
Adjust the difficulty of One-Leg Planche
How to make One-Leg Planche harder?
How to make One-Leg Planche easier?
How to make One-Leg Planche harder?
To make One-Leg Planche harder:
-
Increase the hold duration while maintaining the same bodyline on both sides.
-
Pause at several points while slowly extending and retucking the working leg.
-
Move the tucked knee progressively farther behind you without allowing the hips to sag.
-
Switch the extended leg in midair without returning the feet to the floor.
-
Perform repeated Advanced Tuck-to-One-Leg transitions on alternating sides.
-
Perform controlled One-Leg Planche push-ups while preserving the leg position.
-
Extend both legs into a Straddle Planche without touching the floor.
-
Bring both straight legs together to progress toward the full Planche.
How to make One-Leg Planche easier?
To make One-Leg Planche easier:
-
Return to the Advanced Tuck Planche and strengthen the symmetrical support position first.
-
Extend one leg only partway while keeping the knee straight.
-
Keep the extended leg’s toes lightly supported on the floor during a One-Leg Planche Lean.
-
Use a securely anchored resistance band beneath the pelvis to reduce the supported bodyweight.
-
Ask a competent spotter to support the pelvis without lifting the extended leg.
-
Keep the tucked knee as close to the chest as possible to shorten the lower-body lever.
-
Perform one-to-two-second holds and return to the tuck before the position changes.
-
Practise slow transitions from Advanced Tuck to partial One-Leg Planche without attempting a maximum hold.
