
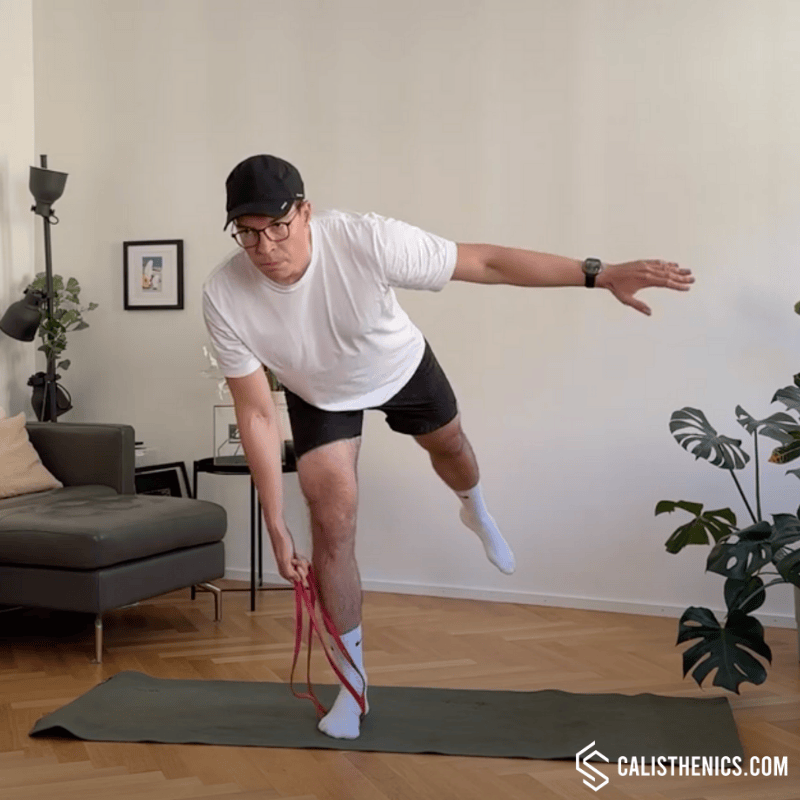
Single Leg RDLs with Resistance Band
How to do Single Leg RDLs with Resistance Band?
Single-leg Romanian deadlifts (RDLs) with a resistance band are a unilateral lower-body exercise that targets the hamstrings, glutes, and core while improving balance and coordination. By using a resistance band, the exercise adds a progressive level of resistance as you stand, intensifying muscle engagement in the glutes, hamstrings, and core. The single-leg RDL is particularly effective for improving stability and addressing muscle imbalances, making it ideal for athletes and anyone looking to enhance functional strength.
Steps to Perform a Proper Single-Leg Resistance Band RDL:
1. Set Up the Resistance Band:
• Step onto the resistance band with your working leg (the leg you’ll be balancing on).
• Hold the other end of the band with the opposite hand, allowing for slight tension in the band when you’re in an upright standing position.
2. Balance on One Leg:
• Shift your weight onto your working leg, keeping a slight bend in the knee. Engage your core to stabilize your torso.
• Lift your opposite leg slightly off the ground behind you, maintaining balance.
3. Hinge at the Hips:
• Inhale as you hinge at the hips, pushing them backward and lowering your torso toward the floor while extending your non-working leg behind you for balance.
• Keep your back flat and your chest lifted, ensuring your spine remains in a straight line from head to tailbone.
4. Lower Until You Feel a Stretch in Your Hamstring:
• Lower down until you feel a stretch in your working leg’s hamstring, but don’t let your back round or your hips twist.
• The band should add resistance as you lower, with your lifted leg extending behind you in a straight line.
5. Drive Through the Heel to Stand Up:
• Exhale as you press through the heel of your working leg, extending your hips forward to return to the starting position.
• Squeeze your glutes at the top without leaning back. Maintain balance throughout.
6. Switch Sides:
• After completing the desired number of repetitions on one side, switch to the other leg and repeat.
Benefits of Single-Leg Resistance Band RDLs
• Builds Functional Lower Body Strength: This exercise engages the glutes, hamstrings, and core, building strength in muscles essential for daily movements and athletic performance.
• Improves Balance and Coordination: The single-leg stance challenges your balance and coordination, improving stability in the ankle, knee, and hip joints.
• Enhances Hamstring and Glute Engagement: The hip hinge movement directly targets the hamstrings and glutes, making it effective for muscle activation and development.
• Promotes Core Stability: This exercise requires core engagement to maintain a straight spine and prevent rotation, strengthening the core.
• Corrects Muscle Imbalances: Working each leg independently helps address any muscle imbalances and strengthens each leg equally.
• Joint-Friendly Resistance: The smooth resistance from bands is gentle on the joints, making this exercise suitable for those with joint sensitivities.
• Portable and Accessible: With only a resistance band, this exercise can be performed anywhere, making it ideal for home workouts or travel.
Common Mistakes to Avoid
• Rounding the Lower Back: Keep your back flat as you hinge at the hips to avoid straining your lower back. Engage your core to stabilize.
• Locking Out the Knee: Avoid fully extending the knee of the working leg. Keep a slight bend to protect the joint and maximize hamstring engagement.
• Twisting or Rotating the Hips: Keep your hips square to the floor, avoiding any twisting or leaning that could reduce muscle engagement and compromise balance.
• Using Momentum: Focus on slow, controlled movement, especially as you return to the standing position. Avoid using momentum to lift the band.
• Leaning Too Far Forward: Maintain balance by keeping your weight evenly distributed through the standing leg without leaning excessively forward.
Tips for the proper execution of Single Leg RDLs with Resistance Band
Keep a Soft Bend in the Knee: Avoid locking your knee; a slight bend in the working leg helps protect the knee and better engages the hamstrings.
Engage the Core: Keep your core tight to stabilize your torso and prevent your lower back from arching.
Avoid Twisting the Hips: Focus on keeping your hips square to the floor as you lower, preventing rotation and ensuring balanced engagement of the muscles.
Controlled Movement: Perform the exercise slowly and with control, especially when returning to the starting position, to maximize balance and muscle engagement.
Breathe Steadily: Exhale as you stand up and inhale as you lower down, maintaining rhythm and core stability.
Muscles worked when doing Single Leg RDLs with Resistance Band
Primary Muscles:
•Hamstrings: The hamstrings are heavily engaged during the hip hinge and control the movement as you lower.
•Glutes: The gluteus maximus and medius work to stabilize the hips and extend them as you return to the starting position.
Secondary Muscles:
•Core: The abdominals and obliques engage to stabilize the torso and prevent rotation.
•Lower Back: The erector spinae muscles help maintain a straight spine, supporting the lower back.
•Calves: Provide additional stability in the standing leg and support balance.
•Forearms and Grip: Help maintain a firm hold on the band and control the resistance during the movement.
Primary Muscle(s):
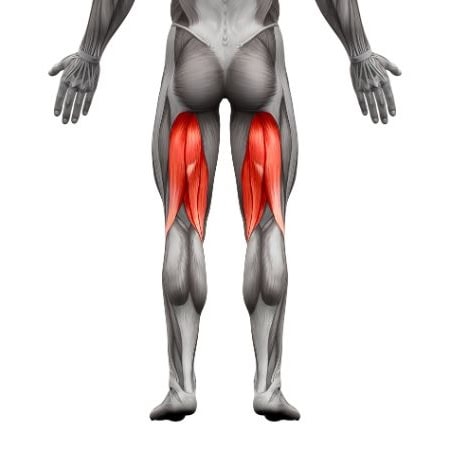
Hamstring
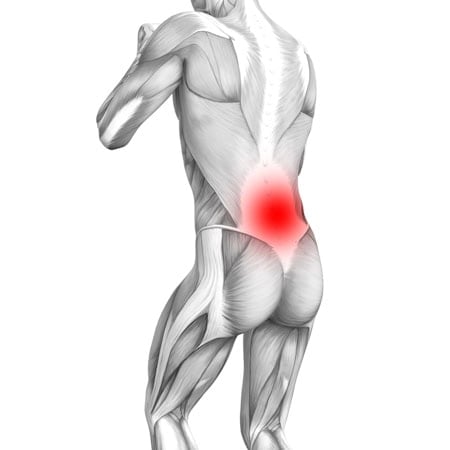
Lower back
Secondary Muscle(s):
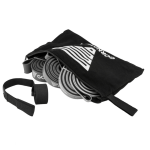
Equipment needed for Single Leg RDLs with Resistance Band
Adjust the difficulty of Single Leg RDLs with Resistance Band
How to make Single Leg RDLs with Resistance Band harder?
How to make Single Leg RDLs with Resistance Band easier?
How to make Single Leg RDLs with Resistance Band harder?
To make Single Leg RDLs with Resistance Band harder:
-
Use a Heavier Resistance Band: Increase the difficulty by using a band with more resistance to further challenge your glutes and hamstrings.
-
Slow Down the Eccentric Phase: Take extra time lowering to the ground, increasing muscle engagement during the eccentric (lengthening) phase.
-
Add a Pause at the Bottom: Pause for 2-3 seconds when you reach the lowest point of the RDL to increase time under tension and engage your muscles fully.
-
Increase Repetitions or Sets: Add more repetitions or sets to build endurance and further challenge your balance and strength.
How to make Single Leg RDLs with Resistance Band easier?
To make Single Leg RDLs with Resistance Band easier:
-
Use a Lighter Resistance Band: Start with a band that provides less resistance, making it easier to control the movement and maintain balance.
-
Keep Both Feet on the Ground: Instead of lifting one leg, perform a two-legged RDL, which provides more stability and reduces the balance challenge.
-
Hold a Stable Surface: Lightly touch a nearby wall or chair with your free hand for added balance and support.