
Ring Push-Up
How to do Ring Push-Up?
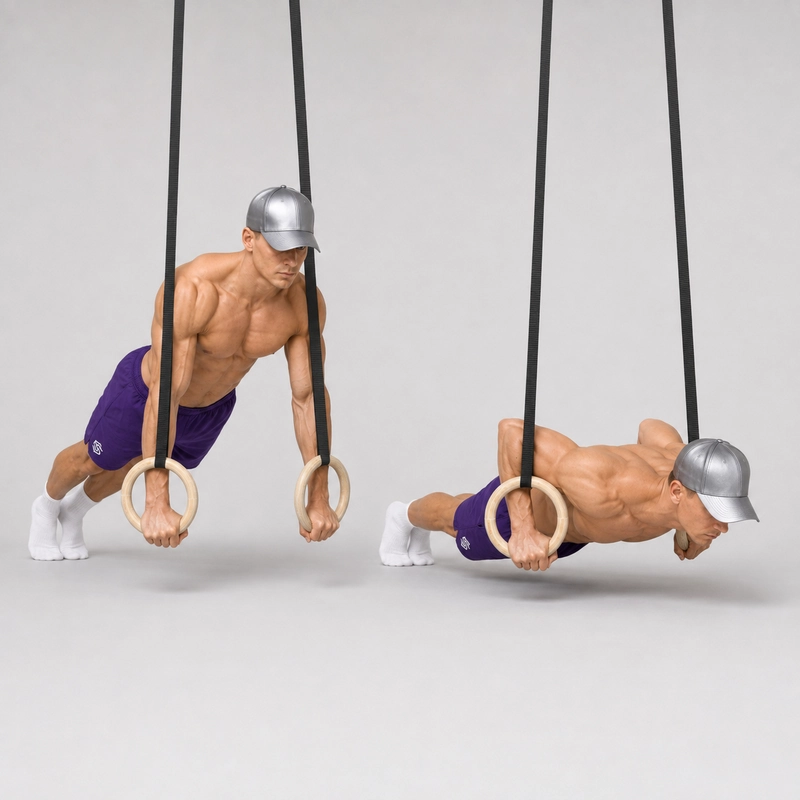
The Ring Push-Up is a horizontal pressing exercise performed with the hands gripping a pair of suspended gymnastics rings. The movement uses the same basic pressing pattern as Regular Push-Ups, but the freely moving rings require you to control their position throughout every repetition.
The standard variation is performed with the rings hanging close to the floor and the feet supported on the ground. However, the exercise can be adjusted for almost any strength level. Raising the rings creates an easier incline Ring Push-Up, while placing the feet on a stable box at or above ring height increases the amount of bodyweight supported by the upper body.
At the top of a standard repetition, the elbows can be extended fully without aggressively forcing them into hyperextension. Athletes can also stop slightly short of elbow lockout to maintain continuous muscular tension, although this deliberately shortens the range of motion and should be tracked as a separate variation.
Because the rings can move independently, Ring Push-Ups challenge the chest, triceps, anterior shoulders, core and muscles that control the shoulder blades. Research comparing stable and suspended push-ups suggests that suspension exercises can change upper-body and core muscle activation, although the effect depends on the suspension system, body position and athlete. See the suspension push-up study indexed by PubMed for additional context.
Before adding Ring Push-Ups to your training, become comfortable with controlled floor push-ups and learn how to adjust and secure your rings. If you are choosing equipment for home or outdoor training, see our guide to the best gymnastics rings.
How to Perform a Ring Push-Up
1. Secure and Adjust the Rings
Attach both straps to a sturdy overhead structure that is designed to support your bodyweight. Check that the straps are undamaged, the buckles are closed correctly and both rings hang at the same height.
For the standard variation, position the rings slightly above the floor so your chest can travel between them without touching the ground. Raising the rings higher creates an incline and makes the exercise easier.
2. Establish the Starting Position
Grip the rings and extend your legs behind you until your weight is supported by your hands and toes. Position the rings approximately shoulder-width apart and directly below or slightly outside your shoulders.
Begin with a neutral grip, meaning your palms face one another. Allow the rings to rotate slightly if that creates a comfortable wrist and elbow position.
Brace your abdominals, squeeze your glutes and straighten your legs. Your head, shoulders, hips and heels should form one controlled line.
3. Stabilize the Rings
Press down through the rings and hold them steady before beginning the descent. Keep your wrists stacked over the rings and avoid allowing the handles to shake, drift forward or separate uncontrollably.
At the top, you can keep the rings neutral or turn them slightly outward if you already have sufficient ring control. A pronounced rings-turned-out position is an advanced option rather than a requirement for a standard Ring Push-Up.
4. Lower Your Chest Between the Rings
Inhale as you bend your elbows and lower your body under control. Allow the rings to move naturally toward the sides of your chest while keeping them close enough to remain stable.
Let your elbows travel diagonally backward rather than flaring directly sideways. Lower until your chest reaches approximately ring level or slightly below it, provided you can maintain shoulder control and a stable body line.
5. Press Back Up
Push firmly through both rings while bringing them back beneath your shoulders. Extend your elbows and return to the starting position without allowing the rings to swing or collide.
For a standard full-range repetition, straighten the elbows under control at the top. This can include a natural elbow lockout, but you should not aggressively snap or force the joints beyond their normal range.
6. Reset Before the Next Repetition
Pause briefly until the rings are stable, maintain abdominal and glute tension and begin the next controlled descent. End the set when ring movement or body alignment can no longer be controlled.
Locked Versus Unlocked Elbows
Both styles can be used, but they serve slightly different purposes:
- Controlled elbow lockout: Extend the elbows fully at the top without snapping or forcing them backward. This produces a clear, repeatable full-range repetition and allows the shoulder blades to protract naturally.
- Soft-elbow lockout: Reach your normal end range while maintaining muscular tension rather than aggressively resting on the joint structures. This is still considered full extension for athletes whose elbows do not visibly lock.
- Continuous-tension repetition: Stop slightly before complete elbow extension and immediately begin the next descent. This can be useful for hypertrophy-focused sets, but it intentionally removes part of the top range.
Use the same standard throughout a set and record continuous-tension repetitions separately when comparing performance. If complete extension causes pain, do not force it; reduce the load or seek assessment from a qualified healthcare professional.
Ring Height and Foot Position
Hands Higher Than the Feet
Raising the rings while keeping the feet on the floor creates an incline Ring Push-Up. The more upright your body becomes, the less bodyweight you generally have to press. This is the best starting variation for athletes who cannot yet stabilize low rings.
Low Rings With Feet on the Floor
Suspending the rings close to the floor while keeping the feet on the ground produces the standard Ring Push-Up. Your body will be nearly horizontal, although the hands may remain slightly higher than the feet.
Feet Approximately Level With the Rings
Placing your feet on a stable box until the shoulders and heels are approximately level creates a more horizontal body position and usually increases the upper-body demand.
Feet Higher Than the Rings
Elevating the feet above the rings creates a decline Ring Push-Up. This shifts more load toward the upper body and increases the contribution required from the shoulders. Build controlled standard repetitions before using this variation.
The same angle principle applies to stable Incline Push-Ups and Decline Push-Ups, although the rings add an independent stability requirement.
What Counts as a Complete Ring Push-Up?
- The rings begin stable and approximately level with one another.
- The body remains aligned from the head through the shoulders, hips and heels.
- The elbows bend through a consistent range without excessive flaring.
- The chest reaches approximately ring level or the athlete's deepest controlled position.
- The rings remain close to the body rather than drifting uncontrollably outward.
- The athlete presses back up without bouncing, swinging or using hip movement.
- A standard repetition finishes at controlled elbow extension.
Common Ring Push-Up Mistakes
Using an Unsafe Anchor
Never suspend the rings from an object that can move, break or allow the straps to slide off. Check the anchor, straps and buckles before placing your body underneath the setup.
Setting the Rings at Different Heights
Uneven rings create unintended asymmetrical loading. Use strap markings or compare the handles visually before beginning the set.
Allowing the Rings to Drift Too Far Apart
Letting the hands separate excessively changes the exercise toward a poorly controlled ring fly and can place the shoulders in a demanding position. Keep the rings relatively close to your chest and use a range you can actively control.
Pressing the Straps Against the Arms
Do not rely on the straps to stop the rings from moving. Hold the handles steady through your hands, forearms and shoulders rather than bracing the straps against your arms.
Flaring the Elbows Directly Sideways
Allow the elbows to travel diagonally backward instead of forming a 90-degree angle with the torso. Adjust the ring rotation as necessary to find a comfortable pressing path.
Sagging Through the Hips
Brace your abdominals and glutes so your trunk and legs move as one unit. If the hips drop, raise the rings or shorten the set.
Holding the Rings Too Far Forward
Rings positioned well in front of the shoulders increase the leverage demand and make the exercise difficult to control. Begin with the handles beneath or only slightly forward of the shoulders.
Forcing a Deep Bottom Position
The rings permit the chest to descend below hand level, but additional depth is useful only when it remains pain-free and controlled. Increase the range gradually rather than dropping into the bottom position.
Snapping Into Elbow Lockout
Full extension should be reached smoothly. Do not accelerate into the top and force the elbows beyond their natural position.
Rushing While the Rings Are Swinging
Allow the rings to become stable before starting the next repetition. Continuing while they swing usually reduces control and changes the movement path.
Benefits of Ring Push-Ups
- Develop horizontal pressing strength: The chest, triceps and anterior shoulders work together to lower and press the body.
- Improve ring control: Each arm must control an independently moving handle throughout the repetition.
- Challenge trunk stability: The abdominals, obliques, glutes and spinal stabilizers maintain the plank position while the rings move.
- Allow natural hand rotation: The rings can rotate as the elbows bend and extend, allowing the athlete to use a comfortable grip path.
- Offer adjustable range of motion: The chest can move between and below the rings when sufficient shoulder control is available.
- Scale across strength levels: Ring height, foot elevation, range, tempo and external resistance can all be modified.
- Prepare athletes for advanced ring pressing: Ring Push-Ups develop foundational control that can support later training for Ring Dips and other ring skills.
Suspension push-up studies have found that instability can change the muscular demands compared with stable push-ups, but the results are not identical across muscles, athletes or suspension configurations. Ring Push-Ups should therefore be treated as a useful variation rather than universally superior to floor push-ups. See the study comparing stable and suspended push-ups at different heights.
Readiness and Safety
You should be able to perform controlled Regular Push-Ups without lower-back sagging or shoulder discomfort before moving to low rings. If the standard variation is too unstable, raise the rings and practise the exercise at an incline.
Inspect the anchor, straps, buckles and rings before every session. Keep the area beneath and around the rings clear, and use a stable non-slip surface for your feet or plyo box.
Begin with a conservative depth and neutral ring position. Stop the set if you cannot control the rings or experience sharp pain, instability, numbness or persistent discomfort in the wrists, elbows or shoulders.
How to Program Ring Push-Ups
For general strength and muscle development, perform 3 to 5 sets of 5 to 12 controlled repetitions. Choose a ring height and foot position that allow approximately two technically sound repetitions to remain before form failure.
Rest for approximately 90 seconds to three minutes between challenging sets. Use lower repetitions and longer rest for harder feet-elevated or weighted variations, and moderate repetitions for standard or continuous-tension Ring Push-Ups.
Frequently Asked Questions
Should you lock your elbows during Ring Push-Ups?
For a standard full-range repetition, extend the elbows completely but do not aggressively snap or hyperextend them. Stopping slightly short is acceptable as a continuous-tension variation, but it should be distinguished from the standard repetition.
Should the rings turn outward at the top?
A slight rings-turned-out position can increase the stability challenge, but it is not required. Beginners can keep the palms facing one another and allow only the rotation needed for a comfortable pressing path.
How low should the rings be?
For the standard exercise, place the rings close enough to the floor that your body is nearly horizontal and your chest can move between them. Raise the rings to create an easier incline variation.
Should the feet be elevated?
Foot elevation is optional. Keeping the feet on the floor is appropriate for the standard variation, while raising them to ring height or higher increases the pressing and stability demands.
Are feet-elevated Ring Push-Ups a separate exercise?
They are a meaningful progression but do not require a separate canonical page. They use the same fundamental movement, equipment and search intent and can be covered as a harder Ring Push-Up variation.
Are Ring Push-Ups harder than floor push-ups?
They are generally harder when performed at a comparable body angle because each hand must stabilize a freely moving ring. However, high rings can make an incline Ring Push-Up easier than a floor push-up.
How far apart should the rings be?
Begin with the rings approximately shoulder-width apart. They can move slightly during the repetition, but they should not separate so far that the movement becomes an uncontrolled ring fly.
How deep should a Ring Push-Up be?
Lower until your chest reaches approximately ring level. Progress below ring level only when you can maintain shoulder control and complete the movement without discomfort.
Why do my rings shake?
Shaking usually indicates that the ring height, body angle, depth or repetition target exceeds your current stability. Raise the rings, widen your feet and use slower repetitions while learning.
Can Ring Push-Ups replace regular push-ups?
They can serve as your primary push-up variation, but neither exercise is universally superior. Floor push-ups provide a stable platform for producing force, while Ring Push-Ups add independent stabilization and adjustable range.
Are Ring Push-Ups good preparation for Ring Dips?
They help develop pressing strength and confidence controlling the rings, but Ring Dips use a different, more vertical movement pattern. Include Ring Support Holds and appropriate dip progressions as well.
Tips for the proper execution of Ring Push-Up
Attach both ring straps to a secure overhead anchor and check the buckles before every set.
Adjust both rings to exactly the same height before beginning the exercise.
Start with the rings approximately shoulder-width apart and positioned beneath your shoulders.
Use a neutral grip and allow the rings to rotate naturally as your elbows bend.
Brace your abdominals, glutes and quadriceps to maintain a straight body line.
Press down through the rings and stabilize them before beginning each repetition.
Keep the rings close to the sides of your chest instead of allowing them to drift excessively outward.
Let your elbows travel diagonally backward rather than flaring directly sideways.
Lower your chest between the rings only as deeply as you can maintain shoulder control.
Bring the rings back beneath your shoulders as you press upward.
Reach controlled elbow extension without snapping or forcing the joints into hyperextension.
Pause briefly between repetitions if the rings begin swinging.
Keep the straps away from your arms instead of using them to stabilize the rings.
End the set when the rings drift, the hips sag or your range of motion becomes inconsistent.
Muscles worked when doing Ring Push-Up
The Ring Push-Up trains the same fundamental horizontal pressing muscles as a floor push-up, while the freely moving rings create an additional requirement to control the hands, shoulder blades and trunk.
Primary Muscles
- Pectoralis major: The chest produces horizontal pressing force and helps bring the upper arms toward the torso as you press upward.
- Triceps brachii: The triceps extend the elbows during the upward phase and help stabilize the arms against the movement of the rings.
Secondary Muscles
- Anterior deltoids: The front shoulders assist the chest and control the upper arms throughout the repetition.
- Serratus anterior: The serratus helps control the shoulder blades against the rib cage, particularly as you press into the top position.
- Rotator cuff: The rotator-cuff muscles contribute to keeping the upper-arm bones controlled while the rings move independently.
- Rectus abdominis: The abdominal muscles resist lower-back extension and help preserve the plank position.
- Obliques: The obliques resist twisting when one ring moves differently from the other.
- Forearms and hand muscles: These muscles maintain the grip and help control the orientation of each ring.
- Glutes and quadriceps: The lower body remains contracted so the athlete moves as one connected unit.
Suspension-system research has reported increased activation of some core and upper-body muscles compared with stable push-ups, but results differ between suspension designs and muscle groups. The most accurate practical description is that Ring Push-Ups change the stabilization demand rather than simply making every involved muscle work more. See the electromyographic comparison of traditional and suspension push-ups.
Primary Muscle(s):

Middle chest

Triceps
Secondary Muscle(s):

Anterior delt

Abdominal

Oblique
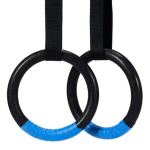
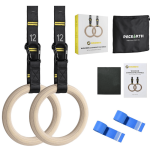
Equipment needed for Ring Push-Up

Adjust the difficulty of Ring Push-Up
How to make Ring Push-Up harder?
How to make Ring Push-Up easier?
How to make Ring Push-Up harder?
To make Ring Push-Up harder:
-
Lower the rings closer to the floor while keeping your feet on the ground.
-
Elevate your feet on a stable plyo box until they are approximately level with the rings.
-
Raise your feet above the rings to perform a decline Ring Push-Up.
-
Turn the rings outward under control as you reach full elbow extension.
-
Lower your chest below ring level to increase the range of motion.
-
Pause for two to three seconds in the bottom position before pressing upward.
-
Use a four-to-six-second eccentric phase on every repetition.
-
Bring your feet closer together to increase the anti-rotation and balance demands.
-
Wear a weighted vest to add resistance without interfering with the ring movement.
-
Perform Ring Archer Push-Ups by shifting toward one ring while extending the opposite arm.
-
Progress to a Ring Fly Push-Up only after developing sufficient shoulder control and strength.
How to make Ring Push-Up easier?
To make Ring Push-Up easier:
-
Raise the rings to create an incline Ring Push-Up with a more upright body position.
-
Move your feet closer to the anchor point to reduce the percentage of bodyweight supported by your arms.
-
Widen your foot position to create a more stable base.
-
Reduce the depth and gradually lower your chest farther as your ring control improves.
-
Keep the rings neutral instead of turning them outward at the top.
-
Perform slow Ring Push-Up negatives and step forward to reset after each descent.
-
Perform Ring Push-Ups from the knees while maintaining a straight line from your knees to your shoulders.
-
Build pressing strength with Regular Push-Ups before returning to the suspended variation.
-
Use shorter sets and pause between repetitions until the rings become stable.
