
Vertical-to-Tuck Human Flag Transition
How to do Vertical-to-Tuck Human Flag Transition?
What is the Vertical-to-Tuck Human Flag Transition?
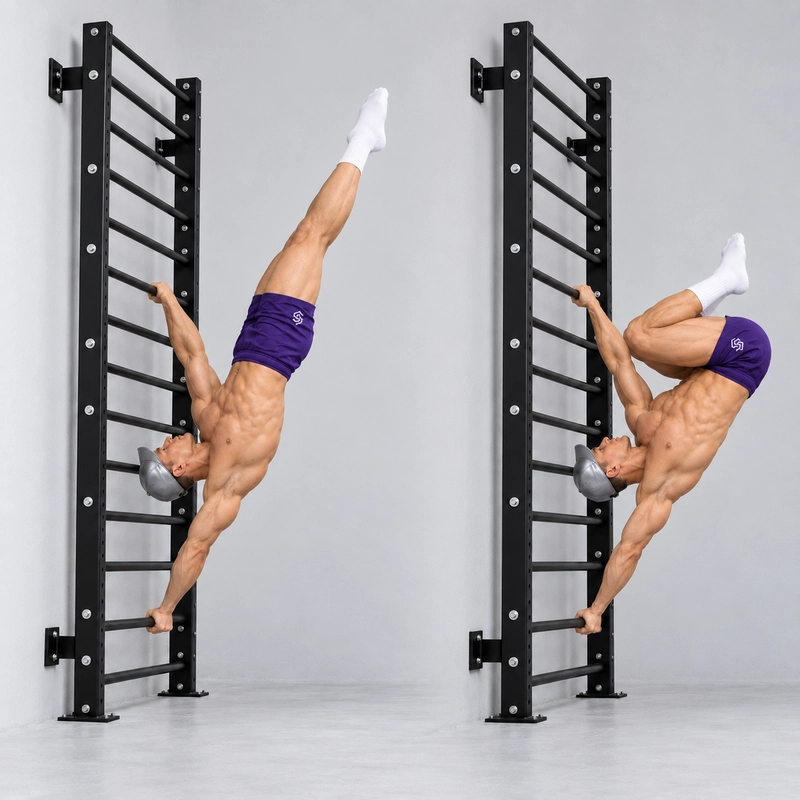
The Vertical-to-Tuck Human Flag Transition, also called the Inverted-to-Tuck Human Flag Transition, is a controlled straight-arm movement from an inverted flag into a horizontal tuck flag. Begin with the body settled above the hands, draw both knees towards the torso and gradually lower until the shoulders and hips are approximately level. Keep pulling with the top arm and pushing with the bottom arm throughout.
The main version is a downward transition. Briefly demonstrate control at horizontal, then return the feet to a planned support and reset. You do not have to raise back to vertical to complete the repetition; that return is a harder extension.
This exercise connects the Vertical Human Flag with the Tuck Human Flag. The first is a static inverted position and the second is a static horizontal hold. This page focuses on the movement between them, particularly keeping control as the torso approaches horizontal.
It is often described as a vertical-to-tuck negative. Our human flag progression guide uses this lowering phase between the vertical and tuck stages. “Inverted” and “vertical” describe the same starting orientation here; they do not indicate separate exercises.
Why practise this transition?
Being comfortable above the hands does not automatically mean you can control a horizontal flag. This transition lets you work through the intervening angles while keeping the lower body compact. The aim is a smooth descent and a controlled arrival, rather than falling into a position you cannot hold.
Tucking both knees brings the lower-body mass closer to the upper body than leaving the legs fully extended. It makes the lowering more manageable, but the arm actions and shoulder control still matter. A tight tuck cannot compensate for a bottom shoulder that collapses.
As the torso moves away from vertical, the loading geometry changes. Control often becomes harder nearer horizontal, so that part of the descent deserves attention. Keep the tuck consistent rather than opening the legs just as the movement becomes demanding.
Antranik’s human flag tutorial explains learning from a supported vertical position and lowering slowly. Its later examples use different leg shapes; the defined endpoint on this page is a compact horizontal tuck.
The transition is useful even if you can already hold a tuck flag entered from the ground. Controlling the approach to horizontal is a different task from simply staying there. Conversely, a slow partial lowering is useful practice but does not demonstrate the complete transition.
Equipment and setup
- Main setup: use securely mounted stall bars with sound rungs and enough clearance beside the structure for the shoulders, torso and tucked legs.
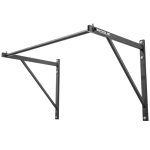
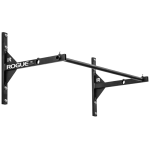
- Alternative: use a rigid, non-rotating pole or purpose-built flag station with two secure grips on a vertical line. Only use it if you have a controlled inverted entry and supported exit.
- Hand positions: choose a top and bottom grip directly above and below one another. Use enough separation to straighten both elbows and maintain active shoulders without forcing an uncomfortable joint position.
- Entry support: choose accessible rungs or appropriate assistance that lets you establish the vertical flag without a large kick. Do not improvise a balancing position on unstable furniture.
- Exit support: plan where the feet will land or contact the rungs before you begin. Keep that path clear and within your controlled range.
- Working area: allow room for the whole descent. A suitable stable mat beneath the working area is useful, but it is not a substitute for a controlled reset.
On stall bars, grip two suitable rungs at different heights with the hands laterally aligned. A pronated top hand and supinated bottom hand is a common starting arrangement, but the grip must be secure and comfortable for the actual apparatus. Keep brackets and uprights clear of the hands.
On a round pole, wrap both hands securely and use the grip you have already controlled in easier flag positions. Do not force the same wrist orientation used on horizontal rungs. Keep the hands from drifting around opposite sides of the pole.
Berg Movement’s human flag progression tutorial discusses aligned grips, supported high-flag entries and lowering into angled positions. Use that as broader coaching context; this page defines a specific straight-arm vertical-to-horizontal tuck sequence.
Readiness and preparation
First learn the top-arm pull and bottom-arm push with support available. The Human Flag Plank is a useful earlier drill for establishing those actions without an inverted descent.
For the main unassisted transition, you should be able to settle in the vertical flag with the feet clear, both hands secure and both elbows straight. You also need a planned way to return to support before control is lost. An assisted vertical start is a regression and should be recorded as such.
You do not need a long static tuck hold before beginning limited lowering practice. Start with the range you can control, then develop the horizontal endpoint. Reaching it without a sudden acceleration is more useful than attempting the complete angle before you can manage it.
Prepare the shoulders, elbows, wrists and grip gradually, then use easier supported flag positions before the main attempts. No universal pull-up count or inverted hold time guarantees readiness for this transition.
Stop for sharp joint pain, instability, tingling, numbness or unexpected grip loss. Use an easier supported drill and seek appropriate assessment for persistent symptoms. Do not attempt an inverted entry alone if you cannot control its support and exit.
How to do the Vertical-to-Tuck Human Flag Transition
- Establish the grips. Place the hands one above the other on the fixed structure. Straighten both elbows and create an active top-arm pull and bottom-arm push before taking the feet away from support.
- Enter the vertical flag. On stall bars, use the rungs to reach a controlled inverted position. Bring the body above the hands, with legs together and knees naturally straight. On a pole, use an already practised controlled entry or qualified assistance.
- Settle without foot contact. Take the feet clear and pause long enough to show that the arms support the vertical position. Do not begin the descent while still swinging from the entry.
- Form the tuck early. Bend both knees and draw them towards the torso, bringing the heels towards the buttocks. Keep the hips high while you organise the compact shape; do not drop first and try to catch up with the tuck.
- Lower through the angles. Move the hips and tucked body away from the vertical position gradually while maintaining the opposing arm actions. Keep the hands fixed, elbows straight and shoulders active. Avoid twisting around the structure.
- Control the final approach. Continue towards horizontal at a pace you can regulate. Keep the knees close and the trunk braced rather than letting the tuck open or allowing the bottom shoulder to sink.
- Arrive in the horizontal tuck. Bring the shoulders and hips approximately level, with both knees still tucked and the feet clear of the structure. Pause briefly enough to demonstrate a settled position rather than passing through it.
- Reset with support. Keep the tuck compact and use the planned controlled route to return the feet to a stable rung or the ground. Keep both hands secure until bodyweight is supported, then release or rebuild the vertical start for another repetition.
The main movement is complete at the controlled horizontal tuck endpoint. A short pause demonstrates that you have stopped the descent; it does not need to become a long static hold. The supported reset is not a failure to raise back up.
If the descent begins accelerating or an elbow bends before horizontal, finish through your planned supported exit and record the angle reached as partial-range practice. Do not continue past the range you can control merely to reach the endpoint.
What counts as one main repetition?
- A settled vertical flag start with both hands secure, straight elbows and feet clear.
- A compact tuck formed before the demanding lower part of the descent.
- A controlled change in body angle towards horizontal, with continuous top-arm pulling and bottom-arm pushing.
- A horizontal tuck arrival with shoulders and hips approximately level, both knees tucked and no body support from the structure.
- A brief settled endpoint that shows the descent has stopped, followed by a controlled supported reset.
No unassisted raise back to vertical is required. A fall through horizontal, a bent-arm catch or a descent with the feet still pressing on the rungs is not the main unassisted repetition.
Use a deliberately slow lowering as a training aim. Around three to five seconds from the established tucked high position to horizontal is a coaching example, not a universal completion rule. Timing starts after the tuck is formed; do not count the climb-in or a long inverted pause as descent time.
Body position and movement cues
Pull and push continuously
The top arm remains active as the body lowers; the bottom arm keeps pushing the structure away. Neither hand is a passive hinge. Maintain shoulder control without trying to keep both shoulder blades frozen in an identical position through every angle.
Tuck before the difficult part
Bring both knees towards the torso while still high, then keep that shape as you lower. Delaying the tuck until the hips are already falling creates an unnecessary change in leverage during the hardest part of the movement.
Judge the torso angle
The tucked legs are folded, so their feet do not define the body’s angle. At the endpoint, judge the shoulder-to-hip line. Knees near the chest alone do not establish a horizontal tuck if the torso remains steeply angled.
Stay in the flag plane
Avoid rotating the chest towards the ceiling or turning the hips around the pole. Keep the torso and pelvis organised together as you descend. If a twist is needed to finish, use less range or more appropriate assistance and build the untwisted version gradually.
Keep the head with the spine
Use a neutral head position rather than craning towards the feet or throwing the chin up to make the endpoint look higher. Film from an angle that lets you review the shoulders, hips and both elbows.
Common mistakes and corrections
Changing shape without lowering
Tucking the knees while staying vertically above the hands completes only the shape change. The main exercise also requires a controlled descent until the torso approaches horizontal.
Lowering first and tucking late
Form the compact tuck before the torso reaches the difficult lower angles. Reset if the hips drop while the legs are still extending away from the body.
Accelerating near horizontal
A slow first half followed by a fast drop is not a controlled full transition. Reduce the range to an angle you can stop at, use suitable assistance or perform fewer attempts while fresh. Extend the range gradually.
Bending the top elbow
A bent-arm pull changes the intended task. Keep the top-arm action with a straight elbow and reduce the demand if that is unavailable. Do not count a bent-arm catch as straight-arm transition control.
Collapsing through the bottom shoulder
Keep pushing away from the structure. If the shoulder sinks or the elbow softens, end the descent through the planned supported route. A tighter tuck helps leverage but does not replace active pressing support.
Opening the tuck during the descent
Keep both knees close and the lower body compact. Letting the feet move away increases the demand and makes comparisons between attempts less meaningful.
Using rotation to reach the endpoint
Recheck the vertical hand line and control the torso and pelvis together. An angled or twisted tuck may be a useful regression, but record it accurately rather than treating it as the main horizontal endpoint.
Insisting on a return raise
The main exercise is the descent. If raising back up would force an elbow bend or a swing, reset with foot support instead. Add the reverse transition only when it is separately manageable.
Releasing a hand during the exit
Keep both grips until the feet are securely supported. Plan the exit before the first descent and stop the set if fatigue makes that route unreliable.
Optional reverse transition
Once the horizontal tuck and ascent are independently controllable, you may raise the tucked body back towards vertical using the same straight-arm push and pull. Keep the tuck compact and avoid swinging the legs or pulling with a bent elbow.
At the top, stabilise before extending the legs if you want to show the original straight vertical position. Record this as a vertical-to-tuck-to-vertical cycle. It is additional work and a harder version, not a requirement for the main downward transition.
Do not add repeated cycles simply because one descent is successful. The ability to control lowering does not establish that the reverse movement will be available at the same fatigue level.
Regressions and progression
Begin with short-range tucked lowerings from the high position. Stop at an angle you can control and reset with support. Gradually move the endpoint towards horizontal while maintaining the same hand positions and compact tuck.
Qualified assistance can support the hips during the descent when the endpoint is not yet manageable. A suitable band arrangement may also help, but it must remain secure through the changing body angle and have a planned unloaded exit. Do not assume a band setup used for a static hold automatically works for the entire inverted transition.
After clean full descents are repeatable, add a slightly longer settled tuck, improve the entry or practise the optional reverse raise. The One-Leg Human Flag and Straddle Human Flag provide longer-lever goals, but changing leg shape produces a different variation.
The eventual full Human Flag uses straight legs together. Do not rush to extend the legs during this drill merely because its endpoint is horizontal. The compact tuck is an intentional part of this exercise.
Programming and tracking
Practise after preparation while grip and coordination are fresh. An example starting dose is three sets of one to three controlled descents per side, resting about two to three minutes between demanding sets. Use fewer attempts if the inverted entry or reset is tiring.
These are coaching suggestions, not a validated protocol. The climb-in, vertical stabilisation, tuck formation and supported exit all add workload even though the lowering timer covers only the descent.
Train both hand orientations and choose an appropriate range or assistance for each. Identify the side by the top arm rather than an ambiguous left or right body label.
Log apparatus, hand positions, assistance, endpoint angle, descent time and endpoint control. Keep the descent time separate from the final tuck hold. A faster drop followed by a longer pause does not show better transition control.
Stop the set when grip, straight elbows, shoulder support or the planned exit deteriorates. Recover sufficiently between demanding practices rather than repeating failed descents daily.
Frequently asked questions
Does “inverted-to-tuck” mean a different exercise?
No. On this page, inverted and vertical name the same high starting orientation. Use the alternative expression when describing the movement, but keep one canonical exercise page.
Do I tuck while still vertical?
Yes. Begin from the settled vertical flag and form the compact tuck before lowering through the more demanding angles. Keep the tucked shape until you arrive at horizontal.
Do I have to return to vertical?
No. A controlled descent into the horizontal tuck completes the main movement. Use a supported reset. Raising back up is an optional harder extension.
Is this a static tuck flag?
It finishes in that position, but its main task is the descent from above the hands. A static hold entered directly from the ground is the Tuck Human Flag rather than this transition.
Can I stop above horizontal?
Yes as a regression. Record the angle and range honestly; it is partial-range practice rather than a complete vertical-to-horizontal tuck transition.
Can I use a pole instead of stall bars?
Yes if the pole is suitable and you can control the inverted entry and supported exit. Stall-bar instructions rely on rungs that are not available on a plain pole, so do not copy the mounting sequence unchanged.
How slow should the descent be?
Use a pace you can regulate through the entire range. Three to five seconds is an example target; smooth control near horizontal matters more than meeting a timer while the final part becomes a drop.
Tips for the proper execution of Vertical-to-Tuck Human Flag Transition
Use a fixed structure and plan both the inverted entry and supported exit before starting. Stall bars provide rung options that a plain pole does not.
Keep the hands vertically aligned with enough spacing for straight elbows and active shoulders. Use the same grip positions when comparing attempts.
Settle in the vertical flag with the feet clear before beginning. Do not start the transition while still swinging from the entry.
Form a compact tuck while still high by drawing both knees towards the torso. Keep the lower body close before the more demanding part of the descent.
Maintain the top-arm pull and bottom-arm push continuously. The band or a shorter tuck, if used as a regression, does not replace active shoulder support.
Keep both elbows straight as the torso lowers. End the range if an elbow bends or the bottom shoulder collapses rather than catching the endpoint with bent arms.
Control the final approach to horizontal without speeding up. Judge the shoulder-to-hip line, not the angle of the folded legs.
Keep the tuck compact and avoid rotating the chest or hips around the structure. A twisted or angled endpoint is a different practice result.
Pause briefly in the horizontal tuck to show that the descent has stopped. Raising back to vertical is optional and is not required for the main repetition.
Reset with both hands secure until the feet are supported. Record descent time, endpoint angle and final hold separately, and practise both orientations.
Muscles worked when doing Vertical-to-Tuck Human Flag Transition
The Vertical-to-Tuck Human Flag Transition combines controlled lowering with straight-arm support and trunk stabilisation. The top arm pulls against the upper grip while the bottom arm pushes the structure away throughout the changing body angle.
- Latissimus dorsi and upper-back muscles: contribute to the top-arm pulling action and control of the upper shoulder as the torso descends.
- Deltoids, serratus anterior and other shoulder stabilisers: help maintain the opposing shoulder positions and active bottom-arm support.
- Obliques, abdominals and other trunk muscles: organise the torso and pelvis, resisting uncontrolled side bending and rotation.
- Triceps: help maintain extended elbows rather than allowing a bent-arm catch.
- Forearms and hand muscles: retain both grips through the entry, descent, endpoint and supported reset.
- Hip flexors and lower-body muscles: draw the knees towards the torso and keep the tuck organised; the initial straight vertical shape also requires leg tension.
The main descent is commonly coached as a negative or eccentric lowering, with isometric stabilisation at the elbows, grip and paused positions. That does not mean every contributing muscle lengthens throughout the entire movement. The optional reverse raise adds an upward phase and should be logged separately. These are qualitative movement roles rather than measured activation rankings for this exact transition.
Primary Muscle(s):

Anterior delt

Lats

Oblique
Secondary Muscle(s):

Trapezius

Abdominal
Equipment needed for Vertical-to-Tuck Human Flag Transition
Adjust the difficulty of Vertical-to-Tuck Human Flag Transition
Adjust the lowering range, assistance and tempo while keeping straight elbows, a compact tuck and a controlled supported exit. Partial-angle descents and assisted transitions are useful regressions but should be logged separately from the full unassisted vertical-to-horizontal movement. Add hold time or a reverse raise only after the main descent is repeatable.
How to make Vertical-to-Tuck Human Flag Transition harder?
How to make Vertical-to-Tuck Human Flag Transition easier?
How to make Vertical-to-Tuck Human Flag Transition harder?
To make Vertical-to-Tuck Human Flag Transition harder:
-
Slow the same full descent without adding a long pause to inflate the timer. Maintain the compact tuck and avoid acceleration near horizontal; use fewer repetitions if needed.
-
Extend the settled horizontal tuck hold modestly after the descent. Keep its duration separate from lowering time and stop before the hips sag or an elbow bends.
-
Progress towards one-leg or straddle flag lowerings once compact tuck descents are repeatable. These use a longer lever and are different variations, so keep their body shape and results distinct.
How to make Vertical-to-Tuck Human Flag Transition easier?
To make Vertical-to-Tuck Human Flag Transition easier:
-
Lower through a shorter range from the established tucked high position and stop at an angle you can control. Extend the endpoint gradually towards horizontal; record partial-range attempts accurately.
-
Use qualified assistance at the hips, or a suitable band arrangement that remains secure throughout the changing angle. Test the complete supported entry and exit first and log assisted transitions separately.
-
Practise vertical flag stabilisation and tuck formation as separate steps with foot support available. Use the Human Flag Plank for the push–pull pattern if the shoulders or grip are not ready for an inverted lowering.
