
Tuck Human Flag
How to do Tuck Human Flag?
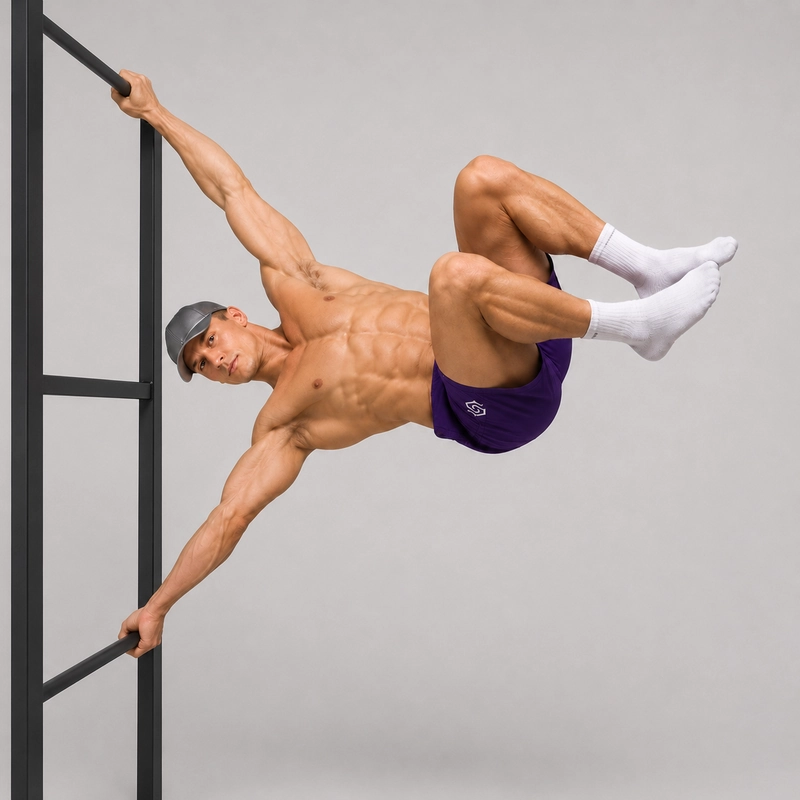
The tuck human flag is an advanced calisthenics skill in which you hold your torso sideways while gripping a secure vertical structure and keeping both knees drawn toward your chest. The top arm pulls against the equipment, the bottom arm pushes away and the trunk maintains the horizontal flag position.
Bringing the knees close to the torso moves more of the lower body's mass toward the grip axis, substantially reducing the leverage compared with the full human flag. This makes the tuck variation one of the most useful first unsupported horizontal flag positions.
The tuck human flag bridges the gap between feet-assisted, upright or band-assisted drills and longer-lever variations such as the one-leg and straddle human flag. For a complete sequence of preparatory exercises, see our human flag progression guide.
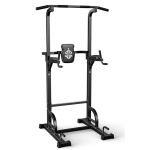
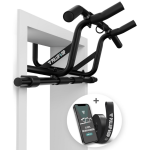
Use a rigid vertical pole, stall bar or similarly secure structure with enough clearance around your body. Check that the equipment and your hands are dry before beginning.
How to perform a tuck human flag
- Position your hands: Place the hands one above the other with enough distance between them to produce strong opposing forces without losing shoulder control.
- Establish your grip: Use the grip orientation you have already practised during easier flag drills. When the equipment allows, a pronated top-hand grip and supinated bottom-hand grip can provide a stable learning position.
- Activate both arms: Pull firmly with the top arm while pushing the structure away with the bottom arm. Fully extend both elbows and keep the shoulders active.
- Enter a compact tuck: Lift your feet from the ground or move from a supported or inverted position while bringing both knees toward your chest and the heels toward your glutes.
- Move the hips away from the structure: Continue the opposing arm actions as you bring your hips and torso toward a sideways horizontal position.
- Stabilize the tuck: Brace your abdominals and obliques, keep the knees compact and prevent the pelvis from rotating toward the ground or sky.
- Hold the position: Maintain straight elbows, active shoulders and a stable torso with the hips approximately level with the shoulders.
- Exit under control: Return to a supported or upright position and place the feet securely on the ground before releasing either hand.
What counts as a clean tuck human flag?
A clean tuck human flag has vertically aligned hands, fully extended elbows and active shoulders. The torso is held approximately horizontal, both feet remain unsupported and the knees stay compact without the hips rotating or dropping substantially below the shoulders.
Common mistakes to avoid
- Opening the tuck: Keep the knees close to the torso and the heels near the glutes so the lower body does not create unnecessary leverage.
- Dropping the hips: Continue pulling and pushing while moving the pelvis away from the equipment instead of allowing it to hang below the shoulders.
- Bending the top elbow: Maintain a straight-arm pulling action rather than turning the skill into a bent-arm side hold.
- Collapsing through the bottom shoulder: Push the structure away continuously and keep the bottom elbow fully extended.
- Relaxing the compact leg position: Keep both legs active instead of allowing the knees and feet to drift apart uncontrollably.
- Rotating the chest: Keep the shoulders and pelvis in approximately the same plane rather than turning toward the ground or sky.
- Forcing excessive spinal rounding: Create a compact tuck through controlled hip and knee flexion without aggressively pulling the spine into an uncomfortable position.
- Using too much momentum: Use only enough assistance or kick to reach the position without swinging past horizontal.
- Holding after the shoulders collapse: End the attempt when either elbow bends or you can no longer maintain active shoulder pressure.
- Training only the preferred side: Practise both orientations so each arm develops the pulling and pushing roles.
Benefits of the tuck human flag
- Introduces the unsupported horizontal flag: The compact lower-body position allows you to practise the essential flag mechanics with less leverage than longer variations.
- Develops opposing straight-arm strength: The top arm pulls while the bottom arm pushes against the same structure.
- Strengthens the lateral core: The obliques and other trunk muscles work isometrically to keep the torso from falling toward the ground.
- Builds shoulder control: Both shoulders must remain active while performing different roles under load.
- Improves body awareness: The exercise teaches you to judge the position of your hips and torso while suspended sideways.
- Provides a measurable progression: You can extend the hold, open the hip angle or gradually extend one or both legs as your control improves.
Readiness and safety
Before attempting an unsupported tuck human flag, develop the push-and-pull coordination with feet-assisted or upright flag drills. Supporting exercises such as the strict pull-up, chest-to-wall handstand, side plank and hollow body hold can help prepare the relevant pulling, pushing and trunk muscles. Use short attempts with generous rest and avoid repeatedly kicking into a position you cannot control. Stop if the exercise causes sharp pain, joint instability, tingling or numbness, and seek qualified medical advice if symptoms persist.
Frequently asked questions
Is the tuck human flag easier than the full human flag?
Yes. Bending the hips and knees brings the lower body's mass closer to the hands and shortens the effective lever. The shoulders, arms and trunk still perform the same essential push, pull and bracing actions.
What is the difference between a tuck human flag and an upright human flag?
In an upright flag, the torso remains closer to vertical and the legs are generally positioned below or closer to the equipment. In a tuck human flag, the torso moves sideways toward horizontal while both knees remain compact, making it a more specific progression toward the full flag.
How tight should the tuck be?
Bring the knees close enough to the torso to create a short, compact lever while keeping the position comfortable and controlled. The knees do not need to touch the chest, but they should not drift outward or away as fatigue develops.
How long should I hold a tuck human flag?
A practical starting point is three to five sets of technically clean three-to-eight-second holds per side with approximately two to three minutes of rest. The quality of the position matters more than reaching a particular duration.
Why do my hips remain below my shoulders?
Common causes include insufficient pulling from the top arm, weak pushing from the bottom arm, an opening tuck or entering from an angle that is too low. Use feet or band assistance and practise bringing the hips progressively higher without bending the elbows.
Should I enter from the ground or an inverted position?
Either entry can work. A controlled supported or inverted entry may make it easier to find the horizontal position, while a ground kick-up requires careful control of momentum. Use the method you can perform safely with a predictable exit.
What should I practise after the tuck human flag?
First extend your clean tuck holds and learn to enter and exit without losing shoulder position. You can then open into an advanced tuck, extend one leg, move into a straddle or gradually work toward the full human flag.
Tips for the proper execution of Tuck Human Flag
Align the top and bottom hands vertically so your body does not rotate around the structure.
Pull continuously with the top arm while pushing the structure away with the bottom arm.
Keep both elbows fully extended during the entry, hold and exit.
Maintain active pressure through the bottom shoulder instead of allowing it to collapse toward the hand.
Bring both knees toward your chest and keep the heels close to your glutes.
Keep both legs active so the knees and feet do not drift apart uncontrollably.
Move the hips away from the structure until the torso approaches a horizontal position.
Brace the obliques and abdominals to prevent the hips from dropping or rotating.
Keep the chest, shoulders and pelvis in approximately the same plane.
Use only enough momentum to enter the position without swinging past horizontal.
Keep your head neutral and look forward instead of excessively lifting or dropping the chin.
Practise both sides so each arm develops experience in the pulling and pushing positions.
Use short, technically clean attempts and stop when your tuck or shoulder position deteriorates.
Return the feet to a stable surface before releasing either hand.
Muscles worked when doing Tuck Human Flag
The tuck human flag is a full-body isometric exercise in which the top arm pulls, the bottom arm pushes and the trunk resists lateral flexion and rotation. The compact leg position reduces the lower-body leverage but does not remove the need for strong, coordinated shoulder and core engagement.
Primary muscles
- Latissimus dorsi: The lat on the top-arm side contributes substantially to the straight-arm pulling force needed to support the body.
- Deltoids: The shoulders stabilize both arms, with particularly high demand on the bottom shoulder as it pushes the structure away.
- Obliques: The internal and external obliques resist lateral flexion and help keep the torso and hips in the horizontal position.
- Rectus abdominis and transverse abdominis: These muscles brace the trunk and help maintain the compact pelvic and torso position.
Secondary muscles
- Serratus anterior: The serratus supports the active pushing position and scapular control of the bottom shoulder.
- Trapezius and other scapular stabilizers: These muscles control the shoulder blades while the arms apply opposing forces.
- Teres major: The teres major assists the latissimus dorsi in the top-arm pulling action.
- Triceps: The triceps work isometrically to maintain elbow extension, especially in the bottom arm.
- Forearms and hand muscles: These muscles maintain both grips and resist slipping or unwanted wrist movement.
- Quadratus lumborum and spinal erectors: These trunk muscles help resist side bending and stabilize the spine.
- Hip flexors: The iliopsoas, rectus femoris and other hip flexors help keep the thighs drawn toward the torso.
- Hamstrings: The hamstrings assist in maintaining knee flexion and keeping the heels close to the glutes.
- Glutes: The glutes help stabilize the pelvis and prevent uncontrolled rotation.
Compared with the longer human flag variations, the tuck position increases the sustained hip- and knee-flexion demand while reducing the torque created by the legs. The essential upper-body pattern remains unchanged: the top arm pulls, the bottom arm pushes and the trunk keeps the body stable.
Primary Muscle(s):

Anterior delt

Lats

Oblique
Secondary Muscle(s):

Trapezius

Abdominal
Equipment needed for Tuck Human Flag

Adjust the difficulty of Tuck Human Flag
How to make Tuck Human Flag harder?
How to make Tuck Human Flag easier?
How to make Tuck Human Flag harder?
To make Tuck Human Flag harder:
-
Increase the tuck hold gradually while preserving straight elbows and active shoulders.
-
Move the knees slightly farther from the chest to create an advanced tuck human flag.
-
Extend one leg while keeping the opposite knee tucked toward the torso.
-
Alternate which leg is extended during one-leg human flag holds.
-
Open both legs into a wide straddle while keeping the knees straight.
-
Perform controlled tuck human flag negatives from a higher position.
-
Raise the tucked body from a lower angle into the horizontal position.
-
Transition slowly between the tuck, one-leg and straddle human flag positions.
-
Enter the tuck human flag with progressively less momentum or assistance.
-
Progress to the full human flag with both legs straight and together.
How to make Tuck Human Flag easier?
To make Tuck Human Flag easier:
-
Practise a feet-assisted flag plank while learning the top-arm pull and bottom-arm push.
-
Keep one foot on the ground or a low platform while bringing the opposite knee into a tuck.
-
Use a resistance band to support the hips while holding the compact position.
-
Practise an upright flag before moving the torso toward horizontal.
-
Hold a downward-angled tuck flag instead of immediately trying to become parallel to the ground.
-
Start from a supported high tuck and lower only as far as you can maintain straight elbows.
-
Use a spotter to support the hips lightly while you learn the horizontal position.
-
Perform very short tuck holds and accumulate more sets instead of extending a failing attempt.
