
90-Degree Push-Up
How to do 90-Degree Push-Up?
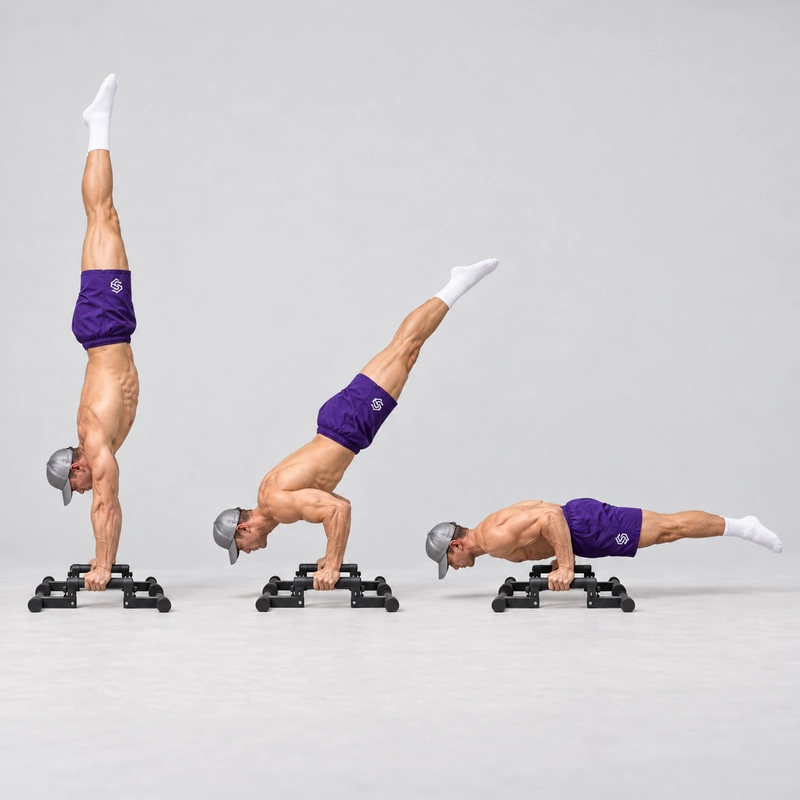
The 90-Degree Push-Up is an elite calisthenics skill that moves from a freestanding handstand into a horizontal Bent-Arm Planche and then reverses the movement back to handstand. Instead of lowering and pressing along a mostly vertical path like a conventional handstand push-up, your entire straight body rotates through approximately 90 degrees while your shoulders travel forward of your hands.
The exercise is also called a 90-Degree Handstand Push-Up, 90° Push-Up or 90DPU. These names describe the same movement and should not receive separate canonical pages. The name does not refer to an ordinary floor push-up performed with 90-degree elbows.
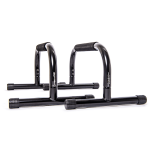
This page uses parallettes for the primary demonstration. The handles provide a neutral grip, useful clearance for the head and shoulders and a secure surface to squeeze during the transition. The exercise can also be performed with the palms on the floor, but the body positions and completion standard remain sufficiently similar that a separate floor exercise page is unnecessary.
The 90-Degree Push-Up is more than an especially deep Handstand Push-Up on Parallettes. A deep handstand push-up keeps the legs primarily above the hands, whereas the 90-degree variation lowers the legs and torso toward horizontal as the shoulders shift into a Bent-Arm Planche position.
| Exercise type | Dynamic bent-arm strength and hand-balancing skill |
|---|---|
| Primary equipment | Parallettes |
| Starting position | Stable freestanding handstand with straight arms |
| Bottom position | Horizontal Bent-Arm Planche with the elbows approximately bent to a right angle |
| Defining standard | Lower to the horizontal position and press back to a stable handstand without touching down or using leg momentum |
How to Do the 90-Degree Push-Up
Prerequisites and Readiness
The 90-Degree Push-Up combines two advanced abilities: freestanding inverted pressing and forward-leaning Bent-Arm Planche strength. Developing only one side of this combination will usually leave a clear sticking point during the transition.
You should already be able to balance and exit a Freestanding Handstand on parallettes and perform controlled deep Handstand Push-Ups on the same equipment. Forward-leaning exercises such as Planche Leans, the Pseudo Planche Push-Up on Parallettes and Bent-Arm Planche holds develop the other half of the movement.
A practical but non-universal readiness profile is a repeatable 15-to-30-second parallette handstand, two or more controlled deep parallette handstand push-ups and a short Bent-Arm Planche hold in the leg position you intend to use. These are coaching benchmarks rather than mandatory tests.
You do not need a full straight-arm Planche before learning the 90-Degree Push-Up. The Bent-Arm Planche uses different elbow mechanics and allows the chest, shoulders and triceps to contribute more directly.
Equipment and Setup
Use two matching parallettes that are rigid, level and unable to slide, rotate or tip when forward pressure is applied. Medium-height parallettes normally provide useful clearance without placing the athlete unnecessarily high above the floor, but stability is more important than a specific height.
- Place the parallettes parallel to one another on a flat, non-slip surface.
- Begin with the handles approximately shoulder-width apart and adjust them slightly for comfortable overhead alignment.
- Test each bar by pressing forward, backward and sideways before entering the handstand.
- Leave enough space behind you for the legs to lower toward horizontal and enough space beside you for a cartwheel exit.
- Keep thick padding away from the parallette bases if it makes them unstable, but place suitable mats around the potential fall area.
- Grip the middle of each handle firmly with the thumbs wrapped around the bars and the wrists aligned with the forearms.
If you are choosing equipment for this movement, the guide to the best parallettes explains the differences between low, medium and high models. Prepare the hands, wrists and forearms with the Wrist Warm-Up Routine, followed by progressively harder handstand and pressing drills.
Step-by-Step Instructions
- Enter a freestanding handstand on the parallettes using a kick-up or press that you can control consistently.
- Stabilize before beginning the repetition instead of carrying entry momentum directly into the descent.
- Fully extend the elbows, elevate the shoulders and center your bodyweight above the handles.
- Bring the ribs toward the pelvis, squeeze the glutes, straighten the knees and keep the legs together with the toes pointed.
- Begin shifting the shoulders forward while gradually bending the elbows.
- Allow the straight body to rotate from vertical toward horizontal as the shoulders and head travel forward of the hands.
- Guide the elbows diagonally backward and keep the forearms comparatively vertical instead of allowing the elbows to flare abruptly sideways.
- Maintain active shoulder-blade control as you move from elevation in the handstand toward strong protraction in the Bent-Arm Planche.
- Continue lowering the torso, hips and legs together without folding at the hips or throwing the legs downward.
- Reach the bottom when the body is approximately parallel to the floor, the elbows are bent to roughly 90 degrees and the shoulders remain well in front of the hands.
- Pause only long enough to demonstrate control without resting the torso or head on the floor.
- Press forcefully through both parallettes and begin extending the elbows while raising the hips and legs as one connected unit.
- Guide your center of mass progressively back over the hands instead of trying to press only vertically from the bottom.
- Continue pressing until the body returns to vertical, the elbows reach full extension and the shoulders are actively elevated.
- Stabilize the finished handstand before beginning another repetition or using your established step-down or cartwheel exit.
Completion Standard
A complete repetition begins and ends in a stable freestanding handstand with straight elbows. Between those positions, the athlete must reach a recognizable horizontal Bent-Arm Planche and return without the feet, knees, head or torso touching the floor.
- The parallettes remain fixed and parallel throughout the repetition.
- The start and finish show full elbow extension and active shoulder elevation.
- The shoulders travel clearly forward of the hands during the descent.
- The torso, hips and legs reach an approximately horizontal bottom position.
- The elbows are bent to approximately a right angle at the bottom.
- The shoulders, hips, knees and ankles remain in one controlled line.
- The legs remain together unless the repetition is specifically recorded as a straddle variation.
- No kick, kip, bounce or uncontrolled leg throw assists the upward press.
- The athlete regains a stable handstand before the repetition is counted as complete.
The elbow angle does not need to measure exactly 90 degrees with a goniometer because body proportions and parallette dimensions affect the visible position. The defining standard is the controlled transition between a straight-arm handstand and a clear horizontal Bent-Arm Planche.
Breathing
Take a controlled breath and brace in the handstand, then release a small amount of air during the descent without relaxing the trunk. Exhale through the hardest part of the press and reset your breathing after stabilizing at the top.
Common 90-Degree Push-Up Mistakes
- Performing only a deep handstand push-up keeps the legs vertical instead of rotating the body toward a horizontal Bent-Arm Planche.
- Lowering the legs before shifting the shoulders forward causes the athlete to fall behind the base of support.
- Bending the elbows without sufficient forward lean makes the bottom position impossible to balance.
- Dropping rapidly into the bottom uses momentum and creates an unreliable transition.
- Piking at the hips shortens the lever and prevents the body from reaching the intended straight horizontal position.
- Arching excessively separates the rib cage from the pelvis and makes the leg path harder to control.
- Flaring the elbows abruptly reduces forearm alignment and can make the bottom position unstable.
- Allowing the shoulder blades to collapse removes the active support needed in the Bent-Arm Planche.
- Trying to press only upward leaves the legs behind instead of moving the entire body back toward handstand.
- Throwing or separating the legs uses momentum to compensate for insufficient pressing strength.
- Stopping with bent elbows at the top produces an incomplete repetition.
- Beginning another repetition before regaining balance makes the following descent dependent on momentum.
- Using unstable parallettes creates a tipping risk when the shoulders move forward of the hands.
- Training to failure can leave insufficient strength for a controlled exit from the bottom position.
Benefits of the 90-Degree Push-Up
- It combines advanced vertical and horizontal pressing strength in one continuous movement.
- It develops dynamic strength through the Bent-Arm Planche position.
- It challenges the shoulders and triceps through a large change in body orientation.
- It develops handstand balance while the center of mass moves substantially relative to the hands.
- It strengthens coordination between elbow extension, shoulder movement and scapular control.
- It requires the abdominals, glutes and legs to maintain a rigid lever throughout the transition.
- It provides a measurable progression beyond deep freestanding handstand push-ups.
- It prepares the athlete for harder bent-arm presses, dead presses and advanced handstand transitions.
A peer-reviewed handstand push-up technique paper describes the underlying exercise as a combination of handstand, shoulder press and push-up that challenges upper-extremity strength and stability. The additional horizontal transition of the 90-Degree Push-Up has not been studied separately, so its specific technique and progression recommendations are primarily based on established coaching practice.
Programming the 90-Degree Push-Up
Practise the exercise near the beginning of an advanced pushing or skill session after warming up and completing several submaximal preparation sets. Do not place maximal attempts after high-volume planche, dip or handstand push-up work.
- Perform three to five sets of one to three full attempts when training the complete exercise.
- Use three to four sets of one to three repetitions for controlled negatives or assisted full transitions.
- Use three to five short holds of approximately three to eight seconds when training the Bent-Arm Planche separately.
- Rest approximately three to five minutes between high-effort full attempts.
- Begin with one or two focused weekly sessions and add exposure only when the shoulders, elbows and wrists recover fully.
- Perform complete skill attempts before accessory Handstand Push-Ups and Pseudo Planche Push-Ups.
- Stop the set before balance, horizontal alignment or pressing speed deteriorates substantially.
- Progress one variable at a time by increasing range, lengthening the lever, reducing assistance or adding a controlled repetition.
Safety Considerations
The 90-Degree Push-Up places the full bodyweight over the hands while moving between an inverted position and a demanding forward lean. It should be attempted only after developing reliable parallette balance, pressing strength and safe exits.
- Use parallettes that cannot slide, rock, rotate or tip under forward pressure.
- Practise a step-down and cartwheel exit before attempting the complete movement.
- If the press fails near the bottom, place the feet down under control instead of forcing the return to handstand.
- Use a qualified spotter at the hips or thighs when first learning the full transition.
- Keep the head clear of the floor and never use it as a support point.
- Avoid practising beside walls or objects that obstruct the horizontal leg path.
- Stop if you experience sharp or persistent wrist, elbow, shoulder or neck pain, instability, numbness, tingling or dizziness.
- Seek appropriate professional guidance if a previous injury or medical condition affects overhead pressing or inverted exercise.
Frequently Asked Questions
Is the 90-Degree Push-Up the same as a deep Handstand Push-Up?
No. A deep Handstand Push-Up follows a mostly vertical pressing path, while the 90-Degree Push-Up rotates the torso and legs into a horizontal Bent-Arm Planche before returning to handstand.
Why is it called a 90-Degree Push-Up?
The name refers to the recognizable transition from a vertical handstand toward a horizontal position, with the elbows also commonly reaching approximately a right angle at the bottom.
Do I need a full Planche first?
No. A full Planche is a straight-arm skill with different strength demands, while the 90-Degree Push-Up passes through a Bent-Arm Planche supported by the shoulders, chest and triceps.
Does a Straddle 90-Degree Push-Up count?
It counts as a legitimate straddle variation and useful progression, but it should be recorded separately from the stricter legs-together version because the straddle shortens the effective lever.
Is a Dead Press the same exercise?
The upward phase is very similar, but a Dead Press begins motionless in the Bent-Arm Planche, whereas a complete 90-Degree Push-Up begins in handstand and includes both the descent and return.
Can the exercise be performed on the floor?
Yes. The floor version uses the same movement standard, but it requires considerably more wrist extension and may provide less clearance than parallettes.
Can I learn it against a wall?
A wall can help develop Handstand Push-Up strength, but it normally obstructs the horizontal leg path required for a complete 90-Degree Push-Up.
How many repetitions are considered good?
One strict legs-together repetition with a controlled horizontal bottom and stable handstand finish is already an elite achievement, so most training should use low-repetition sets.
For an exercise-specific visual analysis and additional coaching progressions, see Simonster Strength’s 90-Degree Push-Up tutorial.
Tips for the proper execution of 90-Degree Push-Up
Place both parallettes parallel to one another on a flat, non-slip surface.
Test the bars against forward pressure before entering the handstand.
Grip the center of each handle firmly with your thumbs wrapped around the bars.
Stabilize the handstand completely before beginning the descent.
Shift the shoulders forward as the elbows begin to bend.
Keep the forearms comparatively vertical throughout the transition.
Guide the elbows diagonally backward instead of flaring them abruptly sideways.
Maintain active shoulder elevation at the top and strong scapular protraction near the bottom.
Keep the ribs controlled, glutes squeezed, knees straight and toes pointed.
Lower the shoulders, hips and feet together instead of folding at the waist.
Look slightly ahead of the parallettes while keeping the neck neutral.
Reach a clear horizontal Bent-Arm Planche before reversing the movement.
Press the handles downward while guiding the entire body back toward vertical.
Finish every repetition with completely straight elbows and an actively elevated shoulder position.
Film the exercise from the side to assess the body angle, elbow depth and hip position.
End the set while you still have enough strength to exit safely.
Muscles worked when doing 90-Degree Push-Up
The 90-Degree Push-Up combines the muscular demands of a deep handstand push-up with a Bent-Arm Planche. The contribution of each muscle changes as the body moves from vertical to horizontal and back again.
Primary Muscles
- Anterior deltoids: The front shoulders produce substantial force as the shoulders move forward of the hands and the body presses back toward handstand.
- Lateral deltoids: The side deltoids assist the overhead press and stabilize the upper arms throughout the transition.
- Triceps brachii: The triceps control elbow flexion during the descent and extend the elbows during the return to handstand.
- Pectoralis major: The chest contributes strongly from the forward-leaning horizontal bottom position.
Secondary and Stabilizing Muscles
- Serratus anterior: The serratus maintains active scapular protraction and supports the shoulder blades against the rib cage.
- Trapezius: The trapezius assists scapular rotation and active shoulder elevation as the body returns to handstand.
- Rotator-cuff muscles: These muscles stabilize the upper-arm bones while the shoulders move through changing angles under load.
- Biceps and brachialis: The elbow flexors help control and stabilize the bent-arm bottom position.
- Forearms and hand muscles: These muscles maintain the grip and make small pressure adjustments for balance.
- Rectus abdominis, transverse abdominis and obliques: The abdominal muscles connect the rib cage and pelvis and limit unwanted arching or rotation.
- Spinal stabilizers: The back muscles co-contract with the abdominals to control the trunk through the changing body angle.
- Glutes: The glutes stabilize the pelvis and help prevent the hips from folding during the transition.
- Quadriceps and hip adductors: These muscles keep the knees straight and legs together during a strict repetition.
Primary Muscle(s):

Anterior delt
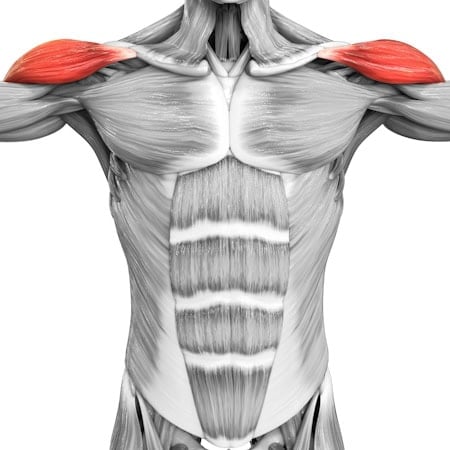
Lateral delt

Triceps
Secondary Muscle(s):

Upper chest

Trapezius

Abdominal
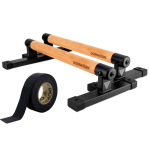
Equipment needed for 90-Degree Push-Up
Adjust the difficulty of 90-Degree Push-Up
How to make 90-Degree Push-Up harder?
How to make 90-Degree Push-Up easier?
How to make 90-Degree Push-Up harder?
To make 90-Degree Push-Up harder:
-
Extend the controlled descent toward five seconds without losing the straight body line.
-
Pause for two to three seconds in the horizontal Bent-Arm Planche.
-
Press from the bottom to handstand over three to five controlled seconds.
-
Perform a Dead Press from a motionless Bent-Arm Planche without using an eccentric preload.
-
Add a clear dead stop in both the bottom position and the finished handstand.
-
Perform two or more consecutive repetitions without stepping down.
-
Enter through a controlled straight-arm Press to Handstand before beginning the repetition.
-
Perform one-and-a-half repetitions by pressing halfway up, returning to the bottom and then completing the full press.
How to make 90-Degree Push-Up easier?
To make 90-Degree Push-Up easier:
-
Develop the vertical pressing component with strict Handstand Push-Ups on parallettes.
-
Build forward-leaning bent-arm strength with Pseudo Planche Push-Ups on parallettes.
-
Practise a tuck or straddle Bent-Arm Planche before trying to move through the position.
-
Lower from handstand into a Bent-Arm Planche and place the feet down instead of pressing back up.
-
Perform only the upper portion of the transition and increase the range gradually.
-
Tuck the knees as the body approaches horizontal to shorten the lower-body lever.
-
Use a half-lay position with bent knees before progressing to straight legs.
-
Perform a Straddle 90-Degree Push-Up to reduce the effective lever.
-
Use a securely anchored overhead resistance band around the hips to reduce the load.
-
Ask a qualified spotter to assist lightly at the hips or thighs during the transition.
-
Practise an Advanced Frog Stand or crow-to-handstand press as a shorter-lever pressing drill.
