
Australian Pull-Up on Rings
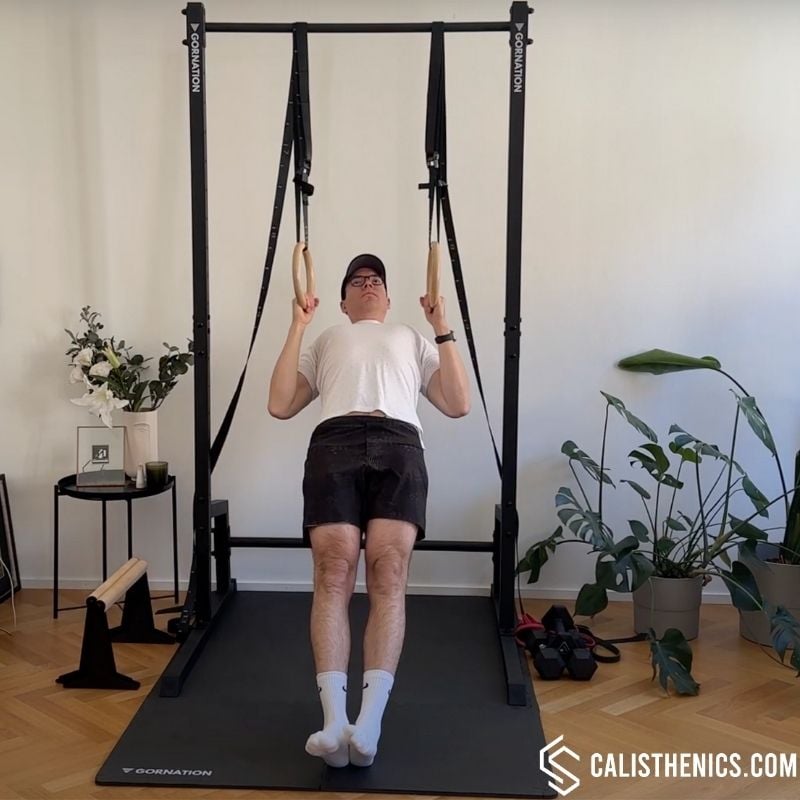
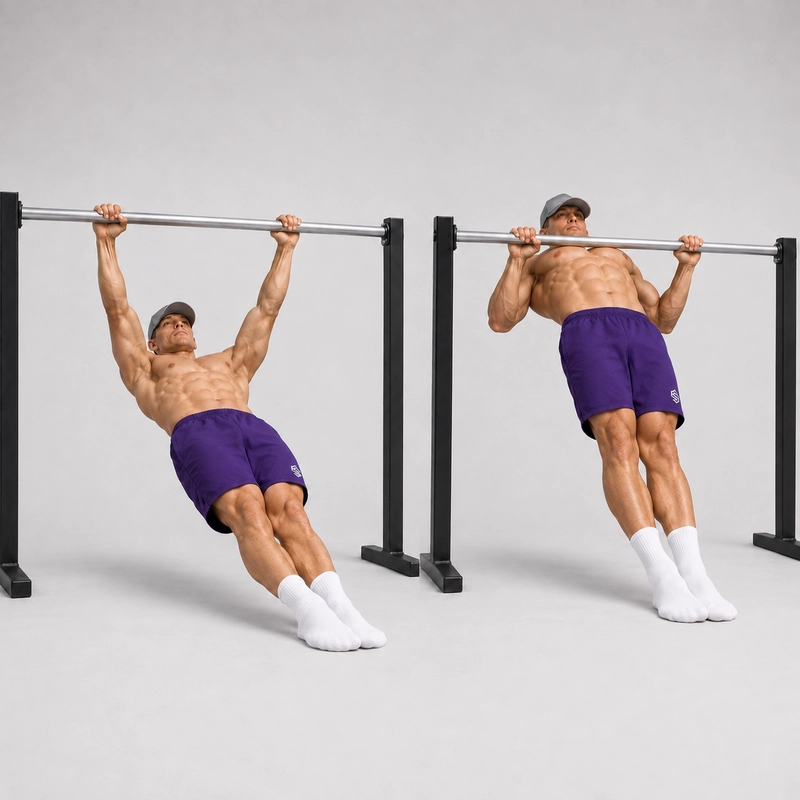
How to do Australian Pull-Up on Rings?
The inverted row—also known as the Australian pull-up or bodyweight row—is a horizontal pulling exercise performed underneath a low fixed bar. Unlike the strict pull-up, which pulls your body vertically, the inverted row keeps your heels on the floor as you pull your chest toward the bar.
This variation uses straight, fully extended legs and a rigid body line from shoulders to heels. It develops the upper-back and arm strength needed for balanced pulling and supports your pull-up training, although it does not replace vertical pulling practice. If your main goal is your first pull-up, combine rows with our 6-week pull-up workout plan.
Equipment and Setup
Use a stable horizontal bar fixed low enough that you can lie underneath it with straight arms while your body remains off the floor. A bar around waist height is a useful starting point, but the correct height depends on your body length and strength.
- Confirm that the bar and its supports cannot roll, slide or lift.
- Leave enough clear floor space to extend both legs fully.
- Use a firm, non-slip surface under your heels.
- Position the bar so your lower chest can reach it without your hips touching the floor.
How to Do an Inverted Row
- Move underneath the low bar. Sit beneath it, grip it securely and extend your legs forward until only your heels contact the floor.
- Take an overhand grip. Place your hands around shoulder-width or slightly wider, with your thumbs wrapped around the bar and wrists straight.
- Set the starting position. Straighten your elbows and raise your hips until your shoulders, hips, knees and heels form one line. Keep your knees locked, toes pointing upward and neck neutral.
- Brace your body. Tighten your abs, glutes and legs before pulling. Your torso and legs should move as one rigid unit.
- Pull your chest toward the bar. Draw your shoulder blades back, drive your elbows behind you and lift your lower chest toward the bar. Keep the elbows roughly 30–45 degrees from your torso.
- Make controlled chest contact. Finish when your lower chest or sternum gently touches the bar while your hips remain fully extended.
- Lower under control. Extend your elbows until your arms are straight again without letting your hips drop or touch the floor.
Exhale as you pull your chest toward the bar and inhale as you lower. Use a smooth rhythm and briefly reset your body line before each repetition.
What Counts as a Full Inverted Row?
A strict repetition begins with straight elbows and finishes with controlled contact between the bar and the lower chest. Your heels stay planted, your legs remain extended and your body maintains one continuous line throughout the pull.
- Arms fully extended at the bottom.
- Knees straight and heels in the same position.
- Shoulders, hips, knees and heels aligned.
- Lower chest or sternum touches the bar at the top.
- No hip thrust, bouncing or neck reach.
- Controlled return to the starting position.
Do not count the repetition if the hips sag, the knees bend, the feet slide, the bar does not reach the chest or momentum completes the pull.
Inverted Row Benefits
- Builds horizontal pulling strength: The exercise trains you to pull the arms behind the torso while retracting the shoulder blades.
- Strengthens the upper back and arms: The rhomboids, trapezius, lats, rear deltoids and elbow flexors work together during each rep.
- Trains full-body tension: Your abs, glutes and posterior chain hold the body rigid while the upper body pulls.
- Scales without external weights: Raising the bar makes the exercise easier, while lowering the bar or elevating the feet increases the challenge.
- Complements pull-ups: Rows strengthen a horizontal pulling pattern and scapular retraction, while pull-ups train vertical pulling.
A comparative study of rowing exercises found that the inverted row produced high activation of the latissimus dorsi, upper-back and hip-extensor muscles, supporting its use as a compound horizontal pull. See the study abstract.
Common Inverted Row Mistakes
Letting the Hips Sag
If the hips drop, the exercise becomes shorter and the trunk no longer moves as one unit. Squeeze your glutes before each rep and imagine holding a straight reverse-plank position.
Thrusting the Hips Into the Bar
Driving the hips upward can create the appearance of a full rep without completing the row. Keep the hips aligned with the shoulders and heels while the chest—not the pelvis—travels toward the bar.
Bending the Knees
Bent knees shorten the lever and make the exercise easier. That is a valid regression, but it is not the straight-leg inverted row defined on this page. Keep both knees extended throughout every counted rep.
Reaching With the Chin
Pulling the head forward reduces the remaining distance without improving the row. Keep your neck aligned with your torso and bring the sternum to the bar.
Pulling the Bar Toward the Neck
Aiming too high often causes excessive elbow flare and shoulder shrugging. Pull toward the lower chest with the elbows traveling down and behind you.
Stopping Before Chest Contact
If you cannot touch the bar without losing your body line, raise the bar or move your heels slightly closer to it. Use an angle that allows complete, repeatable repetitions.
Failing to Straighten the Arms
Shortening the bottom position removes part of the range. Lower until both elbows are straight while keeping the shoulders controlled and the hips off the floor.
Using an Unstable Bar
Do not row from a loose bar, rolling barbell or improvised support that could move under load. Check the equipment before positioning your body beneath it.
How Many Inverted Rows Should You Do?
A practical starting point is 3–4 sets of 6–12 strict repetitions with 60–120 seconds of rest. Choose a bar height and body angle that let you complete every rep with chest contact and a straight body line.
Once you can perform 3 sets of 8–12 clean reps, make the movement slightly harder by lowering the bar, moving the heels farther forward or adding a brief pause at the top. This range is a coaching guideline rather than a universal advancement test.
How to Adjust Inverted Row Difficulty
The body angle controls how much of your bodyweight the arms must pull. A higher bar creates a more upright, easier position. A lower bar brings the body closer to horizontal and shifts more load toward the upper body.
Change only one variable at a time. Keep your legs straight, chest-contact point and tempo consistent so you can tell whether your pulling strength is actually improving.
Easier Inverted Row Progressions
- Higher-bar inverted row: Raise the bar so your torso is more upright while keeping your legs extended.
- Short-lever inverted row: Keep the legs straight but walk the heels closer to the bar.
- Bent-knee inverted row: Bend the knees and place the feet flat on the floor to shorten the lever.
- Doorway row: Use a more upright body position when a low bar is not available. See the doorway row.
Harder Inverted Row Variations
- Lower-bar inverted row: Bring the body closer to horizontal while preserving chest contact.
- Feet-elevated inverted row: Place the heels on a stable box so the body is horizontal or slightly declined.
- Paused inverted row: Hold the chest against the bar for two to three seconds.
- Slow-eccentric inverted row: Lower for three to five seconds on every repetition.
- Weighted inverted row: Use a weighted vest or have a training partner position and remove a plate securely before and after the set.
- Archer inverted row: Pull primarily toward one hand while the other arm straightens to the side.
Inverted Row FAQ
Is an inverted row the same as an Australian pull-up?
Yes. Inverted row, Australian pull-up and bodyweight row are common names for the same horizontal pulling movement performed beneath a bar or similar support.
Should your chest touch the bar during inverted rows?
For the strict standard on this page, yes. Touch the lower chest or sternum to the bar without thrusting the hips, bending the knees or reaching the neck forward. If contact is not possible, use a higher bar or easier body angle.
Where should your feet be during an inverted row?
For this variation, keep both legs fully extended with the heels on the floor and toes pointing upward. The heels should remain planted in the same place throughout the set.
Are inverted rows easier than pull-ups?
Usually, because the heels support part of your bodyweight and the difficulty can be reduced by raising the bar. However, a low-bar or feet-elevated inverted row can still be demanding. The two exercises also use different movement patterns: inverted rows are horizontal pulls, while pull-ups are vertical pulls.
Can inverted rows help with pull-ups?
They strengthen many of the same back and arm muscles and help develop scapular retraction and body tension. However, include vertical pulling exercises such as assisted pull-ups and negatives as well, because rows alone do not practice the pull-up movement pattern.
How low should the bar be?
Use a height that lets you begin with straight arms, keep the hips off the floor and touch your chest to the bar on every rep. Raise the bar if your body line or range of motion breaks down; lower it when the current angle becomes consistently easy.
Tips for the proper execution of Australian Pull-Up on Rings
Maintain a neutral neck position to avoid strain.
Keep your wrists straight and aligned with your forearms.
Adjust grip width to target different areas of the back (wider for lats, narrower for biceps).
If using rings, rotate your grip naturally during the movement for better joint alignment.
Pause at the top for a brief second to maximize muscle engagement.
Gradually increase the difficulty by changing body position or adding weight.
Muscles worked when doing Australian Pull-Up on Rings
The inverted row is a compound horizontal pulling exercise. The upper-back and arm muscles create the row while the trunk, hips and legs hold the body in a rigid line.
Primary Muscles
- Rhomboids: Retract the shoulder blades as the chest approaches the bar.
- Middle and lower trapezius: Control the shoulder blades and support the upper-back position.
- Latissimus dorsi: Pulls the upper arms behind the torso and assists throughout the row.
- Rear deltoids: Help move the upper arms backward during the pulling phase.
- Biceps brachii and brachialis: Flex the elbows as you pull toward the bar.
Secondary Muscles
- Forearms and grip muscles: Maintain a secure hold on the low bar.
- Abdominals and spinal stabilizers: Keep the torso rigid rather than allowing the lower back to arch.
- Glutes and hamstrings: Hold the hips extended and help preserve the straight line from shoulders to heels.
Compared with a pull-up, the inverted row places greater emphasis on horizontal shoulder movement and scapular retraction. Both exercises train the lats and elbow flexors, but they should be treated as complementary pulling patterns rather than interchangeable movements.
Primary Muscle(s):

Lats
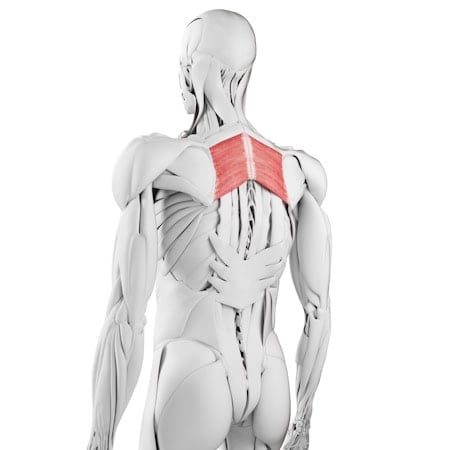
Rhomboid
Secondary Muscle(s):
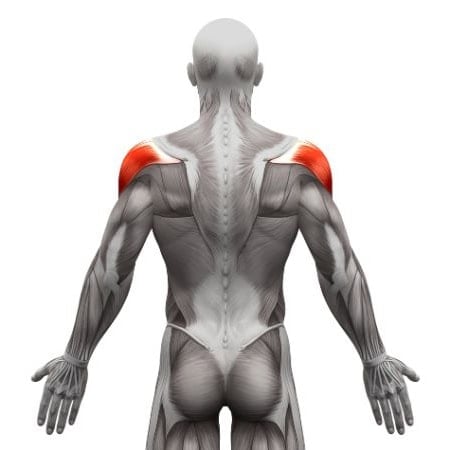
Rear delt

Biceps
Equipment needed for Australian Pull-Up on Rings
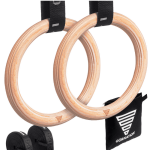
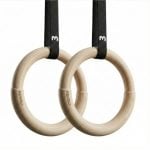
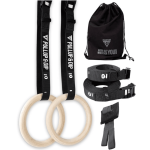
Adjust the difficulty of Australian Pull-Up on Rings
The Australian Pull-Up is highly adaptable, making it a staple in any calisthenics routine. By adjusting your body position, grip, or equipment setup, you can fine-tune the difficulty to match your current strength level. Beginners can start with an elevated bar and bent-knee variations, while advanced athletes can challenge themselves with ring rows, weighted variations, or even one-arm progressions. This level of adaptability makes the Australian Pull-Up an essential exercise for building pulling strength in a scalable way.
How to make Australian Pull-Up on Rings harder?
How to make Australian Pull-Up on Rings easier?
How to make Australian Pull-Up on Rings harder?
To make Australian Pull-Up on Rings harder:
-
Elevate Your Feet – Placing your feet on a raised surface increases difficulty.
-
Use Gymnastic Rings – Rings add instability, making the exercise more challenging.
-
Weighted Rows – Wear a weighted vest or place a weight plate on your torso.
-
Pause Reps – Hold the top position for 2-3 seconds before lowering.
-
One-Arm Variations – Progress towards a single-arm row for maximum challenge.
How to make Australian Pull-Up on Rings easier?
To make Australian Pull-Up on Rings easier:
-
Bend Your Knees – Placing your feet flat on the ground reduces the load on your upper body.
-
Raise the Bar Higher – The more upright your body, the easier the movement.
-
Use Resistance Bands – Loop a band around the bar and under your back for assistance.
-
Perform Negative Reps – Focus on the lowering phase to build strength gradually.
