
Back Lever
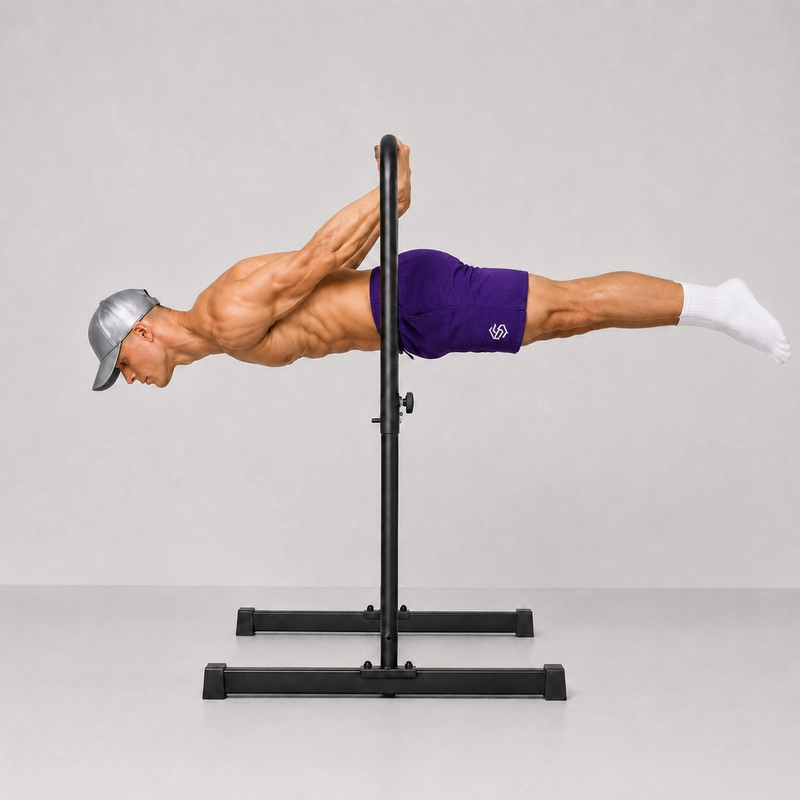
How to do Back Lever?
The full back lever is an advanced straight-arm calisthenics skill in which you suspend your body horizontally beneath a pull-up bar or gymnastics rings. Your stomach faces the floor while your shoulders, hips, knees and ankles form one straight line parallel to the ground.
Unlike the front lever, where the athlete faces upward, the back lever places the arms behind the torso in a demanding shoulder-extension position. The anterior shoulders, chest and biceps work isometrically around the shoulder while the trunk, hips and legs maintain a rigid body line.
The full back lever is the final position in a long progression. Before attempting it, you should be comfortable with a controlled skin the cat, an inverted hang and shorter-lever back lever variations. A sensible progression is advanced tuck → one-leg → half-lay → straddle → narrow straddle → band-assisted full back lever → full back lever negative → full back lever.
You can perform the exercise on a fixed pull-up bar or gymnastics rings. A shoulder-width overhand grip is the recommended starting grip on a bar. Rings allow the hands to rotate more naturally, but they also introduce additional movement that must be controlled. A fully supinated grip places greater demand on the biceps and should be treated as a later variation rather than the default technique.
The back lever exposes the shoulders and straight-arm tissues to substantial load. Build the position gradually, use an apparatus with enough clearance and never force yourself through shoulder extension that feels painful or unstable. The inverted hang on rings and reverse plank can help develop the inversion control and body tension needed before harder lever work.
Tips for the proper execution of Back Lever
Enter from a controlled inverted hang. Stabilize above the lever before lowering. Do not swing or throw your legs into position.
Keep the elbows completely straight. Actively lock the elbows before beginning the descent and maintain that position throughout the hold.
Lower the body as one unit. Move the shoulders, torso, hips and legs together instead of allowing the feet to fall first.
Press firmly through the apparatus. Maintain active tension through the hands, arms and shoulders rather than hanging passively in the joints.
Draw the ribs down. Brace the abdomen and avoid allowing the chest and lower back to arch excessively.
Squeeze the glutes and legs. Keep the hips extended, knees straight, legs together and toes pointed.
Use a side-view recording. A side view makes it easier to judge whether the shoulders, hips and ankles are genuinely horizontal.
Start timing after stabilization. Do not count the lowering phase as part of the five-second strict hold.
Keep the head neutral. Look toward the floor without lifting the chin or throwing the head backward.
Control the exit. Return to the inverted hang or tuck the legs and lower safely instead of dropping out of the position.
Muscles worked when doing Back Lever
The back lever is a full-body isometric exercise, but its loading differs from the front lever. The arms are fixed behind the torso while the anterior shoulder and upper-arm muscles resist the body rotating toward the floor. The trunk, hips and legs then maintain the straight horizontal line.
Primary Muscles
- Anterior deltoids: The front deltoids contribute to shoulder flexion and help resist the extended shoulder position created by the back lever. The anterior deltoid is identified as one of the principal shoulder flexors in the NCBI overview of the glenohumeral joint.
- Biceps brachii: The biceps work isometrically while the elbows remain straight and the shoulders support the lever. Because the long head crosses the shoulder joint, it also contributes to shoulder stability. Its anatomy and stabilizing role are described in the NCBI review of the biceps brachii.
- Pectoralis major: The chest contributes to shoulder flexion, adduction and internal rotation while helping control the position of the upper arms. These functions are outlined in the NCBI anatomy review of the pectoralis major.
Secondary and Stabilizing Muscles
- Latissimus dorsi and teres major: Contribute to shoulder and upper-body control while the athlete transitions into and out of the lever.
- Rotator cuff and scapular stabilizers: Help maintain the position of the shoulder joint and control the shoulder blades under load.
- Triceps: Work isometrically to maintain complete elbow extension.
- Forearms and hand muscles: Maintain a secure grip on the bar or rings throughout the entry, hold and exit.
- Abdominals and obliques: Brace the trunk, control the ribs and resist unwanted arching or rotation.
- Spinal erectors: Contribute to trunk rigidity and help keep the torso aligned with the legs.
- Glutes: Maintain hip extension and prevent the body from folding at the hips.
- Quadriceps, hamstrings and adductors: Keep the knees extended and the legs straight, together and aligned with the torso.
Back Lever vs. Front Lever Muscle Emphasis
Both exercises require straight arms, grip strength and complete body tension. However, the front lever predominantly challenges the pulling muscles of the back and trunk, while the back lever places more direct demand on the anterior shoulders, chest and biceps because of the arms-behind-the-body position.
Primary Muscle(s):

Anterior delt

Biceps
Secondary Muscle(s):

Middle chest
Equipment needed for Back Lever
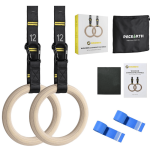
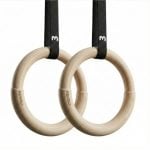
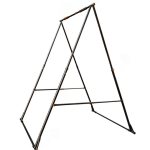
Adjust the difficulty of Back Lever
The back lever is scaled primarily by changing the length of the body lever, adding assistance or modifying the hold duration. Use the hardest variation that allows straight elbows, active shoulders and repeatable horizontal alignment. Progress only after you can enter, hold and exit the current variation without pain or uncontrolled movement.
How to make Back Lever harder?
How to make Back Lever easier?
How to make Back Lever harder?
To make Back Lever harder:
-
Increase the hold duration. Progress from a strict five-second hold toward eight to twelve seconds without losing horizontal alignment.
-
Perform back lever pulls. Move repeatedly between the inverted hang and full back lever while keeping the body straight and the elbows locked.
-
Add a bottom-position pause. Lower slightly below horizontal, regain the horizontal position and hold without bending the elbows.
-
Use a supinated grip. Practise the back lever with the palms oriented differently only after developing strong control with the standard grip. Introduce it gradually because it increases the demand around the biceps and anterior shoulder.
-
Add external resistance. Use a light weighted vest or very small ankle weights after the unweighted position is consistently secure.
-
Perform back lever pull-ups. Maintain the straight-body back lever while bending the elbows and pulling the body toward the bar. This is substantially harder than the static hold.
-
Progress toward a one-arm back lever. Gradually shift weight toward one arm or use assisted one-arm variations before attempting an unsupported hold.
How to make Back Lever easier?
To make Back Lever easier:
-
Full Back Lever Negative. Begin above horizontal and lower through the full back lever as slowly as possible, ending the repetition when you can no longer control the position.
-
Band-Assisted Full Back Lever. Place a resistance band beneath the hips to reduce the load while practising the complete straight-body position.
-
Narrow-Straddle Back Lever. Separate the feet slightly to shorten the effective lever while keeping both knees straight.
-
Straddle Back Lever. Spread the straight legs wider to reduce the leverage and make the horizontal position easier to maintain.
-
Half-Lay Back Lever. Keep the hips extended and thighs aligned with the torso while bending both knees to approximately 90 degrees.
-
One-Leg Back Lever. Extend one leg fully while keeping the other leg bent. Train both sides equally.
-
Advanced Tuck Back Lever. Keep the knees bent but move them farther away from the chest so that the back and thighs approach a straight horizontal line.
-
Tuck Back Lever. Pull both knees closely toward the chest to create the shortest and most manageable lever.
