
Feet-Assisted Ring Muscle-Up
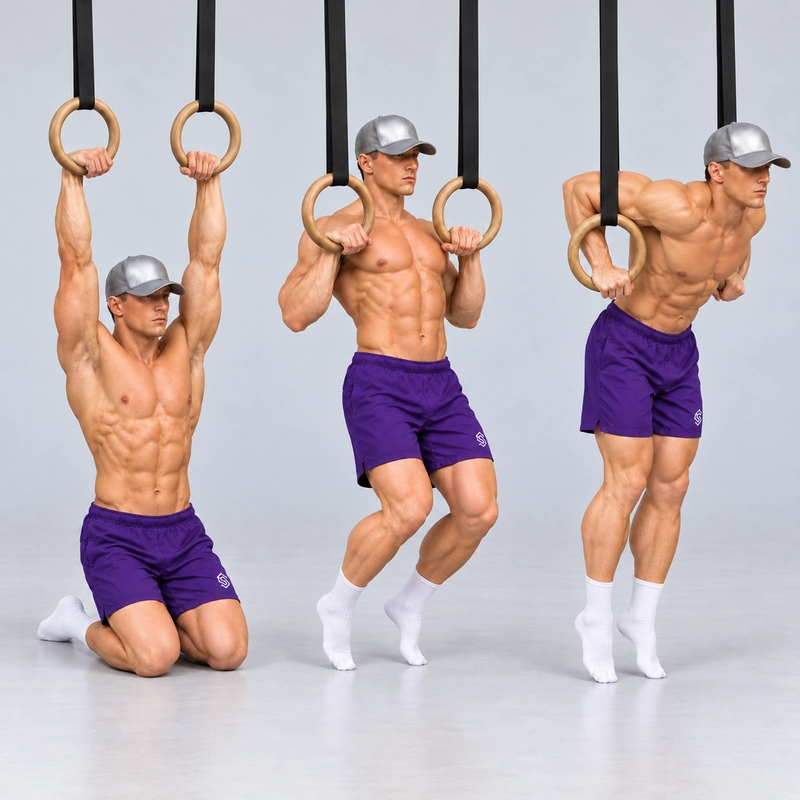
How to do Feet-Assisted Ring Muscle-Up?
What is the Feet-Assisted Ring Muscle-Up?
The Feet-Assisted Ring Muscle-Up on this page is a kneeling, low-ring preparation that connects a vertical false-grip pull with the muscle-up turnover. Start below the rings with your knees on the floor and a secure false grip. Use only enough assistance through the feet to pull your body upwards until the rings touch your chest, then move both shoulders over the hands into the controlled bottom of a ring dip.
The required finish is the bottom of the dip. You do not have to press to straight-arm support. If you can perform a controlled feet-assisted dip from there, you may add it voluntarily, but record it as an extension of the drill.
A complete Ring Muscle-Up includes the pull, turnover and press into support, without foot assistance in the strict version. This drill lets you practise the first two phases with support available from the floor. Reaching the assisted bottom-of-dip position is a useful result, but it does not count as a full strict muscle-up.
It differs from the Ring Muscle-Up Transition, which begins near the top of the pull with the rings already at the lower chest. Here, you first perform a recognisable vertical pull from the kneeling position. It also differs from the Feet-Elevated Assisted Ring Muscle-Up, which uses straight legs on a plyo box, a row-like start and a required press to support.
For related coaching context, CrossFit’s low-ring technique progression includes a supported pull followed by a transition into the bottom of a dip. Its example uses rows; this page uses the kneeling vertical pull specified for this exercise.
What you are practising
The drill combines pulling height with turnover timing. You maintain a false grip while bringing the rings to the chest, then guide the torso above the hands without losing control of either ring. The feet make the load manageable while the upper body still performs the movement.
“As little assistance as possible” means the smallest amount that preserves a secure grip, a controlled chest-high pull and a symmetrical transition. It does not mean refusing assistance until the grip slips or one elbow climbs over first. Use a little more support when needed, then reduce it as the same movement becomes repeatable.
The initial pull should be predominantly vertical. Keep the knees and hips reasonably beneath the working rings rather than stretching the legs forward into a reclined row. After the rings reach the chest, the shoulders must move forward over the hands. That short change in direction is part of the turnover; it is not a reason to pull in a rigid vertical line through the entire drill.
The low-ring setup also lets you practise entering a bent-arm support position without having to press out of it immediately. Keep the shoulders active and the rings close. The bottom of the dip is a position you control, not a place where you drop and hang passively between the rings.
This version does not replace separate grip, pulling or dip practice. It connects them at an accessible load and gives you feedback about which part breaks down. The optional press can be added later without moving the drill’s required endpoint.
Equipment and kneeling setup
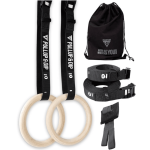
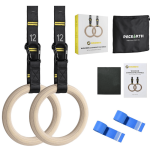
- Rings: attach both straps to a secure overhead structure and set the rings to the same height. Check the anchor, straps and buckles before loading them.
- Height: position the rings so you can establish the false grip and reach a comfortable straight-arm pulling start while kneeling. Leave enough room above the hands to complete the turnover without hitting the anchor or another obstacle.
- Floor: use a level, non-slip surface. A thin stable pad beneath the knees is optional for comfort, provided it does not move or interfere with foot contact.
- Body position: kneel beneath the rings with the knees bent and the torso relatively upright. Avoid starting in a long, reclined row position.
- Foot support: arrange comfortable foot or toe contact so you can provide small, controlled assistance as the knees become light and leave the floor. Do not force an uncomfortable ankle position simply to copy a photograph.
- Clearance: leave space for the chest and elbows to pass through the rings and for a controlled return to kneeling. A plyo box is not needed for this version.
Test the assisted high pull and bottom-of-dip position before joining them. The ring height must allow both a meaningful pull and a supported turnover. If you already begin with the rings touching the chest and the elbows deeply bent, you have shortened the pulling phase into a transition-only drill.
Knee contact is appropriate in the initial kneeling start and at the final reset. During the ascent, the knees should leave the floor as the body rises. Keep the feet available for assistance; do not lift the entire lower body into an unsupported attempt before you can control the grip and transition.
Readiness and false-grip preparation
You do not need a complete ring muscle-up or a fixed number of unsupported pull-ups before practising this assisted drill. You do need to hold the rings securely, support a manageable amount of bodyweight through the false grip and enter the assisted dip position without collapsing.
A supported version of the Ring False Grip Hang can help you learn the hand position. Seat the ring across the heel of the palm near the wrist crease, roll the wrist above the ring and close the fingers and thumb securely. Increase load gradually before attempting a connected pull and turnover.
The False Grip Pull-up is a related pulling exercise. For this kneeling preparation, scale the loading through the feet rather than making its unsupported version a compulsory entry test.
Practise the assisted bottom position separately if it is unfamiliar. Feet Assisted Ring Dips can help you find a controllable supported range. The aim here is to arrive in the bottom of that position deliberately, not to force the deepest dip your shoulders can reach.
CrossFit’s muscle-up development guide separates component strength from assisted technique work. It is a broader coaching plan, not a validated test for this specific kneeling drill. Select the assistance that makes your present practice controlled.
How to do the Feet-Assisted Ring Muscle-Up
- Start kneeling. Position yourself below the low rings with the knees on the floor and comfortable foot contact available. Establish the false grip on both sides and extend the elbows naturally into the pulling start. Keep the straps tensioned without suddenly dropping bodyweight onto the wrists.
- Load the hands gradually. Brace the trunk and begin transferring support towards the rings. Make the knees light without using a bounce, jump or forceful hip extension.
- Pull vertically. Bend the elbows and pull your torso upwards, allowing the knees to leave the floor. Use only the foot assistance needed to maintain the path. Keep the rings close and retain the false grip rather than letting them slide into the fingers.
- Bring the rings to the chest. Continue until both rings make light, controlled contact at the chest, preferably near the lower chest for the turnover. Do not stop at chin height or throw the head forward to imitate contact.
- Connect the turnover. Bring the chest and shoulders forward over the hands as both elbows move behind the torso together. Keep the rings close to the body and the feet supported. Avoid lifting one shoulder over before the other.
- Control the bottom of the dip. Settle above the hands with bent elbows, rings close to the sides of the chest and shoulders actively supported. Maintain secure hand contact while the wrists move naturally from pulling false grip towards palm support. Do not release the rings or force the wrist angle to remain frozen.
- Show the required finish. Pause briefly enough to demonstrate control in the bottom position. The main drill is complete here. Straightening the elbows into a dip press is optional.
- Return or add the optional dip. For the main version, reverse the turnover under control, restore the pulling false grip and lower towards the kneeling start with adequate foot support. If you choose to add a dip, press to a stable support first, then lower deliberately and perform the same supported return.
- Reset gently. Place the knees back on the floor without dropping onto them. Re-establish the grip and starting position before the next pull, or stop the set if control has deteriorated.
What counts as the main repetition?
One successful main repetition moves from the kneeling false-grip pulling start through a predominantly vertical pull to chest contact, then through a symmetrical turnover into a stable bottom-of-dip position. The feet provide controlled assistance, both hands stay secure and there is no jump or one-arm scramble.
A dip press to straight-arm support is not required. Record it separately when added. A controlled return prepares the next repetition and is part of good practice, but it must not be used to redefine the required ascent finish as a full muscle-up lockout.
A partial pull, chest-high pull without a turnover or turnover-only attempt starting at chest level is a different practice result. If you cannot reverse the turnover safely, use a planned low-ring supported reset, increase assistance and practise the return separately. Do not drop through the grip or onto the knees to complete a count.
Technique cues and common mistakes
Pull first, then move over the hands
Trying to turn over before the rings reach the chest can leave you too low and encourage a one-arm transition. Keep the initial pull directed upwards and bring both rings to the chest before moving the shoulders across the hands. Connect the phases smoothly rather than throwing the torso forward.
Use enough assistance to keep the rep recognisable
Less help is useful only if the path stays controlled. If the false grip slides, the rings separate or one elbow turns first, add assistance and slow the attempt. Foot pressure should be steady, without a sudden push that bypasses the pull.
Keep the false grip through the pull
The rings should not slide down into the fingers before chest contact. Unload and reset if that happens. During the turnover, retain secure contact through the heel of the hand while allowing the wrist to adapt into support. Grip retention does not require an identical wrist angle in every phase.
Do not replace the vertical pull with a row
If the legs move far forward and the torso reclines substantially, you have changed the setup. Rows are useful preparations, but they do not reproduce this kneeling vertical entry. Adjust ring height and body placement before the next attempt.
Do not turn assistance into a jump
A forceful rise from the legs or hips can move you above the rings without a meaningful pull. Start settled, transfer support gradually and use the feet as assistance rather than a launch. The knees lift because the body rises, not because you kick them upwards.
Own the bottom-of-dip position
Keep the rings near the torso and the shoulders supportive. Reaching above the hands and then collapsing is not the intended finish. Use more foot support or a shorter transition practice if that position is not yet comfortable and controlled.
Do not add an exhausted dip merely to finish
The required drill already finishes at the bottom of the dip. If pressing from there would force a collapse, leave the press out and return. Add it when the supported dip is available under control, not as a test after repeated difficult turnovers.
Keep the reset deliberate
Lower with assistance available, restore the false grip and settle the knees gently. Repeated rushed resets can hide grip loss and make the next pull less consistent. Pause to rebuild the same start.
Optional dip extension
If you choose to continue, press down through the rings from the controlled bottom position until both elbows straighten. Stabilise the rings close beside the hips and keep useful foot assistance. A supported version of the Ring Support Hold can prepare this finish.
Then lower into the assisted dip, reverse the turnover and return to kneeling. Log this as “pull + transition + assisted dip” so that it remains distinct from the main pull-to-bottom-of-dip result. The extra press changes the workload; do not assume you should retain the same set size immediately.
An optional supported lockout still does not make the repetition a strict ring muscle-up. The feet share the load, and the kneeling start differs from an unsupported hang.
Programming and progression
Practise while the hands, wrists and shoulders are fresh, after gradual preparation and easy supported pulls. A conservative starting example is three to four sets of two to five main repetitions, with roughly 90 seconds to two minutes of rest or longer if needed. Use fewer attempts if the grip or turnover is new. These are coaching suggestions, not experimentally validated requirements for this drill.
Use a smooth ascent, a brief recognisable bottom-of-dip finish and a controlled reset. Focus on ring-to-chest contact, symmetrical turnover and assistance you can repeat. You do not need a long maximal hold in the deep position to make the movement useful.
First make the existing assisted setup consistent, then reduce foot pressure gradually. A slightly slower return or a brief pause at chest contact can add a challenge without changing the required endpoint. Record any added dip separately.
If you cannot connect the phases, separate them: practise an assisted false-grip chest-high pull, then the low-ring turnover. Join them again when both can be controlled with the same support setup. A successful isolated transition is not the same as a completed vertical pull plus transition.
The Feet-Elevated Assisted Ring Muscle-Up offers a different geometry and adds a compulsory press in its defined version. It is a related option, not a mandatory next step or universally harder configuration. A later strict ring muscle-up requires separate unsupported pulling, turnover and dip ability.
End the set when the pull becomes a jump, ring contact becomes uneven, the grip slips or the bottom position collapses. Stop for sharp wrist, elbow, shoulder or chest discomfort, tingling or numbness. If symptoms persist or recur with lighter loading, get appropriate professional guidance before resuming the exercise.
Frequently asked questions
Do I have to perform the ring dip?
No. The required finish is a controlled bottom-of-dip position after the vertical pull and turnover. Pressing to support is an optional extension.
Is the kneeling start part of the definition?
Yes. Start with the knees on the floor beneath the low rings and the false grip established. The knees lift as you pull upwards, while the feet remain available for assistance.
Should I use no assistance if I can?
Use the smallest amount that preserves the grip, chest-high pull and symmetrical turnover. If removing help changes the technique, retain assistance. An unsupported version has a different loading standard.
Should the whole movement be vertical?
The initial pull is predominantly vertical. Once the rings reach the chest, the shoulders travel forward over the hands into the turnover. That shift is part of the skill.
Is this the same as the transition-only drill?
No. The transition-only drill starts with the rings already near the chest. This version includes the vertical pull from the kneeling start before turning over.
Do the knees stay on the floor throughout?
No. They contact the floor at the start and reset, then lift as the body rises. Arrange comfortable foot contact to provide the assistance needed during the pull and turnover.
Can I count the result as a full muscle-up?
No. The main drill stops before the dip press and uses foot support. Even with an optional assisted press, it remains assisted practice rather than a strict unsupported muscle-up.
Tips for the proper execution of Feet-Assisted Ring Muscle-Up
Set both rings to the same height and check the anchor, straps and buckles before loading them.
Start kneeling below the rings with the false grip established and the elbows naturally extended for a meaningful pull.
Arrange comfortable foot contact so assistance remains available as the knees lift. Avoid forcing the ankle position.
Use the least assistance that preserves a smooth pull and symmetrical turnover. Add support if technique breaks down.
Pull predominantly upwards until both rings touch the chest. Do not turn the start into a reclined row.
Retain the false grip through chest contact, then maintain secure palm contact as the wrists move into support.
Keep the rings close and move both shoulders and elbows through the turnover together.
Finish in a controlled bottom-of-dip position. The dip press is optional, not a requirement for this drill.
Use foot support for a deliberate return and place the knees down gently. Reset the grip before repeating.
Record any added assisted dip separately and stop the set before jumping, grip loss or one-arm transitions appear.
Muscles worked when doing Feet-Assisted Ring Muscle-Up
The Feet-Assisted Ring Muscle-Up combines a supported vertical pull with a turnover into bent-arm support. The feet share the load, so muscle demand depends on assistance and movement quality. This description explains likely roles rather than measured activation in the exact drill.
- Pulling muscles: the latissimus dorsi and upper-back muscles help raise the torso and keep the rings close. The biceps and other elbow flexors contribute as the elbows bend towards chest contact.
- Grip and wrists: the forearm and hand muscles help retain the false grip through the pull and manage the change into palm support.
- Turnover and bottom-position control: the chest, anterior deltoids, triceps and shoulder stabilisers contribute as the shoulders move above the hands and the athlete holds the assisted bottom of the dip.
- Trunk and lower body: the abdominal and hip muscles help control the torso and pelvis, while foot pressure supplies the assistance needed to keep the movement deliberate.
The main drill does not require elbow extension from the dip. When an optional press is added, the triceps and pressing muscles have an additional dynamic role. Do not describe that extra pressing work as a mandatory feature of every repetition or equate an assisted bottom-position hold with a full unassisted ring dip.
Primary Muscle(s):

Biceps

Lats
Secondary Muscle(s):

Lower chest

Anterior delt

Triceps
Equipment needed for Feet-Assisted Ring Muscle-Up
Adjust the difficulty of Feet-Assisted Ring Muscle-Up
Adjust foot assistance before removing parts of the movement. Keep the kneeling start, vertical chest-high pull and symmetrical turnover into the bottom of the dip as the main standard. Use enough support to preserve control, then reduce pressure gradually. The dip press may be added voluntarily, but record it separately; it does not change the required finish of the base drill.
How to make Feet-Assisted Ring Muscle-Up harder?
How to make Feet-Assisted Ring Muscle-Up easier?
How to make Feet-Assisted Ring Muscle-Up harder?
To make Feet-Assisted Ring Muscle-Up harder:
-
Reduce foot pressure gradually while keeping the same ring height, kneeling start and controlled turnover. Do not substitute a jump or an asymmetrical transition for less assistance.
-
Add a brief pause when the rings touch the chest, then transition smoothly into the bottom of the dip without losing the false grip or separating the rings.
-
Voluntarily add a controlled feet-assisted ring dip from the bottom position to stable straight-arm support. Record the extra press as an extension; it remains optional for the main drill.
How to make Feet-Assisted Ring Muscle-Up easier?
To make Feet-Assisted Ring Muscle-Up easier:
-
Use more steady foot assistance while preserving the vertical pull and symmetrical turnover. Recheck ring height and foot placement so the support is accessible without a jump.
-
Practise supported false-grip chest-high pulls without turning over. Return to kneeling under control, then add the transition once the grip and pulling height are repeatable.
-
Start with the rings already near the chest and practise the isolated low-ring transition with substantial foot support. Label it as transition-only practice rather than the full kneeling pull-to-transition drill.
