
Ring False Grip Hang
How to do Ring False Grip Hang?
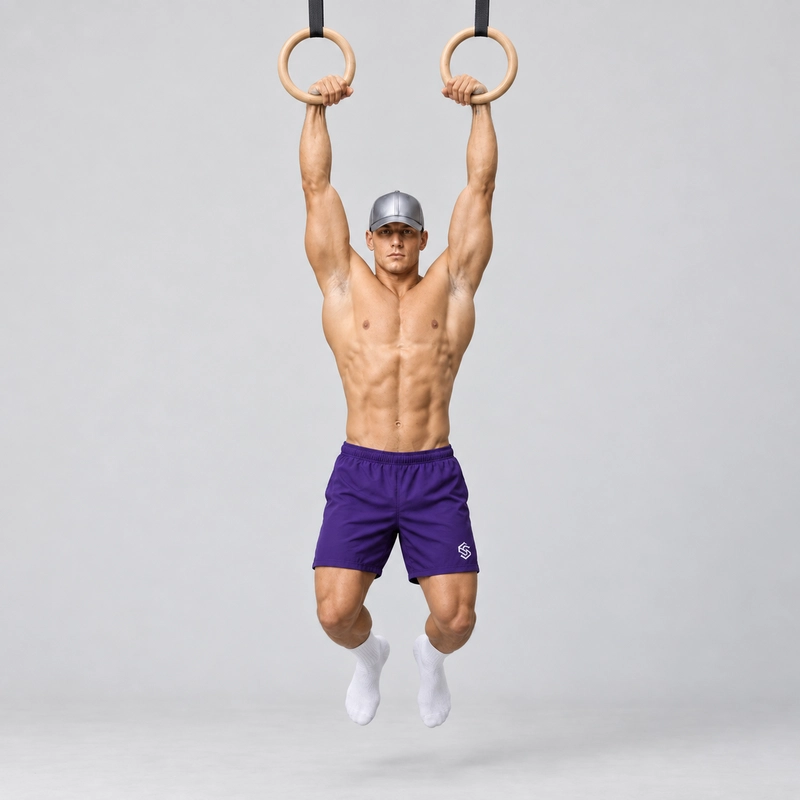
The ring false grip hang is an isometric grip exercise performed beneath gymnastics rings with the heel of each hand resting on the rings and the wrists flexed above them. In the complete version, your elbows are straight, your feet are off the floor and the false grip remains unchanged throughout the hold.
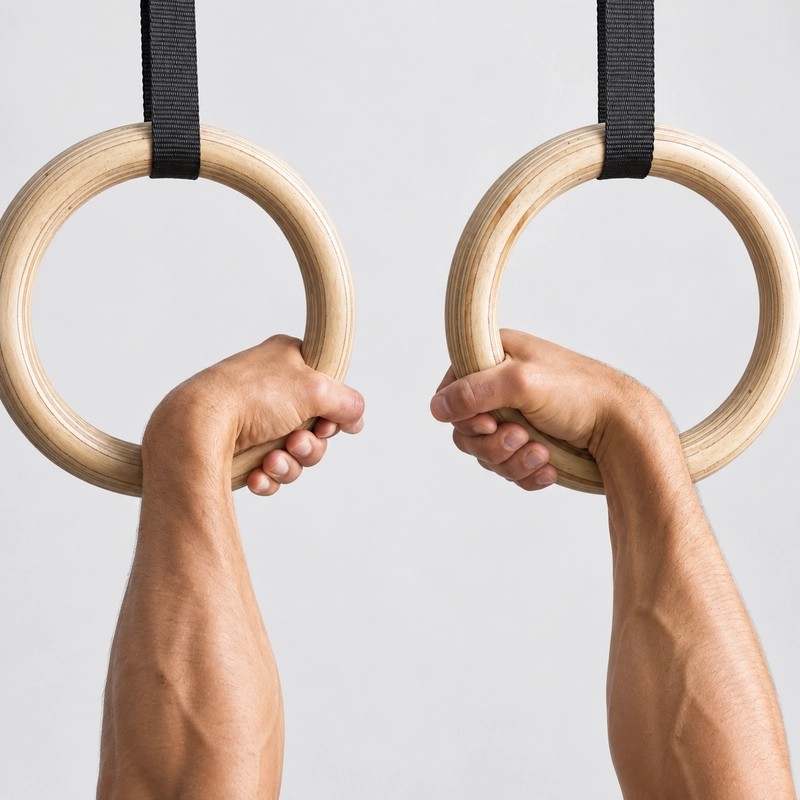
During a conventional dead hang or ring pull-up, the rings are held mainly through the fingers and palms while the wrists remain underneath them. A false grip moves the contact point diagonally toward the heel of each palm and positions the wrists above the rings.
This exercise primarily develops isometric strength and endurance in the hands, forearms and wrist flexors. It also teaches you to retain the false grip as the elbows straighten, which is where many athletes lose the position. The shoulders and trunk provide supporting stability, but the exercise does not replace the pulling and pressing strength needed for a complete muscle-up.
Why the Ring False Grip Matters
A secure false grip allows the hands to move from pulling below the rings to supporting above them without releasing and repositioning the grip. It is therefore commonly used during the strict ring muscle-up.
The ring muscle-up transition requires the wrists to move from a flexed false-grip position into support while the shoulders pass over the hands. A ring muscle-up progression published by CrossFit similarly identifies the false grip as part of the pulling phase and the change from wrist flexion to extension as part of the transition.
The false grip is not required for every ring exercise. Conventional ring pull-ups, dead hangs, front lever training and most general pulling exercises can use a normal grip. Its main value is preparing false-grip pulling and strict ring transitions.
Ring False Grip Hang vs Bar False Grip Hang
The ring and bar versions should remain separate exercises. Each ring moves independently and rests diagonally across the hand, allowing the forearms and rings to rotate during a transition. A fixed pull-up bar locks both hands at one width and produces a different pressure pattern across the lower palms.
Practise the version that matches your intended skill. Use the ring variation for ring false-grip pull-ups and ring muscle-ups, while the bar variation is more specific to false-grip pulling and selected transition techniques on a fixed bar.
Readiness and Equipment
You do not need a full ring muscle-up or an arbitrary dead-hang time before practising this exercise. You should, however, be able to support part of your bodyweight through your hands without pain and control a basic overhead hanging position.
Beginners should start with low rings and keep their feet on the floor. A feet-assisted hold uses the same hand position as the complete exercise while allowing the legs to regulate how much weight reaches the wrists.
- Attach both rings to a stable structure and check that the straps and buckles are secured correctly.
- Set both rings to exactly the same height and approximately shoulder-width apart.
- Begin with the rings low enough to establish the grip while sitting, squatting or standing with your feet supported.
- Use a non-slip floor and leave sufficient space around your body and the hanging straps.
- Keep the rings and your hands dry, and use a small amount of chalk only when permitted.
- See the Calisthenics.com guide to choosing and setting up gymnastics rings if you need equipment guidance.
How to Do the Ring False Grip Hang
1. Establish the false grip
- Sit, squat or stand beneath the low rings with both feet firmly supported.
- Hold the rings with your palms facing each other and feed each hand slightly deeper through its ring than you would for a normal grip.
- Position each ring diagonally across the palm, running from the web between the thumb and index finger toward the fleshy heel on the little-finger side.
- Seat the lower inside curve of the ring against the heel of the palm close to the wrist crease rather than directly against a prominent wrist bone.
- Flex the wrist and roll the heel of the hand over the ring until the wrist sits directly above it.
- Close the fingers firmly around the ring and wrap the thumb in opposition to create a secure closed grip.
- Repeat the same placement on the other side and confirm that both wrists sit at equal heights.
2. Load the supported position
- Keep your feet on the floor and lean or lower your body gradually until you feel pressure through both false grips.
- Use your legs to control the load rather than dropping suddenly into the hands.
- Allow the rings to settle into a comfortable angle while keeping the wrists above them and the straps approximately vertical.
- Brace your abdominal muscles and glutes and keep your legs together.
- Practise gradually extending the elbows without allowing either ring to slide from the heel of the hand into the fingers.
3. Perform the full hang
- Set the rings high enough for your feet to clear the floor while keeping a secure step or box available for entry and exit.
- Establish both false grips while your feet are still supported.
- Transfer your bodyweight into the hands gradually and remove your feet only after both grips feel secure.
- Straighten the elbows while keeping the wrists flexed above the rings.
- Allow the shoulder blades to elevate and upwardly rotate naturally while maintaining enough muscular tension to control the position.
- Keep the head neutral, ribs controlled and lower body quiet beneath the rings.
- Breathe normally and hold only while both hands retain the same false-grip position.
- Return your feet to the box or floor before unloading and opening the hands.
Ring False Grip Hang Completion Standard
- Both rings are set to the same height and remain beneath their attachment points.
- Each ring stays diagonally across the heel of the palm rather than rolling into the fingers.
- Both wrists remain above the rings for the complete hold.
- The fingers and thumbs remain securely closed around the rings.
- Both elbows remain fully extended in the complete exercise.
- The feet remain clear of the floor or box for the prescribed duration.
- The torso remains controlled without kipping, twisting or deliberate leg swinging.
- The shoulders remain controlled without being aggressively pulled down and back.
- The athlete returns to a secure support before releasing the grip.
A feet-assisted hold or bent-arm hold is a useful regression, but it should be recorded as an assisted variation rather than counted as the complete straight-arm exercise.
Should the Rings Be Turned Out?
No deliberate ring turn-out is required during the false grip hang. Ring turn-out is mainly associated with the support position above the rings, such as the ring support hold.
Below the rings, allow the palms and rings to settle into a comfortable inward-facing or slightly angled position. Small ring movements are normal, provided the grip remains secure and both wrists stay above the equipment.
Benefits of the Ring False Grip Hang
- Develops false-grip endurance: The wrist and finger flexors work isometrically to prevent the rings from sliding into a normal grip.
- Trains the straight-arm position: The exercise specifically addresses the point at which many athletes lose the grip as their elbows extend.
- Improves grip-placement awareness: Supported practice teaches you to reproduce the same ring path across both palms.
- Prepares false-grip pulling: A stable hang provides the starting position for the ring false grip pull-up.
- Supports muscle-up transitions: The wrist-over position helps the hands move from pulling to supporting without a separate regrip.
- Develops independent ring control: Each hand must keep its ring positioned correctly without relying on a fixed bar.
The exercise should not be presented as a major lat-building movement or a complete muscle-up solution. Continue training ring pull-ups, high pulling strength, transition drills and ring support strength separately.
Common Mistakes
- Holding the rings through the fingers: This is a normal ring grip rather than a false grip because the wrists remain underneath the equipment.
- Placing the rings directly on the wrist bones: Seat each ring against the fleshy heel of the palm instead of searching for the most painful contact point.
- Setting the grip after leaving the floor: Establish and compare both hand positions while your feet are still supported.
- Using unequal grip depth: One shallower hand position causes that wrist to roll underneath first and may twist the torso.
- Dropping into straight arms: Transfer weight gradually and use the legs until you can extend the elbows without losing the grip.
- Forcing the shoulders down: The shoulder blades should be allowed to elevate and rotate naturally in an overhead hang.
- Forcing a ring turn-out: Turning the rings outward is unnecessary below the equipment and may make the grip harder to control.
- Chasing maximum hold time: End the set once either ring begins moving from the heel of the palm toward the fingers.
- Assuming the grip replaces pulling strength: A secure false grip does not compensate for insufficient pulling height or transition control.
How to Program the Ring False Grip Hang
Practise false-grip hangs after preparing the wrists and shoulders but before demanding ring pull-ups or muscle-up work. The Calisthenics.com wrist warm-up routine can be used before gradually loading the position.
A practical starting point is three to five sets of five to fifteen seconds with enough foot assistance to maintain exact hand placement. Rest for approximately sixty to 120 seconds between sets, or longer if your grip quality has not recovered.
Progress one variable at a time by reducing assistance, straightening the elbows or increasing clean hold time. When you can repeat the full straight-arm position without either wrist rolling underneath, begin incorporating small scapular movements, false-grip pull-ups and low-ring muscle-up transition drills.
Safety and Discomfort
Concentrated pressure against the heel of the hand and muscular fatigue in the forearms can occur, but pain is not the training objective. Stop and unload the hands if you experience sharp or electrical pain, tingling, numbness, loss of grip control or skin pinching that may lead to tearing.
Do not use chalk, tape or wrist wraps to conceal painful technique, and do not continue once you can no longer return safely to the floor. Anyone with a current hand, wrist, elbow or shoulder injury should obtain individual guidance from an appropriate healthcare professional before loading the position.
Tips for the proper execution of Ring False Grip Hang
Set both rings to the same height and check the anchors, straps and buckles before loading them.
Establish both false grips while your feet are supported instead of trying to adjust them during a full hang.
Position each ring diagonally across the palm with its lower curve supported by the fleshy heel of the hand.
Keep the rings close to the wrist creases without pressing them directly onto prominent wrist bones.
Wrap the fingers and thumbs securely around the rings before transferring your bodyweight.
Match the depth and wrist angle of both grips before beginning the hold.
Transfer your weight gradually so you can correct the grip while your feet remain available.
Allow small natural ring movements while keeping both wrists above the equipment.
Maintain gentle shoulder control without forcing the shoulder blades aggressively down and back.
End the set as soon as either ring begins sliding from the heel of the palm toward the fingers.
Return your feet to a stable surface before opening your hands.
Stop the exercise if you experience sharp pain, tingling, numbness or loss of hand control.
Muscles worked when doing Ring False Grip Hang
The ring false grip hang primarily challenges the muscles that keep the fingers closed and the wrists flexed above the rings. The shoulders and trunk stabilize the hanging body, but their contribution depends on how actively the position is performed.
Primary Muscles
- Finger flexors: The flexor digitorum profundus and flexor digitorum superficialis contract isometrically to keep the fingers closed around the rings.
- Wrist flexors: The flexor carpi radialis and flexor carpi ulnaris resist the force attempting to pull the wrists underneath the rings.
- Intrinsic hand muscles: These smaller muscles help control pressure and maintain consistent contact with the curved equipment.
Secondary Muscles
- Forearm extensors and brachioradialis: These muscles co-contract with the flexors to stabilize the wrists and forearms.
- Rotator cuff and shoulder-girdle muscles: These muscles control the upper arms and shoulder blades while each ring moves independently.
- Latissimus dorsi, trapezius and serratus anterior: These muscles provide varying levels of isometric control during the overhead hang.
- Abdominals, obliques and glutes: These muscles limit swinging, twisting and excessive spinal extension.
- Biceps and brachialis: Their contribution is limited with straight elbows but increases during bent-arm regressions.
The ring false grip hang should therefore be classified primarily as an isometric forearm and grip exercise rather than a complete pulling-strength exercise.
Primary Muscle(s):
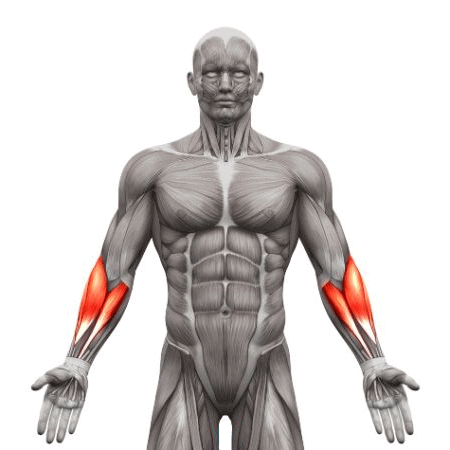
Forearm
Secondary Muscle(s):
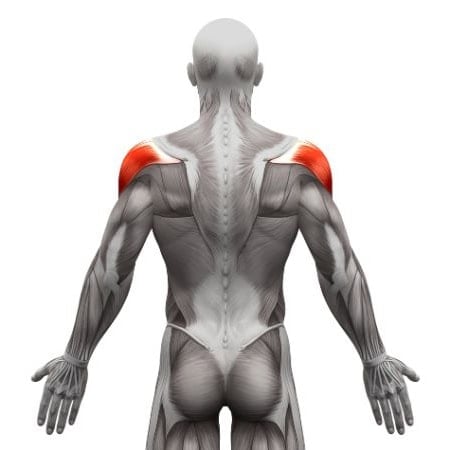
Rear delt

Trapezius
Equipment needed for Ring False Grip Hang
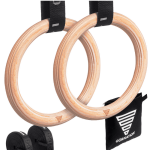
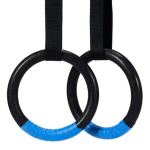
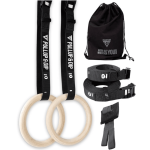
Adjust the difficulty of Ring False Grip Hang
How to make Ring False Grip Hang harder?
How to make Ring False Grip Hang easier?
How to make Ring False Grip Hang harder?
To make Ring False Grip Hang harder:
-
Gradually reduce pressure through the feet until you can support your complete bodyweight.
-
Extend the elbows farther until you can maintain the false grip in a full straight-arm hang.
-
Increase the hold duration while preserving identical hand placement from beginning to end.
-
Perform small scapular pulls without allowing either wrist to move underneath its ring.
-
Lift the legs into a tuck or L-sit while maintaining the straight-arm false grip hang.
-
Perform strict ring false-grip pull-ups from the complete hanging position.
-
Connect a high false-grip pull-up to a controlled low-ring muscle-up transition.
-
Practise controlled ring muscle-up negatives while maintaining pressure through the heels of the hands.
How to make Ring False Grip Hang easier?
To make Ring False Grip Hang easier:
-
Lower the rings and practise the false grip while sitting or standing with both feet fully supported.
-
Lean back slightly from low rings while using your legs to control how much bodyweight reaches the hands.
-
Begin with bent elbows and gradually extend them without allowing the wrists to roll underneath.
-
Practise one hand at a time while both feet remain supported and the other hand stabilizes your body.
-
Use one foot for assistance while keeping the other leg relaxed and gradually reduce the pressure through the supporting foot.
-
Perform several short holds instead of continuing until the grip begins to slip.
