
Press to Handstand
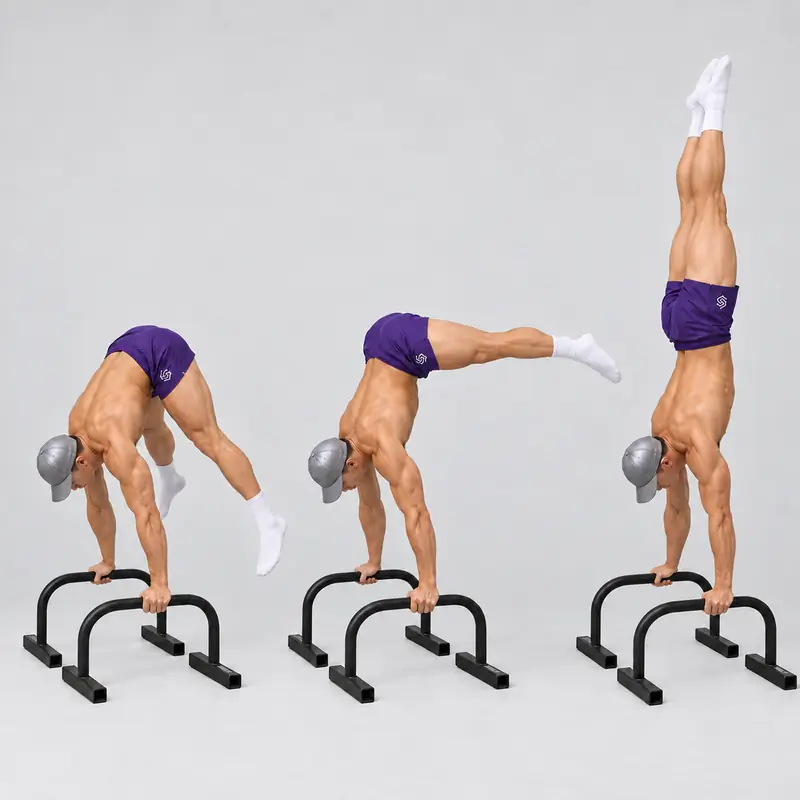
How to do Press to Handstand?
The Press to Handstand is a controlled handstand entry in which you place your hands on the floor, transfer your bodyweight forward and raise your hips and legs into a freestanding handstand without jumping. The elbows remain straight throughout the movement, making this a demanding combination of straight-arm shoulder strength, active compression, flexibility, balance and coordination.
This page covers the standing straight-arm straddle Press to Handstand. Begin in a wide straddle stance, place both hands on the floor and lift both feet simultaneously before bringing the legs together above you. Press Handstand, Straddle Press to Handstand and Straight-Arm Press to Handstand are alternative names for this same canonical exercise.
A Press to Handstand is different from a kick-up because momentum from the legs is not used to reach the balance point. It is also different from a handstand push-up or bent-arm press because the elbows do not bend. A Pike Press keeps the legs together and is a harder variation, while a Stalder Press begins from a supported straddle position rather than standing.
The movement finishes in the same balanced position used during a Freestanding Handstand. You should therefore develop consistent handstand balance and a safe exit before treating the full press as a primary training exercise.
| Exercise type | Dynamic straight-arm strength and handstand skill |
|---|---|
| Recommended level | Advanced |
| Equipment | None, with an exercise mat optional |
| Starting position | Standing in a wide straddle with both hands on the floor |
| Defining standard | Both feet leave the floor without a jump while both elbows remain straight |
| Final position | Controlled freestanding handstand with the legs together |
On this page: progression, benefits, readiness, mechanics, setup, instructions, form standard, common mistakes, limiting factors, programming, safety and frequently asked questions.
Where the Press to Handstand fits in the handstand progression
The Press to Handstand is an advanced entry rather than a beginner handstand progression. It combines abilities that are normally developed through several related training branches:
- Chest-to-Wall Handstand: Develop overhead alignment, active shoulders and confidence while inverted.
- Freestanding Handstand Practice: Learn to enter, balance and exit without relying continuously on the wall.
- Freestanding Handstand: Establish the unsupported balance position in which the press must finish.
- Seated Double-Leg Pike Lifts: Develop active hip compression while keeping the knees straight.
- Press leans and toe floats: Practise moving the hips toward the hands and gradually unloading the feet.
- Straddle handstand negatives: Learn the movement in reverse by lowering slowly from a handstand.
- Press to Handstand: Combine the weight transfer, compression and straight-arm push into one controlled ascent.
This is not a rigid checklist, and different athletes will rely on different combinations of mobility and strength. However, attempting the full press without handstand balance or a safe exit makes it difficult to practise consistently and safely.
Benefits of the Press to Handstand
- Develops a controlled handstand entry that does not depend on kicking or jumping.
- Builds straight-arm shoulder strength through a large change in body position.
- Strengthens active straddle and pike compression.
- Improves coordination between the wrists, shoulders, trunk, pelvis and legs.
- Teaches you to control your center of mass as it moves over the hands.
- Develops finger-pressure control for preventing overbalance at the top.
- Provides preparation for harder skills such as the Pike Press and Stalder Press to Handstand.
Are you ready to train the Press to Handstand?
You do not need to satisfy one universal flexibility or strength test before practising press drills. However, the following abilities make full attempts more productive:
- You can enter and exit a handstand safely without collapsing onto your head or neck.
- You can maintain a controlled chest-to-wall handstand with straight elbows and active shoulders.
- You can produce repeatable freestanding handstand balances and control an overbalance through your fingers.
- You can place both palms on the floor from a straddle stance without sharp discomfort.
- You can keep your knees straight while actively drawing your thighs toward your torso.
- You can perform a press lean or partial toe float without bending your elbows.
A repeatable five-to-ten-second freestanding handstand, a twenty-to-thirty-second chest-to-wall hold and a controlled wall-assisted straddle negative are useful coaching benchmarks, but they are not scientifically validated pass-or-fail requirements.
How strength, flexibility and technique interact
For the feet to leave the floor without a jump, your hips and combined center of mass must move far enough over the base created by your hands. A wide straddle and strong hip compression bring more of your body mass closer to the hands, reducing the amount of forward shoulder lean required.
Athletes with greater straddle and forward-fold mobility can usually position their hips higher before takeoff. Athletes with less mobility generally need more forward shoulder lean and greater straight-arm shoulder strength. Most successful presses use a combination of both qualities rather than relying entirely on flexibility or strength.
Your shoulders normally move slightly in front of your wrists during the initial weight transfer. Trying to keep the shoulders perfectly vertical above the wrists from the beginning can prevent the hips from reaching the balance point. As the hips rise, gradually return the shoulders toward a stacked handstand position.
A systematic review of handstand biomechanics describes the importance of wrist-based balance control and summarizes research modelling shoulder torque and center-of-mass movement during the press handstand. The available studies primarily involve trained gymnasts, so they explain general mechanics more confidently than they establish universal training benchmarks.
Starting position and setup
- Use a firm, level and non-slip surface with enough open space to step or cartwheel out safely.
- Stand with your feet in a wide but comfortable straddle.
- Fold forward from the hips and place your hands approximately shoulder-width apart between or slightly in front of your feet.
- Spread your fingers and keep the entire palm in contact with the floor.
- Point the middle fingers forward or slightly outward according to your wrist comfort.
- Straighten the elbows without forcing the joints beyond their natural range.
- Contract the quadriceps, keep the knees straight and point the toes comfortably.
- Look at a fixed point between or slightly ahead of your hands.
Warm-up and safety preparation
Prepare the wrists, elbows and shoulders before supporting your full bodyweight. The Wrist Warm-Up Routine can be followed by handstand shrugs, light press leans, controlled forward folds and active straddle-compression drills.
Use dynamic and active mobility before full attempts rather than forcing a maximal passive pancake stretch immediately before pressing. Rehearse your chosen step-down or cartwheel exit on both sides before beginning the working sets.
How to perform a Press to Handstand
- Create the starting shape. Fold between your straddled legs, place both palms firmly on the floor and maintain straight knees and elbows.
- Push the floor away. Elevate the shoulders toward the ears and make the upper back broad instead of allowing the chest to sink between the arms.
- Brace and compress. Keep the ribs controlled and actively draw the thighs toward the torso so that the hips can rise while the feet remain light.
- Transfer your weight forward. Allow the shoulders to move slightly beyond the wrists while maintaining pressure through the fingers and palms.
- Lift the hips first. Continue raising the pelvis toward the space above the hands instead of trying to throw the feet upward.
- Float both feet together. Once your weight is fully supported by the hands, lift both feet simultaneously without hopping, kicking or bending the elbows.
- Maintain the straddle. Keep the legs wide, knees straight and toes pointed while the hips continue travelling above the shoulders.
- Control the balance through the hands. Increase finger pressure if the legs begin travelling too far beyond the hands, and keep pressure through the palms if you begin falling back toward the feet.
- Return the shoulders toward the stack. As the pelvis moves above the shoulders, reduce the forward lean and align the shoulders more directly over the wrists.
- Close the legs near vertical. Bring the legs together only after the hips are nearly stacked above the shoulders.
- Finish the handstand. Maintain straight elbows, elevated shoulders, controlled ribs, straight knees and pointed toes.
- Demonstrate control. Hold the freestanding handstand for at least one to two seconds before using a controlled exit.
Breathing during the Press to Handstand
Take a comfortable breath before shifting your weight, then exhale gradually through the compression and toe-off phase. Use small controlled breaths once inverted instead of holding your breath for the entire attempt.
What counts as a proper repetition?
A full repetition begins with both feet motionless on the floor and finishes in a recognizable unsupported handstand. The following standards should remain visible:
- Both hands remain planted in their original position.
- Both elbows remain straight from the initial lean to the final handstand.
- The shoulders remain actively elevated rather than collapsing toward the ears.
- Both feet leave the floor through controlled weight transfer rather than a jump.
- Both feet leave the floor at approximately the same time.
- The knees remain straight and the legs stay deliberately straddled during the ascent.
- The legs close only after the hips approach the vertical stack.
- The top position is balanced without wall contact or assistance.
- The final handstand is held for at least one to two controlled seconds.
A press lean, toe float, one-foot takeoff or assisted repetition can be valuable training, but it should not be recorded as an unassisted Press to Handstand.
Common mistakes and corrections
| Mistake | Correction |
|---|---|
| Jumping or hopping from the feet | Reduce the range and practise slow weight shifts until the toes become light without momentum. |
| Bending the elbows during takeoff | Use an easier variation and maintain active straight-arm pressure throughout the attempt. |
| Trying to lift the feet before the hips rise | Think about moving the pelvis above the hands while keeping the legs compressed toward the torso. |
| Keeping the shoulders behind the wrists | Allow a small controlled forward lean so the hips can reach the base of support. |
| Leaning excessively forward | Use a wider straddle, improve compression and apply finger pressure before the shoulders travel unnecessarily far. |
| Allowing the shoulders to collapse | Push the floor away continuously and keep the shoulder blades elevated throughout the press. |
| Closing the legs too early | Maintain the straddle until the hips are nearly stacked above the shoulders. |
| Bending the knees to create clearance | Contract the quadriceps before takeoff and use a wider straddle or easier drill. |
| Arching heavily at the top | Control the ribs and pelvis as the shoulders return toward the vertical handstand stack. |
| Looking too far forward | Fix your gaze between or slightly ahead of the hands while keeping the neck comfortable. |
| Continuing after technique deteriorates | End the set when hopping, elbow bending or uncontrolled falls begin to appear. |
How to identify your limiting factor
| What happens | Likely limitation | Training emphasis |
|---|---|---|
| Your toes remain heavy and your hips stay behind your hands | Compression, mobility or weight-transfer timing | Seated pike lifts, active straddle work and press leans |
| Your elbows bend or shoulders sink as the feet leave | Straight-arm shoulder strength | Elevated press holds, planche-style leans and slow negatives |
| Your feet float but immediately return to the floor | Insufficient hip height or incomplete weight transfer | Toe-float holds and feet-elevated press attempts |
| You reach vertical but repeatedly fall over | Handstand balance and finger-pressure control | Freestanding handstands, toe pulls and heel-pull drills |
| You can lower slowly but cannot press upward | Concentric strength or initiation timing | Partial presses, assisted repetitions and pauses near toe-off |
| One foot always leaves before the other | Asymmetric compression or weight distribution | Slow bilateral toe floats and video review from the front |
Sets, repetitions and training frequency
Train the Press to Handstand near the beginning of the session while your wrists, shoulders and coordination are fresh. A practical starting structure is:
- Frequency: Two to four short sessions per week when the wrists and shoulders recover comfortably.
- Full or assisted presses: Four to eight high-quality singles or three to five sets of one to three repetitions.
- Rest: Approximately ninety seconds to three minutes between demanding attempts.
- Straddle negatives: Two to four sets of one to three descents lasting approximately three to six seconds.
- Toe floats or press leans: Three to five sets of one to five controlled attempts.
- Compression work: Two to four sets of five to ten controlled pike or straddle lifts.
These numbers are starting guidelines rather than universal requirements. End the press work when you must jump, bend the elbows or lose control of your exits, because repeated fatigued attempts reinforce a different movement than the strict press.
Safety and discomfort
Pressure and muscular effort in the hands, forearms, shoulders, upper back, abdominals and front of the hips are expected. A moderate stretch through the hamstrings and inner thighs may also occur in the starting position.
Stop the exercise if you experience sharp wrist, elbow, shoulder, neck or lower-back pain, or if you develop numbness, tingling, dizziness or visual disturbance. Reduce the range, use an easier variation or consult an appropriate healthcare professional when symptoms persist.
Do not practise full presses in a confined space where you cannot exit safely. A competent spotter may guide the hips, but the spotter should not pull the legs upward or place you unexpectedly beyond your balance point.
Frequently asked questions
Is a Press to Handstand the same as a Straddle Press to Handstand?
On this page, yes. The standard canonical version uses a straddle because the wider leg position reduces the compression and leverage demands compared with a legs-together Pike Press.
Do I need a full pancake split?
No universal flexibility angle is required. Better straddle and forward-fold mobility can reduce the necessary shoulder lean, but strong athletes may compensate for less flexibility with greater straight-arm strength and precise weight transfer.
Should the shoulders remain directly above the wrists?
Not during the entire ascent. The shoulders normally move slightly forward of the wrists during takeoff and return toward the vertical stack as the hips rise.
Can I learn the press before I can hold a freestanding handstand?
You can practise compression, leans and assisted negatives, but a reliable freestanding balance and safe exit make it much easier to complete and control the full skill.
Why can I lift one foot but not both?
One-foot takeoff often indicates uneven weight distribution, asymmetric compression or insufficient hip height. Practise slower toe floats and keep both legs equally active before leaving the floor.
Is a Press to Handstand a shoulder or core exercise?
It is a whole-body skill. The shoulders generate and control substantial straight-arm force, while the abdominals and hip flexors create compression and the hands regulate balance.
Is this the same as a handstand push-up?
No. A Press to Handstand keeps the elbows straight and changes the position of the hips and legs, whereas a handstand push-up bends and extends the elbows to lower and raise the body.
Should I practise the lowering phase?
Yes. A slow straddle descent from a wall-supported or freestanding handstand teaches the correct pathway and develops strength through positions that may initially be too difficult to press through concentrically.
Do floor and parallette presses need separate exercise pages?
No. A standing Press to Handstand performed on parallettes can remain an equipment variation of this exercise, while a press beginning from a supported straddle or L-sit should be classified separately as a Stalder Press to Handstand.
Tips for the proper execution of Press to Handstand
Warm up your wrists, shoulders, hamstrings and inner thighs before full press attempts.
Use a firm, level and non-slip surface with enough space to exit safely.
Place your hands approximately shoulder-width apart and spread your fingers.
Begin with a wide but comfortable straddle to reduce the effective leg lever.
Keep both elbows fully extended without forcing them beyond their natural range.
Push the floor away continuously to maintain elevated and active shoulders.
Allow the shoulders to move slightly forward of the wrists during takeoff.
Focus on lifting the hips above the hands before trying to raise the feet.
Actively compress the thighs toward the torso while keeping the knees straight.
Make both feet leave the floor together without jumping or kicking.
Keep the legs straddled until the hips are nearly stacked above the shoulders.
Use increasing finger pressure to prevent the legs from travelling too far forward.
Bring the legs together only when you are approaching the vertical handstand.
Hold the final freestanding handstand for at least one to two controlled seconds.
End the set when you must hop, bend the elbows or use an uncontrolled exit.
Muscles worked when doing Press to Handstand
The primary muscles used during the Press to Handstand are the anterior deltoids, trapezius and serratus anterior, which create and maintain the elevated straight-arm shoulder position while controlling the changing angle between the arms and torso.
The abdominals and obliques stabilize the trunk and pelvis, while the iliopsoas and rectus femoris actively draw the legs toward the torso during the compressed takeoff position. The triceps maintain elbow extension, and the forearm and finger flexors regulate pressure through the hands as the center of mass moves toward and beyond the wrists.
The quadriceps keep the knees straight, while the inner-thigh muscles, glutes and other hip muscles control the straddle and bring the legs together as the body reaches the vertical handstand.
Primary Muscle(s):

Anterior delt

Trapezius
Secondary Muscle(s):

Triceps

Abdominal

Oblique
Equipment needed for Press to Handstand
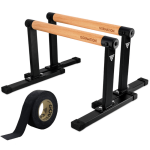
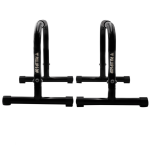
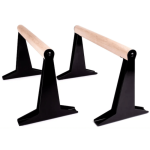
Adjust the difficulty of Press to Handstand
How to make Press to Handstand harder?
How to make Press to Handstand easier?
How to make Press to Handstand harder?
To make Press to Handstand harder:
-
Use a progressively narrower straddle while preserving straight knees and a controlled takeoff.
-
Pause for one to three seconds immediately after both feet leave the floor.
-
Perform the entire press as slowly as possible without stopping the movement.
-
Lower from the handstand through the same straddle pathway without dropping the feet.
-
Perform a press, controlled descent and second press without resting on the floor.
-
Keep the legs together throughout the ascent to perform a Pike Press to Handstand.
-
Begin from a supported straddle position and progress toward a Stalder Press to Handstand.
-
Progress toward a planche-to-handstand transition after developing the necessary straight-arm strength.
How to make Press to Handstand easier?
To make Press to Handstand easier:
-
Practise press leans while keeping both feet on the floor and gradually transferring more weight into the hands.
-
Lift only the heels or toes for brief toe-float holds while keeping the elbows straight.
-
Start with the feet on a low stable block so the hips begin higher relative to the hands.
-
Use a wider straddle to shorten the effective lever created by the legs.
-
Allow a controlled bend in the knees and practise a tuck press before returning to straight legs.
-
Let one foot leave slightly before the other as a temporary press-walk regression.
-
Lower slowly from a wall-supported handstand through the straddle press pathway.
-
Ask a competent spotter to guide the hips while you perform the movement under your own strength.
-
Improve active compression with Seated Double-Leg Pike Lifts before repeating full press attempts.
