
Single-Leg Calf Raise

How to do Single-Leg Calf Raise?
The single-leg calf raise is a unilateral lower-body exercise that strengthens the muscles responsible for lifting the heel and extending the ankle. Compared with regular standing calf raises, performing the movement on one leg places substantially more demand on the working calf while also challenging foot stability and balance.
The standard version is performed on a flat floor with the working knee kept straight and one hand lightly touching a wall, rail or other stable support. Using support is encouraged when it allows you to train the calf through a larger and more controlled range of motion. Once the bodyweight version becomes easy, you can increase the difficulty with an elevated surface, a slower tempo, external weight or resistance band calf raises.
The primary working muscles are the gastrocnemius and soleus, which together form most of the calf. Knee position affects their relative contribution: the straight-knee standing position keeps the gastrocnemius at a longer length, while the soleus continues to contribute to ankle plantarflexion. In a 12-week unilateral training study, loaded standing calf raises produced greater gastrocnemius and total calf growth than seated calf raises, although the study used external resistance rather than an unweighted floor variation. Read the study on PubMed.
How to Perform a Single-Leg Calf Raise
Equipment and setup
You only need a flat, non-slip surface. Stand beside a wall, rail or sturdy upright object that you can touch lightly for balance. If your ankles feel stiff, prepare them with the joint warm-up routine before beginning.
Starting position
- Stand tall with your feet approximately hip-width apart and your toes pointing forward or in their natural direction.
- Place one hand lightly against a stable support. The hand should assist your balance without lifting or pulling your body.
- Shift your weight onto one foot and lift the other foot clear of the floor.
- Keep the working foot fully planted, with pressure distributed through the base of the big toe, the base of the little toe and the heel.
- Stack your hip over the working ankle. Keep your pelvis level, torso upright and working knee straight without forcefully locking it.
Execution
- Press the ball of your working foot into the floor and raise your heel as high as you can under control.
- Think about moving the heel vertically upward rather than allowing the ankle to roll toward its inner or outer edge.
- Keep your knee still and your hip stacked over your foot throughout the ascent.
- Pause at the top for one to two seconds while actively contracting the calf.
- Lower your heel slowly for approximately two to four seconds.
- Touch the heel to the floor without bouncing or relaxing completely.
- Complete the prescribed repetitions, then repeat on the opposite side.
Breathing and tempo
Exhale as you raise your heel and inhale during the controlled descent. A useful starting tempo is two seconds up, a one-second pause at the top and three seconds down. Avoid rushing the bottom portion of the movement.
What counts as a complete repetition?
A repetition is complete when you reach your highest controlled heel position, briefly stabilize at the top and return the heel to the floor without hopping, bending the knee, shifting the hip or using the support hand to lift your body. Your heel should travel upward without the ankle collapsing inward or rolling excessively outward.
Why keep the knee straight?
The gastrocnemius crosses both the knee and ankle, so keeping the knee extended helps maintain its length while you plantarflex the ankle. The soleus also remains active, but a bent-knee calf raise reduces the gastrocnemius contribution and places relatively more emphasis on the soleus. Research comparing loaded unilateral variations found greater gastrocnemius growth from straight-knee standing calf raises than from seated calf raises performed with the knee bent. View the full study.
Common Mistakes
- Using the support arm: Touch the support lightly instead of pushing or pulling yourself upward.
- Rolling onto the outside of the foot: Keep the base of the big toe pressing into the floor as the heel rises.
- Allowing the ankle to collapse inward: Keep the heel aligned above the forefoot and use a smaller range if necessary.
- Bending the working knee: Keep the knee angle consistent so the calf performs the movement.
- Bouncing at the bottom: Reverse direction under muscular control rather than using momentum from the Achilles tendon.
- Curling the toes: Keep the toes long and relaxed instead of gripping the floor excessively.
- Shifting the hip: Keep the pelvis level and the working hip stacked over the ankle.
- Performing shallow repetitions: Raise the heel as high as your ankle mobility and control allow.
Benefits of the Single-Leg Calf Raise
- Strengthens the gastrocnemius and soleus using minimal equipment.
- Provides more resistance per working leg than a bilateral bodyweight calf raise.
- Develops foot, ankle and single-leg balance control.
- Allows you to compare strength and coordination between sides.
- Can be progressed with additional range of motion, pauses, resistance bands or external weight.
- Builds ankle plantarflexion strength relevant to walking, running, jumping and other lower-body movements.
- Complements unilateral leg exercises such as Bulgarian split squats and single-leg RDLs with a resistance band.
Readiness and Safety
You should first be able to perform pain-free bilateral calf raises and stand briefly on one leg. Use hand support if balance prevents you from completing controlled repetitions. Begin on a flat floor before trying the exercise from a step.
Stop if you experience sharp pain in the Achilles tendon, calf, foot or ankle. Athletes returning from a calf strain, Achilles tendon injury or lower-leg surgery should follow the progression recommended by their healthcare professional. Do not bounce into a deep heel position when performing the exercise from an elevated surface.
Progression
Begin with two-leg calf raises if you cannot yet lift your full bodyweight smoothly on one foot. You can then progress to a supported single-leg version, reduce your reliance on the support and gradually add repetitions.
Once you can perform 20 or more controlled repetitions without losing height at the top, increase the challenge instead of adding unlimited repetitions. Suitable options include a slower descent, longer pauses, standing on a step for additional range of motion, using a resistance band or holding a dumbbell or kettlebell.
Programming
- Learning the movement: 2–3 sets of 6–10 controlled repetitions per leg.
- General strength and endurance: 2–4 sets of 8–20 repetitions per leg.
- Muscle growth: 3–5 challenging sets of approximately 8–20 repetitions, stopping when technique or range of motion begins to deteriorate.
- Tempo: Use a one- to two-second ascent, a one- to two-second top pause and a two- to four-second descent.
- Rest: Rest for approximately 45–90 seconds between sets or sides.
- Frequency: Train the exercise two to four times per week, depending on total lower-body training volume and recovery.
In a strength workout, calf raises normally fit after larger lower-body exercises. If you use them before jumping or running, keep the volume low enough that calf fatigue does not reduce the quality of the main activity.
Frequently Asked Questions
Should I perform single-leg calf raises on the floor or a step?
Start on the floor. It provides a clear bottom position and places less demand on ankle dorsiflexion. A step allows the heel to descend below the forefoot and is an effective progression once you can control the floor variation without pain or bouncing.
Should I use a wall for support?
Yes. Light fingertip support can help you train the calf more effectively by preventing balance from ending the set prematurely. The support should stabilize you without pushing or pulling your body upward.
How high should I raise my heel?
Rise to the highest position you can reach while keeping the knee still, the base of the big toe planted and the ankle properly aligned. Stop before the foot rolls outward or the toes begin gripping excessively.
Why do I feel one side working more?
Differences in strength, coordination, ankle mobility and balance can make one side feel different. Begin with the weaker or less coordinated side and perform the same number of controlled repetitions on both legs.
Are single-leg calf raises enough to build the calves?
They can provide an effective starting stimulus, particularly when performed close to technical failure with full range and controlled tempo. Stronger athletes will eventually need more resistance, additional range of motion or another progression to continue increasing the challenge.
What is the difference between a calf raise and a heel raise?
The terms generally describe the same movement. “Calf raise” refers to the muscles being trained, while “heel raise” describes the visible action. Use Single-Leg Calf Raise as the canonical exercise name and treat Single-Leg Heel Raise as a synonym.
Tips for the proper execution of Single-Leg Calf Raise
Keep the base of your big toe pressed into the floor as the heel rises. This helps prevent the foot from rolling outward.
Use one or two fingertips for balance if necessary. Better stability usually produces a stronger calf contraction and a more consistent range of motion.
Imagine that the heel is travelling straight upward. Avoid allowing it to drift inward or outward.
Pause at the highest controlled position instead of rushing immediately into the descent.
Make the exercise harder with range of motion, tempo or resistance once high-repetition sets become easy.
Muscles worked when doing Single-Leg Calf Raise
Primary muscles
- Gastrocnemius: The large, visible calf muscle contributes strongly to ankle plantarflexion when the knee remains straight.
- Soleus: Lies underneath the gastrocnemius and assists with raising the heel and controlling the descent.
Secondary muscles and stabilizers
- Intrinsic foot muscles: Help maintain pressure and stability across the foot.
- Fibularis muscles and tibialis posterior: Assist with controlling side-to-side ankle movement.
- Gluteus medius: Helps keep the pelvis level during the single-leg stance.
- Quadriceps: Work isometrically to maintain a consistent knee position.
- Core muscles: Stabilize the torso and pelvis while balancing on one leg.
Primary Muscle(s):
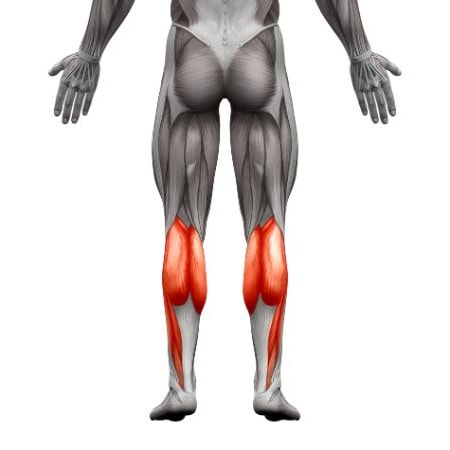
Calf
Secondary Muscle(s):
Equipment needed for Single-Leg Calf Raise
No equipment needed for this exercise.
Adjust the difficulty of Single-Leg Calf Raise
How to make Single-Leg Calf Raise harder?
How to make Single-Leg Calf Raise easier?
How to make Single-Leg Calf Raise harder?
To make Single-Leg Calf Raise harder:
-
Perform the exercise without touching a wall or rail. This increases the balance and foot-stability requirement but should only be used if you can maintain full calf-raise height.
-
Place the ball of the working foot securely on the edge of a step and allow the heel to descend below the forefoot. Use only a comfortable range and avoid bouncing in the stretched position.
-
Pause for two to three seconds at the top of every repetition while maintaining maximum controlled heel height.
-
Take four to six seconds to lower the heel on each repetition. Maintain steady pressure through the forefoot throughout the descent.
-
Hold a dumbbell, kettlebell or other suitable weight while using the opposite hand for light balance support. Increase the load gradually without sacrificing range of motion.
-
Anchor a resistance band under the working forefoot and hold it securely near shoulder height. Perform the same single-leg movement against increasing band tension.
How to make Single-Leg Calf Raise easier?
To make Single-Leg Calf Raise easier:
-
Perform the movement with both feet on the floor. This distributes your bodyweight between both legs and removes most of the single-leg balance requirement.
-
Hold a stable rail or upright with enough assistance to complete the full movement. Gradually reduce pressure through the hand as your calf strength improves.
-
Raise the heel only through the range you can control without ankle collapse, knee movement or assistance from the support arm. Increase the range gradually.
-
Rise onto both toes, transfer your weight to one foot at the top and lower slowly on that leg. This removes the most difficult portion of the single-leg ascent while retaining eccentric calf training.
