
Weighted Pistol Squat
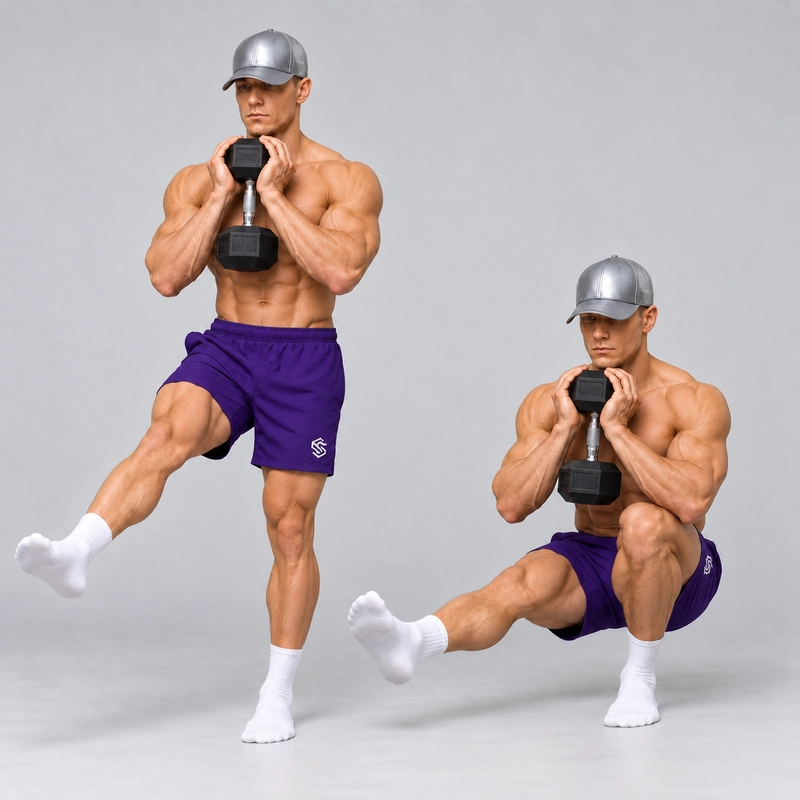
How to do Weighted Pistol Squat?
The Weighted Pistol Squat is a deep, freestanding single-leg squat performed with added resistance kept close to the torso. Wear a securely fitted weighted vest, hold a kettlebell or dumbbell close to the chest, or use a properly supported front-racked barbell. Lower on one leg with the free leg extended forward and clear of the floor, then stand using the same leg.
This variation builds on an established bodyweight pistol squat. Its main task is to increase resistance while preserving the movement: planted working heel, controlled depth, free-foot clearance and an unassisted rise. Load selection, secure placement and a manageable return matter more than lifting the largest number you can get into position.
The ACSM's resistance-training guidance emphasizes matching load and volume to individual goals and capacity. Apply that principle by adding manageable resistance to a repeatable pistol rather than copying another athlete's load. The guidance does not prescribe a starting weight for this exercise.
How This Differs From Other Pistol Squats
A Counterweight Pistol Squat uses a weight held forward, away from the torso, to help organize balance. This weighted version keeps the load close and focuses on increasing resistance. A vest remains fitted to the torso; a handheld weight stays near the chest instead of being pushed out to launch the ascent.
Both add mass, and both may affect balance. A chest-held load is not free of counterbalancing effects, and a forward-held weight still adds resistance. The difference is the defined setup and progression goal, not an arbitrary kilogram threshold. Do not treat identical forward-held repetitions as two different movements merely by changing their name.
The hand-assisted pistol squat uses a fixed support, while the single-leg box squat uses a supported seated pause to set depth. Neither support is part of this exercise. Bench-assisted single-leg squat negatives allow a two-leg return; here, one leg completes the lowering and rising phases.
The reason to choose this variation is specific: you can perform the underlying pistol and want to develop strength with additional resistance. If you still need a hand pull, seat contact or a forward weight swing to stand, use the relevant progression rather than adding load to conceal that limitation.
Establish the Movement Before Adding Resistance
Demonstrate several controlled unweighted repetitions on each side through the range you intend to load. You should retain the working heel contact, free-leg clearance and same-leg ascent without a bounce or a sudden twist. There is no universal repetition count that guarantees readiness for a particular weight.
Rehearse the chosen loading position while standing on both feet, then test a light controlled repetition. Being strong enough to hold a weight does not prove you can squat and recover with it on one leg. A comfortable two-leg front squat also does not establish a loaded pistol.
Prepare with the joint warm-up routine, easy narrow-stance squats and unweighted pistol practice. Use the squat mobility guide if ankle movement or free-leg clearance limits depth. Additional weight is not a substitute for a controllable bottom position.
Stop a set for sharp pain, repeated balance loss, an unstable load or an uncontrolled descent. Persistent pain or a substantial unexplained change in movement calls for individual assessment rather than a heavier attempt.
Choose a Close-to-Torso Loading Method
Start with a setup you can enter, hold and leave confidently. A centered two-handed goblet hold is a practical handheld option; a fitted vest leaves the hands available. A barbell front rack requires additional skill and preparation. There is no requirement to progress through every implement.
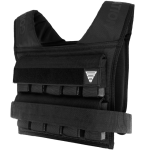
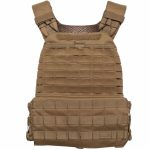
Weighted vest
Fit the vest while standing on both feet and follow its manufacturer's loading and fastening instructions. Secure all pockets, plates or blocks and distribute the load as the model is designed to carry it. Tighten the adjustment straps enough to prevent sliding or bouncing without restricting a comfortable full breath.
Test a two-leg squat before the pistol. The vest should not ride into the throat, shift sideways or dig into the hips at the bottom. If the vest cannot remain stable through your range, adjust it or choose a different loading method. The hands may reach forward naturally for balance, but they do not push on a support or the working thigh.
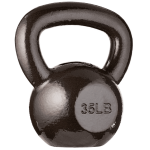
Kettlebell
Use a secure two-handed goblet grip on the horns with the bell close to the upper chest and the elbows bent. Keep it supported by the hands without pressing it painfully into the throat. Check that the bell and forearms clear the free leg throughout the squat.
Establish the grip while standing on both feet. Maintain the bell's close position during both phases instead of extending the arms to create a forward counterweight. A single-sided kettlebell rack is a different load distribution; record that configuration separately.
Dumbbell
Hold a suitable dumbbell in a secure two-handed goblet position close to the chest. The grip depends on its construction: a fixed dumbbell may be supported around one head, while an adjustable model needs an appropriate handle grip with all retainers secured. Do not suspend it from a loose removable end.
Check the lower end does not hit the free thigh or foot at depth. Use a compact grip and comfortable wrist position, keeping the weight close rather than moving it forward to rescue a difficult ascent. A pair of front-racked dumbbells changes the configuration; log the combined mass and actual placement.
Barbell
Use a front rack across the front of the shoulders, keeping the bar close to the upper torso. The shoulders support the bar; the hands guide it in a familiar, stable rack position. Do not hold it out in front or try to support its full weight solely with the wrists against the chest.
The CrossFit front-squat guide explains the shoulder-supported rack. That is guidance for the load position, not proof that a two-leg front squat prepares you for a barbell pistol. Learn the rack and recovery with qualified coaching if they are unfamiliar.
Use an appropriate stable rack to take and return the bar with both feet planted. Secure the plates with collars and use a loading area with sufficient clearance for the free leg, bar ends and a planned failed-attempt recovery. Rack supports or safeties must suit the actual single-leg movement rather than obstructing the extended foot.
Only use the barbell when you already have a reliable front rack and an appropriately supervised recovery plan. If a manageable exit cannot be arranged, choose a vest or goblet load. A full-size empty bar may already exceed the load you can control; “empty” does not mean light enough.
How to Do a Weighted Pistol Squat
- Secure the load. Fit the vest or establish the chest-held/front-rack position while standing on both feet. Confirm nothing loosens, slides or blocks the free leg.
- Set the working foot. Use a comfortable foot orientation on a level, non-slip surface. Keep the heel and forefoot connected to the floor.
- Lift the free leg forward. Keep its knee approximately straight and the foot clear. Raise it enough to maintain clearance during the descent without forcing a particular starting height.
- Brace and lower. Bend the working hip and knee smoothly. Allow the knee to travel forward as needed, generally following the toe direction. Keep the load close and the torso organized.
- Reach the controlled bottom. For a full repetition, lower until the working hip crease is below the top of the knee, with the heel planted and free foot clear. Use only the depth from which you can rise without losing the load position.
- Stand on the same leg. Press through the whole working foot and extend the hip and knee together. Do not thrust a handheld weight forward, plant the free heel or use hand support.
- Finish upright. Return to controlled hip and knee extension while the load remains secure. Regain balance before the next repetition.
- Unload from stable support. At the end of the set, plant both feet before putting down a handheld weight or returning a barbell to the rack. Remove or adjust the vest only from a stable position.
A smooth two-to-three-second descent is a useful practice option, followed by a controlled ascent. Brace before lowering and maintain breathing appropriate to the effort; a gentle exhale through the ascent works well with manageable training loads. Reduce the load if you need a prolonged grinding effort to complete each repetition.
Some forward torso lean and pelvic movement are normal in a deep pistol. Avoid forcing a perfectly vertical chest or allowing an abrupt collapse under the load. A biomechanical review of the squat describes how trunk position, shin position and depth interact to affect muscular and joint demands. It does not provide an exact joint-load estimate for this weighted variation.
Keep Depth and Loading Position Consistent
Choose a working load that preserves your intended range. If adding weight makes the squat substantially shallower, record that as partial-range loaded work rather than an improvement at the previous depth. Partial repetitions can have a purpose, but they are not the same performance.
Keep the vest fitted in the same way or maintain the same handheld/rack position. A 10 kg (22 lb) vest and a 10 kg goblet weight add the same nominal external mass but distribute it differently. Balance, arm demands and torso position may differ, so compare them as separate configurations.
Record implement, total external mass, load position, footwear, depth and clean repetitions for each leg. Include the bar's own mass in a barbell total; do not log only the plates. For a vest, record the actual worn mass where known, or state clearly that the figure is the manufacturer's nominal loaded weight.
A heel wedge, elevated working foot, bent free leg or one-sided rack also changes the setup. Do not introduce one midway through a set and treat the results as unchanged flat-floor, straight-free-leg repetitions.
Sets, Rest and Load Progression
A practical starting session is two or three sets of three to five controlled repetitions per leg, with approximately two to three minutes between demanding sets. Begin with a smaller amount of work if this loading is unfamiliar. Keep enough reserve that balance, load security and the same-leg ascent remain reliable.
Start with the side that needs more attention and initially match its clean count on the other side. Two nonconsecutive sessions can fit into a broader leg-training plan; adjust the total to your existing squat volume and recovery. These are coaching examples, not a researched dose for every weighted pistol setup.
The ACSM resistance-training guidance emphasizes individualizing load and volume and notes that training to momentary failure is not consistently necessary for the average healthy adult. Here, stop before a failed loaded repetition compromises the planned recovery. Do not interpret that general guidance as a validated weighted-pistol progression.
Build repeatable repetitions with one setup before adding resistance. For example, two sets of five clean repetitions per side across two sessions can be an adjustable coaching checkpoint. It is not a guarantee that the next weight is manageable.
Use the smallest practical increase available, then test it with a controlled repetition before rebuilding volume. An increase from 5 kg (11 lb) to 6 kg (13.2 lb) is an example, not a universal step size. If the next available implement is too large a jump, keep the current load and develop repetition quality, an additional repetition or a controlled pause instead.
Do not simultaneously increase load, add a pause and change depth. If the new weight makes you swing it forward, lose heel contact or require free-foot help, return to the previous setup. Developing strength does not require turning every session into a maximal attempt.
Completion Standard and Recovery
- The working heel and forefoot remain planted on the same surface.
- The free leg remains forward, approximately straight and clear of the floor.
- The load stays secure and close to the torso in the declared configuration.
- The athlete reaches the selected depth without seat contact or resting the arms/weight on the legs.
- The same leg completes the ascent without assistance, a bounce or a deliberate forward weight thrust.
- The repetition ends upright with controlled hip and knee extension.
One complete lowering-and-rising cycle counts as one repetition. Label partial depth, seat contact, hand assistance or a two-leg recovery accurately. A safe recovery is useful, but it is not a completed unassisted repetition.
Before working sets, rehearse planting the free foot to recover two-foot support through an easy partial range. With a vest or light goblet load, regain balance before setting the weight down. A barbell needs its own rehearsed recovery under the conditions described above; do not assume the same exit works for every implement.
Common Mistakes and Corrections
- Loading a pistol that still needs assistance: develop the same-leg ascent with an appropriate regression first.
- Using forward reach to rescue a heavy rep: reduce the load and keep it close. That change in position turns the attempt toward counterweight work.
- Losing depth as the number rises: record the actual range and return to a load that preserves the intended standard.
- Letting the vest shift: refit it and test the fastenings through a two-leg squat before continuing.
- Resting elbows or weight on the legs: choose a compact hold that clears the free leg without supplying support through it.
- Letting a barbell roll out of the rack: stop; use a manageable loading method until the rack position and recovery are reliable.
- Chasing failure: end the set while the load, balance and exit remain controlled rather than attempting another unstable repetition.
Frequently Asked Questions
Is a weighted vest better than a kettlebell?
A vest leaves the hands available and keeps resistance fitted to the torso. A kettlebell offers a compact chest-held load and may be easy to change between sets. Choose a setup you can secure and control; neither is universally better, and their results should be logged separately.
How much weight should I start with?
Use the smallest manageable load that lets you reproduce the intended depth and unassisted rise. No fixed kilogram figure or percentage suits everyone. Test a light controlled repetition rather than assuming your two-leg squat strength transfers directly.
Can I hold the weight out in front?
That is the counterweight configuration. It can help a balance limitation but changes the standard of this page. For this exercise, keep the handheld load close to the chest or use a fitted vest/front rack.
Can I use a barbell?
Yes, with a familiar shoulder-supported front rack, a manageable load and an appropriate setup and recovery plan. It is an advanced equipment option rather than a required next step. Choose a vest or goblet hold if the barbell position or exit is uncertain.
Tips for the proper execution of Weighted Pistol Squat
Establish controlled unweighted pistols through the intended range before adding resistance. A strong two-leg squat does not prove loaded-pistol readiness.
Keep handheld weights close to the chest, a vest fitted to the torso, or a barbell supported in a stable front rack. Do not thrust the load forward to stand.
Fit and test the vest with both feet planted. Secure its load and straps without restricting breathing or letting it slide during the squat.
Use a secure grip and check that the implement, elbows and forearms clear the free leg at depth. Do not suspend an adjustable dumbbell from a loose end.
Keep the working heel and forefoot planted. Allow comfortable forward knee travel while keeping the knee generally aligned with the toe direction.
Hold the free leg forward and approximately straight with the foot clear. Planting it for recovery ends the unassisted attempt.
Maintain controlled torso and pelvic movement rather than forcing a perfectly vertical chest or collapsing abruptly under the load.
Preserve depth as you add resistance. More kilograms at a much shallower range are a different result, not automatically an improvement.
Rehearse the recovery for your implement and end sets before control becomes unreliable. Use an appropriately supervised setup for barbell work.
Log implement, total load, placement, footwear, depth and repetitions per leg. Compare vest, goblet and barbell results within their recorded configurations.
Muscles worked when doing Weighted Pistol Squat
Primary working-leg muscles
- Quadriceps: control knee flexion while lowering and extend the knee during the return to standing.
- Gluteus maximus: contributes to controlling hip flexion and producing hip extension as the athlete rises.
Hip, ankle and foot control
The lateral glutes and other hip muscles help organize the pelvis and thigh over the supporting foot. The adductors, hamstrings, calves and foot muscles contribute to coordinated control, with their demands affected by depth, body position and load placement.
Free-leg support
The hip flexors and quadriceps of the free leg keep it forward and clear of the floor. A heavier supporting-leg squat does not remove this active-clearance requirement.
Trunk and load support
The abdominal wall, obliques and spinal stabilizers help control the torso under resistance. A goblet hold also requires sustained work from the arms, shoulders and grip. A barbell front rack uses shoulder and upper-back support, while a vest secures the load through its fit and does not require the same handheld grip effort.
The working leg performs dynamic lowering and rising while the trunk, free leg and load-supporting muscles stabilize the chosen configuration. Added mass increases the supported weight, but changes in posture can redistribute muscular demands. Do not assume an identical increase at every muscle or joint across different loading methods.
Primary Muscle(s):
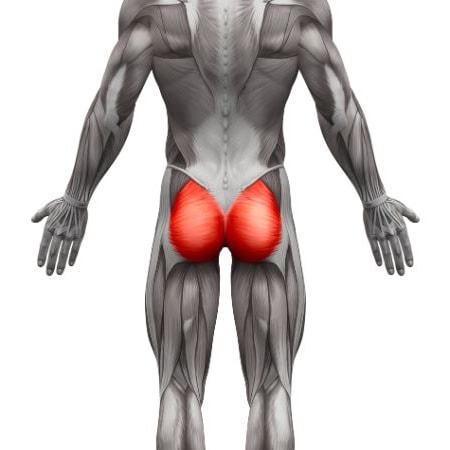
Glutes
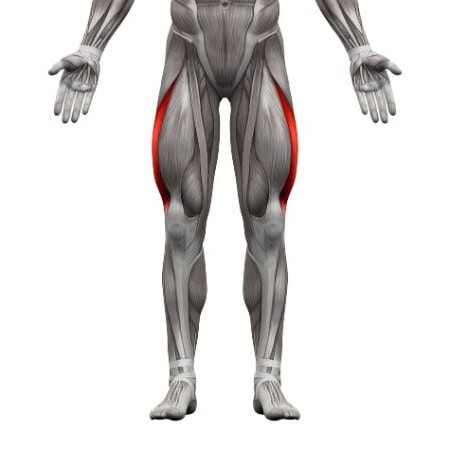
Quads
Secondary Muscle(s):
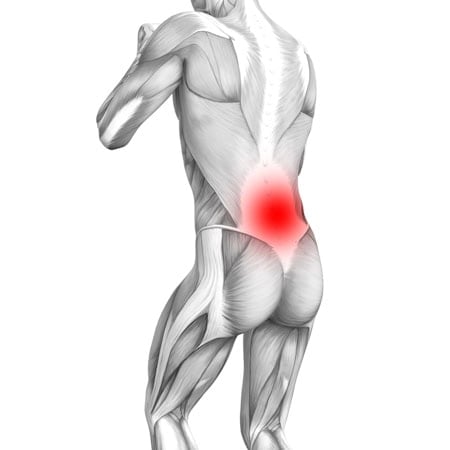
Lower back

Abdominal
Equipment needed for Weighted Pistol Squat
Adjust the difficulty of Weighted Pistol Squat
Scale resistance while preserving the same depth, load position and unassisted return. Reduce weight first if control deteriorates, and label partial or assisted work separately. Increase load in small practical steps, or build repeatability at the current load when the next implement is too large a jump. Keep the weight close to the torso; moving it forward changes the task toward counterweight work.
How to make Weighted Pistol Squat harder?
How to make Weighted Pistol Squat easier?
How to make Weighted Pistol Squat harder?
To make Weighted Pistol Squat harder:
-
Increase resistance by the smallest manageable step while keeping the same loading method, depth, heel contact and unassisted return.
-
Add a controlled repetition or another small set at the current load, stopping before balance or load security becomes unreliable.
-
Add a brief controlled pause at the bottom without seat contact, free-foot help or resting the arms on the legs. Reduce the load if needed to preserve the standard.
-
Use a slower controlled descent at the same depth and load. Change tempo separately from resistance so the progression remains clear and manageable.
How to make Weighted Pistol Squat easier?
To make Weighted Pistol Squat easier:
-
Reduce the external load or return to an unweighted pistol while keeping the same intended depth and controlled same-leg ascent.
-
Use controlled singles or shorter sets with adequate rest. Choose a vest or manageable goblet setup if the barbell rack or handheld grip is the limiting task, and record the equipment change.
-
Use a shallower recorded range or switch to an appropriate hand-assisted or box-supported single-leg squat if the full ascent is unavailable. Keep those modifications distinct from a complete unassisted weighted pistol.
