Push-Up Progression Exercises To Build Strength
In our previous article we covered the pull up progressions to master the strict pull up. In this article we will focus on the push up as it is also a foundational exercise in calisthenics that everyone should master. By doing a push up you lift about 70% of your bodyweight and primarily engage your chest, shoulder, triceps, core and back muscles. It seems easy but to do it correctly and without injury you need to prepare your body for it.
If you want to master the strict push-up up you need to build the foundational strength - you can do it by utilizing the exercises from the push-up progression chart described in the following section.
10 isotonic push-up progression exercises:
Isotonic push-up progressions involve dynamic movement through a range of motion—you’re actively pushing up and lowering down, building real-world strength and coordination. These variations help develop your pushing ability from every angle and are essential for building up to strict, full-range push-ups. Whether you’re a complete beginner or looking to take your form and volume to the next level, there’s a progression here for you.
Each exercise below is accompanied by a quick-reference exercise card from our ▶️ complete exercise library, where you can find demonstration videos to help you learn proper technique.
- Wall push-up


Muscle groups:


Tips
-
Core Engagement: Keep your core tight throughout the movement to maintain proper alignment and avoid straining your lower back.
-
Hand Placement: Your hands should be slightly wider than shoulder-width apart to allow for better chest engagement. If you feel shoulder discomfort, adjust the position of your hands slightly.
-
Elbow Positioning: Keep your elbows close to your body or at a slight angle to prevent shoulder strain and engage the triceps more effectively.
-
Body Angle: The further you stand from the wall, the more challenging the exercise becomes. Adjust your distance from the wall based on your fitness level.
-
Controlled Movement: Lower yourself slowly and push back up with control. Avoid rushing through the movement, as this reduces the effectiveness of the exercise.
The wall push-up is the most accessible push-up variation, perfect for absolute beginners. By standing and pressing against a wall, you reduce load and focus on learning body alignment, bracing your core, and maintaining tension through the arms and shoulders. It’s a great place to build confidence, especially for those with limited strength, mobility, or recovering from injury.
2. Knee push-up

Muscle groups:

Tips
-
Core Engagement: Keep your core tight and maintain a straight line from your head to your knees. Avoid sagging or arching your lower back.
-
Hand Placement: Your hands should be placed directly under your shoulders or slightly wider for a balanced position.
-
Controlled Movement: Lower yourself in a controlled manner, avoiding jerky or fast motions. Control helps build strength and reduces the risk of injury.
-
Breathing: Inhale as you lower your body, exhale as you push up. Controlled breathing supports overall stability.
Knee push-ups lower you closer to the floor while still keeping some load off the upper body. This variation allows you to train the full push-up movement pattern—bending the elbows, engaging the chest and triceps, and controlling your core—without being overwhelmed by bodyweight. Focus on keeping a straight line from knees to shoulders for best results.
3. Incline push-up

Muscle groups:
Tips
-
Core Engagement: Keep your core tight to prevent your hips from sagging or rising too high. This ensures proper body alignment and protects your lower back.
-
Hand Placement: Your hands should be placed directly under your shoulders. Adjust the width based on comfort, but ensure that your elbows don’t flare out too much.
-
Body Positioning: Ensure that your body forms a straight line from your head to your heels throughout the exercise. Engage your glutes and quads to maintain this alignment.
-
Controlled Movement: Lower yourself slowly to engage your muscles fully and avoid rushing through the reps.
-
Breathing: Inhale as you lower yourself and exhale as you push back up. Proper breathing helps maintain strength and stability.
Incline push-ups are done with your hands elevated on a box, bench, or step. They’re slightly more challenging than knee push-ups and help bridge the gap to full push-ups. By adjusting the incline height, you can scale the difficulty. This variation is especially helpful for learning how to push through the full range with control while maintaining solid core tension.
4. Negative push-up

Muscle group:
Tips
-
Focus on Eccentric Movement: The primary focus is on the slow lowering (eccentric) phase. Aim for 3-5 seconds of controlled lowering to maximize muscle engagement.
-
Core Engagement: Keep your core tight throughout the movement to maintain proper body alignment and prevent sagging hips.
-
Elbow Positioning: Keep your elbows close to your body or at a slight 45-degree angle. This will reduce strain on the shoulders and engage the triceps more effectively.
-
Controlled Movements: Don’t rush the descent. The slower the movement, the greater the benefit for building muscle strength.
-
Breathing: Inhale as you lower your body slowly, and exhale as you reset to the starting position.
In a negative push-up, you lower yourself from the top to the bottom of a push-up as slowly as possible, focusing on control and form. This eccentric movement builds strength fast—especially in the chest and triceps—and is one of the best tools for those who can’t yet push themselves back up. Start with a 3–5 second descent and increase time under tension as you progress.
5. Cobra push-up

Muscle groups:

Tips
-
Maintain smooth, steady breathing, inhaling as you lower and exhaling as you press upward.
-
Gradually increase your range of motion over time as spinal flexibility improves.
-
Keep your palms evenly pressed into the floor to avoid uneven shoulder activation.
-
Engage your core and lightly activate your glutes to prevent excessive lower-back arching.
-
Start slowly, emphasizing quality over quantity or speed.
The cobra push-up is a flowing variation that combines strength with mobility. Starting from a low position, you push your chest forward and upward, extending through the arms and spine. It emphasizes the triceps and shoulders while also gently opening the chest. This is a great exercise to build pressing strength while improving body awareness and fluidity.
6. Regular push-up
Muscle groups:
Tips
-
Body Alignment: Keep your body in a straight line from head to heels. Engage your core and glutes to prevent your hips from dropping or rising.
-
Hand Placement: Your hands should be positioned just outside of shoulder-width for optimal stability. Moving them closer or wider will target different muscles.
-
Elbow Positioning: Keep your elbows at about a 45-degree angle from your body, not flaring out too far to avoid shoulder strain.
-
Breathing: Inhale as you lower yourself, and exhale as you push back up. Controlled breathing improves strength and endurance.
-
Controlled Movements: Lower yourself slowly to build strength, then push back up with a smooth, steady motion.
The classic push-up needs no introduction—but doing it well is another story. In a regular push-up, your body should form a straight line from head to heels, elbows should track at about a 45° angle, and your chest should lower close to the floor before pressing back up. This variation trains your chest, shoulders, triceps, and core all at once.
7. Resistance band push-up

Muscle group:
Tips
-
Position the Band Securely: Make sure the band is positioned across your upper back, so it won’t slip or move during the exercise.
-
Engage the Core: Keep your core tight to prevent your hips from sagging, which maintains a straight body line.
-
Controlled Movements: Perform the exercise slowly and with control, especially when lowering your body to the ground.
-
Avoid Flaring Elbows: Keep your elbows at a 45-degree angle to your body to protect your shoulders and engage the chest effectively.
-
Breathing: Inhale as you lower down, and exhale as you press back up, maintaining a steady rhythm and focus.
Adding a resistance band across your upper back increases the difficulty of push-ups, especially at the top of the movement. This helps develop lockout strength and builds explosive power in the chest and triceps. It’s a great way to overload the push-up once regular reps start to feel easy—and a smart stepping stone toward weighted push-ups.
8. Staggered push-up

Muscle groups:
Tips
-
Hand Placement: Start with a moderate stagger, around 6-12 inches, and adjust based on comfort and strength. The further apart your hands are, the more challenging the movement becomes.
-
Elbow Positioning: Keep your elbows close to your body to protect your shoulders and engage your triceps more effectively.
-
Controlled Movements: Lower yourself slowly and with control to ensure that the muscles are properly engaged. Avoid rushing through the reps.
-
Core Engagement: Keep your core tight throughout the movement to stabilize your body and prevent any twisting or sagging of the hips.
-
Breathing: Inhale as you lower your body, and exhale as you push back up to maintain power and stability.
Staggered push-ups involve placing one hand slightly forward and one hand slightly back. This shifts the load unevenly and challenges your shoulders, core, and coordination. It’s a good variation to correct imbalances, increase time under tension, and make your regular push-ups more adaptable and controlled.
9. Decline push-up

Muscle groups:
Tips
-
Core Engagement: Keep your core tight throughout the movement to avoid letting your lower back sag or your hips rise too high. This ensures proper body alignment.
-
Elbow Positioning: Keep your elbows close to your body (around 45 degrees) to reduce shoulder strain and engage the triceps more effectively.
-
Controlled Descent: Lower yourself slowly to maximize muscle engagement and avoid rushing through the reps.
-
Body Alignment: Ensure that your body stays in a straight line from head to heels, maintaining tension in your core and glutes to prevent sagging.
-
Breathing: Inhale as you lower your body, and exhale as you push back up. Controlled breathing helps stabilize your core and improve endurance.
By placing your feet on an elevated surface, decline push-ups shift more of the workload to your upper chest and shoulders. This makes them more challenging than regular push-ups and helps build the strength needed for more advanced vertical pushing movements (like pike push-ups or handstand push-ups). Keep your core tight to avoid lower back sagging.
10. Pseudo-planche push-up

Muscle groups:
Tips
-
Lean forward more to increase difficulty and better mimic planche mechanics.
-
Keep toes pointed and legs together to improve body alignment.
-
Use a slow eccentric phase (3-5 seconds down) to build more time under tension.
-
Experiment with wider and narrower parallettes placement to target different muscle engagement.
-
If feeling wrist discomfort, adjust grip angle slightly on the parallettes for better comfort.
The pseudo-planche push-up mimics the lean-forward body position of a planche hold. Your hands are placed closer to your waist, forcing your shoulders and chest to take on much more of the load. It’s an advanced push-up variation that develops extreme upper body and core strength, as well as wrist and scapular control. Lean only as far forward as you can while maintaining form.
10 isometric push-up progression exercises:
Isometric push-up progressions focus on building strength by holding your body in a fixed position. These variations teach full-body tension, improve joint stability, and help develop control in the hardest parts of the push-up—especially the bottom.
Holding these positions can be just as challenging (and sometimes more effective) than doing reps, especially for beginners who lack strength or control in certain ranges.
Use these holds to break through sticking points, strengthen weak areas, and reinforce perfect push-up form. Each exercise below includes a quick-access exercise card from our ▶️ complete exercise library with demo videos and tips for getting it right.
- Knee plank


Tips
-
Core Engagement: Make sure to keep your core muscles tight throughout the exercise. Imagine bracing your abdominals as if someone is about to push against your stomach.
-
Avoid Arching or Sagging: Keep your body in a straight line from shoulders to knees. Don’t allow your hips to sag or your back to arch, as this can put strain on your lower back.
-
Elbow or Hand Position: You can perform the knee plank with your arms straight (hands on the ground) or in a forearm plank position (elbows on the ground), depending on your comfort level.
-
Breathing: Maintain steady breathing throughout the plank. Inhale deeply through your nose and exhale through your mouth to help keep your core engaged and prevent fatigue.
A beginner-friendly way to learn core tension and shoulder stacking, the knee plank teaches you how to engage your abs, glutes, and shoulders while keeping a neutral spine. It’s perfect for complete beginners or those easing into bodyweight training from rehab or inactivity.
2. Elbow plank

Tips
-
Straight Body Line: Ensure your body forms a straight line from your head to your heels. Avoid raising or lowering your hips too much, as this can compromise form.
-
Core Engagement: Keep your core muscles tight throughout the entire exercise. This helps stabilize your spine and prevents your hips from sagging or arching.
-
Elbow Positioning: Your elbows should be directly under your shoulders, creating a strong base of support. This will also help engage your shoulders and reduce strain.
-
Steady Breathing: Focus on controlled, deep breaths. Inhale through your nose and exhale through your mouth, which helps stabilize your core and manage endurance.
-
Avoid Tension in the Neck: Keep your neck neutral by looking down at the floor to prevent any tension or strain in the neck.
The elbow plank is a core classic and an essential stepping stone toward solid push-up mechanics. By keeping your forearms grounded and elbows under your shoulders, you’ll build endurance and strength in your core, glutes, and scapular stabilizers—all of which are vital for full push-ups.
3. Elbow side plank

Tips
-
Shoulder Alignment: Ensure your shoulder is directly over your elbow to avoid unnecessary strain on the shoulder joint. This helps distribute your weight evenly and supports proper form.
-
Core Engagement: Keep your core muscles tight throughout the exercise to stabilize your body and prevent your hips from sagging.
-
Maintain a Straight Line: Keep your body in a straight line from your head to your feet. Don’t allow your hips to dip or lift too high.
-
Steady Breathing: Breathe steadily throughout the hold. Inhale deeply through your nose and exhale through your mouth to maintain focus and core engagement.
This variation targets the obliques and lateral stabilizers, which often get overlooked in push-up prep. Holding your body in a straight line on your side builds anti-rotational strength, spine alignment, and improves control during pushing and bracing movements.
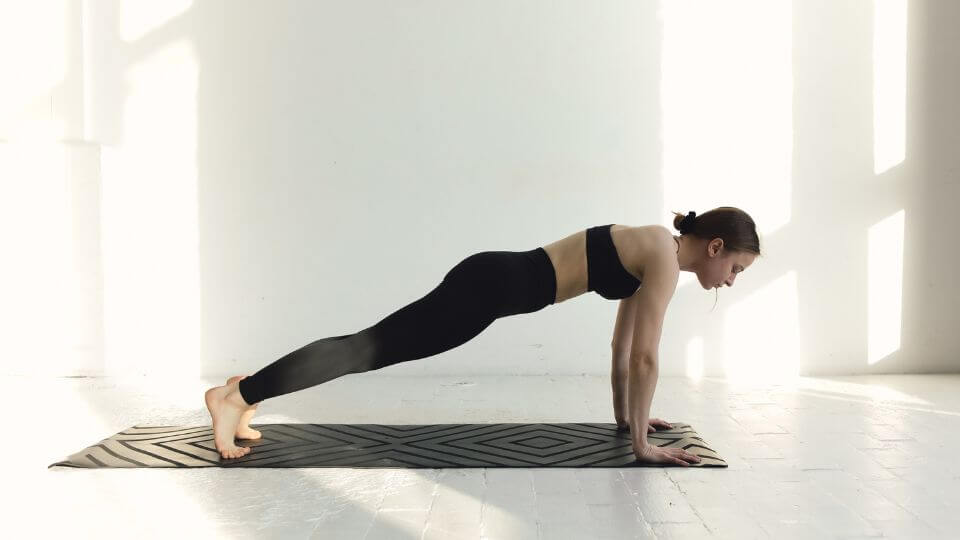
4. Straight arm plank

Tips
-
Core Engagement: Keep your core tight throughout the exercise to avoid letting your lower back sag. Imagine bracing your abdominals as if someone is about to punch your stomach.
-
Neutral Spine: Maintain a straight line from head to heels. Avoid looking forward or letting your head drop—your neck should stay in line with your spine.
-
Shoulder Positioning: Your shoulders should stay directly above your wrists, not leaning forward or backward. This will help engage your shoulders and prevent wrist strain.
-
Controlled Breathing: Breathe steadily throughout the plank. Inhale deeply through your nose and exhale through your mouth, using your breath to help stabilize your core.
Also known as a high plank, this is a great drill for reinforcing top push-up position. You’ll work shoulder stability, scapular protraction, core tension, and wrist resilience. Focus on pressing the ground away and maintaining a long, tight body line from head to heels.
5. Side plank pulses

Muscle groups:
Tips
-
Core Engagement: Keep your core tight throughout the exercise to stabilize your body and prevent your hips from sagging or rotating.
-
Shoulder Stability: Ensure that your supporting shoulder stays directly above your wrist and remains engaged. Avoid letting your shoulder collapse inward.
-
Small, Controlled Movements: Focus on small, controlled pulses. You don’t need to lower your hips too far—just a few inches to engage the obliques and glutes.
-
Breathing: Inhale as you lower your hips and exhale as you lift them. Proper breathing helps maintain rhythm and control during the pulses.
-
Neck Alignment: Keep your neck in line with your spine, looking straight ahead. Avoid looking down or arching your neck, which can cause strain.
This dynamic isometric drill blends stillness with slight controlled movement. Pulsing your hips up and down from a side plank position helps build strength and endurance in your obliques, glutes, and shoulders—key muscles for keeping your body aligned in push-ups.
6. Plank shoulder taps

Tips
-
Core Engagement: Keep your core tight throughout the entire movement. This is key to minimizing any rotation or movement in your hips and torso as you lift each hand.
-
Hip Stability: Focus on keeping your hips level and preventing them from swaying side to side. A wider stance with your feet can provide better stability as you progress.
-
Slow and Controlled: Perform the shoulder taps slowly and with control to maximize core engagement and prevent losing form.
-
Breathing: Breathe steadily throughout the exercise. Inhale as you prepare to lift your hand, and exhale as you tap your shoulder. Controlled breathing will help stabilize your core and prevent fatigue.
This anti-rotation drill is great for learning shoulder control and midline stability. From a high plank, tap each shoulder with the opposite hand while minimizing hip movement. It’s a great progression toward explosive or single-arm push-up variations.
7. Plank push-up

Tips
-
Core Engagement: Keep your core tight and engaged throughout the entire exercise to prevent your hips from sagging or rotating as you transition between positions.
-
Minimize Hip Rotation: The key to this exercise is keeping your hips as still as possible. Widen your stance by positioning your feet slightly wider than shoulder-width apart to help stabilize your body.
-
Controlled Movement: Move slowly and with control when transitioning between the elbow and straight arm planks. Avoid jerking motions to prevent losing form.
-
Alternate Starting Arms: Ensure you alternate which arm you push up with first on each rep to avoid overworking one side of the body
-
Breathing: Breathe steadily throughout the movement. Inhale when lowering into the elbow plank, and exhale as you push up into the straight arm plank.
This is a dynamic isometric where you move between elbow plank and high plank. It builds endurance and coordination in the shoulders, chest, triceps, and core. A great functional bridge between static holds and full push-up strength.
8. Off-knees quadruped shoulder taps

Tips
-
Core Engagement: Keep your core engaged throughout the movement to stabilize your torso and prevent your hips from swaying.
-
Minimize Hip Movement: The primary focus of this exercise is to keep your hips and torso as stable as possible. The shoulder tap should be the only movement.
-
Controlled Movement: Perform each tap slowly and with control. Avoid rushing through the exercise, as this can lead to instability and reduce its effectiveness.
-
Breathing: Exhale as you lift your hand to tap your shoulder and inhale as you return to the quadruped position. Steady breathing helps maintain focus and stability.
-
Hand and Knee Alignment: Ensure your hands are directly under your shoulders and your knees remain close to the floor throughout the exercise to maintain proper form.
This variation keeps your knees close to the ground, reducing load while still developing scapular control and anti-rotation core strength. Ideal for those who are still building basic strength but want to begin moving toward push-up mechanics.
9. Planche leans

Muscle group:
Tips
-
Keep shoulders depressed and protracted to avoid unnecessary trap activation.
-
Keep toes pointed and legs straight to maintain good form.
-
Lean forward gradually—don’t rush into an extreme lean too soon.
-
If feeling wrist discomfort, grip the parallettes firmly and keep wrists aligned with the arms.
-
Record your lean angle progress by marking where your shoulders are in relation to your hands.
A challenging isometric that requires you to shift your shoulders forward past your wrists while holding a straight arm plank. This builds shoulder, chest, and core strength, and develops the lean mechanics needed for advanced pushing skills like pseudo-planche or handstand push-ups.
10. Frog stand

Muscle group:
Tips
-
Spread your fingers wide (on the ground) for greater balance and control.
-
Turn your biceps externally so it's facing forward.
-
Keep your gaze slightly forward rather than directly down to help with balance.
-
Start with brief holds and slowly increase the duration as confidence builds.
-
Use parallettes if wrist discomfort occurs, to place your wrists in a more neutral and comfortable position.
-
Practice regularly, even daily, with short and frequent attempts to accelerate progress.
A beginner hand-balancing hold that builds shoulder and wrist strength, body tension, and coordination. Though it looks different from a push-up, it shares the same demand for upper body stability and core engagement. It’s also a great mental confidence booster as you learn to hold your own bodyweight.
By practicing these calisthenics exercises you will gain enough strength and muscle to be able to perform your first strict push up. It’s important to note that these exercises are not only for beginners. They are useful for even advanced athletes as part of the warm up or pre-hab workout.
10-week Calisthenics Routine to Get Stronger in Push-Ups
This beginner calisthenics workout is using push up progression to help you build strength in the chest, core, shoulders, and triceps to be able to complete 10 strict push-ups. The workout plan contains exercises that require no equipment or just a resistance band. The program is designed to become progressively more challenging as you get stronger towards the end of the program.
Before starting the workout plan, please consult with your physician to ensure that you are fit to perform these exercises.
The workout plan only contains exercises that target a specific muscle group. For good progress it’s recommended to target the same muscle groups at least twice per week. Since the same workout is programmed for two weeks, you will perform each workout 4 times (2x per week) before moving to the next one.
As always, start each workout with a 5-10 minute warm-up. Pick some light cardio exercises and do some dynamic stretching.
Week 1-2
Perform each exercise for 3 sets of 10 repetitions with a 60-second rest between each set.
- Wall Push Ups: Stand facing a wall with your arms outstretched and your palms flat against the wall. Lean in towards the wall, bending your elbows and keeping your body straight, then push back to the starting position. You can increase the difficulty by walking farther away from the wall.
- Plank: Start in a push-up position with your hands directly under your shoulders and your toes on the ground. Tighten your core and hold the position for 30-60 seconds.
- Tricep Dips: Sit on the edge of a chair or bench with your hands on the edge. Straighten your arms, then lower yourself towards the ground by bending your elbows. Push back up to the starting position.

Week 3-4
Perform each exercise for 3 sets of 12 repetitions with a 60-second rest between each set.
- Incline Push Ups: Place your hands on an elevated surface, like a bench or step, and your feet on the ground in a push-up position. Lower your chest towards the bench, keeping your back straight, then push back up to the starting position.
- Plank with Shoulder Taps: Start in a push-up position with your hands directly under your shoulders and your toes on the ground. Tighten your core and lift one hand off the ground to touch the opposite shoulder. Lower your hand back to the ground and repeat with the other hand.
- Resistance Band Pull Aparts: Stand with your feet shoulder-width apart and hold a resistance band with both hands. Pull the band apart, keeping your arms straight and shoulder blades squeezed together.

Week 5-6
Perform each exercise for 3 sets of 15 repetitions with a 60-second rest between each set.
- Negative Push Ups: Start in a plank position with your hands shoulder-width apart, and and legs together. Glutes and core engaged. Lower your chest as slow as possible until it touches the ground.
- Plank with Leg Lifts: Start in a push-up position with your hands directly under your shoulders and your toes on the ground. Tighten your core and lift one leg off the ground, keeping it straight. Lower your leg back to the ground and repeat with the other leg.
- Scapula Push Ups: Start in a plank position with your hands shoulder-width apart, fingers spread wide, and your body in a straight line from head to heels. Squeeze your shoulder blades together and down towards your spine, without bending your elbows. The second part of the movement is the protraction - push your shoulder blades apart from each other towards your shoulders.
Week 7-8
Perform each exercise for 3 sets of 10 repetitions with a 60-second rest between each set.
- Close Grip Negative Push Ups: Start in a push-up position with your hands close together, just under your chest. Lower your chest towards the ground, keeping your elbows close to your body. The eccentric phase should be as slow as possible
- Plank with Knee-to-Elbow (aka Mountain climbers): Start in a push-up position with your hands directly under your shoulders and your toes on the ground. Tighten your core and bring one knee towards your elbow on the same side. Return to the starting position and repeat with the other leg.
- Resistance Band Chest Press: Stand with your feet shoulder-width apart and hold a resistance band with both hands. Pull the band apart, then bring your hands in front of your chest, keeping your elbows close to your body. Slowly release the band back to the starting position.
Week 9-10
Perform each exercise for 3 sets of 12 repetitions with 60-second rest between each set.
- Decline Negative Push Up: With 5-second hold at the bottom. Start in a plank position with your hands shoulder-width apart, and legs together. Glutes and core engaged. Lower your chest as slowly as possible and stop just slightly before it touches the ground - hold here for 5 seconds.
- Walking Plank: Start in the plank position. Switch one arm to a low plank position into your elbow and follow with your other arm. Keep core, glutes engaged and a straight body position.
- Resistance Band Fly: Hold a resistance band in front of your chest with your palms facing each other and your elbows slightly bent. Step back until the band is taut, then open your arms out to the sides, keeping your elbows slightly bent. Bring your hands back together in front of your chest and repeat.

Zero to 10 Push-Ups Calisthenics Program - 6-Week Structured Version
If you’re looking for a more structured and time-efficient way to build your push-up strength, I highly recommend trying my 6-week Zero to 10 Push-Ups program. It’s specifically designed for beginners and anyone who struggles with form, endurance, or consistency. While the 10-week routine offers a slower pace, this 6-week version is focused, progressive, and easy to integrate into any training schedule—even if you’re short on time. It’s ideal if you want to see measurable progress, fast.

- Go from 0 to 10 push-ups
- Beginner-friendly, 2 sessions per week
- Just 25–30 minutes per workout
- Progressively harder exercises each week
- Large variety of push-up variations
- Targets chest, triceps, shoulders, core
Conclusion
If your goal is to get stronger at push-ups, the best place to start is with a clear progression. This article introduced you to the key push-up progression exercises that will help you gradually build strength, improve technique, and increase your rep count safely. Whether you’re a complete beginner or someone who can do a few push-ups but wants to improve form, the included 10-week unstructured routine gives you the flexibility to train at your own pace using foundational calisthenics movements.
For those who prefer a step-by-step system, the ▶️ 6-week Zero to 10 Push-Ups program is a structured alternative that guides you week-by-week, workout-by-workout. It includes two short sessions per week (25–30 minutes each), progressive difficulty, detailed exercise explanations, and video demonstrations to help you get the most out of each movement. If you’re ready to commit to improving your push-up strength with a proven and beginner-friendly plan, I highly recommend giving it a go.
Once you are able to do a few push ups and pull ups you are ready to build your own workout plan and progress further in calisthenics.