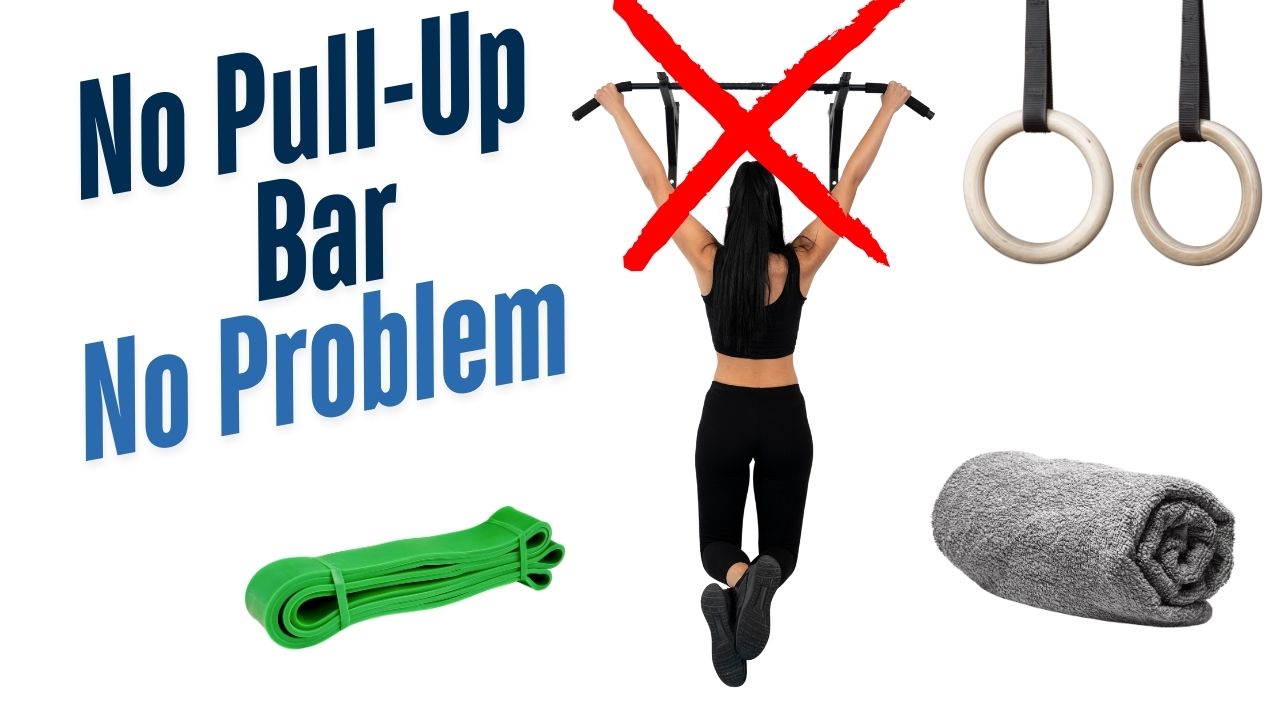
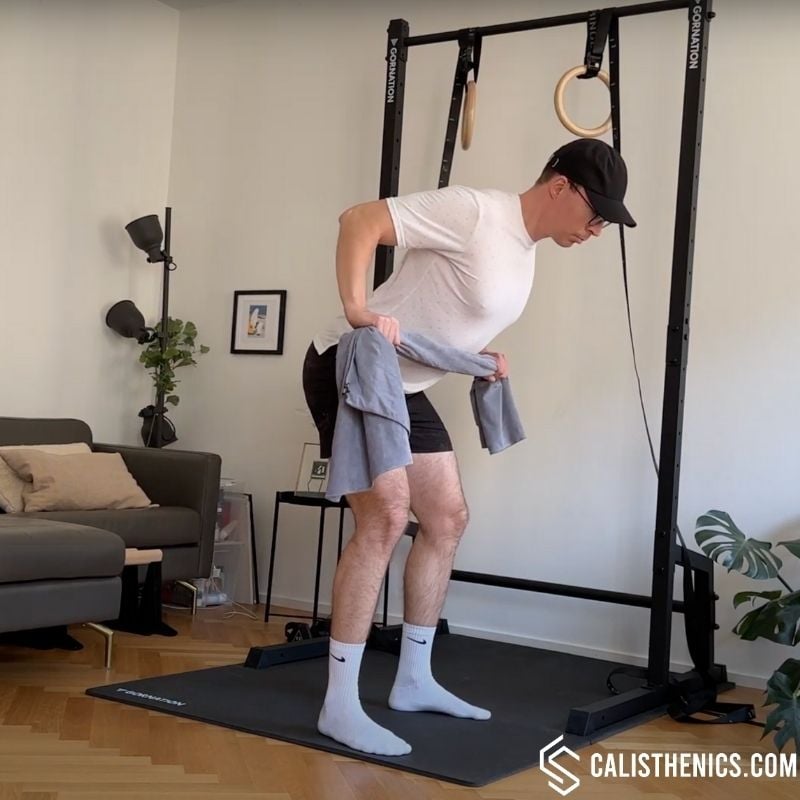
When it comes to bodyweight strength training, developing the posterior chain — especially the muscles of the back — is essential. Yet most at-home workout routines emphasize pushing movements like push-ups and neglect pulling movements, leaving the back undertrained.
The common assumption is that serious back training requires access to a pull-up bar or a full gym. In reality, you can build a strong, functional back using simple bodyweight exercises and basic household items. Adding resistance bands into your routine opens even more possibilities.
This guide explains why back training is critical, which muscles you should focus on, and exactly how to train your back effectively at home, without a pull-up bar.
Why Back Training Matters in Calisthenics
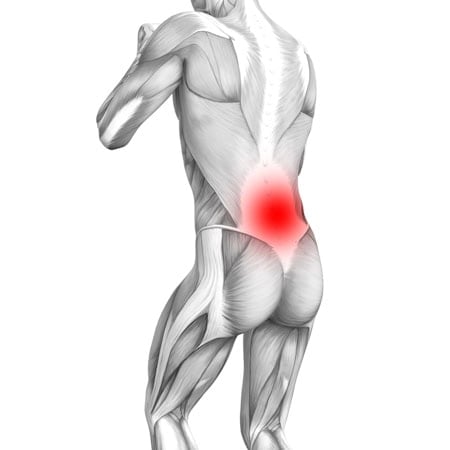
The back plays a central role in structural balance, athletic performance, and injury prevention. It consists of multiple large and small muscle groups working together to:
- Support spinal alignment and posture
- Stabilize the shoulder girdle
- Assist in nearly every upper-body movement, from pulling to lifting
In the context of bodyweight strength training, the ability to pull — horizontally and vertically — is critical for exercises like pull-ups, rows, muscle-ups, front levers, and even handstands.
Without sufficient pulling strength and scapular control, athletes often plateau early, struggle with shoulder discomfort, and fail to progress toward more advanced skills.
Neglecting back training can also lead to muscular imbalances. These imbalances can cause postural deviations such as forward head posture, rounded shoulders (kyphosis), and exaggerated lumbar curvature (hyperlordosis), all of which increase injury risk during physical activity and in daily life.
Thus, balanced development of the back is not merely aesthetic; it is foundational for long-term performance and joint health.
Key Back Muscles You’ll Be Targeting
Effective back training should address all major regions of the posterior upper body, including:
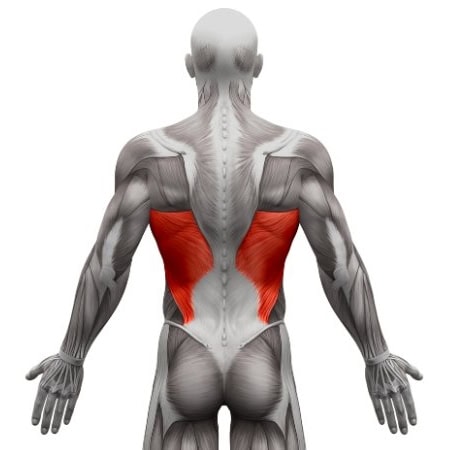
- Latissimus dorsi (lats): These are the primary muscles involved in vertical pulling and contribute heavily to shoulder stability.
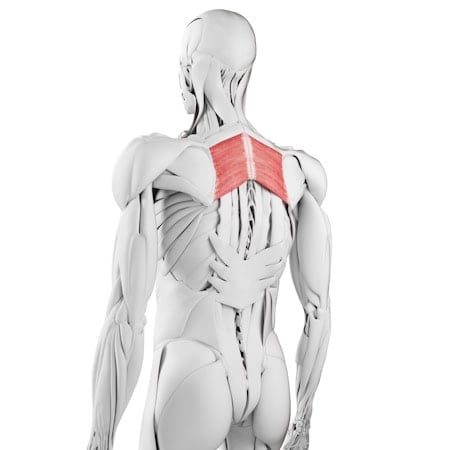
- Rhomboids: These muscles retract the scapulae, which is critical for maintaining a neutral shoulder position during pulling and pressing movements.
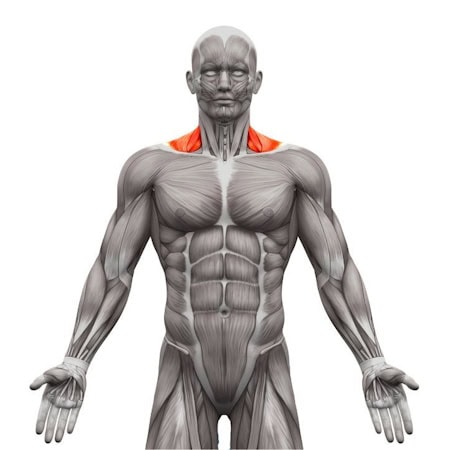
- Trapezius (traps): Divided into upper, middle, and lower fibers, the traps control scapular elevation, retraction, and depression.
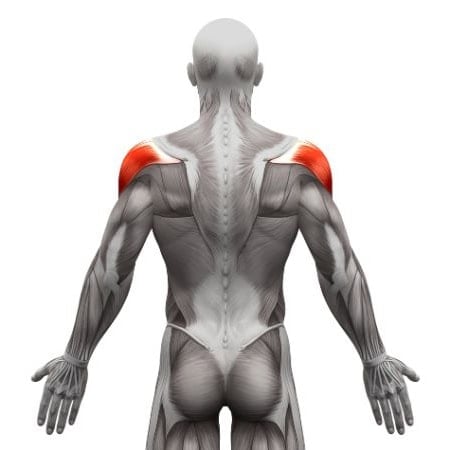
- Posterior deltoids (rear delts): These shoulder muscles assist in shoulder extension and external rotation, balancing the work of the anterior deltoids.
- Erector spinae: Running along the spine, these muscles are responsible for spinal extension, rotational control, and overall trunk stability.
Training all of these areas ensures comprehensive development and minimizes the risk of movement compensations or injuries.
Understanding Horizontal vs. Vertical Pulling
Back training revolves around two primary movement patterns: vertical pulling and horizontal pulling.
- Vertical pulling includes movements like pull-ups and lat pulldowns, where you pull in a downward direction relative to your body. These exercises primarily target the latissimus dorsi (lats) but also engage the traps, rhomboids, rear delts, and biceps.
- Horizontal pulling consists of rowing movements, where you pull towards your torso in a straight line. These work the mid and upper back muscles, including the traps, rhomboids, lats, and rear delts, and also involve the biceps and forearms.
Since we’re skipping the pull-up bar, we’ll focus on alternative ways to train both of these movement patterns using whatever equipment (or lack of equipment) you have at home.
Below, we’ll break it down into three categories based on what you have available:
Option 1: gymnastics rings
Option 2: resistance bands
Option 3: no equipment at all
Option 1: Training Your Back with Gymnastics Rings
Gymnastics rings are one of the most effective and versatile tools for calisthenics back training. They are similar to TRX Suspension Trainers however, gymnastics rings have several benefits over TRX Straps.
They allow full freedom of movement at the shoulder joint, which helps minimize joint stress, build stabilizer strength, and improve pulling mechanics.
Compared to bodyweight-only exercises or bands, ring training introduces instability, forcing more muscle recruitment from the lats, rhomboids, rear delts, and scapular stabilizers.
Additionally, rings make progression seamless: simply adjust the ring height or body angle to modify exercise difficulty.
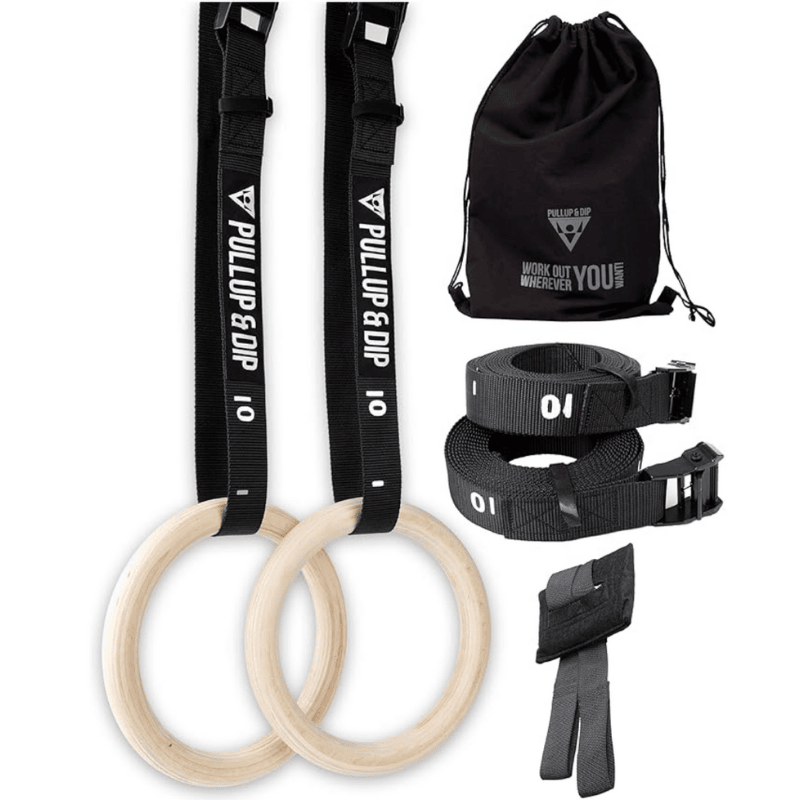
Premium Wooden Gymnastics Rings
*not from the US? Check on:
- PULLUP&DIP (DE) use code CALIS10 for 10% off
- GORNATION (UK&EU) use code CS10 for 10% off
- Made of high quality birch wood
- Olympic standard sizing
- Extra wide straps with numbered length markings for easy adjustment
- Quick release buckles for increased safety
Pros & Cons of Using Gymnastics Rings
Pros:
- Extremely versatile for horizontal and vertical pulling
- Adjustable height for easier or harder variations
- Allows for a natural wrist rotation, reducing strain on the joints
- Engages stabilizing muscles more than fixed bars or machines
Cons:
- Requires a sturdy mounting point
- Can be tricky for beginners to stabilize at first
12 Back Exercises On Gymnastics Rings
If you want to see ▶️ every back exercise you can train with gymnastics rings make sure to check our exercise library.
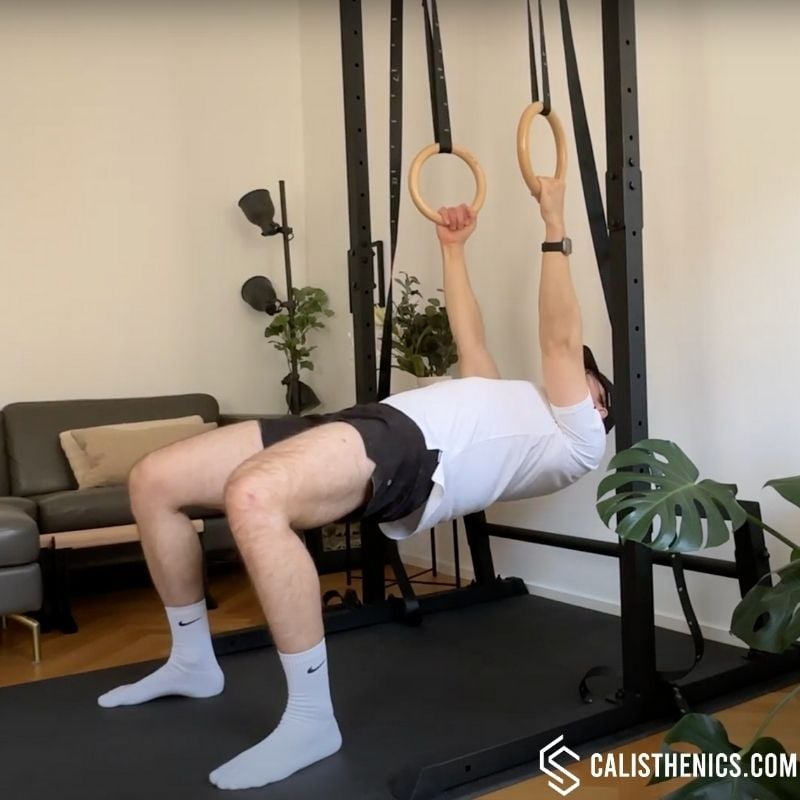
- Ring Rows (Bent Knees) – Bent-knee ring rows are an entry-level horizontal pulling exercise that reduce load by shortening the body lever. They target the mid-back, lats, and rear delts while helping beginners build scapular control and pulling strength.
Muscle group:
Tips
-
Keep your body in a rigid plank position to maximize stability.
-
Engage your lats throughout the movement to maintain control.
-
Perform the exercise slowly, focusing on mind-muscle connection.
-
If you’re new to scapular control, practice hanging scapular retractions first.
-
Use controlled breathing to maintain core engagement and stability.
-
Keep your neck neutral—avoid tucking or craning it forward.
2. Narrow Grip Ring Rows - In this variation, you grip both rings together with both hands and pull toward your chest, focusing on lat contraction and scapular retraction. It’s a simple way to add variety and increase lat engagement in horizontal pulling.
Tips
-
Keep your wrists straight and aligned with your forearms to avoid discomfort.
-
Experiment with different angles to find the right difficulty level for your strength.
-
Use a slight pause at the top of the movement to increase time under tension.
-
Engage your legs and glutes to help maintain a straight body position.
-
Breathe in as you lower, and exhale as you pull yourself up.
-
If you experience wrist discomfort, slightly rotate the rings as you pull to find a more natural position.
3. Ring Rows (Feet Elevated) – By elevating the feet onto a surface like a bench or box, you shift more of your bodyweight into the pull, creating a more challenging horizontal row that builds upper back and core strength simultaneously.
Tips
-
Engage the Core Throughout the Movement: Keep a hollow body position to maintain stability.
-
Adjust the Ring Height to Modify Difficulty: Lower rings = harder (more horizontal position), higher rings = easier.
-
Use a Controlled Tempo: 3-4 second eccentric (lowering) phases will increase time under tension for strength gains.
-
Focus on Scapular Retraction: Squeeze your shoulder blades together at the top of each rep.
-
Keep Wrists Neutral: Avoid excessive wrist bending by maintaining a strong, aligned grip.
-
Breathe Properly: Inhale during the eccentric phase (lowering) and exhale as you pull up.
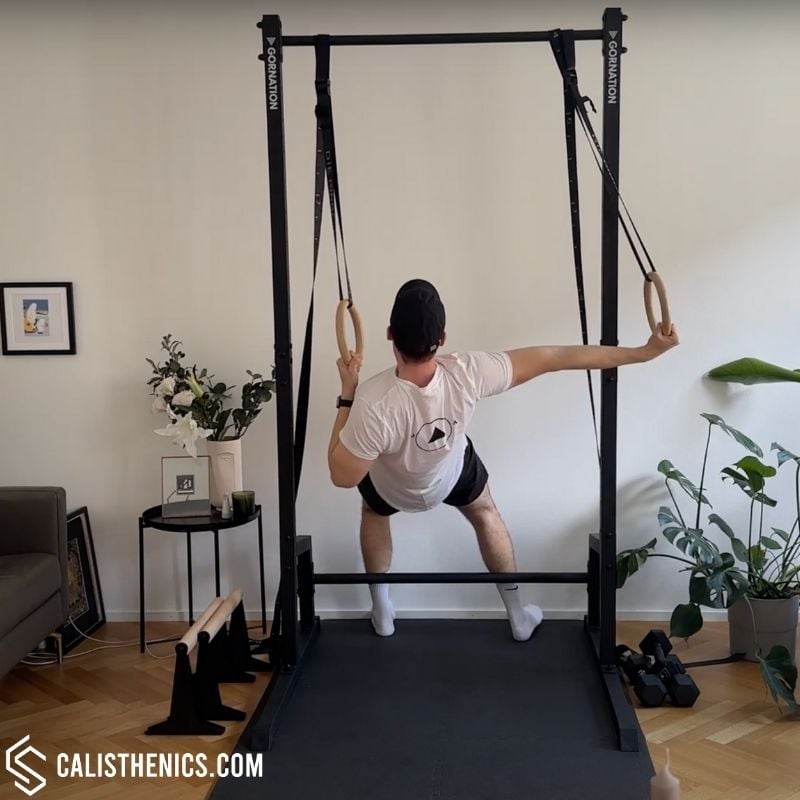
4. Ring Archer Rows – Archer rows introduce unilateral loading by having one arm perform the pull while the other arm extends out to the side. This variation increases intensity, improves balance, and builds strength for future one-arm pulling skills.
Tips
-
Keep your wrist neutral to avoid strain during pulling.
-
Adjust your foot placement to increase or decrease difficulty.
-
Focus on pulling with your back rather than relying only on your biceps.
-
Breathe in before pulling and exhale as you reach the top.
-
Squeeze your shoulder blades together at the top for full contraction.
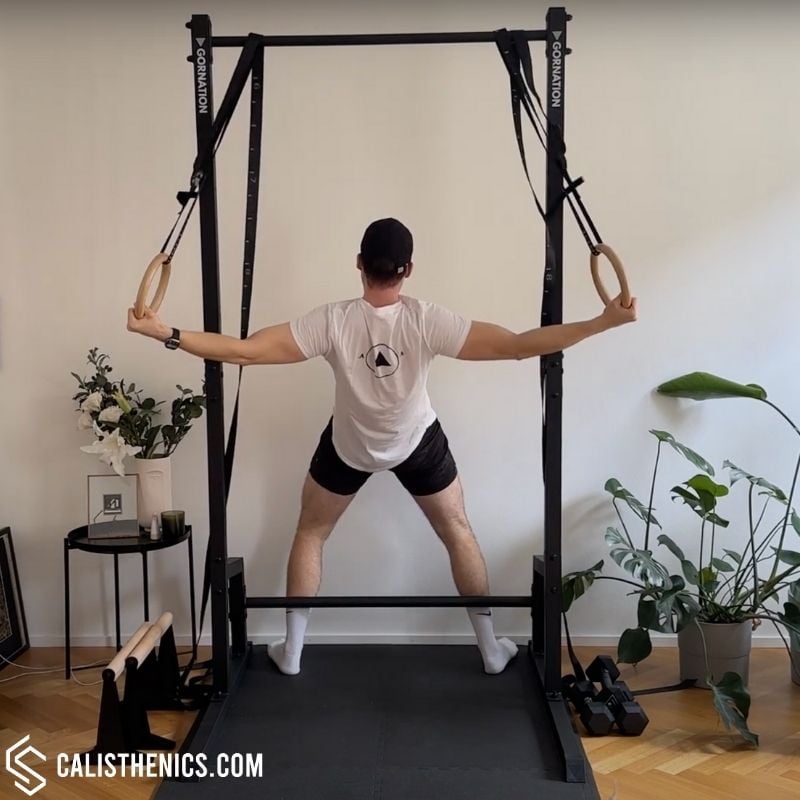
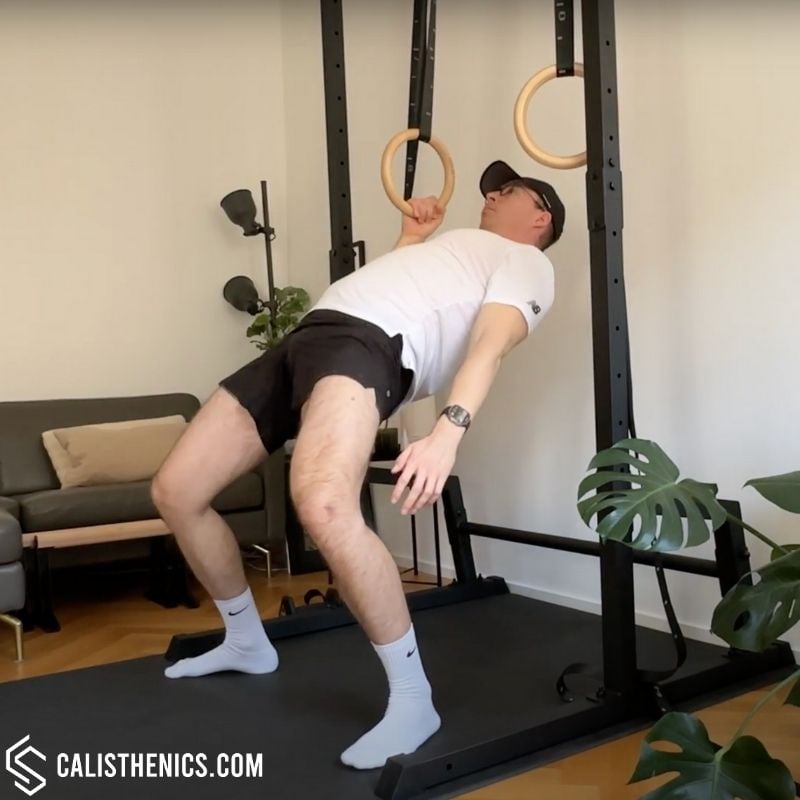
5. Ring Reverse Flys – Ring reverse flys target the rear deltoids, rhomboids, and mid-traps with a controlled, open-arm movement. They are excellent for shoulder stability, posture correction, and developing scapular endurance.
Tips
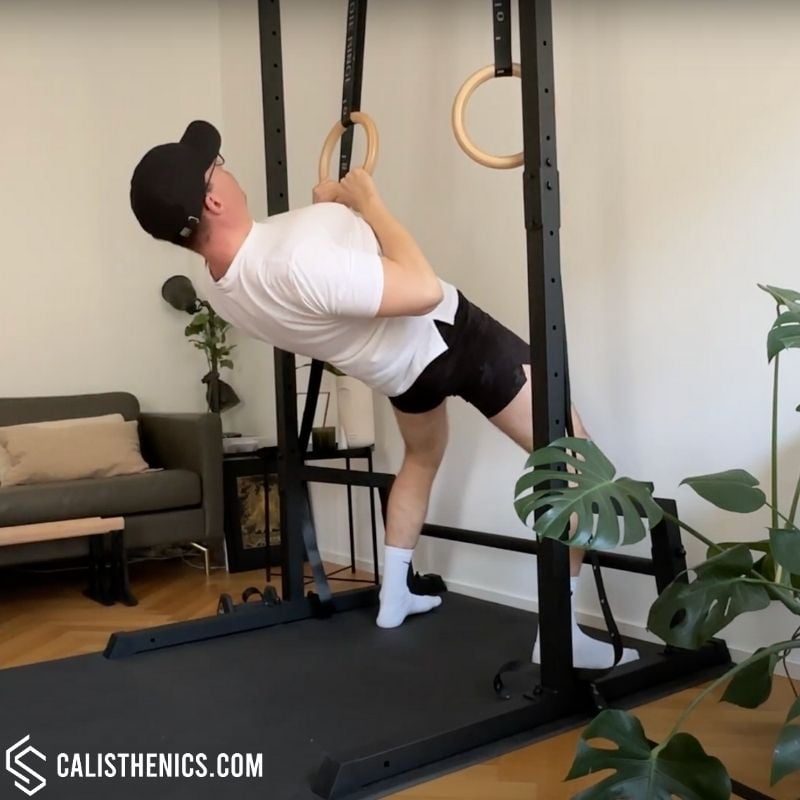
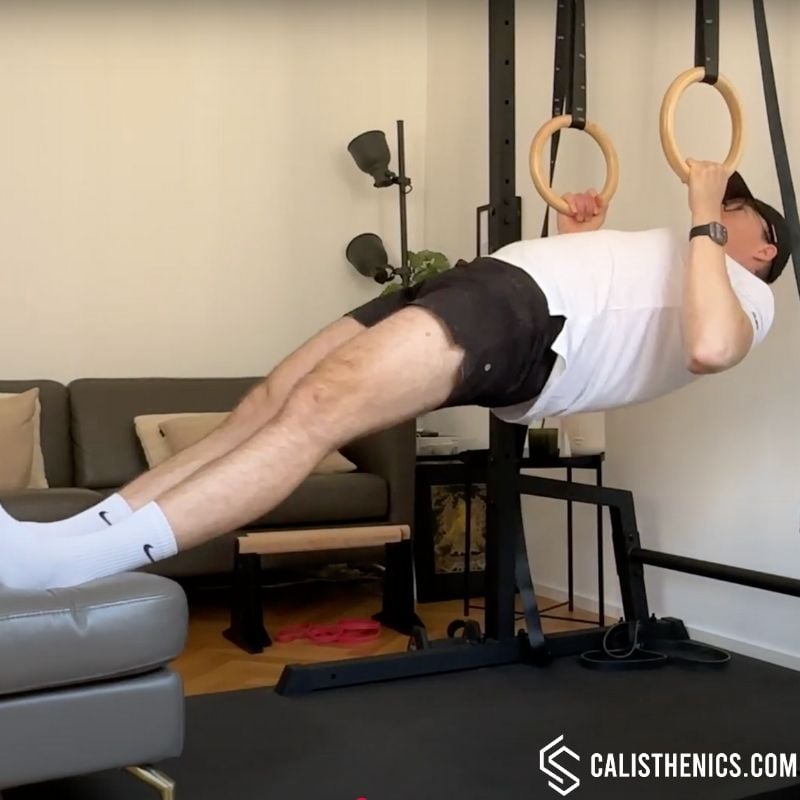
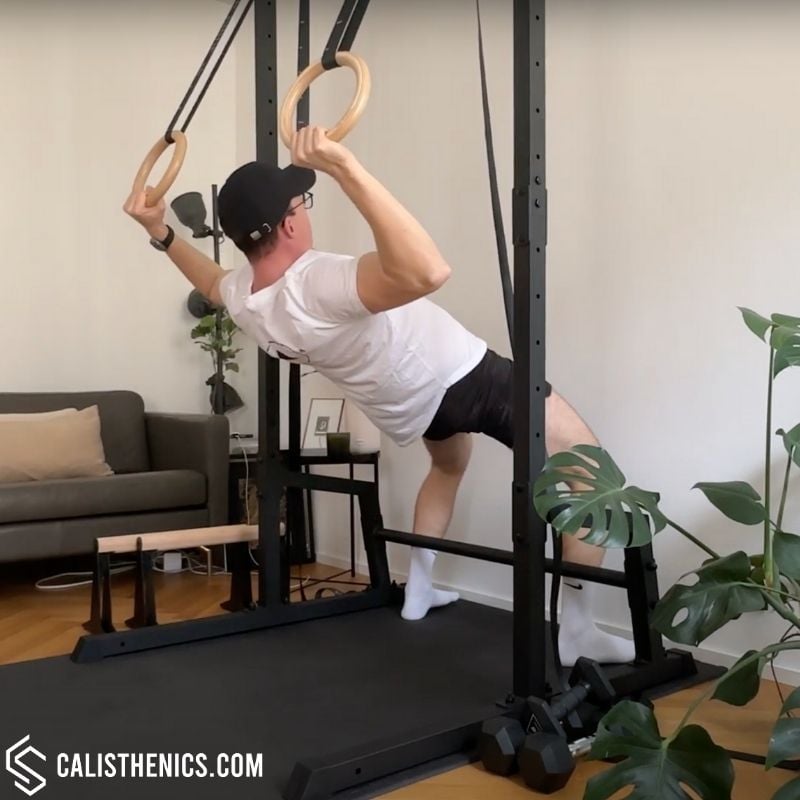
6. Ring Pseudo Front Lever Rows – This row variation mimics the horizontal body position of a front lever, engaging the lats, core, and lower traps more intensely. It builds specific strength and body positioning awareness for front lever progressions.
Tips
-
Keep your hips and shoulders aligned to maintain full-body tension.
-
Use a neutral grip for comfort, but experiment with supinated and pronated grips for variety.
-
Exhale as you pull yourself toward the rings, and inhale on the way down.
-
Hold the top position for 1-2 seconds to reinforce scapular strength and control.
-
If struggling with form, raise the rings or bend the knees slightly to reduce difficulty.
7. Ring One-Arm Rows – One-arm ring rows are an advanced unilateral pulling exercise that significantly challenges the lats, rear delts, core, and grip strength. They help develop the control and stability needed for one-arm pull-up progression.
Tips
-
Keep your core engaged to prevent rotation.
-
Use your free arm for balance, extending it to the side or slightly forward.
-
Focus on scapular retraction at the beginning of each rep.
-
Maintain a steady breathing pattern to help control movement.
-
Start with a higher ring height before progressing to lower positions.
-
Squeeze your glutes and quads to maintain body tension.
8. Ring Face-Pulls - Ring face-pulls isolate the rear delts, traps, and external rotators of the shoulder, reinforcing healthy scapular mechanics and balancing out heavy pushing work. They are key for shoulder health and injury prevention.
Tips
-
Focus on leading the movement with your elbows, not your hands.
-
Keep your wrists neutral during the pull and rotate them only at the top.
-
Adjust the ring height to modify intensity—higher is easier, lower is harder.
-
Breathe in as you lower down, and exhale as you pull up and externally rotate.
-
Pause for a second at the top to reinforce muscle activation.
9. Ring Pull-up - The basic ring pull-up trains vertical pulling strength while allowing natural wrist rotation, making it more joint-friendly than a fixed bar. It heavily engages the lats, biceps, and scapular stabilizers.
Tips
-
Keep Rings Close to Your Body – Avoid letting the rings drift outward.
-
Engage Your Back Before Pulling – Start each rep by activating the scapula to maximize back engagement.
-
Squeeze Shoulder Blades Together and Downwards – Keep scapular retraction throughout the movement.
-
Maintain Core Engagement – Prevent swinging by keeping your torso stable.
-
Use a Controlled Tempo – Avoid jerky movements and use smooth, deliberate control.
-
Breathe Properly – Inhale before pulling up, and exhale at the top.
10. Wide Ring Pull-ups - Wide ring pull-ups place more emphasis on the lats and mid-back, requiring greater scapular control. They are an effective variation for increasing back width and building strength in the outer pulling muscles.
Muscle group:
Tips
-
Maintain a Slight Arch in Your Back – Avoid a hollow body position; keep your chest open and ribs elevated.
-
Keep Elbows Flaring Out – This maximizes lat and upper back activation.
-
Engage Scapular Retraction Throughout – Avoid letting your shoulders roll forward at any point.
-
Control the Descent – Lower slowly and deliberately to maintain muscle tension.
-
Breathe Properly – Inhale before pulling up, exhale at the top, and inhale on the descent.
11. Ring Commando Pull-ups - Commando pull-ups involve pulling between the rings with a neutral grip, alternating sides slightly. This variation strengthens the lats, biceps, and forearms while also enhancing body control and grip endurance.
Muscle group:
Tips
-
Keep Elbows Close – This helps with controlled movement and maximizes lat engagement.
-
Engage Your Core – Stabilizes the torso and prevents excessive twisting.
-
Use a Full Range of Motion – Lower completely before the next rep.
-
Maintain a Strong Grip – Prevents slipping and improves wrist endurance.
-
Breathe Properly – Inhale before pulling up, and exhale at the top.
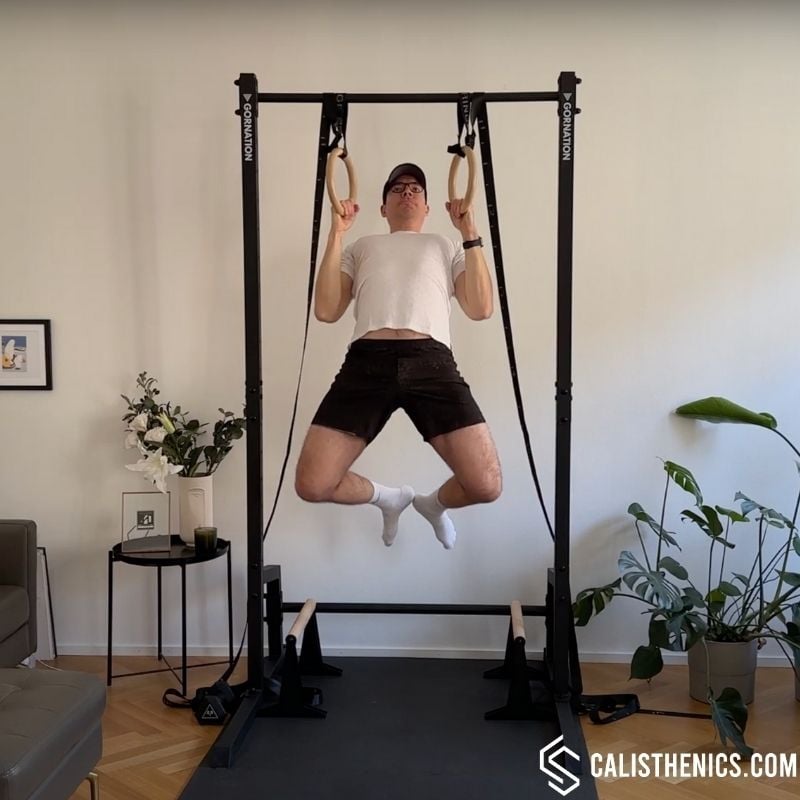
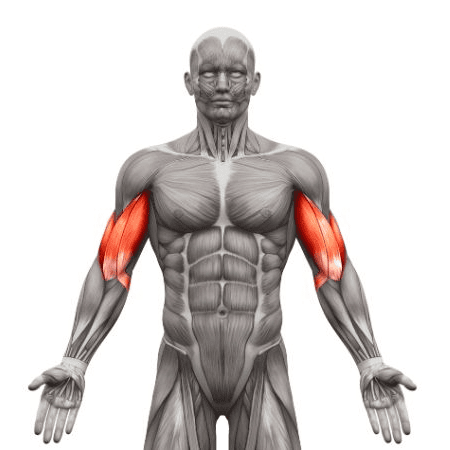
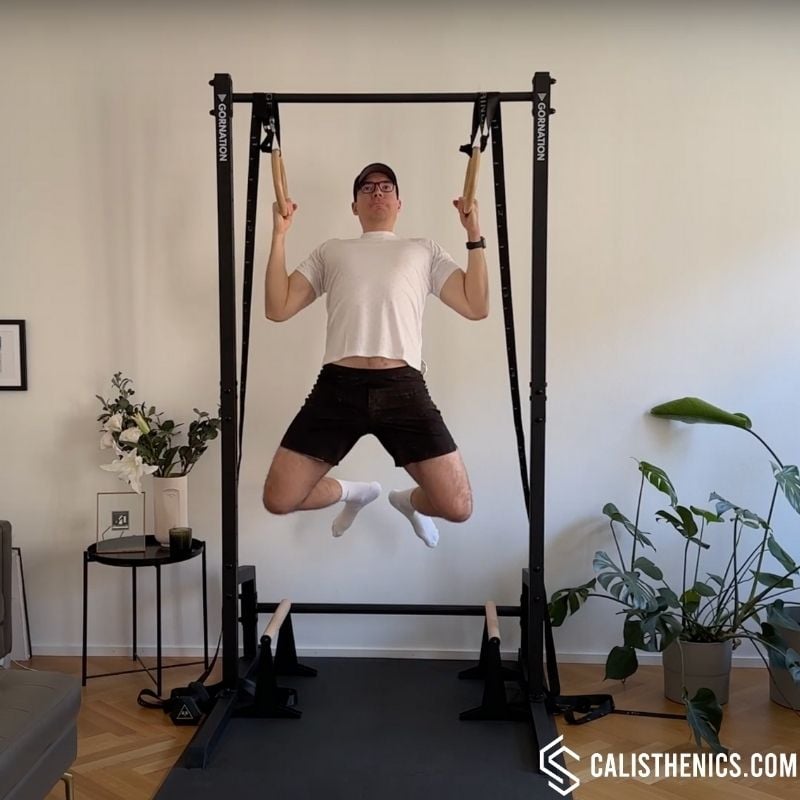
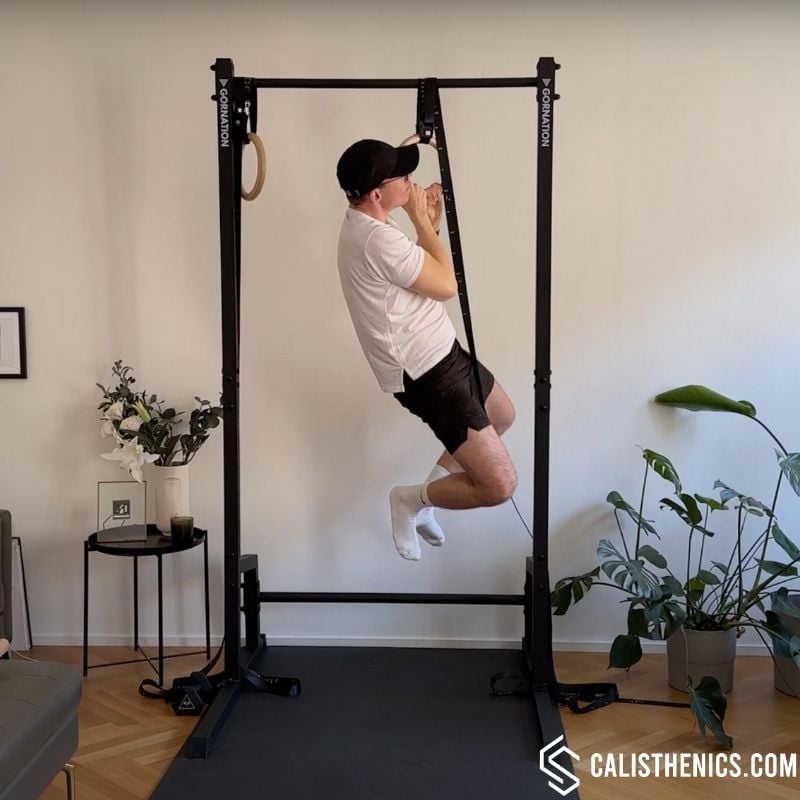
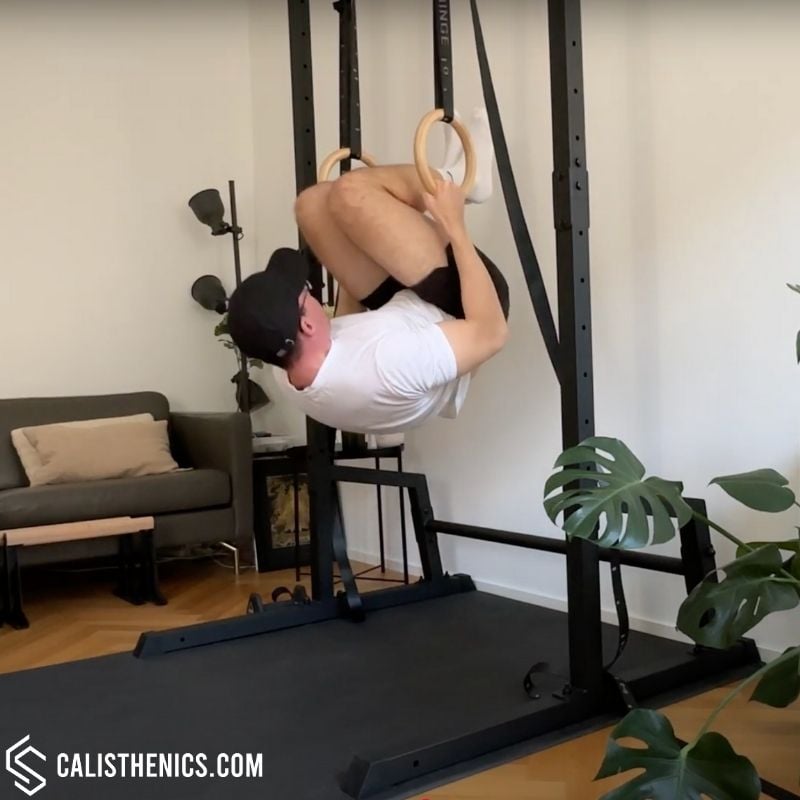
12. Tuck Front Lever Row - Performed in a tucked position, this exercise trains horizontal pulling strength while simultaneously developing core engagement and full-body tension needed for front lever progressions.
Tips
-
Keep your knees tucked tightly to reduce unnecessary movement.
-
Squeeze your glutes and core to maintain a rigid body line.
-
Use a controlled tempo to maximize strength gains—especially on the eccentric phase.
-
Adjust the angle of your body (pushing your knees further away from your chest into an advanced tuck front lever) to find an appropriate difficulty level.
-
Breathe steadily and avoid holding your breath, as it can cause unnecessary tension.
-
If grip is an issue, try wrapping your thumbs around the bar or rings for extra security.
Option 2: Training Your Back with Resistance Bands
Resistance bands are a fantastic alternative for home back workouts. With different band thicknesses, you can scale difficulty easily while still hitting the same muscle groups you’d target with free weights or machines.
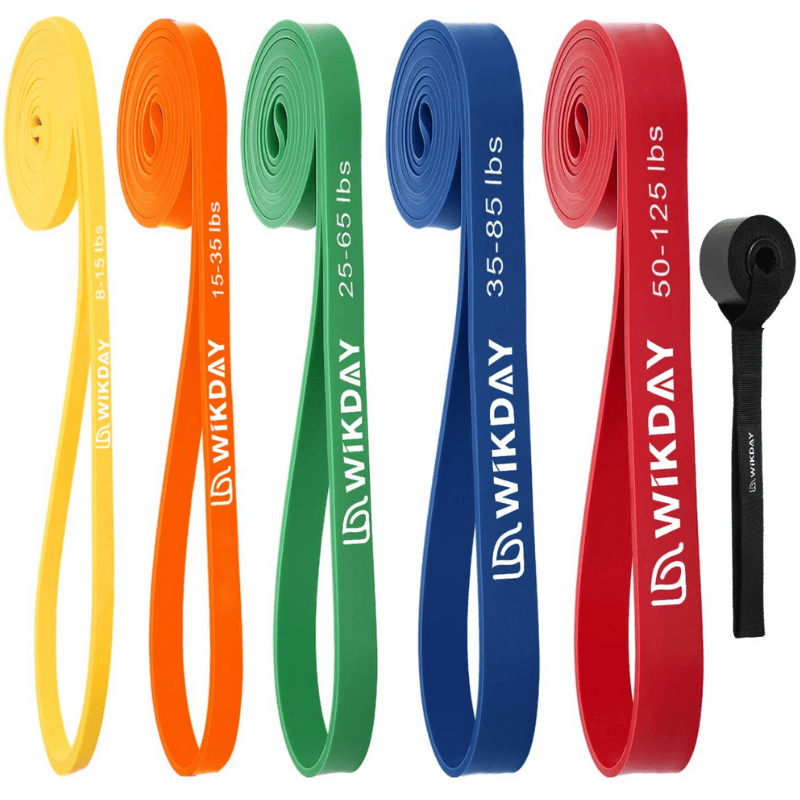
Resistance Bands
*alternative buying options:
👉 PULLUP&DIP (DE) use code CALIS10 for 10% off
👉 GORNATION (UK&EU) use code CS10 for 10% off
- High quality natural latex
- Multiple sizes: great for beginners and advanced
- Inlcudes a door anchor for standalone exercises
Pros & Cons of Using Resistance Bands
Pros:
- Portable and inexpensive
- Easy to scale resistance
- Gentle on the joints, making them great for all fitness levels
- Can mimic both pulling directions (vertical and horizontal)
Cons:
- Less stability challenge compared to rings or free weights
- Can be tricky to anchor securely at home
10 Back Exercises With Resistance Bands
See the ▶️ full list of back exercises that you can do with resistance band in our exercise library.
1. Resistance Band Scapula Rows - This exercise isolates scapular retraction by focusing on pulling the shoulder blades together without bending the elbows. It builds foundational scapular strength and control, critical for proper pulling mechanics.
Muscle group:
Tips
-
Focus on the Scapula: Avoid pulling with your arms; focus on the shoulder blades’ movement to maximize the engagement of the upper back.
-
Keep the Core Tight: Engage your core to stabilize your torso and prevent leaning or twisting during the exercise.
-
Maintain a Relaxed Grip: Avoid over-gripping the band, as the goal is to activate the back, not the forearms.
-
Avoid Shrugging the Shoulders: Keep your shoulders down and relaxed, focusing on pulling your shoulder blades together rather than upward.
-
Controlled Movement: Perform the movement slowly to fully activate the muscles around the scapula, ensuring proper form and effectiveness.
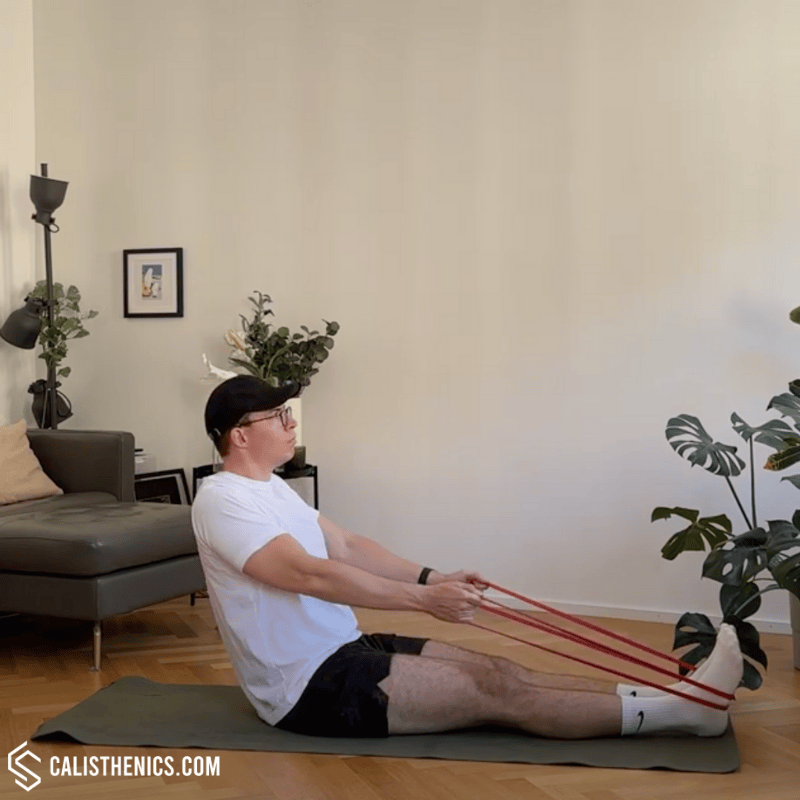
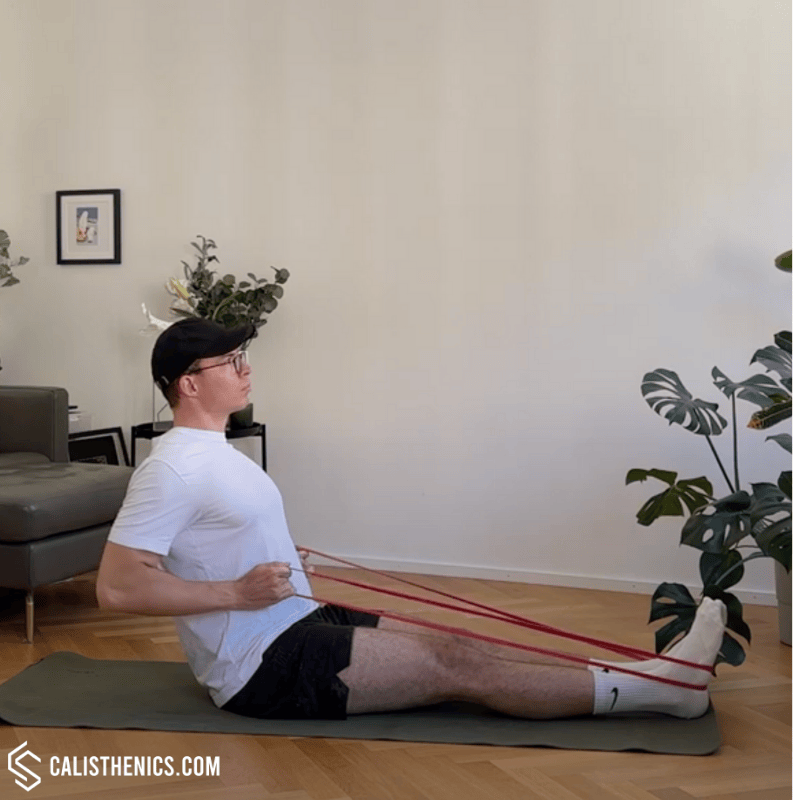
2. Seated Band Rows - Seated band rows simulate a cable row setup, targeting the lats, rhomboids, and traps while allowing controlled horizontal pulling in a stable seated position. It’s a joint-friendly option for building back strength at home.
Tips
-
Sit Tall: Keep your spine straight and chest lifted to avoid slouching, which can reduce effectiveness and strain your back.
-
Engage the Core: Maintain a tight core to stabilize your torso and prevent excessive rocking or leaning.
-
Squeeze the Shoulder Blades: Focus on squeezing your shoulder blades together as you pull to fully engage the back muscles.
-
Controlled Movement: Avoid using momentum; perform the exercise slowly and with control to maximize muscle activation.
-
Breathe Steadily: Exhale as you pull the band toward you and inhale as you release it back, maintaining rhythm and control.
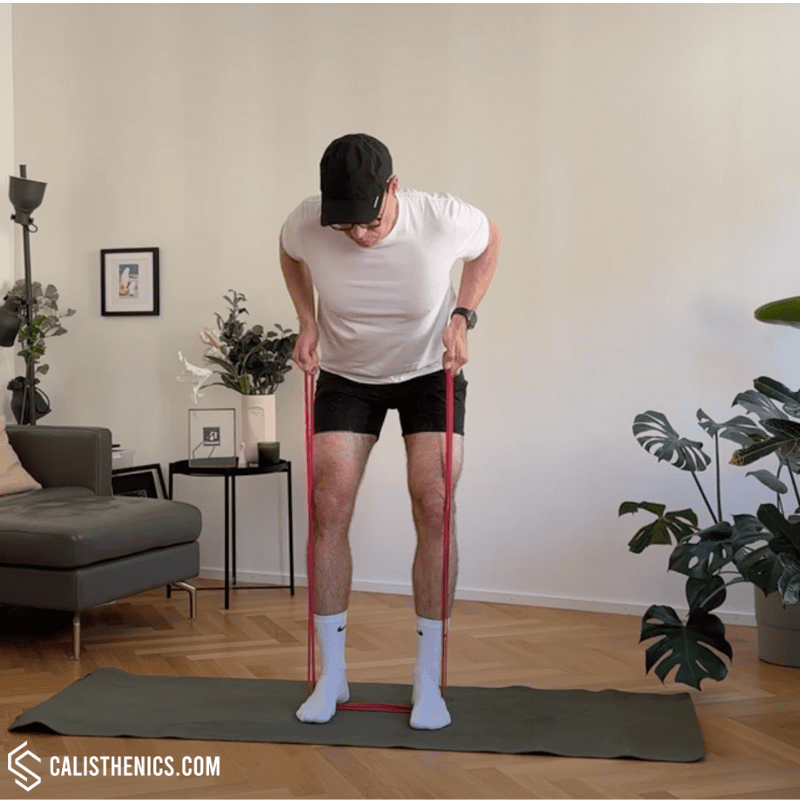
3. Standing Band Rows - Standing band rows engage the upper back, lats, and arms while challenging postural stability. They are versatile and scalable, depending on band thickness and body position.
Tips
-
Maintain a Neutral Spine: Keep your back straight and avoid rounding. Engage your core to protect your lower back.
-
Focus on the Elbows: Lead with your elbows, keeping them close to your body to maximize engagement of the lats and rhomboids.
-
Squeeze at the Top: Squeeze your shoulder blades together at the top of the row to ensure full engagement of the back muscles.
-
Controlled Movements: Avoid using momentum. Perform the row slowly and with control to maximize muscle activation.
-
Breathing: Exhale as you pull up, and inhale as you lower back down. This rhythm helps maintain stability and focus.
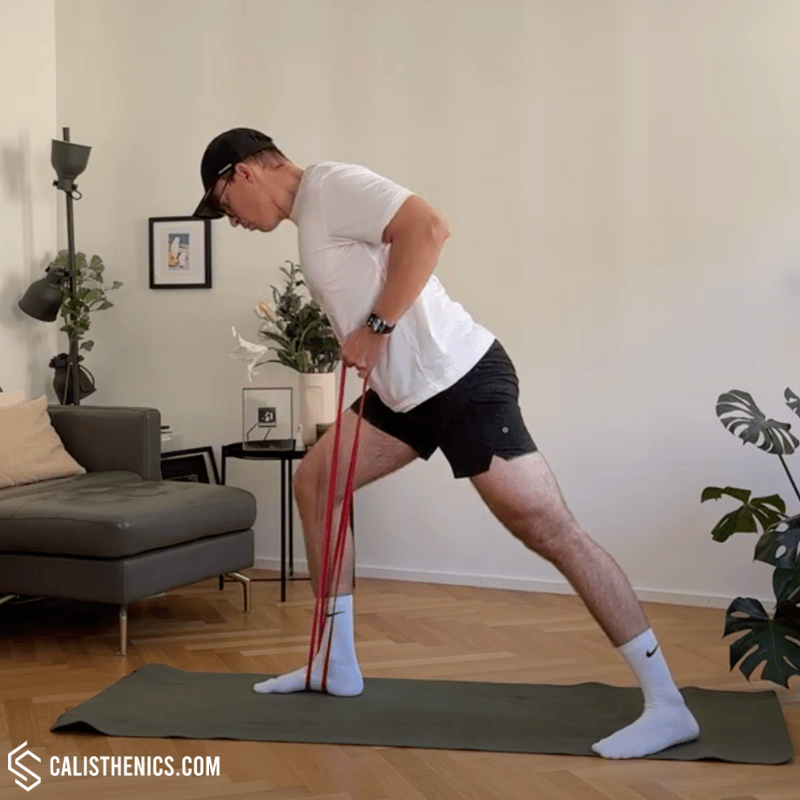
4. Single Arm Resistance Band Bent Over Rows - This unilateral variation develops independent pulling strength, helping to correct muscular imbalances between sides. It targets the lats, rhomboids, and rear delts while reinforcing trunk stability.
Tips
-
Engage the Core: Keep your core tight to stabilize your torso and protect your lower back from strain.
-
Maintain a Neutral Spine: Keep your back straight and avoid rounding. Focus on hinging at the hips rather than bending at the waist.
-
Squeeze the Shoulder Blade: Focus on pulling with your back muscles by squeezing your shoulder blade toward the spine, ensuring proper activation of the back muscles.
-
Control the Movement: Avoid using momentum; perform the row slowly and with control to maximize muscle engagement.
-
Breathing: Exhale as you pull up and inhale as you release down, maintaining stability and focus throughout the movement.
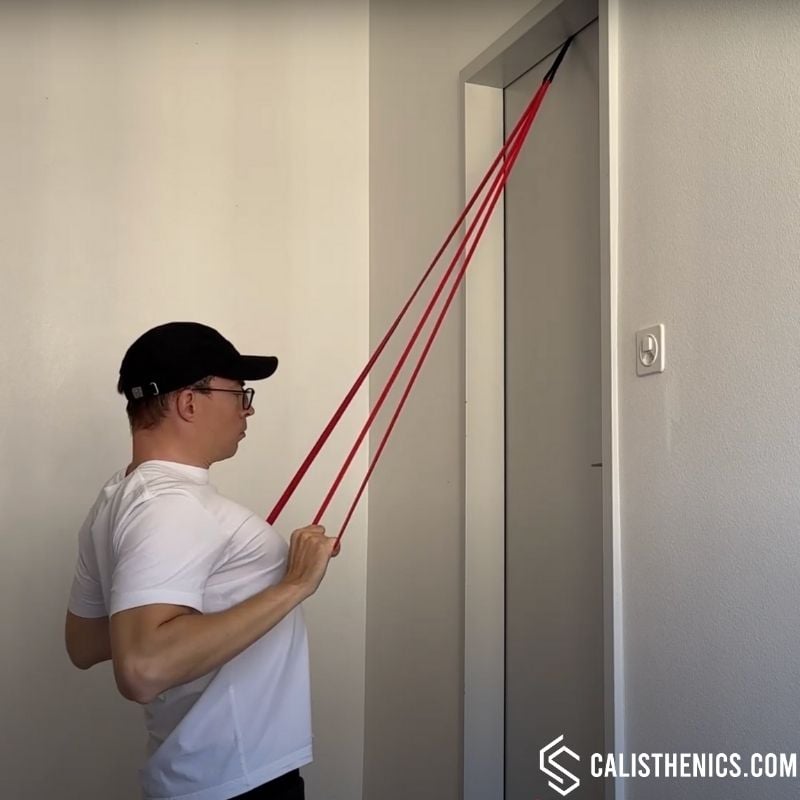
5. Standing Band Pulldowns – Mimicking the pull-up motion without a bar, this movement strengthens the lats and upper back through a vertical pulling pattern, helping to build foundational strength for pull-up progressions.
Muscle group:
Tips
-
Keep your core tight to prevent excessive body movement.
-
Focus on driving the elbows down and back, not just pulling with your hands.
-
Try different grip variations (neutral, supinated, pronated) for varied muscle activation.
-
Use a thicker band for more resistance or double up bands for progressive overload.
-
Maintain slow eccentric control to build strength effectively.
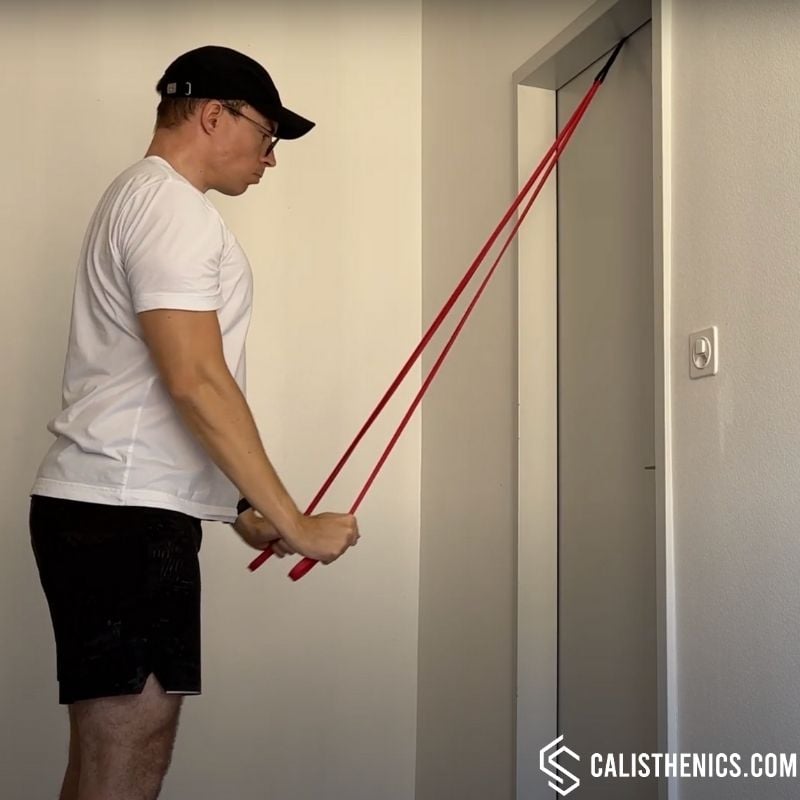
6. Standing Band Lat Pulldowns - This variation isolates the lats by keeping the arms straight throughout the movement, emphasizing shoulder extension strength and teaching proper lat engagement for advanced pulling skills.
Muscle group:
Tips
-
Slow Down the Eccentric Phase (Lowering the band back up) to increase time under tension and improve strength.
-
Experiment with Different Grips (Overhand, underhand, or neutral) to engage different parts of the back.
-
Anchor the Band at Slightly Different Angles to vary the tension and muscle activation.
-
If the Band Is Too Long, wrap it around your hands or use a shorter band to increase resistance.
-
Maintain a Stable Base by kneeling or sitting to minimize unnecessary body movement.
7. Band Face Pulls – Band face pulls target the rear deltoids, traps, and external rotators, promoting scapular health, improving posture, and balancing pressing-dominant training programs.
Tips
-
Keep the Elbows High: Lead with your elbows, keeping them in line with your shoulders as you pull to maximize engagement of the rear deltoids.
-
Engage the Core: Keep your core tight to stabilize your torso and maintain an upright posture, avoiding any rocking or leaning.
-
Focus on Shoulder Rotation: Rotate your shoulders externally as you pull, ensuring your hands are level with your ears at the peak of the movement.
-
Avoid Shrugging the Shoulders: Keep your shoulders down and away from your ears to avoid upper trap overactivation.
-
Controlled Movement: Perform the exercise slowly and with control to fully activate the target muscles and avoid using momentum.
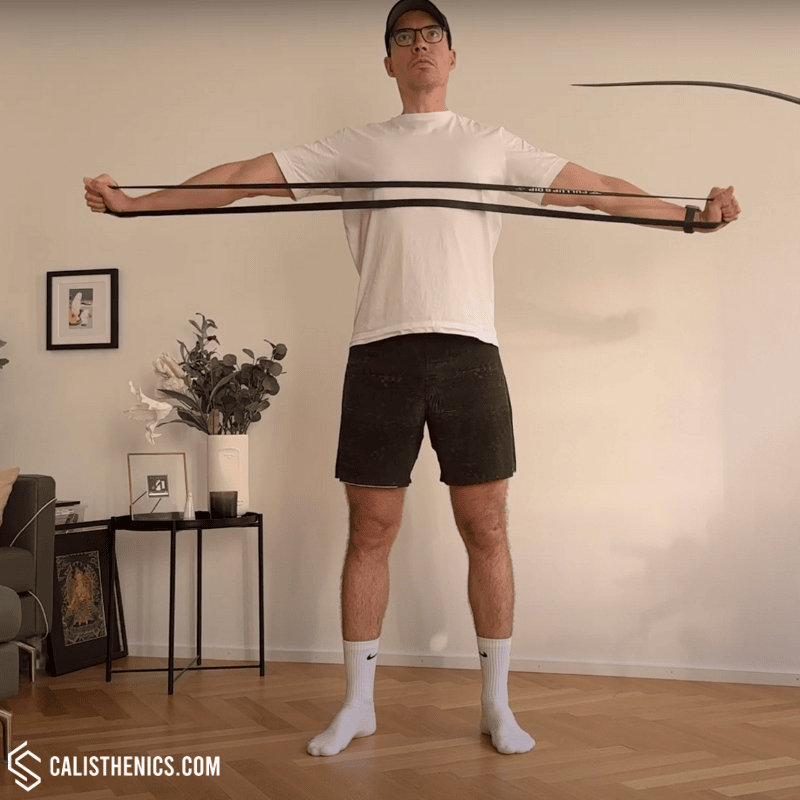
8. Band Pull-Aparts - A simple but highly effective exercise for strengthening the rear delts, rhomboids, and mid-traps. It improves scapular stability and endurance, especially important for injury prevention and posture correction.
Tips
-
Squeeze Your Shoulder Blades: Focus on squeezing your shoulder blades together as you pull the band apart. This ensures that you engage the muscles of your upper back effectively.
-
Keep Arms Straight but Not Locked: Maintain straight arms during the movement, but avoid locking your elbows to protect your joints and maximize muscle engagement.
-
Core Engagement: Keep your core tight to prevent arching your back as you pull the band apart. A stable core helps maintain proper posture and prevents compensations.
-
Controlled Movement: Perform the movement slowly and with control, both when pulling the band apart and when returning to the starting position. Avoid jerking or using momentum.
-
Breathing: Exhale as you pull the band apart and inhale as you return to the starting position. Proper breathing helps maintain focus and control.
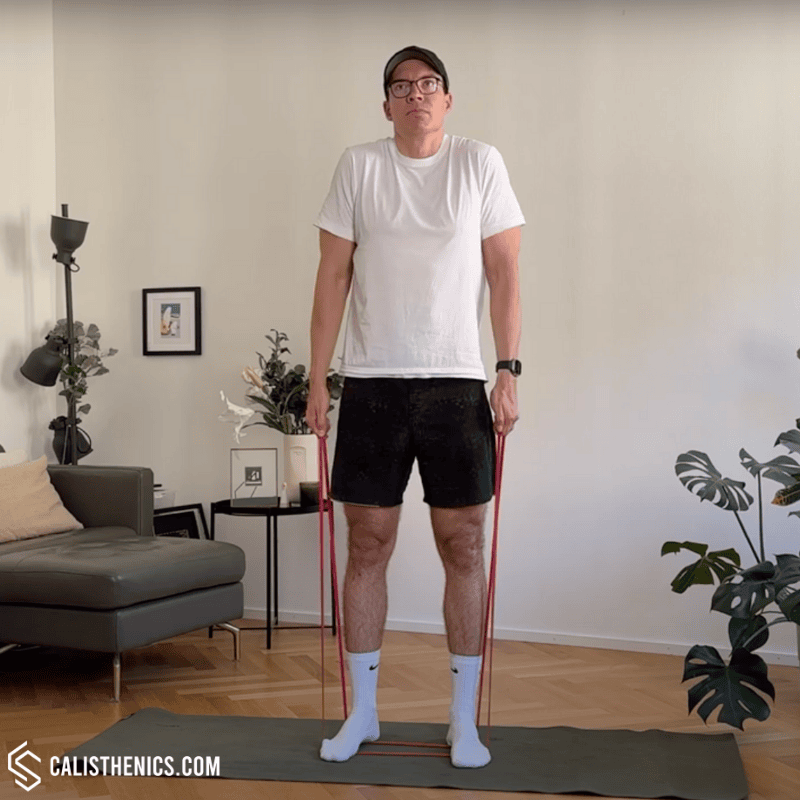
9. Resistance Band Shrugs - Band shrugs isolate the upper trapezius muscles, enhancing scapular elevation strength and building the resilience needed for carrying and overhead work.
Muscle group:
Tips
-
Keep the Core Tight: Engaging your core helps stabilize your torso, ensuring the movement focuses on the traps.
-
Focus on Shoulder Elevation: Avoid pulling with your arms; instead, focus on lifting your shoulders directly upward toward your ears.
-
Avoid Rolling the Shoulders: Lift your shoulders straight up and down; rolling the shoulders can lead to improper form and shoulder strain.
-
Controlled Movement: Perform the exercise slowly, focusing on squeezing the traps at the top and controlling the descent.
-
Breathe Steadily: Exhale as you lift into the shrug and inhale as you lower back down, maintaining a consistent rhythm.
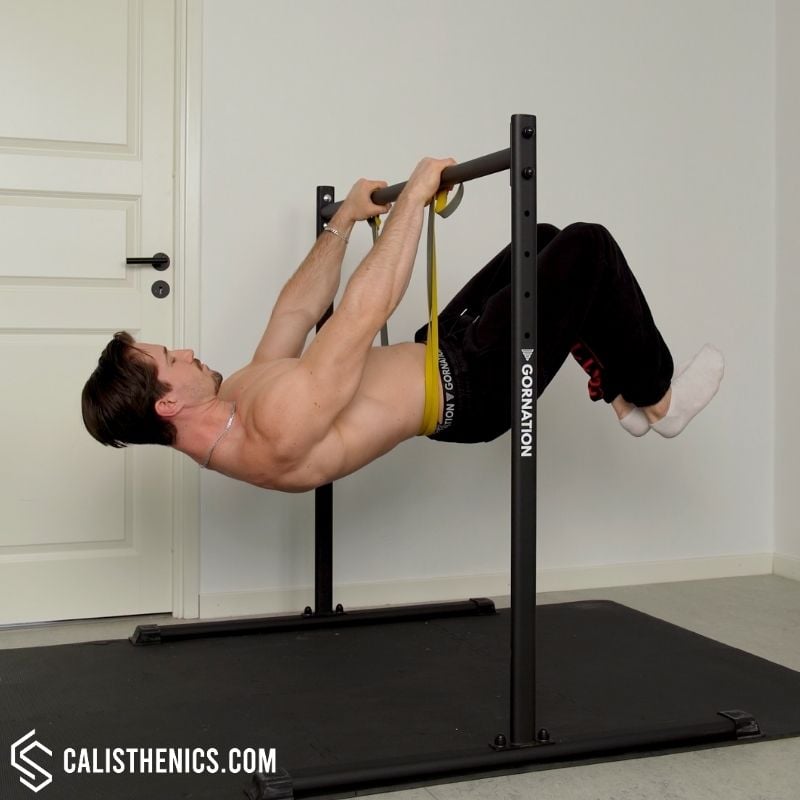
10. Band Assisted Front Lever Tuck Hold – Using a band for assistance, this exercise allows athletes to practice the front lever tuck position while reducing the difficulty, building isometric core, lat, and scapular strength necessary for front lever development.
Muscle group:
Tips
-
Choose the Right Band Resistance: Select a resistance band that provides enough support to help you maintain proper form but still challenges your strength.
-
Engage the Core and Lats: Keep your core tight and your lats engaged to stabilize your body and maintain alignment.
-
Focus on Full Body Tension: Squeeze your glutes, core, and legs to create a stable and rigid body position.
-
Maintain Scapular Depression: Keep your shoulders down and away from your ears to avoid strain and improve shoulder stability.
-
Progress Gradually: As you build strength, transition to lighter resistance bands to reduce assistance and increase difficulty.
Option 3: Training Your Back with No Equipment
Even if you don’t have rings or bands, you can still train your back effectively using common household items like chairs, towels, a sturdy table, or even a broomstick.
Pros & Cons of Training with No Equipment
Pros:
- Completely free and accessible to anyone
- Encourages creativity and bodyweight mastery
- Can be surprisingly effective for strength gains
Cons:
- Harder to progressively overload
- Requires creativity to set up stable pulling movements
- Some exercises might feel awkward compared to traditional gym equipment
10 Back Exercises Using No Equipment
To check ▶️ the full list of back exercises you can train at home with no equipment go to our exercise library.
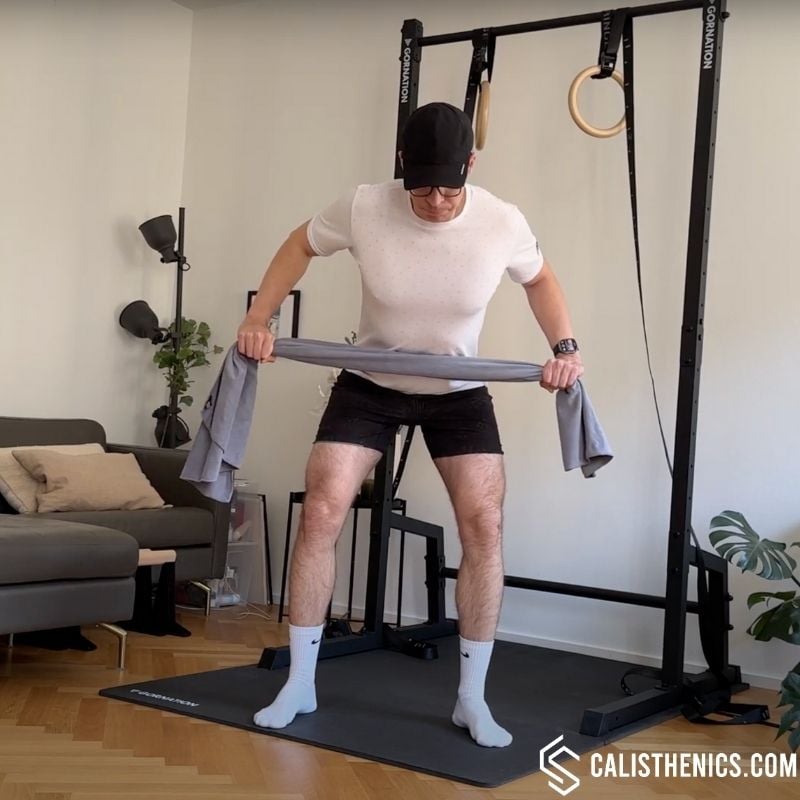
- Towel Rows – Towel rows are a simple bodyweight exercise that strengthen the lats, rhomboids, and rear delts by pulling your chest toward a towel anchored under a sturdy surface, mimicking inverted rows.
Tips
-
Keep Your Back Flat – Avoid rounding your spine by keeping your chest up and core engaged.
-
Control the Resistance – In self-resisted rows, make sure your non-working arm provides enough tension.
-
Squeeze the Shoulder Blades – This maximizes back muscle activation.
-
Use a Sturdy Anchor – If using an anchored towel, ensure it won’t slip or loosen.
-
Focus on squeezing your shoulder blades: This will help activate the target muscles and ensure proper form.
-
Maintain a Slight Knee Bend – This helps stabilize your position and prevent lower back strain.
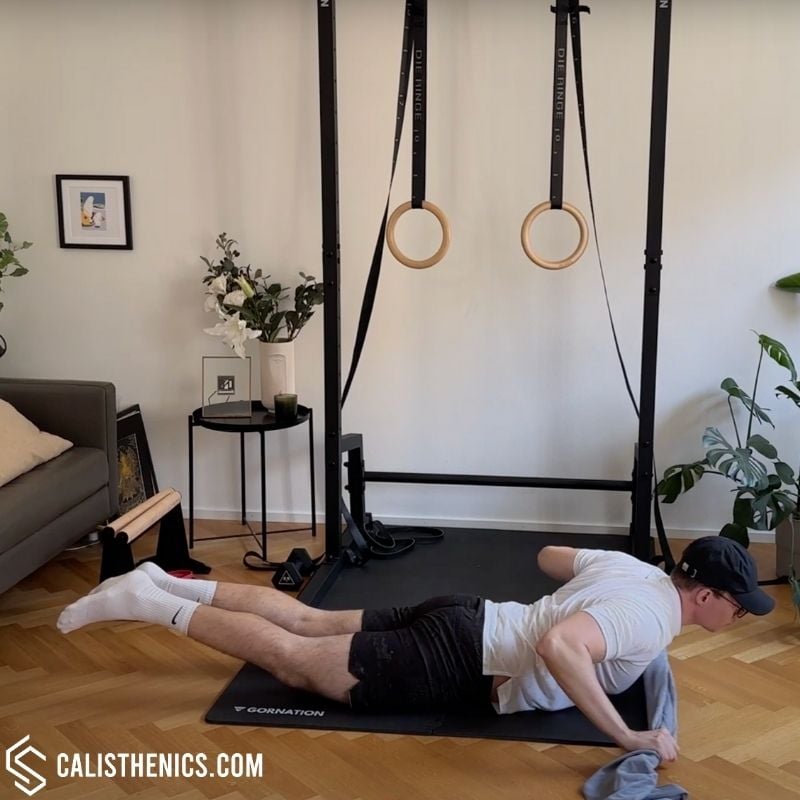
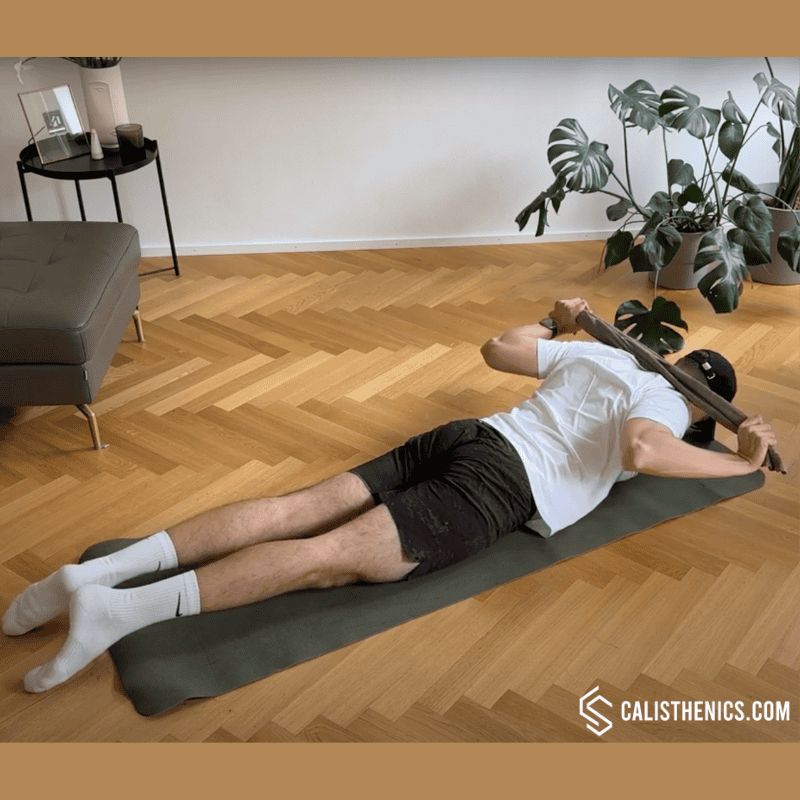
2. Superman Towel Rows – Performed from a superman position, this variation trains scapular retraction, mid-back, and lower back strength simultaneously, combining a static hold with active pulling for full posterior chain engagement.
Muscle groups:
Tips
-
Keep Constant Tension on the Towel: Actively pull outward to engage shoulders and upper back more effectively.
-
Lift Your Chest Slightly for Full Activation: Avoid lying completely flat—slight elevation increases muscle engagement.
-
Slow Down the Movement: Take 3-4 seconds to extend the arms back out, increasing time under tension.
-
Breathe Properly: Inhale when extending the arms, exhale when pulling the towel toward the chest.
-
Engage the Glutes & Core: Maintain a tight posterior chain to stabilize the movement.
-
Use a Thicker Towel or Band for Added Resistance: This helps increase muscle engagement and pulling endurance.
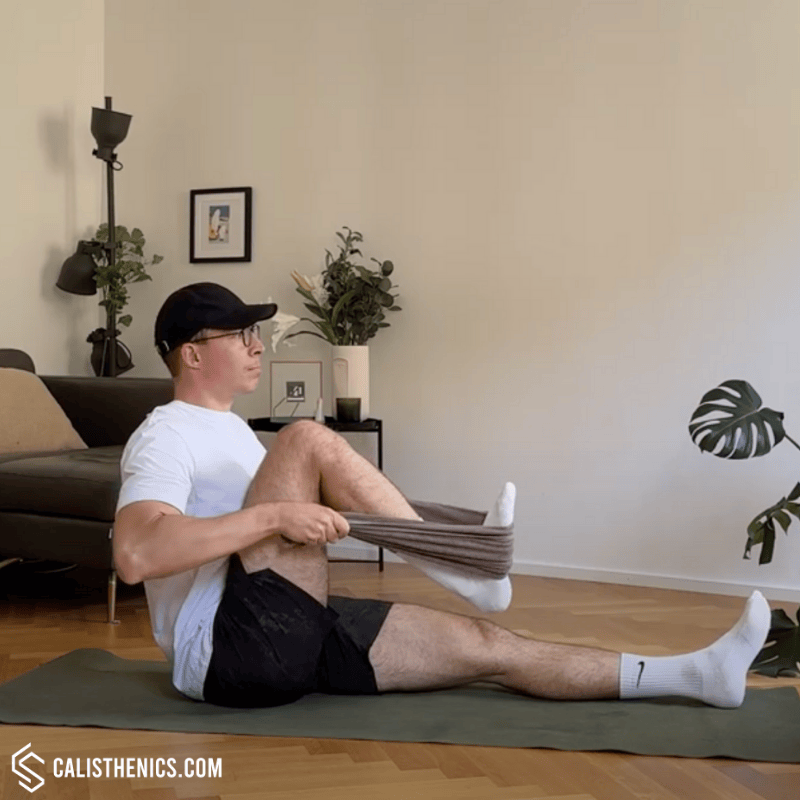
3. Seated Towel Rows – Seated towel rows use a towel looped around the feet to replicate a rowing motion, focusing on the lats and rhomboids while building pulling strength with controlled, seated leverage.
Tips
-
Core Engagement: Keep your core tight throughout the exercise to support your lower back and maintain good posture.
-
Squeeze Your Shoulder Blades: Focus on squeezing your shoulder blades together as you pull the towel toward your body. This helps engage the upper back muscles more effectively.
-
Controlled Movement: Perform the exercise slowly and with control, avoiding jerky movements. Both the pulling and the resistance from the leg should be steady.
-
Leg Resistance: Your leg should push forward gently but with enough force to create resistance. The goal is to mimic the effect of pulling against a resistance band or weight.
-
Breathing: Exhale as you pull the towel toward you, and inhale as you extend your arms back to the starting position. Proper breathing helps maintain focus and control.
4. Lying Towel Pull Downs – Lying towel pulldowns mimic the overhead pulling pattern of a lat pulldown or pull-up while lying on the floor, developing lat activation, shoulder stability, and coordination in a low-load environment.
Tips
-
Squeeze the Shoulder Blades: Focus on squeezing your shoulder blades together as you pull the towel down. This ensures you engage the upper back and lat muscles effectively.
-
Keep Core Tight: Maintain core engagement throughout the exercise to prevent your lower back from arching excessively. This helps protect your spine and stabilize your body.
-
Controlled Movement: Perform the exercise slowly and with control, especially when returning to the starting position. Avoid rushing through the movement.
-
Elbow Position: As you pull the towel down, make sure your elbows stay wide and level with your shoulders, simulating the proper mechanics of a pull-up or lat pull-down.
-
Breathing: Exhale as you pull the towel down, and inhale as you return to the starting position. Proper breathing helps maintain focus and control.
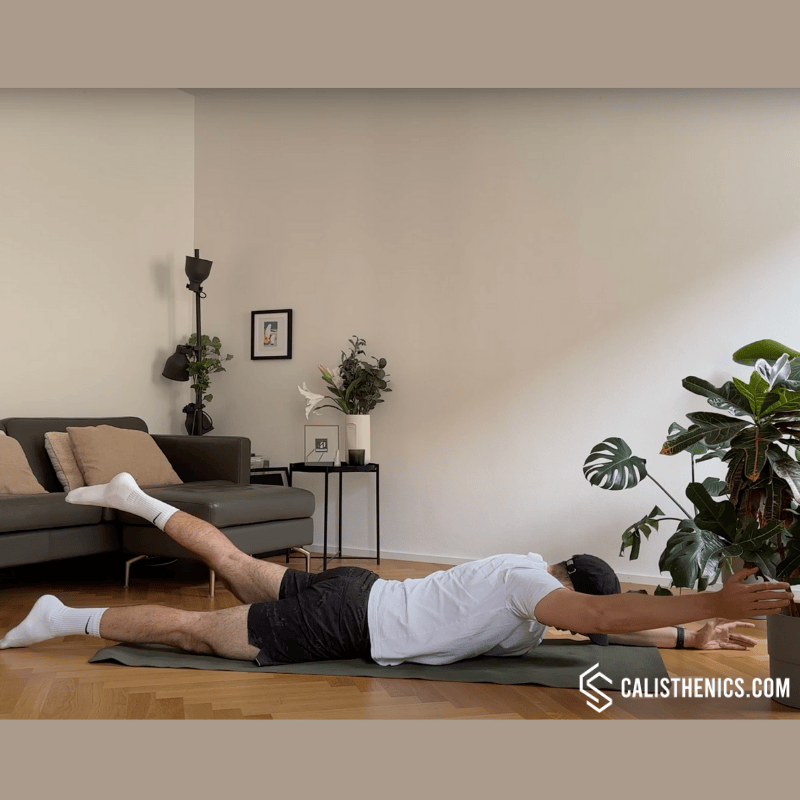
5. Superman Raises – Superman raises target the lower back, glutes, and upper traps by lifting the arms and legs off the floor simultaneously, strengthening the entire posterior chain and improving spinal extension endurance.
Muscle groups:
Tips
-
Core Engagement: Keep your core muscles tight throughout the movement to support your lower back and avoid excessive arching of the spine.
-
Lift with Control: Focus on lifting your arm and leg slowly and with control. Avoid swinging your limbs, as this can reduce the effectiveness of the exercise and strain your lower back.
-
Small, Effective Range of Motion: You don’t need to lift your arm and leg very high. A few inches off the ground is sufficient to engage the muscles properly.
-
Neck Position: Keep your head in a neutral position by looking down at the floor. Avoid lifting your head too high, which can cause neck strain.
-
Breathing: Exhale as you lift your arm and leg, and inhale as you lower them back down. Proper breathing helps maintain focus and control during the movement.
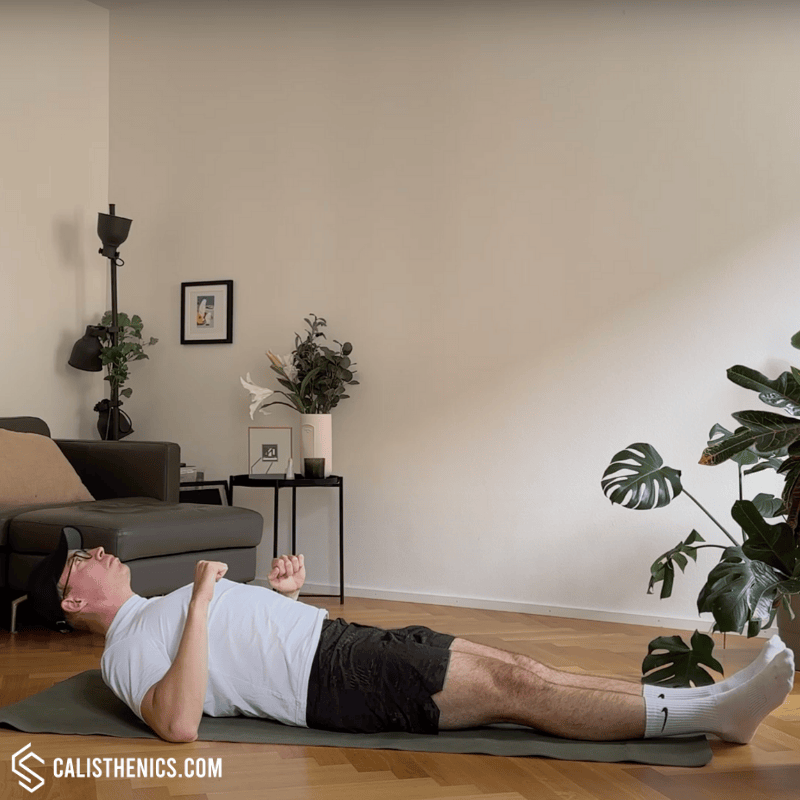
6. Reverse Elbow Push-Ups – Reverse elbow push-ups work the rear delts, rhomboids, and mid-traps by pushing the elbows into the floor to lift the chest slightly, emphasizing scapular control and upper back engagement.
Tips
-
Engage the Upper Back: Focus on engaging your rear delts, rhomboids, and upper back muscles as you push your body off the ground. Avoid using momentum or relying on your lower body.
-
Squeeze the Shoulder Blades: Actively squeeze your shoulder blades together during the lift to fully engage the muscles in your upper back.
-
Controlled Movement: Perform the exercise slowly, especially when lowering yourself back down. This increases muscle engagement and helps you build strength more effectively.
-
Keep Hips Stable: Ensure that your hips and lower back remain on the ground throughout the movement. The focus should be on the upper body, driven by your elbows and back muscles.
-
Breathing: Exhale as you push your body up with your elbows and inhale as you lower back down. Proper breathing helps maintain control and stability during the exercise.
7. Floorslide Pull-Ups – Floorslide pull-ups simulate a pull-up motion while lying on the floor, promoting scapular depression, lat engagement, and shoulder mobility through controlled arm movement against friction.
Tips
-
Squeeze Your Shoulder Blades: As you pull yourself up, focus on squeezing your shoulder blades together to maximize engagement of your upper back muscles.
-
Core Engagement: Keep your core tight to protect your lower back and stabilize your torso during the movement. This will prevent excessive arching or strain.
-
Keep Elbows Close: As you pull, ensure that your elbows stay close to your body, similar to the form used in a traditional pull-up or lat pull-down.
-
Controlled Movement: Perform the movement slowly and with control, especially when returning to the starting position. Avoid using momentum to slide.
-
Breathing: Exhale as you pull your body forward and inhale as you return to the starting position. Proper breathing helps you maintain rhythm and focus.
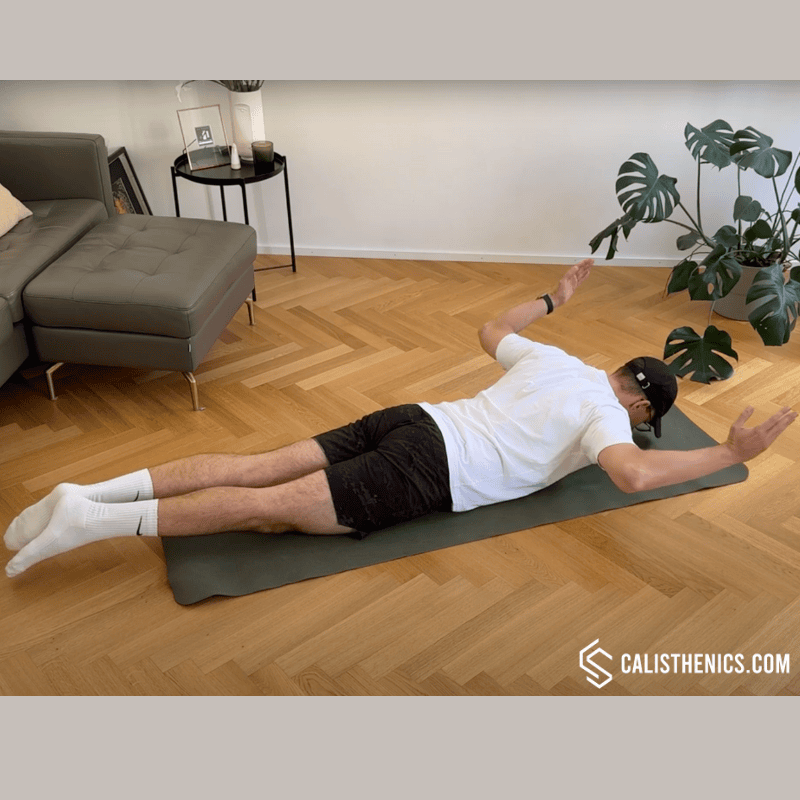
8. WTY Raises – This sequence of arm raises in “W,” “T,” and “Y” shapes trains all the major scapular stabilizers and mid-back muscles, reinforcing posture, shoulder endurance, and healthy overhead mechanics.
Tips
-
Core and Glute Engagement: Keep your core and glutes engaged throughout the exercise to support your lower back and maintain proper body alignment.
-
Focus on Shoulder Blades: The key to WTY raises is squeezing your shoulder blades together during each raise to engage the muscles of the upper back.
-
Control the Movement: Perform each raise slowly and with control, avoiding any jerky movements. Focus on quality over speed.
-
Neck Alignment: Keep your neck in a neutral position by looking down at the floor. Avoid lifting your head too high, which could strain your neck.
-
Breathing: Inhale as you prepare to lift your arms and exhale as you squeeze your shoulder blades together and raise your arms. Steady breathing helps maintain control and focus.
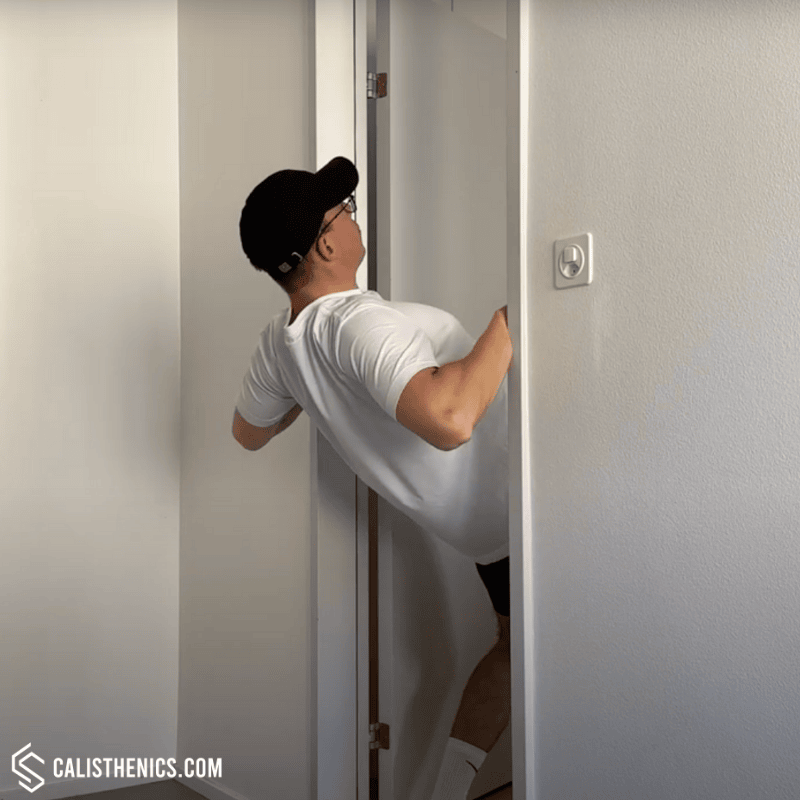
9. Doorframe Rows – Doorframe rows allow you to perform standing horizontal pulls by gripping the sides of a doorframe and leaning back, training the lats, rear delts, and scapular retractors with adjustable intensity.
Tips
-
Core Engagement: Keep your core tight to support your spine and prevent any sagging or arching during the movement.
-
Squeeze Your Shoulder Blades: Focus on squeezing your shoulder blades together as you pull yourself toward the door frame. This helps target the upper back muscles more effectively.
-
Elbow Positioning: Keep your elbows close to your body during the rowing movement to avoid placing unnecessary strain on your shoulders.
-
Grip Strength: Ensure you have a firm grip on the door frame for stability. Use both hands evenly to maintain balance throughout the movement.
-
Breathing: Inhale as you extend your arms and lean back, and exhale as you pull your body toward the door frame. Proper breathing helps maintain control and power during the exercise.
10. Towel Iso Holds – Towel iso holds involve gripping a towel and maintaining an isometric pull, developing endurance in the lats, biceps, and forearm muscles while reinforcing scapular stability under static tension.
Tips
-
Maintain Full-Body Tension – Engage your core, glutes, and legs to minimize movement.
-
Squeeze the Shoulder Blades – Actively retract and hold scapular engagement for better posture.
-
Control Your Breathing – Inhale before pulling, hold the breath lightly during the hold, and exhale after releasing.
-
Gradually Increase Hold Time – Start with 10 seconds and work up to 30+ seconds.
-
Keep Your Back Flat – Avoid rounding the lower back to prevent strain.
Ready to Take the Next Step?
Once foundational strength is built through bodyweight and band-based training, moving toward vertical pulling is the logical next goal.
The ▶️ From 0 to 5 Pull-Ups in 6-Weeks Workout Program provides a complete system to guide you from assisted rows and band pulldowns to your first unassisted pull-up.
Key features:
- Step-by-step weekly progressions
- Pull-up-specific accessory work (scapular pull-ups, negative eccentrics)
- Core and grip strengthening modules
- Clear metrics for when to progress each phase
This approach ensures you’re not simply “practicing pull-ups” but building the necessary physiological foundation for mastery.
Final Thoughts
No pull-up bar? No problem! Whether you have gymnastics rings, resistance bands, or just household items, you can still get a killer back workout at home. The key is to focus on both horizontal and vertical pulling, progressively challenge yourself, and stay consistent. Try mixing and matching exercises from different categories based on what you have available, and you’ll build serious back strength in no time!

