
Advanced Tuck Front Lever Row
How to do Advanced Tuck Front Lever Row?
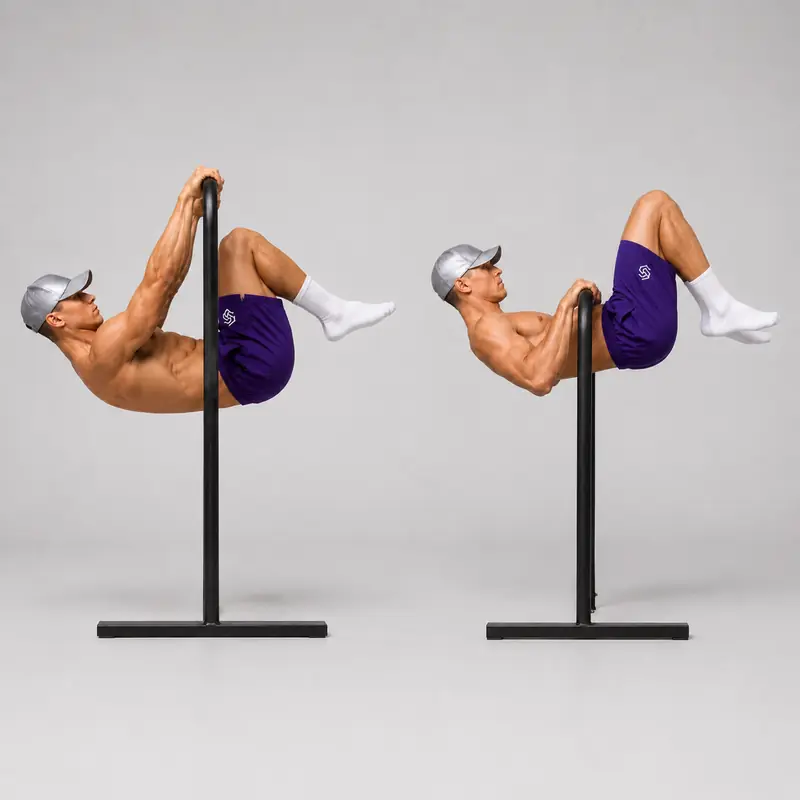
The advanced tuck front lever row is a dynamic horizontal pulling exercise in which you maintain an advanced tuck front lever while bending your elbows and pulling your torso toward the handles or bar. Your knees remain bent, but they are positioned farther away from your chest than during a basic tuck.
This longer body position makes the exercise more demanding than the tuck front lever row. It builds on the static advanced tuck front lever and develops the bent-arm pulling strength needed for harder front lever rows and the full front lever.
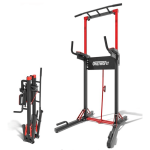
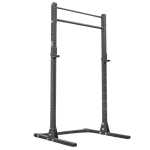
A low dip-bar station provides a convenient setup because you can enter the position without first raising your body from a high hang. The exercise can also be performed on a sufficiently high and secure pull-up bar. Both versions train the same fundamental movement and belong on this single canonical exercise page.
No study has directly tested the advanced tuck front lever row. However, a study of related inverted bodyweight rows recorded substantial activation of the latissimus dorsi, biceps, posterior deltoids and scapular stabilizers. This supports the general muscular rationale for horizontal bodyweight rows, but it should not be treated as direct evidence about this exact front lever variation.
Equipment and Setup
The easiest setup uses a stable dip-bar or parallel-bar station that allows you to hang underneath the handles without your hips, knees or head touching the floor.
- If the station has two parallel rails, face along the rails and take a neutral grip with one hand on each handle.
- If you are using one accessible horizontal rail or another low straight bar, take an overhand grip approximately shoulder-width apart.
- Confirm that the station cannot tip, slide, rotate or lift when horizontal force is applied.
- Check that crossbars and supports will not obstruct your head, back or legs.
- Wrap your thumbs around the handles and keep your wrists aligned with your forearms.
If you need suitable equipment, compare the stability and dimensions of different dip bars. A high pull-up bar can also be used, provided it offers enough clearance and is securely installed.
Starting Position
- Position yourself underneath the handles or bar and establish a secure grip.
- Extend your elbows and draw your shoulders down, away from your ears.
- Bring your knees toward your torso and lift your hips into a tuck front lever.
- Open your hip angle and move your knees away from your chest until you reach the advanced tuck position.
- Keep your knees bent while positioning your torso and thighs approximately parallel to the floor.
- Brace your abdominals and glutes so your lower back does not arch excessively.
On a high pull-up bar, enter from a controlled hang by first moving into a tuck and then raising your hips. Do not jump or swing into the advanced tuck position.
How to Perform the Advanced Tuck Front Lever Row
- Establish the bottom position. Begin with straight elbows, controlled shoulders, elevated hips and your knees held away from your chest.
- Brace before pulling. Tighten your core and glutes while maintaining the same hip and knee angles.
- Initiate through the upper back. Begin drawing your shoulder blades back while keeping your shoulders away from your ears.
- Drive your elbows backward. Bend your elbows and pull your lower chest or upper abdomen toward the bar. On parallel rails, pull your torso upward between the handles.
- Maintain the advanced tuck. Do not pull your knees toward your chest to make the repetition easier.
- Reach the top under control. Finish when the handles reach approximately lower-rib level or your torso cannot travel farther without losing its horizontal position.
- Lower slowly. Extend your elbows over approximately two to four seconds while keeping your hips elevated.
- Reset at straight arms. Regain a stable advanced tuck before beginning the next repetition.
Related inverted-row research has examined both overhand and underhand grips and found strong involvement of several pulling muscles. For a repeatable fixed-bar standard, use an overhand grip; use a neutral grip when the dip-bar configuration requires one. See the inverted-row muscle-activation study for context.
Breathing
Inhale and brace in the straight-arm position. Exhale gradually as you pull upward, then inhale as you lower. Avoid relaxing your trunk between repetitions.
What Counts as a Full Repetition?
A strict repetition should meet the following standards:
- The elbows are straight at the beginning and end of the repetition.
- The knees remain noticeably farther from the chest than in a basic tuck.
- The hip and knee angles remain substantially unchanged during the row.
- The hips remain approximately level with the shoulders.
- The torso reaches the handles or bar without kicking, swinging or thrusting the hips.
- The athlete returns to the starting position under control.
On a single straight bar, the lower chest or upper abdomen may lightly touch the bar. Contact is not required on parallel rails because the torso travels between the handles. The important standard is a complete, controlled pull without shortening the advanced tuck.
Common Mistakes
Pulling the Knees Back Toward the Chest
This shortens the lever and changes the exercise into a tuck front lever row. Choose an easier variation if you cannot keep your knees in the same position.
Letting the Hips Drop
Dropping the hips turns the movement into a steep inverted row and reduces the front lever demand. Brace before pulling and stop the set when you can no longer keep your hips near shoulder height.
Opening the Advanced Tuck Too Far
Extending the legs beyond your current strength can cause an arched back, reduced range or uncontrolled repetitions. Bring the knees slightly closer until you can maintain a consistent position.
Swinging Into Each Repetition
Using a kick or hip swing reduces the amount of controlled pulling work. Pause briefly in the bottom position before initiating each row.
Shrugging the Shoulders
Do not allow your shoulders to collapse toward your ears. Maintain active shoulder control throughout the lowering phase and begin each pull from a stable position.
Rowing Toward the Face
Pulling too high can encourage excessive elbow flare and neck extension. Direct the handles or bar toward the lower chest or upper abdomen.
Stopping Before Straight Arms
Shortening the bottom position makes repetitions difficult to compare. Extend both elbows fully while retaining active shoulder control.
Using an Unstable Dip-Bar Station
Portable bars may shift or tip when used for horizontal pulling. Test the station before moving underneath it and do not use equipment that cannot remain completely stable.
Benefits
- Develops front lever pulling strength: The exercise combines the advanced tuck body position with active elbow flexion.
- Bridges static and dynamic training: It progresses beyond holding an advanced tuck without immediately requiring a longer one-leg or straddle position.
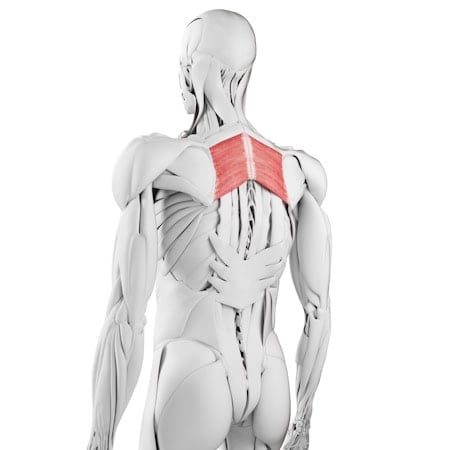
- Strengthens the back and arms: The lats, rhomboids, trapezius, rear deltoids and elbow flexors contribute to the row.
- Improves positional control: The core and glutes must preserve the advanced tuck while the upper body moves.
- Exposes technical weaknesses: Hip drop, knee movement and reduced range reveal whether the chosen lever is currently too difficult.
- Works on different fixed-bar setups: The movement can be trained on low dip bars, parallel bars or a sufficiently high pull-up bar.
Readiness and Safety
Before attempting this exercise, you should be comfortable with the tuck front lever row and capable of holding an advanced tuck front lever without immediately dropping your hips.
As a practical coaching guideline, aim for approximately three to five controlled tuck front lever rows and an eight- to twelve-second advanced tuck hold before training full-range advanced tuck rows. These are useful readiness checks rather than universal requirements.
Prepare your wrists, elbows and shoulders with the joint warm-up routine and several easier pulling sets. Stop if you experience sharp shoulder, elbow, forearm or lower-back pain. Regress the movement or seek advice from an appropriately qualified healthcare professional if discomfort persists.
Progression Path
- Australian pull-up
- Tuck front lever
- Tuck front lever row
- Advanced tuck front lever
- Advanced tuck front lever row
- Single-leg front lever row
- Straddle front lever row
- Full front lever row
Use the complete front lever training routine to combine dynamic rows with static holds, raises and supporting exercises.
Programming Recommendations
Perform three to five sets of three to six strict repetitions with approximately two to three minutes of rest. Use a controlled two- to four-second lowering phase and stop the set when your hips begin to drop or your knees move toward your chest.
Train the exercise once or twice per week near the beginning of a pulling or front lever session. Leave at least one technically clean repetition in reserve rather than continuing until your body position breaks down.
Frequently Asked Questions
Is the advanced tuck front lever row harder than the advanced tuck front lever?
Usually. The static hold establishes the body position, while the row requires you to maintain that position as your elbows bend and straighten. Someone may have sufficient straight-arm strength for the hold without yet having the bent-arm strength for strict rows.
How is it different from a tuck front lever row?
During a tuck front lever row, the knees remain close to the chest. In the advanced tuck variation, the hips are more open and the knees remain farther from the torso, creating a longer and more difficult lever.
Should I use dip bars or a pull-up bar?
Use the setup that is most stable and allows sufficient clearance. Low dip bars are convenient because the advanced tuck can be entered close to the floor. A high pull-up bar works equally well once you can enter the starting position without swinging.
Should my chest touch the bar?
Light lower-chest or upper-abdomen contact can define the top on a single straight bar. On parallel dip bars, the torso travels between the handles, so use lower-rib handle height and maximum controlled elbow flexion as the standard instead.
What if I can hold an advanced tuck but cannot perform a row?
Continue training the static hold alongside tuck front lever rows, reduced-range advanced tuck rows or a lightly assisted version. Do not convert every repetition into a basic tuck by pulling your knees toward your chest.
Tips for the proper execution of Advanced Tuck Front Lever Row
Keep your knees the same distance from your chest throughout every repetition.
Maintain your hips approximately level with your shoulders.
Pull the handles toward your lower ribs rather than toward your face.
Drive your elbows backward while keeping your shoulders away from your ears.
Use the same hip and knee angles on every repetition.
Pause briefly at the top without allowing your hips to drop.
Lower for two to four seconds until both elbows are straight.
Stop the set when the advanced tuck begins turning into a basic tuck.
Film the exercise from the side to check hip height and knee position.
Muscles worked when doing Advanced Tuck Front Lever Row
The advanced tuck front lever row combines a dynamic horizontal pull with isometric control of the trunk and lower body.
Primary Muscles
- Latissimus dorsi: Helps extend the upper arms and provides much of the pulling force required to raise the torso. The anatomical actions of the lats include shoulder extension and adduction, as outlined in the NCBI overview of the latissimus dorsi.
- Rhomboids: Assist with scapular retraction as the torso approaches the handles or bar.
- Middle and lower trapezius: Help control the shoulder blades throughout the pulling and lowering phases.
- Biceps brachii and brachialis: Flex the elbows during the rowing phase.
Secondary and Stabilizing Muscles
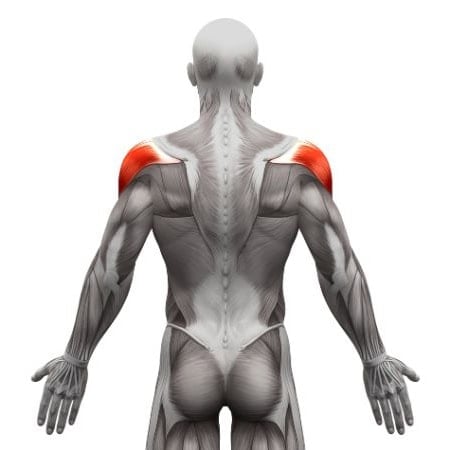
- Rear deltoids: Assist with moving the upper arms behind the torso.
- Teres major: Assists the lats with shoulder extension.
- Forearms and grip muscles: Maintain a secure hold on the handles or bar.
- Abdominals and obliques: Resist excessive spinal extension and help preserve the advanced tuck position.
- Glutes: Help stabilize the pelvis and prevent the hips from folding or dropping.
- Spinal stabilizers: Maintain torso position while the upper body moves.
A related inverted-row study measured very high activation in the latissimus dorsi, biceps, lower trapezius and posterior deltoid, with high activation in the middle and upper trapezius. The study did not examine an advanced tuck front lever position, so its findings should be used only as supporting evidence for the general horizontal-row muscle pattern.
Primary Muscle(s):

Lats
Rhomboid
Secondary Muscle(s):
Rear delt

Trapezius

Biceps
Equipment needed for Advanced Tuck Front Lever Row
Adjust the difficulty of Advanced Tuck Front Lever Row
How to make Advanced Tuck Front Lever Row harder?
How to make Advanced Tuck Front Lever Row easier?
How to make Advanced Tuck Front Lever Row harder?
To make Advanced Tuck Front Lever Row harder:
-
Pause for two to three seconds at the top of every repetition.
-
Use a five-second eccentric while maintaining your hip height.
-
Move your knees farther away from your torso to lengthen the advanced tuck.
-
Extend one leg into a single-leg front lever row.
-
Perform straddle front lever rows while keeping both knees straight.
-
Progress toward full front lever rows with a completely extended body.
How to make Advanced Tuck Front Lever Row easier?
To make Advanced Tuck Front Lever Row easier:
-
Perform tuck front lever rows with your knees held close to your chest.
-
Practice the advanced tuck front lever as a static hold before adding the row.
-
Use a smaller range of motion while preserving the advanced tuck position.
-
Place your feet lightly on a box and use only as much assistance as necessary.
-
Support your hips with a resistance band anchored securely above you.
-
Move your knees slightly closer to your torso without returning to a fully compressed tuck.
