
Bar Pullover
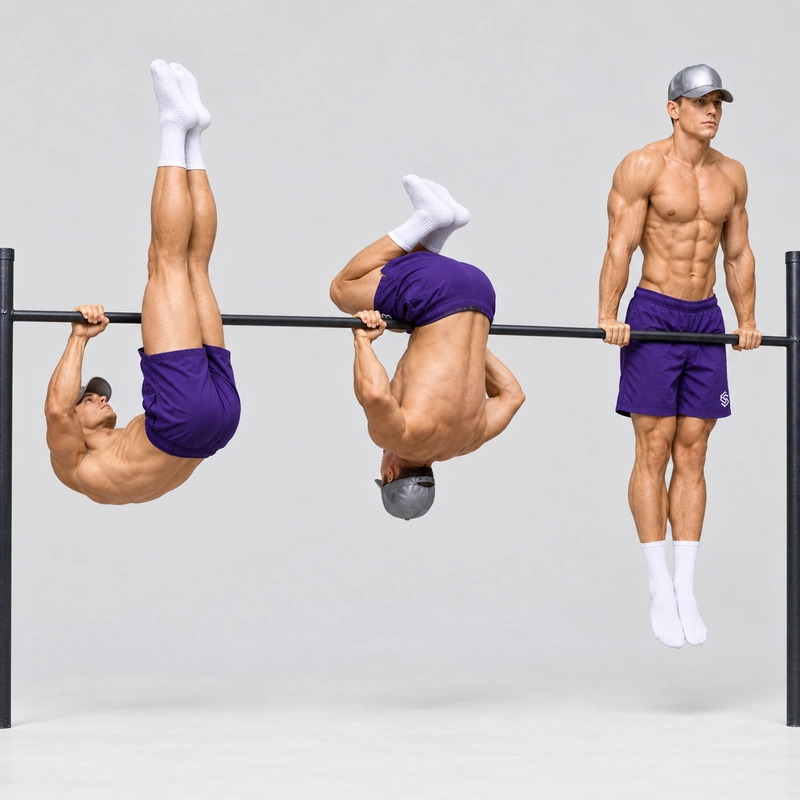
How to do Bar Pullover?
The bar pullover is a full-body calisthenics and gymnastics skill that moves you from a hang beneath a pull-up bar into a straight-arm support position above it. You first pull your upper body toward the bar, raise both legs over it, bring your hips into contact with it, and then rotate your body around the bar before pressing into support.
The exercise is also known as a pull-up bar pullover, gymnastics pullover, bar pull-over, or simply a pull over on a pull-up bar. It should not be confused with the dumbbell or barbell pullover, which is a completely different resistance-training exercise performed while lying on a bench.
This page covers the strict hanging bar pullover. A strict repetition begins from a motionless, straight-arm hang and uses a controlled pull and leg raise rather than a jump from the floor or a deliberate kipping swing. Tuck, jumping, and low-bar foot-assisted pullovers are useful progressions, but they are not the completion standard for the canonical exercise.
The bar pullover combines the bent-arm strength of a strict pull-up, the compression and hip-flexion strength developed by hanging leg raises and toes-to-bar, and the top support used during a straight bar dip. Timing is equally important: CrossFit’s pull-over coaching guide identifies the coordination of the arm bend, leg raise, and hips-to-bar action as the central challenge of the movement.
Bar Pullover vs. Similar Exercises
| Exercise | How the body passes the bar | Finish |
|---|---|---|
| Bar Pullover | Both legs pass over and behind the bar while the hips remain close enough for the body to rotate around it. | Straight-arm front support above the bar. |
| Bar Muscle-Up | The legs remain below the bar while a high pull carries the torso above it and both elbows turn over. | Straight-arm support after a dip-style transition. |
| Toes-to-Bar | The feet reach the bar but do not continue behind it and the body does not rotate around the bar. | Return to the hanging position. |
| Jumping or Foot-Assisted Pullover | The feet push from the floor or a box to assist the pull and rotation. | Front support, but with lower-body assistance. |
Benefits of the Bar Pullover
- Develops whole-body coordination: The arms, trunk, hips, and legs must contribute in the correct sequence rather than working independently.
- Builds pulling and bent-arm strength: The lats and elbow flexors pull the body upward and maintain the shortened arm position while the legs rise.
- Trains active compression: The hip flexors lift the legs while the abdominal wall controls the pelvis and torso.
- Improves bar awareness: Rotating around a fixed bar develops spatial awareness and confidence in inverted positions.
- Strengthens the support finish: The chest, shoulders, and triceps help press and stabilize the body above the bar.
- Provides another route above the bar: The skill teaches a hang-to-support transition without requiring the same pulling height as a strict muscle-up.
The bar pullover is best treated primarily as a skill exercise, not as a high-repetition hypertrophy movement. Its greatest value comes from practising accurate timing, close bar contact, and a controlled finish.
Prerequisites and Readiness
There is no universal strength test that guarantees a bar pullover, because limb proportions, compression mobility, confidence, and timing all affect the movement. However, the following are useful coaching markers before attempting the strict high-bar version:
- A secure 20–30-second dead hang for basic grip endurance, combined with the ability to engage the shoulders actively before pulling.
- Approximately three to five controlled strict pull-ups and a chin-over-bar hold lasting several seconds.
- Controlled hanging knee raises followed by high hanging leg raises or a strict toes-to-bar.
- A stable straight-bar support lasting approximately 10–15 seconds and at least a few controlled straight-bar dips.
- Pain-free overhead shoulder motion and enough wrist tolerance to establish front support above a fixed bar.
- A safe way to mount the bar and step down from the final support position.
These numbers are practical guidelines rather than mandatory standards. If you can complete the components individually but cannot connect them, the limiting factor is more likely to be timing or bar proximity than general strength.
Equipment and Safety Setup
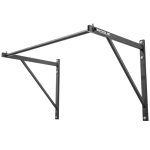
Use a fixed pull-up bar that is stable enough for rotational movement and provides enough space below, above, in front of, and behind the bar for your complete body path. Check the bar, mounting points, surrounding uprights, ceiling, and floor before every session.
Do not attempt a pullover on a pressure-mounted or loosely installed doorway bar unless its manufacturer explicitly permits this type of movement. The rotational force and changing direction can load the equipment differently from an ordinary pull-up, while most doorways also provide insufficient clearance above the bar.
Place suitable matting beneath the bar and keep a stable box beside it for mounting and dismounting. Beginners should first learn the rotation on a low gymnastics bar with a qualified coach or experienced spotter rather than repeatedly attempting it on a high bar.
How to Warm Up for a Bar Pullover
Raise your general body temperature before preparing the wrists, shoulders, elbows, trunk, and hips for the specific movement. A short skill-specific warm-up can include two or three rounds of scapular pull-ups, easy strict pull-ups, hanging knee raises, pike-compression lifts, and straight-bar support holds.
Finish the warm-up with one or two low-bar assisted pullovers or segmented pull-and-leg-raise drills. Keep the preparation submaximal so that your grip and bent-arm pulling strength remain fresh for the full skill.
How to Perform a Strict Bar Pullover
- Check the bar and clearance. Confirm that the bar is secure and that your feet, hips, head, and torso can travel around it without striking the ceiling, wall, uprights, or nearby equipment.
- Take a closed overhand grip. Hold the bar approximately shoulder-width or slightly wider with your palms facing away and both thumbs wrapped securely around it.
- Establish the starting hang. Straighten your elbows, bring your legs together, brace your trunk, engage your shoulders, and allow all existing swing to stop.
- Pull toward the bar. Drive your elbows down and back until your nose or chin reaches approximately bar height, keeping your chest and upper body close.
- Begin the leg raise. Maintain the bent-arm position while lifting both legs together toward and above the bar rather than allowing your elbows to open as soon as the feet move.
- Lean back slightly. As the legs approach horizontal, allow the torso to incline backward enough for the feet to continue upward while maintaining a strong pull on the bar.
- Bring the hips to the bar. Continue lifting the legs and pulling with the arms until the hips or lower abdomen approach the bar, because feet-over-bar height without close hips rarely produces a successful rotation.
- Take both feet behind the bar. Keep the legs together as they travel over the top of the bar, and avoid hooking one knee or using one leg before the other.
- Rotate around the bar. Maintain bent elbows and close hip contact while the feet descend behind the bar and the torso rotates upward on the opposite side.
- Roll the wrists over together. Allow both hands and wrists to rotate naturally around the fixed bar without releasing, regripping, or turning one side before the other.
- Press into front support. Shift your chest forward over the bar and press the bar downward until both elbows are completely straight.
- Demonstrate control. Finish with the bar close to the hips, the shoulders stable, the chest lifted, and the legs together before stepping safely onto a box.
The Most Important Technique Cue
Think “pull, feet up, hips in, rotate, push tall.” Many failed attempts happen because the athlete lifts the feet but stops pulling, leaving the hips too far below or away from the bar to rotate efficiently.
Looking toward your feet as they travel over the bar can help preserve the rounded rotational path. Throwing the head backward usually moves the upper body away from the bar and makes hip contact more difficult.
Strict Completion Standard
Count the repetition when all of the following conditions are met:
- The movement begins from a motionless hang with the elbows completely extended.
- The athlete uses a secure overhand grip without releasing or changing hand position.
- Both legs rise and pass over the bar together without assistance from the floor, a box, or a spotter.
- The hips reach or closely approach the bar and the body rotates around it under control.
- No knee or lower leg is hooked over the bar to climb into support.
- The repetition finishes in a stable front support with both elbows locked.
- No deliberate kip, beat swing, or jumping action is used for the strict version.
A small amount of natural body movement may occur as the legs rise, but it should not become a separate preparatory swing. Relatively straight legs are the canonical standard, while a pronounced tuck belongs in the easier variation.
Breathing and Bracing
Inhale and brace before initiating the pull, then exhale gradually as you pull and raise the legs. Maintain trunk tension through the inverted transition without holding your breath longer than necessary, and resume normal breathing once support is stable.
Common Bar Pullover Mistakes
| Mistake | Why it causes problems | Correction |
|---|---|---|
| Starting with a large swing | The body moves away from the bar and makes the timing inconsistent. | Let the swing stop and practise single strict attempts. |
| Stopping the pull too low | The legs must overcome a much longer lever while the hips remain beneath the bar. | Reach nose or chin height and preserve the bent-arm position. |
| Straightening the arms while lifting the legs | The hips fall away from the bar just as they need to move closer. | Practise chin-over-bar holds combined with partial leg raises. |
| Kicking the feet away from the bar | Foot height increases without bringing the hips into a useful rotational position. | Aim the feet upward while actively pulling the hips inward. |
| Throwing the head backward | The upper body opens and the hips separate from the bar. | Keep the neck neutral and look toward the rising feet. |
| Hooking one leg | The movement becomes an asymmetrical climb and loads the shoulders unevenly. | Use a tuck or assisted regression that keeps both legs together. |
| Crashing the abdomen onto the bar | The athlete has generated rotation without controlling bar proximity and support. | Slow the turnover and maintain active pulling until the chest is above the bar. |
| Failing to lock the elbows | The athlete has not established a complete or stable support position. | Press the bar down and lift the chest until both arms are straight. |
| Dropping from the top | An uncontrolled dismount increases fall risk after grip and coordination are already fatigued. | Stabilize first and step onto a box positioned beside the bar. |
Why You Are Getting Stuck
| What happens | Likely limitation | What to train |
|---|---|---|
| You pull high but cannot bring the feet to the bar. | Active compression, hip-flexor strength, or hamstring mobility. | Hanging knee raises, hanging leg raises, toes-to-bar, and seated pike-compression lifts. |
| Your feet clear the bar but your hips remain underneath it. | Loss of the bent-arm pull or poor hips-to-bar timing. | Chin-over-bar leg raises and low-bar hips-to-bar drills. |
| You reach an inverted position but cannot rotate into support. | Insufficient hip contact, wrist turnover practice, or confidence around the bar. | Foot-assisted low-bar pullovers with qualified spotting. |
| You reach the top but cannot straighten your arms. | Weak or unfamiliar straight-bar support and pressing strength. | Straight-bar support holds and straight-bar dips. |
| Your body swings away before the legs rise. | Insufficient shoulder engagement or trunk control in the hang. | Motionless hangs, scapular pull-ups, and strict hanging core work. |
| Your hands begin to open during the turnover. | Grip fatigue, an insecure thumb position, or too many failed attempts. | Closed-grip hangs, lower repetition sets, and longer rest periods. |
How to Program the Bar Pullover
Practise the bar pullover near the beginning of a session, after warming up but before grip, pulling, or core fatigue accumulates. Two or three focused sessions per week are sufficient for most athletes learning the skill.
Begin with three to six sets of one to three controlled attempts and rest approximately two to three minutes between sets. Assisted drills can be performed for sets of two to five repetitions, but stop when your hips move away from the bar, one leg begins leading, or your grip becomes unreliable.
Train the missing components separately rather than using repeated failed attempts as conditioning. Strict pull-ups address the initial pull, hanging leg raises and toes-to-bar address the leg-lift phase, and straight-bar supports or dips address the finish.
Frequently Asked Questions
Is a bar pullover the same as a bar muscle-up?
No. During a bar pullover, the legs pass over the bar and help the body rotate around it, whereas a muscle-up keeps the legs below the bar and uses a much higher pull followed by an elbow turnover.
Do the legs need to stay straight?
The canonical version uses legs that remain together and relatively straight, but a tuck-leg pullover is a valid regression while developing strength, mobility, and timing.
Why can I get my feet over the bar but not my hips?
You are probably allowing the elbows to extend or directing the feet away from the bar. Continue pulling as the legs rise and think about bringing the hips inward rather than merely getting the toes higher.
Can beginners learn a bar pullover?
Yes, but beginners should first learn a foot-assisted or jumping pullover on a low bar with suitable matting and qualified supervision before attempting the strict hanging version.
Can I use a kip?
A deliberate swing can make the movement easier, but that creates a kipping variation rather than the strict standard described on this page.
Is a doorway pull-up bar suitable?
Only use equipment that is securely fixed, explicitly rated for the intended movement, and surrounded by adequate clearance; most temporary doorway setups are poor choices for a pullover.
What should I learn after the bar pullover?
After developing a consistent pullover and strong straight-bar support, you can connect it to straight-bar dips or begin training the distinct pulling height and transition required for the bar muscle-up.
Tips for the proper execution of Bar Pullover
Use only a fixed, stable bar with enough clearance for your feet and torso to pass above and behind it.
Place a mat under the bar and keep a stable box beside you for mounting and dismounting.
Wrap your thumbs around the bar and keep both hands at the same width throughout the skill.
Let all swinging stop before beginning the strict repetition.
Pull until your nose or chin reaches bar height before driving the legs upward.
Keep your elbows bent as the feet rise so your hips can travel toward the bar.
Think “feet up, hips in” instead of kicking the legs away from the bar.
Keep both legs together and let them pass over the bar at the same time.
Look toward your feet during the rotation instead of throwing your head backward.
Maintain hip-to-bar contact as the legs travel behind the bar.
Let both wrists roll over the bar together without releasing or regripping.
Press the bar down and lift your chest to finish in a tall front support.
Lock both elbows and demonstrate control before counting the repetition.
Do not hook one knee or lead with one leg to climb over the bar.
Practise low-repetition sets while fresh because fatigue quickly disrupts grip and timing.
Stop immediately if your grip opens or you feel sharp pain in the wrists, elbows, or shoulders.
Step down to a box from support instead of dropping blindly from above the bar.
Muscles worked when doing Bar Pullover
The bar pullover uses different muscle groups during its pulling, leg-raising, rotational, and support phases. It is primarily a coordination skill, but it still places substantial demands on the back, arms, core, hip flexors, grip, and pressing muscles.
Primary Muscles
- Latissimus dorsi: Pulls the upper body toward the bar and helps keep the hips close during the rotation.
- Biceps, brachialis, and brachioradialis: Flex the elbows and maintain the bent-arm position while the legs rise.
- Hip flexors: The iliopsoas and rectus femoris actively raise the legs toward and over the bar.
- Rectus abdominis: Controls the pelvis and trunk while assisting the compressed body position.
Secondary and Stabilizing Muscles
- Trapezius, rhomboids, posterior deltoids, and teres major: Control the shoulder blades and assist the pulling phase.
- Forearm and hand muscles: Maintain the closed grip as the hands rotate around the fixed bar.
- Obliques and transverse abdominis: Stabilize the trunk and help prevent twisting or separation of the legs.
- Pectorals, anterior deltoids, and triceps: Press and stabilize the body as it arrives in front support.
- Quadriceps: Extend the knees and maintain a clean straight-leg position.
- Glutes and spinal stabilizers: Control the pelvis and lower body as the legs travel behind the bar.
The hip flexors produce much of the leg lift, while the abdominal wall stabilizes the pelvis and controls trunk position; describing the movement as being performed by the abs alone would therefore be inaccurate.
Primary Muscle(s):

Abdominal

Lats
Secondary Muscle(s):

Biceps

Triceps
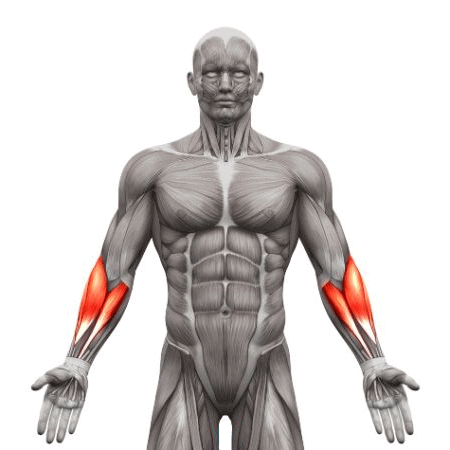
Forearm

Oblique
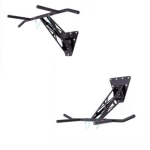
Equipment needed for Bar Pullover
Adjust the difficulty of Bar Pullover
How to make Bar Pullover harder?
How to make Bar Pullover easier?
How to make Bar Pullover harder?
To make Bar Pullover harder:
-
Keep the knees fully locked and toes pointed from the initial leg raise through the complete rotation.
-
Start every repetition from a completely motionless full hang without a preparatory swing.
-
Pause with the chin above the bar for two seconds before initiating the leg raise.
-
Raise the straight legs slowly instead of using a quick kick to create momentum.
-
Pause for two seconds in the bent-arm hips-to-bar inversion before completing the turnover.
-
Perform the entire movement on a controlled five-second tempo from hang to support.
-
Begin from an L-hang and continue directly into the pullover without lowering the legs.
-
Add one or more controlled straight-bar dips after reaching stable support.
-
Hold the final straight-arm support for ten seconds before stepping down.
-
Progress to the strict bar muscle-up when you want a distinct skill that demands a higher pull and different transition.
How to make Bar Pullover easier?
To make Bar Pullover easier:
-
Perform a low-bar foot-assisted pullover, pushing lightly through the floor while learning to keep your hips close.
-
Use a stable box for a small controlled jump into the rotation, then reduce the leg assistance over time.
-
Perform a tuck-leg pullover with the knees drawn toward the chest to shorten the lever.
-
Ask a qualified coach to provide a light spot at the hips on a low bar while you learn the rotation.
-
Practise chin-over-bar holds for three to five seconds to strengthen the bent-arm position.
-
Combine a partial pull-up with a bent-knee raise, then return to the hang without attempting the turnover.
-
Practise pulling the hips to a low bar and pausing in a tucked inverted position before stepping down.
-
Build the leg-lift phase with hanging knee raises before progressing to hanging leg raises and toes-to-bar.
-
Build the finish with straight-bar support holds and shallow straight-bar dips.
-
Reduce the movement to single high-quality attempts with full rest instead of repeating failed efforts.
