
Ring-Assisted One-Arm Pull-Up
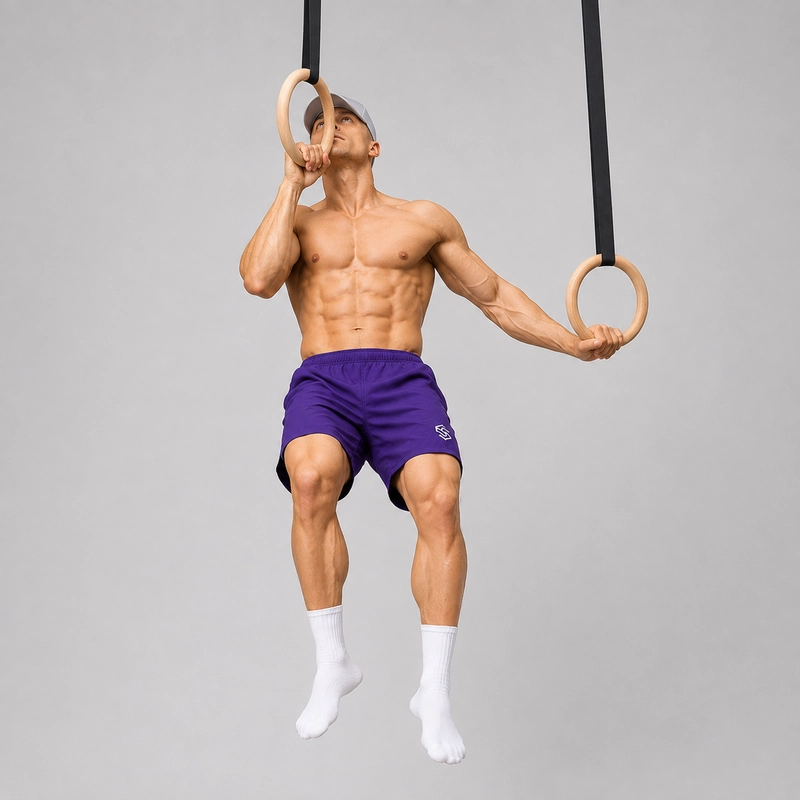
How to do Ring-Assisted One-Arm Pull-Up?
The ring-assisted one-arm pull-up is an advanced unilateral pulling exercise performed with two gymnastics rings set at different heights. The working hand grips the higher ring and carries most of the load, while the opposite hand holds a lower ring and supplies only enough assistance to complete a controlled full-range repetition.
This exercise is also called an assisted one-arm pull-up on rings, uneven ring pull-up, uneven-ring assisted pull-up, or offset ring pull-up. All of these names describe the same underlying progression and should be consolidated on this canonical page.
The defining feature is the vertical difference between the rings. Bringing the lower assisting ring closer to the height of the working ring makes the movement more similar to a normal two-arm ring pull-up. Lowering the assisting ring limits its useful pulling range and normally forces the higher arm to accept more of your body weight.
This is different from a ring archer pull-up, where both rings begin level and the assisting arm extends laterally as the body moves toward the working side. It is also different from the band-assisted one-arm pull-up, where only one hand holds the apparatus and an elastic band supports the foot or knee.
The uneven-ring version creates a more vertical pulling path than the archer variation while retaining adjustable help from the opposite arm. It can bridge the gap between bilateral ring exercises and the strict one-arm pull-up, although athletes targeting a fixed-bar one-arm pull-up should also practise the appropriate bar grip and body position.
Because each ring can rotate, begin with a comfortable neutral or slightly pronated grip and allow the working ring to turn naturally as you rise. A separate ring-assisted one-arm chin-up page is unnecessary because the hand may move continuously between neutral and more supinated positions during the same repetition.
How the Ring Assistance Works
The working ring should always be the higher ring. At the bottom, the working elbow reaches full extension while the lower position of the assisting ring keeps the opposite elbow more flexed.
When the rings are nearly level, both arms can contribute substantially and the exercise approaches an ordinary ring pull-up. As the assisting ring is lowered, that arm begins in a shorter and mechanically less useful position, increasing the demand on the arm holding the higher ring.
The height difference does not tell you exactly how many kilograms of assistance you are receiving because the assisting arm can pull harder or softer during any repetition. Make progress measurable by recording the height of each ring from the floor, the difference between them, your repetitions, and your descent tempo.
A practical starting point is a small ring offset that allows complete repetitions without kicking or dropping through the descent. Lower the assisting ring in increments of approximately 2–5 cm, or 1–2 inches, only after both sides meet the same completion standard.
Ring-Assisted One-Arm Pull-Up vs. Related Exercises
| Exercise | Source of assistance | Primary progression variable |
|---|---|---|
| Ring-Assisted One-Arm Pull-Up | The opposite hand holds a lower ring. | The vertical distance between the two rings. |
| Ring Archer Pull-Up | The opposite arm remains on a level ring and extends laterally. | How straight and far from the body the assisting arm becomes. |
| Ring Typewriter Pull-Up | Both hands remain on level rings while the body transfers between sides. | Lateral range, arm extension, and time held near the top. |
| Band-Assisted One-Arm Pull-Up | A resistance band supports the foot or knee. | Band tension and support position. |
| One-Arm Pull-Up | No assistance is used. | The complete body weight is supported and moved by one arm. |
Benefits of the Ring-Assisted One-Arm Pull-Up
- Develops unilateral pulling strength: The higher arm performs most of the shoulder extension, adduction, and elbow flexion.
- Provides scalable assistance: The lower ring can be raised or lowered in small, repeatable increments.
- Trains the complete range: Appropriate assistance can make it possible to practise the bottom, middle, top, and descent within one repetition.
- Allows natural grip rotation: The working ring can turn as the wrist and forearm move through the pull.
- Improves one-arm shoulder control: The working shoulder must remain organized as its elbow moves from full extension into a strong top position.
- Challenges rotational stability: The trunk must control the natural tendency to turn toward the working arm.
- Exposes side-to-side differences: Using the same setup on both sides shows which arm requires more assistance or loses range first.
- Provides an objective progression option: Ring height can be recorded more consistently than an instruction to use the assisting arm “less.”
Prerequisites and Readiness
This is an advanced progression rather than a substitute for learning ordinary pull-ups. Build repeatable strict pull-ups and ring pull-ups before placing most of your weight through one arm.
There is no universal repetition or weighted-pull-up threshold that guarantees readiness. Useful coaching markers include:
- Approximately eight or more controlled ring pull-ups through a complete range of motion.
- Several strict ring archer pull-ups on each side without swinging or relaxing the extended shoulder.
- A secure grip and controlled shoulder position while progressively shifting weight toward one arm.
- The ability to hold the top and middle positions of an assisted one-arm pull for several seconds.
- No current shoulder, elbow, biceps-tendon, wrist, or hand pain during ordinary pulling exercises.
These are practical guidelines rather than mandatory tests. Begin with the rings nearly level if you possess adequate bilateral pulling strength but are unfamiliar with uneven-ring loading.
Equipment and Ring Setup
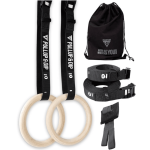
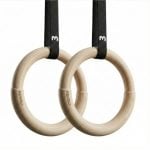
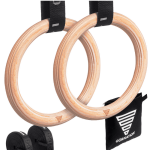
Use a pair of securely mounted gymnastics rings with independently adjustable straps. Inspect the anchor, straps, buckles, stitching, and rings before training, and ensure there is enough space to hang without touching the floor or surrounding equipment.
Position the straps approximately shoulder-width apart and keep the handles beside or slightly in front of your torso. The straps should hang freely without twisting, rubbing heavily against your arms, or contacting nearby structures.
Use a stable box to reach the rings rather than jumping into an uneven setup. For additional installation guidance, see the Calisthenics.com guide to gymnastics rings and GMB’s external guide to hanging rings securely.
Choosing the Initial Ring Heights
- Set one ring high enough that you can hang from it with the working elbow completely straight and your feet clear of the floor.
- Place the assisting ring slightly below the working ring for your first attempts.
- Grip both rings and test whether you can enter a stable bottom position without the lower ring pulling your torso sharply sideways.
- Raise the lower ring if you cannot initiate the pull or control the descent.
- Lower the assisting ring only when you can complete the prescribed repetitions with consistent range and tempo.
- Measure both handles from the floor so the setup can be reproduced and matched between sides.
The same uneven-height method is used in this external assisted one-arm ring pull-up reference, which likewise scales the movement by changing the height of the lower ring.
How to Warm Up
Begin with the joint warm-up routine or another general warm-up that prepares the shoulders, elbows, wrists, and hands. Follow it with easy ring hangs, scapular pulls, ordinary ring pull-ups, and gradually more asymmetrical repetitions.
Perform at least one easy uneven-ring set with the assisting ring higher than your working height. The warm-up should prepare your pulling pattern without exhausting the grip, elbow flexors, or working shoulder.
How to Perform a Ring-Assisted One-Arm Pull-Up
- Select the working side. Place the hand you want to train on the higher ring and the opposite hand on the lower assisting ring.
- Use a secure grip. Hold both handles fully in the hands with the thumbs wrapped around the rings and the wrists in comfortable positions.
- Enter from a box. Grip both rings before stepping from the platform so your body weight loads the straps gradually rather than suddenly.
- Align beneath the working ring. Position most of your torso beneath the higher hand instead of hanging midway between both handles.
- Establish the bottom position. Straighten the working elbow, control the working shoulder, brace the abdominals and glutes, and allow all swinging to stop.
- Create shoulder tension. Draw the working shoulder away from the ear before beginning the main elbow bend.
- Initiate with the working arm. Drive the higher elbow downward toward your ribs and begin raising your torso toward the working ring.
- Add only the required assistance. Pull downward on the lower ring just enough to maintain the intended path and complete range.
- Control natural rotation. Allow the torso to turn slightly toward the working ring while preventing uncontrolled spinning, kicking, or twisting.
- Finish the pull. Continue until the working ring and hand approach the side of your upper chest or shoulder and the working elbow is strongly flexed.
- Pause briefly. Demonstrate control at the top without reaching upward with the neck or resting against the strap.
- Lower slowly. Extend the working elbow over approximately two to four seconds while keeping the shoulder and rings under control.
- Complete the range. Return to a straight working elbow without dropping suddenly into a passive shoulder position.
- Exit safely. Place your feet back on the box before releasing either ring.
- Repeat on the opposite side. Turn around if the anchor layout allows the high ring to remain on the working side, or exchange the strap heights before changing arms.
Completion Standard
A strict repetition should meet all of the following criteria:
- The working hand grips the higher ring and the assisting hand grips the lower ring.
- The repetition begins with the working elbow fully extended and its shoulder controlled.
- Both feet remain clear of the floor, box, and surrounding equipment.
- The pull begins without jumping, kipping, kicking, or using strap recoil.
- The working ring reaches approximately upper-chest or shoulder height.
- The athlete does not hold either strap, the working wrist, or the working forearm for additional leverage.
- The descent remains controlled until the working elbow is straight.
- The same ring-height difference and completion standard are used on both sides.
The exact percentage carried by each arm cannot be judged visually. Ring height, full range, tempo, and body control are therefore more useful standards than claiming that the working arm performed a particular percentage of the repetition.
Breathing and Tempo
Inhale and brace before initiating the pull, then exhale gradually as you rise. Pause briefly at the top and lower over two to four seconds while maintaining normal breathing rather than holding your breath across several high-effort repetitions.
Common Mistakes and Corrections
| Mistake | Why it matters | Correction |
|---|---|---|
| Setting the rings level | The movement becomes an ordinary two-arm ring pull-up. | Place the working ring visibly higher while initially keeping the offset manageable. |
| Lowering the assisting ring too far | The athlete cannot initiate the pull or control the bottom position. | Raise the assisting ring until a complete strict repetition is possible. |
| Beginning with a bent working elbow | The most difficult lower range is omitted and progression becomes difficult to compare. | Use more assistance and begin each repetition with a straight working elbow. |
| Hanging between the rings | The working arm pulls diagonally while the body swings toward the higher ring. | Position the torso primarily beneath the working hand before initiating the pull. |
| Pulling mostly with the lower hand | The exercise remains a two-arm pull-up with unequal handles rather than a unilateral progression. | Initiate through the higher arm and use the lower hand only when the movement begins to stall. |
| Shrugging the working shoulder | The shoulder loses its controlled starting position as the elbow begins to bend. | Create shoulder tension before driving the elbow downward. |
| Forcing the torso to remain square | Rigidly resisting every degree of rotation can create an awkward pulling path. | Permit a small controlled turn toward the working ring. |
| Kicking or bicycling the legs | Momentum hides whether the selected assistance level is appropriate. | Brace the trunk, keep the legs quiet, and raise the assisting ring if necessary. |
| Reaching with the neck | Head movement creates the appearance of additional range without raising the torso. | Keep the neck neutral and pull the working ring toward the upper chest. |
| Dropping through the descent | The selected progression exceeds the athlete’s current eccentric control. | Raise the assisting ring or end the set before control is lost. |
| Using different offsets on each side | Side-to-side performance can no longer be compared meaningfully. | Measure and reproduce the same handle heights before training the opposite arm. |
Why You Are Getting Stuck
| Problem | Likely limitation | What to change |
|---|---|---|
| You cannot initiate from a straight working elbow. | The ring offset is too large or bottom-range shoulder control is insufficient. | Raise the assisting ring and practise controlled scapular initiation. |
| You move through the bottom but stall halfway. | The working-side lat and elbow flexors cannot yet overcome the selected load. | Use a smaller offset and continue building bilateral and archer pulling strength. |
| You nearly reach the top but cannot finish. | Top-range elbow flexion and shoulder-extension strength are limiting. | Use assisted top holds and slow partial descents from the strongest position. |
| Your body spins beneath the rings. | The torso is not aligned beneath the working ring or the pull begins too aggressively. | Reset your starting position, brace harder, and use more assistance. |
| The assisting arm becomes tired first. | You may be squeezing excessively or relying too heavily on the lower hand. | Reduce the set length and focus on initiating each repetition through the working arm. |
| One side needs much more help. | A side-to-side strength or coordination difference is being exposed. | Start with the weaker side and match its setup and repetitions on the stronger side. |
How to Program Ring-Assisted One-Arm Pull-Ups
Perform the exercise early in a pulling session after warming up but before heavy grip or elbow-flexor fatigue. One or two sessions per week is a reasonable starting frequency for direct one-arm pulling work.
- Sets and repetitions: Perform three to five sets of two to five controlled repetitions per arm.
- Rest: Rest approximately two to four minutes between demanding sets.
- Tempo: Pull without momentum and lower over approximately two to four seconds.
- Effort: Finish each set before range, grip, or shoulder control deteriorates.
- Side order: Train the weaker arm first and match its repetitions with the stronger arm.
- Progression: Lower the assisting ring by approximately 2–5 cm only after every repetition meets the completion standard.
Change only one progression variable at a time. Lowering the assisting ring, slowing the descent, adding a pause, and increasing repetitions simultaneously makes it impossible to identify what produced the increased difficulty.
Combine the exercise with bilateral pulling strength, ring archer or typewriter pull-ups, and appropriately scaled one-arm holds. Avoid repeatedly testing maximal unassisted negatives when you can no longer control the shoulder or elbow.
Readiness and Discomfort Guidance
Uneven-ring pulling can place substantial demand on the working shoulder, elbow flexors, forearm, and grip. Begin conservatively, use low-repetition sets, and allow adequate recovery between direct one-arm pulling sessions.
Stop if you experience sharp or increasing pain, instability, numbness, tingling, or an uncontrolled loss of grip. Persistent symptoms should be assessed by an appropriately qualified healthcare professional rather than trained through.
Frequently Asked Questions
Which hand holds the higher ring?
The working hand always holds the higher ring, while the opposite hand provides assistance from the lower ring.
Does lowering the assisting ring make the exercise harder?
Generally, yes. A lower assisting ring restricts that arm’s useful range and leverage, forcing the higher arm to contribute more.
How far apart should the rings be vertically?
There is no universal distance because arm length and strength differ. Begin with a small offset that permits complete repetitions and lower the assisting ring in measured increments.
Is this the same as a ring archer pull-up?
No. A ring archer pull-up uses level rings and extends the assisting arm laterally, whereas this exercise uses a lower ring and a more vertical one-arm pulling path.
How much assistance does the lower arm provide?
The exact force cannot be determined without measuring equipment because the athlete decides how hard to pull with the assisting hand. Track ring heights, range, tempo, and repetitions instead.
What grip should I use?
Begin with a neutral or slightly pronated grip and allow the working ring to rotate naturally as you pull. A false grip is unnecessary for the standard version.
Can I hold a strap instead of the lower ring?
Holding a strap or towel is a useful related progression, but it changes the hand position and should be described as a strap-assisted one-arm pull-up rather than the canonical uneven-ring version.
Will this help a one-arm pull-up on a fixed bar?
It develops relevant unilateral pulling strength and control, but the freely rotating ring does not reproduce a fixed pronated bar grip exactly. Include bar-specific assisted work if a bar one-arm pull-up is your goal.
Tips for the proper execution of Ring-Assisted One-Arm Pull-Up
Inspect the anchors, straps, buckles, stitching, and rings before every session.
Place the working hand on the higher ring and the assisting hand on the lower ring.
Measure both ring handles from the floor so you can reproduce the setup.
Begin with a small height difference before progressing to a larger offset.
Use a stable box to enter and exit the rings without jumping.
Wrap both thumbs around the rings to maintain secure grips.
Begin with a neutral grip and allow the working ring to rotate naturally.
Position your torso primarily beneath the higher working ring.
Let all swinging stop before initiating the repetition.
Straighten the working elbow while maintaining control of its shoulder.
Initiate the pull through the working shoulder before bending the elbow forcefully.
Drive the working elbow downward toward your ribs.
Use the lower hand only as much as necessary to preserve full range.
Allow a small controlled turn toward the working arm.
Keep the legs quiet and avoid kicking for momentum.
Pull until the working ring approaches the upper chest or shoulder.
Lower slowly until the working elbow is completely straight.
Use identical ring heights and completion standards on both sides.
Stop the set if the descent accelerates or the working shoulder loses control.
Muscles worked when doing Ring-Assisted One-Arm Pull-Up
The ring-assisted one-arm pull-up primarily trains the latissimus dorsi and elbow flexors of the working side. The assisting arm performs a variable amount of work, while the upper back, shoulder, grip, and trunk stabilize the uneven loading.
Primary Muscles
- Latissimus dorsi: Produces shoulder extension and adduction as the torso rises toward the higher ring.
- Biceps brachii: Flexes the working elbow and assists with control of the shoulder and forearm.
- Brachialis: Contributes strongly to elbow flexion regardless of how the working ring rotates.
- Brachioradialis: Assists the pull and controlled descent, particularly in neutral and pronated forearm positions.
Secondary and Stabilizing Muscles
- Teres major: Assists the latissimus dorsi during upper-arm extension and adduction.
- Trapezius and rhomboids: Control the shoulder blade as the working arm moves through the pull.
- Rear deltoid: Assists upper-arm movement and shoulder stabilization.
- Rotator-cuff muscles: Stabilize the upper-arm bone while the ring rotates and the body turns.
- Forearm and hand muscles: Maintain both grips, with particularly high demand on the working hand.
- Abdominals and obliques: Resist uncontrolled extension, swinging, and rotation.
- Glutes and spinal stabilizers: Keep the pelvis and lower body controlled beneath the rings.
The amount of work performed by the assisting side changes with ring height and how forcefully that hand pulls, so no fixed working-arm percentage should be claimed. A peer-reviewed analysis of bilateral pull-up variations found substantial involvement of the lats, biceps, brachioradialis, and shoulder complex, although it did not study this uneven-ring variation directly.
Primary Muscle(s):

Biceps

Lats
Secondary Muscle(s):
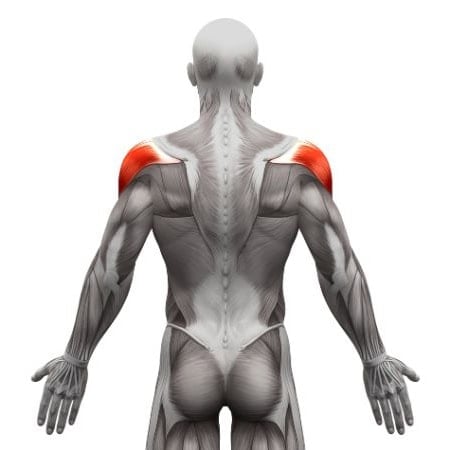
Rear delt
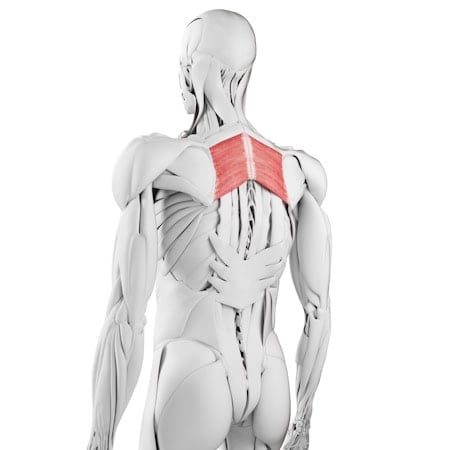
Rhomboid
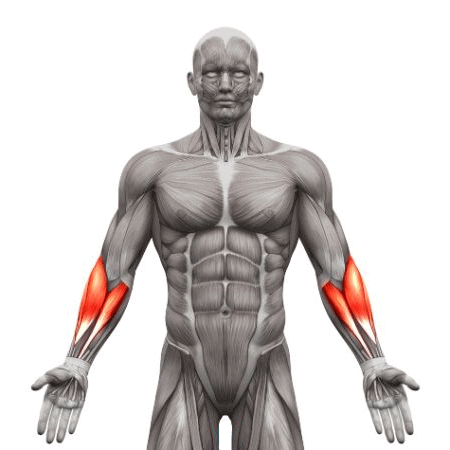
Forearm
Equipment needed for Ring-Assisted One-Arm Pull-Up
Adjust the difficulty of Ring-Assisted One-Arm Pull-Up
How to make Ring-Assisted One-Arm Pull-Up harder?
How to make Ring-Assisted One-Arm Pull-Up easier?
How to make Ring-Assisted One-Arm Pull-Up harder?
To make Ring-Assisted One-Arm Pull-Up harder:
-
Lower the assisting ring by approximately 2–5 cm while preserving the same range and tempo.
-
Use progressively less pulling force through the hand holding the lower ring.
-
Pause for two to three seconds with the working ring beside the upper chest.
-
Pause at the top, middle, and lower positions during the descent.
-
Extend the eccentric phase to five or more seconds.
-
Begin every repetition from a motionless full hang without shortening the working arm.
-
Hold an L-position with straight legs throughout the repetition.
-
Release the assisting ring briefly at the top to perform a controlled one-arm hold before regripping.
-
Perform an assisted ascent followed by a carefully controlled unassisted portion of the descent.
-
Progress to a strict one-arm ring pull-up when you no longer require meaningful help from the lower hand.
How to make Ring-Assisted One-Arm Pull-Up easier?
To make Ring-Assisted One-Arm Pull-Up easier:
-
Raise the assisting ring closer to the height of the working ring.
-
Begin with the rings nearly level before introducing a larger vertical offset.
-
Use a firm full-hand grip and deliberately provide more help through the lower ring.
-
Perform foot-assisted uneven-ring pull-ups with the rings set low enough to keep the toes on the floor.
-
Practise ordinary ring pull-ups before shifting most of your weight toward one arm.
-
Perform ring archer pull-ups while keeping the assisting arm more bent.
-
Step into the top position from a box and practise short assisted holds.
-
Use a smaller range temporarily while maintaining control at both ends of the selected range.
-
Perform fewer repetitions per set and rest longer between sides.
-
Use the weaker side’s required assistance level for both arms.
