
Band-Assisted One-Arm Pull-Up
How to do Band-Assisted One-Arm Pull-Up?
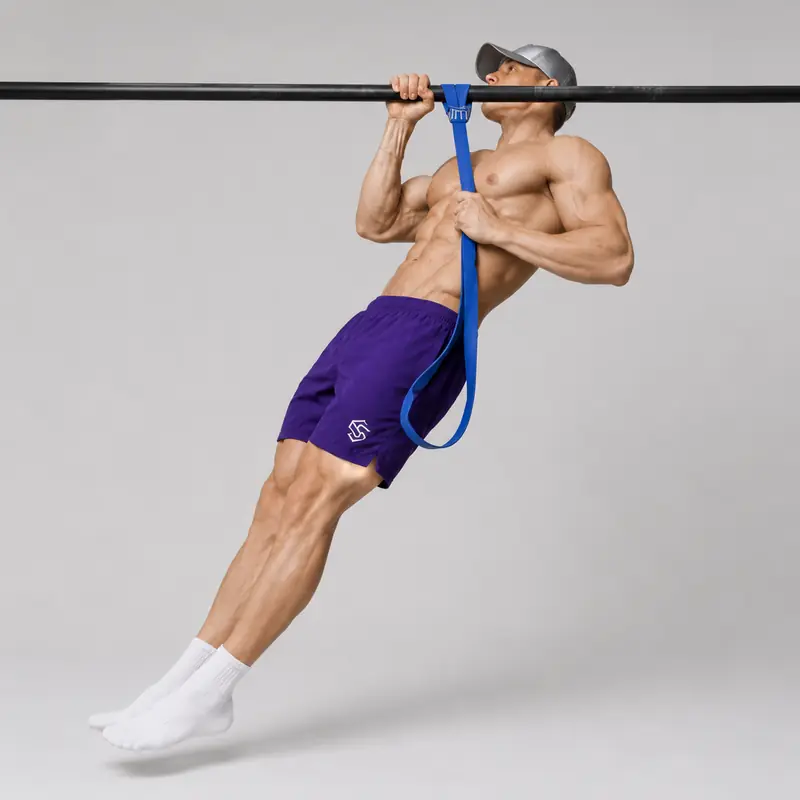
The band-assisted one-arm pull-up is an advanced pull-up progression performed with one hand on a pull-up bar while a resistance band supports part of your body weight through one foot or knee. The free hand remains completely uninvolved, allowing you to practise the grip, pulling path, body rotation and full range of motion of a strict one-arm pull-up with less load.
This exercise is different from a two-handed resistance band pull-up. It is also different from the band archer pull-up and band typewriter pull-up, where the assisting hand actively holds the band. Here, only the working hand connects the upper body to the bar.
Band assistance is not constant. Because the band is normally stretched farther at the bottom of the pull-up, it usually provides more assistance near the starting position and progressively less assistance as you approach the bar. Research measuring rubber-band tension at different lengths confirms that elastic bands have a variable, curvilinear tension–deformation relationship. The actual assistance depends on the band, its resting length, your height and whether it supports your foot or knee.
Band-supported one-arm holds and negatives are also used in established climbing-oriented one-arm pull-up progressions. However, the band does not make this a beginner exercise. Build a strong bilateral pulling foundation with strict pull-ups and practise progressively more unilateral variations before attempting full band-assisted repetitions.
How to Perform a Band-Assisted One-Arm Pull-Up
Equipment and setup
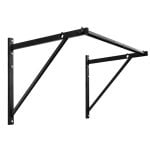
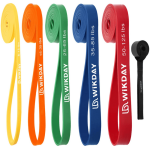
You need a stable pull-up bar, a long closed-loop resistance band and preferably a plyo box or another stable platform from which you can enter and exit the band safely.
Inspect the band before every session. Check the entire loop, especially the section that contacts the bar, for small cuts, cracks, thinning, discoloration or other damage. This elastic-resistance safety guidance recommends inspecting bands before use and discarding any band with nicks or tears.
The page-standard version uses a pronated grip and one foot inside the band. Supporting the knee or shin is an acceptable variation, but it changes the band’s stretch and therefore the amount of assistance.
Set up the resistance band
- Place the box under the bar: Position a stable plyo box where you can reach the bar and enter the band without jumping.
- Attach the band: Pass one end of the closed-loop band over the bar and pull the other end through it to create a secure girth hitch.
- Position the band: Place the attachment immediately inside the working hand so the band hangs approximately through your body’s center line rather than pulling you sharply to one side.
- Test the attachment: Pull downward on the band while standing on the box and confirm that the hitch, bar and band remain secure.
- Enter the band: Place the middle of one foot securely into the lower loop. You may lightly cross the free foot behind the supported ankle to help keep the band in place.
If using the knee-supported variation, position the band across the upper shin immediately below the knee rather than directly behind the knee joint. Because this creates less band elongation than foot support, it will usually provide less assistance when the same band is used.
Step-by-step execution
- Grip the bar with one hand: Use a closed overhand grip with the palm facing away from you and the thumb wrapped around the bar.
- Remove the free hand: Place the non-working arm across your torso, alongside your body or slightly in front of you without touching the bar, band or working arm.
- Load the band gradually: Step carefully from the box and let the band take part of your weight. Do not jump or suddenly drop into the band.
- Establish the bottom position: Begin with the working elbow straight, the shoulder controlled and your body free from swinging.
- Initiate through the shoulder: Draw the working shoulder away from your ear before bending the elbow. This creates tension around the shoulder blade before the main pull.
- Pull toward the working hand: Drive the elbow down toward your ribs and raise your body toward the bar. Keep the ribs and pelvis controlled rather than kicking the legs.
- Allow natural rotation: Your torso will usually rotate slightly toward the working arm. Control this movement instead of forcing your shoulders to remain perfectly square.
- Clear the bar: Continue pulling until your chin passes the bar beside the working hand. Do not complete the repetition by reaching upward with your neck.
- Lower under control: Extend the elbow gradually and return to the long-arm starting position over approximately two to four seconds.
- Exit safely: After the set, place your feet back on the box before removing your working hand or stepping out of the band.
The one-arm pull-up progression described by Hooper’s Beta also uses bands at the knee or foot for assisted one-arm holds and negatives. The essential standard is that the non-working hand does not contribute to the pull.
Breathing
Inhale and brace before beginning the pull. Exhale gradually as you raise your body and take another controlled breath before the descent. Avoid holding your breath through several maximal repetitions.
Completion standard
- Only the working hand touches the pull-up bar.
- The free hand does not touch the bar, resistance band or working arm.
- The repetition begins with a straight working elbow and controlled shoulder position.
- The pull begins without jumping, kicking or rebounding against the band.
- The chin passes clearly above the bar beside the working hand.
- A small natural turn toward the working arm is acceptable.
- The descent remains controlled until the working elbow is straight.
- The same band, attachment position and foot or knee setup are used on both sides.
Choosing the Correct Resistance Band
Choose a band that allows you to perform approximately two to five technically consistent repetitions per side without kicking, using the free hand or losing control of the descent. If you cannot begin from a straight elbow, use more assistance. If the band launches you out of the bottom or allows high-repetition sets with little effort, use less assistance.
Within the same manufacturer and product line, a thicker band normally provides more assistance. However, band color is not standardized across manufacturers. Even bands of the same color and stated size can produce different tension, so record the following details when tracking progress:
- Band manufacturer and product line
- Band color and width
- Foot-supported or knee-supported setup
- Band attachment position
- Repetitions completed on each side
- Whether the chin cleared the bar
- Descent tempo and any pauses
Progress should be judged using the same setup. Changing from foot support to knee support, changing bands and changing the attachment height simultaneously makes it difficult to determine whether your pulling strength has actually improved.
Common Mistakes
- Using the free hand: Keep the non-working hand away from the band and bar; otherwise, the exercise becomes a different assisted one-arm pull-up variation.
- Choosing excessive assistance: Use a band that permits clean repetitions but still requires substantial effort from the working arm.
- Bouncing at the bottom: Pause briefly after reaching a straight elbow and initiate the next repetition without using the band’s recoil.
- Dropping suddenly into the band: Load the band gradually from a box instead of stepping or jumping directly into a stretched loop.
- Beginning with a bent elbow: Use more assistance if you cannot control the long-arm starting position.
- Shrugging toward the ear: Establish shoulder-blade control before driving the elbow downward.
- Forcing the body to remain square: Allow a small natural rotation toward the working hand while preventing uncontrolled spinning.
- Kicking or bicycling the legs: Brace the abdomen and glutes and keep the lower body quiet.
- Reaching with the chin: Keep the neck relatively neutral and clear the bar by pulling the body higher.
- Falling through the eccentric phase: Use more assistance or finish the set if you cannot lower smoothly.
- Using unequal setups: Keep the band, anchor position and supported limb position consistent when comparing sides.
- Stepping out while hanging: Return to the box and unload the band before removing your foot.
Benefits of the Band-Assisted One-Arm Pull-Up
- Specific one-arm pull-up practice: The working arm performs the same general grip, shoulder and elbow actions used in an unassisted repetition.
- Adjustable assistance: Different bands and support positions allow the load to be scaled to the athlete’s current strength.
- Full-range unilateral pulling: The band can make it possible to practise both the bottom and top portions within one repetition.
- One-arm grip development: The working hand remains solely responsible for holding the bar.
- Controlled body rotation: The exercise teaches the trunk to manage the natural rotation created by unilateral pulling.
- Side-to-side comparison: Training each arm separately can expose differences in range, control and required assistance.
- Progression into negatives: The same setup can be used for assisted holds and slow assisted descents.
Readiness and Safety
The band-assisted one-arm pull-up is intended for athletes who already possess substantial pull-up strength. There is no universal number of strict or weighted pull-ups that guarantees readiness. More useful signs include controlled bilateral pull-ups, familiarity with unilateral progressions and the ability to maintain a stable assisted one-arm hang without shoulder or elbow discomfort.
Prepare with the joint warm-up routine, followed by easy two-arm pulling, scapular pulls and progressively harder assisted sets. Warm-up repetitions should prepare the working pattern without fatiguing the grip or elbow flexors.
One-arm pulling can place substantial stress on the working elbow, forearm and shoulder. Use low-repetition sets and avoid repeatedly testing the thinnest possible band. Stop if you experience sharp, increasing or radiating pain, numbness, instability or an uncontrolled loss of grip. Persistent symptoms should be assessed by an appropriately qualified healthcare professional.
Always inspect the band, use a stable bar and keep your face out of the band’s potential recoil path. Replace damaged bands rather than attempting to repair them.
Suggested Progression Path
- One-arm resistance band pull-down
- Strict pull-up
- Resistance band pull-up
- Band archer pull-up
- Band typewriter pull-up
- Foot-supported band-assisted one-arm pull-up
- Knee-supported band-assisted one-arm pull-up
- Thin-band one-arm pull-up holds
- Band-assisted one-arm pull-up negatives
- Unassisted one-arm pull-up negatives
- One-arm pull-up
The order of foot and knee support assumes the same band and attachment height. Knee support normally stretches the band less and therefore usually provides less assistance, but the actual force should be judged from the specific setup.
How to Program Band-Assisted One-Arm Pull-Ups
Perform band-assisted one-arm pull-ups early in the pulling session, after warming up but before heavy pulling or grip fatigue. Alternate sides rather than completing all sets with the stronger arm first.
- Strength practice: Perform 3–5 sets of 2–5 repetitions per arm.
- Rest: Rest approximately 2–4 minutes between demanding sets.
- Tempo: Pull without bouncing and lower over approximately 2–4 seconds.
- Frequency: One or two weekly sessions is a reasonable starting point.
- Effort: Finish the set before range, grip or eccentric control deteriorates.
Reduce assistance only after you can reproduce the full range on both sides. Moving to a thinner band is not productive if it causes partial repetitions, aggressive kicking or uncontrolled descents.
Frequently Asked Questions
Should the band support my foot or my knee?
Foot support normally stretches the band farther and provides more assistance. Supporting the knee or upper shin usually provides less assistance with the same band. Use the version that permits a strict repetition and record which setup you used.
Where should the resistance band be attached?
Attach it immediately inside the working hand so its upward pull remains close to your body’s line. Placing it far from the working hand can pull the lower body sideways and make rotation harder to control.
Can my free hand hold the band?
Not for the exercise defined on this page. Holding the band with the free hand is a useful progression, but it is an assisted or band archer-style pull-up rather than a lower-body-supported band-assisted one-arm pull-up.
Does a band-assisted repetition count as a one-arm pull-up?
It counts as a band-assisted one-arm pull-up, not an unassisted repetition. The band removes part of your body weight, particularly where it is most stretched.
Why does the exercise feel easier at the bottom?
The band is generally longest and most stretched in the bottom position, so it produces its greatest upward assistance there. As you rise and the band shortens, the assistance decreases.
Which grip should I use?
Use a pronated grip with the palm facing away for a band-assisted one-arm pull-up. An underhand grip makes the movement a band-assisted one-arm chin-up.
When should I progress to a thinner band?
Progress when you can consistently start from a straight elbow, clear the bar and control the descent on both sides without bouncing or using the free hand.
Tips for the proper execution of Band-Assisted One-Arm Pull-Up
Attach the resistance band immediately inside the working hand.
Use a plyo box to enter and exit the band without jumping.
Wrap your thumb around the bar for a secure closed grip.
Keep the free hand away from the bar, band and working arm.
Initiate the repetition by controlling the shoulder before bending the elbow.
Allow a small natural rotation toward the working hand.
Pause briefly at the bottom instead of bouncing against the band.
Lower under control until the working elbow is straight.
Use the same band and support position when comparing sides.
Record the band, supported limb position, repetitions and descent tempo.
Muscles worked when doing Band-Assisted One-Arm Pull-Up
The band-assisted one-arm pull-up primarily trains the latissimus dorsi and elbow flexors of the working side. The upper back, shoulder, forearm and trunk muscles stabilize the body while the resistance band reduces the total load.
Primary muscles
- Latissimus dorsi: Produces shoulder extension and adduction, helping raise the torso toward the fixed working hand. An NCBI anatomy overview of the latissimus dorsi describes its role in moving the trunk upward when the arms are fixed overhead, as in climbing and pull-up movements.
- Biceps brachii: Contributes to elbow flexion and assists with control of the upper arm and shoulder.
- Brachialis: Acts as a strong elbow flexor regardless of forearm position.
- Brachioradialis: Assists elbow flexion and becomes especially important with a pronated grip.
Secondary and stabilizing muscles
- Teres major: Assists the latissimus dorsi during shoulder extension and adduction.
- Trapezius and rhomboids: Control the shoulder blade during the pull and descent.
- Rear deltoid: Assists upper-arm movement and shoulder stability.
- Forearm and hand muscles: Maintain the one-handed grip throughout the repetition.
- Rotator-cuff muscles: Stabilize the upper arm within the shoulder joint.
- Abdominals and obliques: Control the trunk and manage the rotational forces created by one-arm pulling.
- Glutes and spinal stabilizers: Help keep the lower body controlled and reduce swinging.
A peer-reviewed electromyographic analysis of pull-up variations found substantial involvement of the latissimus dorsi, elbow flexors and shoulder-arm complex across different pull-up grips. The study examined bilateral pull-up variations rather than band-assisted one-arm pull-ups specifically.
Primary Muscle(s):

Biceps

Lats
Secondary Muscle(s):
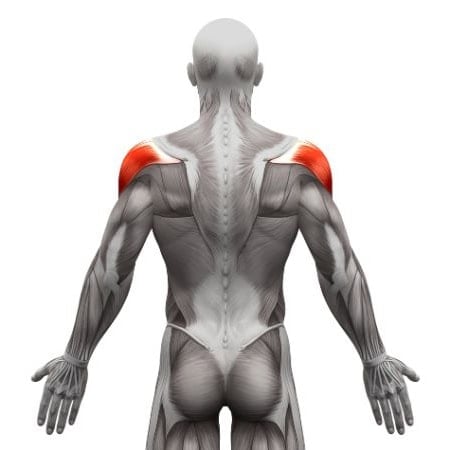
Rear delt
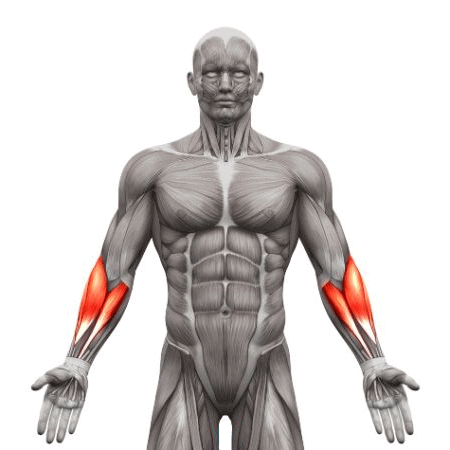
Forearm
Equipment needed for Band-Assisted One-Arm Pull-Up
Adjust the difficulty of Band-Assisted One-Arm Pull-Up
How to make Band-Assisted One-Arm Pull-Up harder?
How to make Band-Assisted One-Arm Pull-Up easier?
How to make Band-Assisted One-Arm Pull-Up harder?
To make Band-Assisted One-Arm Pull-Up harder:
-
Use a thinner resistance band to reduce assistance.
-
Support the knee or upper shin instead of the foot to reduce band stretch.
-
Pause for two to three seconds with your chin above the bar.
-
Lower over five to eight seconds while maintaining shoulder control.
-
Pause at the top, middle and lower positions during the descent.
-
Perform an assisted concentric followed by an unassisted one-arm negative.
-
Progress to a strict unassisted one-arm pull-up.
How to make Band-Assisted One-Arm Pull-Up easier?
To make Band-Assisted One-Arm Pull-Up easier:
-
Use a thicker resistance band from the same product range.
-
Support the foot rather than the knee to create more band stretch and assistance.
-
Perform band-assisted one-arm isometric holds at the top position.
-
Perform assisted one-arm negatives after pulling to the top with both hands.
-
Hold a band or towel with the free hand to provide adjustable upper-body assistance.
-
Perform band archer pull-ups before removing the assisting hand from the movement.
-
Perform one-arm resistance band pull-downs to build unilateral pulling strength without hanging.
