
Front Lever Pull-Up
How to do Front Lever Pull-Up?
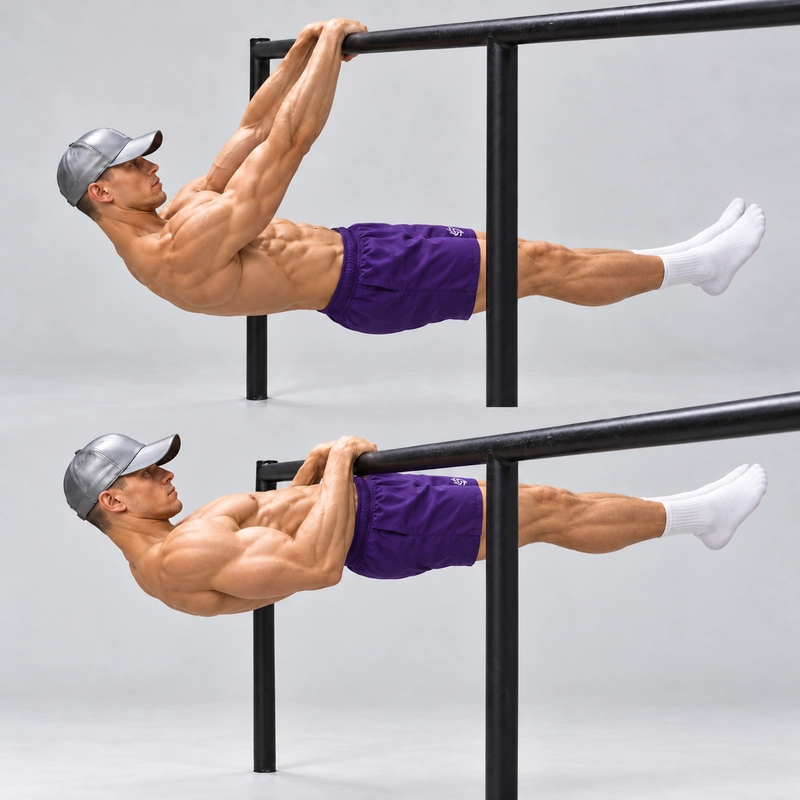
The Front Lever Pull-Up is an advanced pulling exercise performed with the entire body suspended face-up and approximately parallel to the floor. This version uses a false grip on a low straight bar, with both legs straight and next to each other. Pull the lower abdomen or waist toward the bar, then lower back to straight arms while preserving the full-body lever.
The task combines the straight-body control of a full front lever with dynamic elbow bending and shoulder movement. You must keep the hips extended and feet unsupported throughout the working repetition. It is not a vertical pull-up followed by a leg raise.
The CrossFit Gymnastics Training Guide describes the front lever as a face-up suspended position with shoulders, hips and ankles aligned horizontally, and identifies shorter-lever progressions. That provides context for the body position; the full pulling cycle and false-grip low-bar standard described here are specific coaching standards for this page.
How This Differs From Holds and Supported Rows
In the standard front lever, the elbows remain straight while you hold still. In this exercise, the elbows bend as the body approaches the bar and straighten during the controlled return. A front lever top hold trains a static bent-arm endpoint rather than the complete movement between endpoints.
A low bar bodyweight row keeps the heels supported. Here, both feet remain clear and the hands support the entire body. Even if the same bar is used, foot-supported rows and fully suspended lever pulls are different tasks.
Keeping the legs together and knees straight distinguishes the full version from tuck, advanced-tuck and straddle pulling. Those are useful regressions, but they should be labelled rather than counted as full front lever pull-ups. A front lever raise changes the body's angle; this exercise keeps the trunk and legs approximately horizontal while pulling closer to the bar.
Readiness: A Hold Is Useful but Does Not Prove a Pull-Up
Develop a controlled full lever, a comfortable bar false grip and experience pulling through a shorter lever before combining them. You need to support the horizontal body at the straight-arm bottom as well as control the bent-arm top and the return.
The tuck front lever and advanced tuck front lever are positional foundations. Practise pulling with an appropriate shorter lever separately; holding one of these positions is not the same as completing a dynamic repetition.
A banded front lever introduces assisted straight-body practice. Band-assisted pulling can also be useful when the equipment and attachment suit that movement, but the changing band assistance must be recorded. No fixed hold time, vertical pull-up count or band colour guarantees a full unassisted pull.
Use the front lever training routine for broader progression work. Prepare the wrists, elbows and shoulders with the joint warm-up routine, then rehearse a supported false grip and easy shorter-lever pulls before the demanding version.
Choose a Low Bar With Enough Clearance
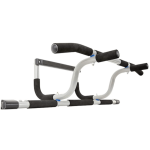
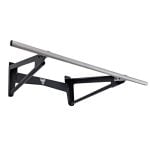
Use a rigid straight bar and stable frame suited to fully suspended pulling. Check the joints, fastenings, floor grip and resistance to sliding or tipping in the direction of the pull. A light freestanding dip bar is not automatically suitable simply because its height is convenient.
The important check is the straight-arm bottom position. Your head, shoulders, hips, heels and legs must remain clear of the floor and frame, with room to pull and exit. A bar that permits a bent-arm top pose may still be too low for the complete repetition.
Select height for your actual arm length, body position and equipment geometry. There is no universal 90 cm (35.4 in) requirement for this exercise. If you cannot clear the floor at the bottom, use a higher appropriate bar instead of bending the knees, resting the heels or omitting arm extension to claim the full version.
Keep the area under and around the body clear. Any firm landing mat must be included when checking clearance. Rehearse the grip, compact entry and feet-to-floor exit before working repetitions; a low setup may not allow a straight-leg vertical hang.
Set a Bar False Grip
Take an overhand hand orientation at approximately shoulder width. Roll the hands farther over the bar than in an ordinary finger-based pull-up grip so the heel of the palm near the wrist is supported over the bar, with the wrists flexed. Keep the fingers securely engaged around it and the thumbs wrapped where the grip comfortably permits.
Establish the grip with the feet supported before adding full bodyweight. Let the contact settle across the fleshy base of the palm rather than balancing on a painful point. Keep both hands in the same configuration throughout the pull and return.
A false grip is not merely removing the thumbs. Nor does it mean you should force the wrists into a prescribed angle. Straight bars and rings have different contact geometry; do not copy a ring false-grip position rigidly onto the bar.
The grip changes hand-to-bar geometry and can help you approach the waist-to-bar endpoint, but it does not replace lever strength or guarantee that the movement is easier for everyone. Build tolerance through short supported exposures and scaled pulling. End the attempt for sharp wrist pain, numbness, skin tearing or a grip that starts to slide.
Keep the bar and hands dry. If chalk is allowed, use only what is needed for predictable contact. Do not rely on wrist straps, a painful grip or last-second hand adjustments to keep an otherwise uncontrolled repetition going.
Enter the Full Lever Without Swinging
From a supported low-bar setup, establish the false grip and bring the body beneath the bar with the knees bent. Gradually transfer support to the hands and organize a compact tuck with the feet clear. Use an entry you already control rather than jumping or kicking into position.
From that stable position, extend the hips and knees until the legs are straight and together. Establish the horizontal line with the arms actively straight, the trunk braced and the glutes and thighs engaged. If you cannot achieve that bottom position while retaining the grip and clearance, use a shorter lever or assistance for the working set.
Entry steps are preparation, not a counted repetition. An inverted-hang entry is another option only when you already control it and the equipment has enough clearance; it is not required for this low-bar version.
How to Do a Full Front Lever Pull-Up
- Check the setup. Confirm bar stability, full-range clearance, secure false grip and a practised exit.
- Establish the straight-arm bottom. Suspend the body face-up, with hips extended, knees straight, legs together and feet clear. Keep the shoulders active rather than dropping abruptly into a loose hang.
- Initiate the pull. Bend the elbows and use the shoulders and upper back to move the body toward the bar. Think of guiding the elbows toward the hips while preserving the trunk-and-leg line.
- Move the body as one lever. Let the shoulders and pelvis travel together. The path need not be perfectly vertical, but do not lift only the hips, drop the heels or turn the movement into a leg swing.
- Reach the top under control. Bring the lower abdomen or waist into a light touch with the bar while the legs remain straight, together and approximately horizontal. Do not arch sharply or rest the body on the bar to manufacture contact.
- Lower smoothly. Extend the elbows while controlling the shoulder movement. Maintain the false grip, straight legs and horizontal body shape.
- Restore the full bottom. Finish with the arms actively straight and the entire body still suspended. Regain control before the next pull.
- Exit deliberately. After the final working repetition, shorten the lever by bending the knees and place the feet onto the floor under control. Keep holding the bar until support is secure.
Use a deliberate pull and a smooth return, rather than an explosive attempt followed by a drop. A two-to-three-second lowering phase can be useful practice when you can maintain the lever. Keep breathing while braced; choose manageable work rather than a long grinding effort that breaks the position.
Allow coordinated shoulder-blade movement as the elbows bend and straighten. Maintain active shoulder support without forcing maximal depression or rigidly pinning the shoulder blades together throughout the repetition. Keep the neck comfortable and roughly aligned with the torso instead of throwing the head back to reach the bar.
Define the Top Endpoint and Range
For this page's strict full-range standard, use a light lower-abdomen/waist-to-bar touch followed by a return to straight arms. Record the actual contact region. The endpoint is a coaching standard, not a universal competition rule.
If you can preserve the full body lever but stop short of contact, record a partial-range full-lever pull. That is useful training, but different from the complete range defined here. If you can touch only by bending the knees, separating the legs, dropping the feet or extending the lower back sharply, choose a regression.
Do not count torso support on the bar as a suspended top hold. Light contact identifies the endpoint; the hands and pulling muscles still support the body. A different grip width or grip style can change the available travel and top geometry, so keep those details consistent.
What Counts as One Complete Repetition?
- Both hands retain the declared false grip without a mid-repetition reset.
- The repetition begins and ends with actively straight arms.
- The hips remain extended and the knees straight, with both legs together.
- The body stays approximately horizontal and fully suspended without foot or frame support.
- The lower abdomen or waist lightly reaches the bar without a kip, hip thrust or resting contact.
- The return is controlled and restores the same bottom position.
One pull-and-return cycle counts as one repetition. A top hold, assisted entry, partial pull, eccentric-only lowering or tuck version should be labelled separately. Bending the knees for the planned exit is acceptable after the working repetition has ended.
Film from the side to check arm extension, hip position and endpoint, and from a front-oblique view when checking leg separation and grip consistency. A head-on angle alone can hide hip sag and shortened range.
Practice Volume and Progression
For an athlete who can already control the full movement, two or three sets of one to three clean repetitions with roughly two to three minutes of rest is a practical starting session. Use controlled singles if necessary. If even one full cycle is unavailable, use a suitable shorter-lever or assisted configuration rather than forcing the target count.
The ACSM resistance-training guidance supports tailoring load and volume to the athlete's goals and capacity. These low-repetition lever examples are coaching choices, not an ACSM-validated protocol for this skill.
Two nonconsecutive sessions may fit alongside other pulling work. Account for existing front lever holds, rows, vertical pulls and false-grip practice rather than adding every progression at high effort. Stop a set when grip security, horizontal alignment or the controlled return deteriorates.
Develop repeatability at one configuration, then change one variable. Shorter-lever pulls can progress toward a longer lever; assisted full-lever pulls can progress toward less assistance. In the full unassisted version, add a controlled repetition, a brief non-resting top pause or a smoother descent before considering external resistance.
Do not progress by changing the grip, adding weight and shortening the range simultaneously. A longer full-lever hold or more vertical pull-ups can support general preparation, but neither guarantees waist-to-bar pulling strength.
Common Mistakes and Corrections
- Using a bar that is too low: raise the setup so the straight-arm bottom clears the floor; do not use heel contact as hidden assistance.
- Starting with bent arms: restore the defined bottom or label the attempt partial range.
- Lifting the hips ahead of the shoulders: use a shorter lever or assistance and rebuild a coordinated pull.
- Bending or separating the legs: record the actual regression rather than counting it as the full legs-together version.
- Losing the false grip on the return: end the set, practise a supported grip and use a range you can control.
- Arching or crashing into the bar: reduce the demand and approach the endpoint without a forceful hip thrust.
- Dropping out of the lever after the top: train the return separately at a manageable lever instead of counting an uncontrolled cycle.
Frequently Asked Questions
Is a front lever pull-up the same as a front lever row?
The names can describe the same fully suspended pulling movement. A foot-supported bodyweight row is different. Check support conditions, body lever and range rather than relying on the name alone.
Does the false grip make it easier?
It changes hand-to-bar geometry and may help with the close-to-bar endpoint, but it also requires wrist and grip tolerance. It does not make the full lever automatic. Compare performances using the same grip.
How low should the bar be?
Low enough for a controlled setup, but high enough to clear your body at the straight-arm bottom and throughout the exit. Your proportions and the frame geometry determine a workable height.
Can I bend my knees or use a straddle?
Yes, as a labelled regression. The full version described here keeps the hips extended, both knees straight and legs together during the entire working cycle.
Tips for the proper execution of Front Lever Pull-Up
Check floor and frame clearance at the straight-arm bottom, not only at the bent-arm top. Raise the bar if any part of the body would touch.
Set the false grip with the feet supported. Keep the heel of the palm near the wrist over the bar and the fingers securely engaged without forcing a painful wrist angle.
Use the same grip and hand width through the pull and return. A false grip is more than simply removing the thumbs from an ordinary grip.
Keep the hips extended, both knees straight and legs together. Feet must stay clear throughout the measured repetition.
Begin and finish with actively straight arms while maintaining shoulder support. Do not omit the bottom position to make the repetition look complete.
Pull the shoulders and pelvis together as one horizontal lever. Avoid leading with a hip thrust or dropping the heels.
Approach a light lower-abdomen or waist-to-bar touch without resting on the bar, arching sharply or crashing into it.
Control the lowering phase and preserve the false grip. A clean top position followed by a fall is not a complete controlled repetition.
Rehearse a compact entry and feet-to-floor exit. Bend the knees for the exit only after the working cycle has ended, and keep holding the bar until support is secure.
Log lever, grip, hand width, assistance and range. Keep full, tuck, straddle, partial and negative-only work identifiable rather than combining their counts.
Muscles worked when doing Front Lever Pull-Up
Primary pulling muscles
- Latissimus dorsi and other shoulder extensors, including teres major: contribute to supporting the body lever and drawing the torso toward the bar.
- Elbow flexors: the biceps, brachialis and brachioradialis contribute to bending the elbows during the pull and controlling their extension on the return.
Shoulder and shoulder-blade control
The posterior shoulder muscles, rotator cuff, trapezius, rhomboids and other scapular stabilizers contribute to coordinated upper-body support. The shoulder blades can move as the arms bend and straighten; this is not a requirement to pin them maximally down and together throughout the exercise.
Trunk and lower-body tension
The abdominal wall and obliques help preserve the relationship between the ribs and pelvis. The glutes maintain hip extension and the quadriceps keep the knees straight, while other trunk and hip stabilizers contribute to the full-body line. These muscles prevent the lever from turning into a hip fold or sagging position.
False-grip support
The hand and forearm muscles maintain contact with the bar and the flexed-wrist grip. False-grip tolerance is a separate limiting factor from back strength, so do not force painful contact just to complete the intended range.
The exercise combines dynamic pulling and controlled lowering with approximately isometric trunk and leg stabilization. Muscle demands change with grip, hand width, lever length, assistance and range. These descriptions are anatomical and mechanical coaching inferences, not measured activation rankings for this exact version.
Primary Muscle(s):

Lats
Secondary Muscle(s):

Trapezius

Biceps

Abdominal
Equipment needed for Front Lever Pull-Up
Adjust the difficulty of Front Lever Pull-Up
Scale the body lever, assistance and controlled range before adding volume. Use tuck or advanced-tuck pulls, a straddle configuration or suitable recorded assistance when the full cycle is unavailable. Progress toward straight legs together, a controlled waist-to-bar endpoint and a complete straight-arm return. Maintain the same grip and clearance; foot support and grip changes create different configurations.
How to make Front Lever Pull-Up harder?
How to make Front Lever Pull-Up easier?
How to make Front Lever Pull-Up harder?
To make Front Lever Pull-Up harder:
-
Add a controlled full-range repetition or another small set with the same false grip, straight-arm bottom and legs-together body line.
-
Pause briefly at the waist-to-bar endpoint while continuing to support the body through the hands. Do not rest the torso on the bar.
-
Use a slower controlled return to straight arms while keeping the hips extended and the feet clear. Reduce the set length if alignment deteriorates.
-
Only after repeatable full-range bodyweight cycles, add a small securely fitted external load without changing the grip or range. Record mass and placement and recheck bar stability and the planned exit.
How to make Front Lever Pull-Up easier?
To make Front Lever Pull-Up easier:
-
Use tuck or advanced-tuck front lever pulls to shorten the body lever. Keep the pulling cycle controlled and record the actual body position rather than counting it as full straight-leg work.
-
Use a suitable band or competent spotter to assist the full-body position and pull. Confirm attachment security and clearance, and record assistance placement and amount rather than relying only on band colour.
-
Use controlled partial pulls, shorter sets or singles at a manageable lever. If false-grip loading or the return is unreliable, practise supported grip work and easier pulling before repeating the full attempt.
