
Low Bar Bodyweight Row
How to do Low Bar Bodyweight Row?
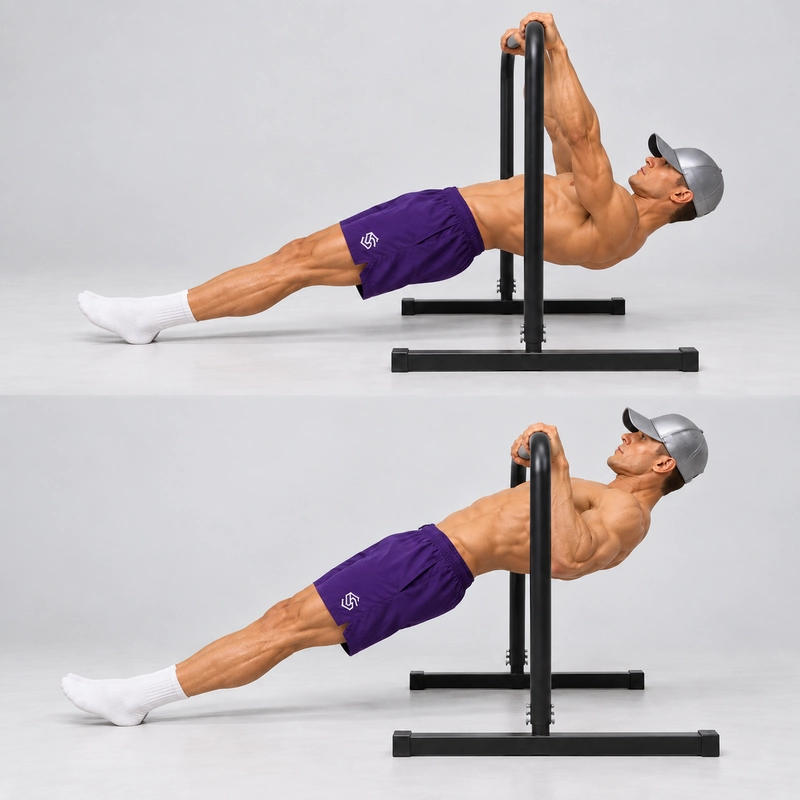
The low bar bodyweight row is a straight-leg horizontal pulling exercise performed beneath a fixed bar set approximately at hip height. With your heels on the floor and your body held in one line, pull your lower chest to the bar, then lower until your elbows are straight.
This is the next main variation after the high bar bodyweight row. Lowering the bar brings your body closer to horizontal, making the pull more demanding when the same full-range, straight-leg standard is maintained. You begin underneath the bar rather than in the more upright leaning position used for the higher-bar variation.
This page covers a fixed bar, an overhand grip, straight knees and heels on the floor. Bodyweight row, inverted row and Australian pull-up are common names for this exercise family; “low bar” identifies the lower fixed-bar setup, approximately at hip height when standing.
Equipment and Setup
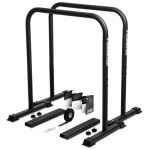
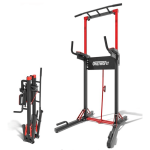
Use a securely fixed horizontal bar, an adjustable row station or a locked Smith-machine bar approved for this use. Start with the bar approximately level with your hip crease when standing upright beside it. Hip height is an anatomical reference, rather than a universal measurement in centimetres or inches.
- Check that the bar and its supports cannot roll, slide, lift or tip under load.
- Allow enough space underneath the bar for your head, back and hips, and enough space beyond it to extend both legs.
- Use a firm, non-slip surface under your heels.
- Choose a heel position that allows straight elbows at the bottom and gentle lower-chest contact at the top.
- Keep your back and hips clear of the floor throughout the working repetitions.
Do not force the setup if the bar is too low to permit full elbow extension without floor contact. Raise it slightly and record the actual height. Do not use a loose barbell resting on supports or an improvised station that can move under your weight.
How to Do a Low Bar Bodyweight Row
- Enter beneath the bar. Sit underneath it and take an overhand grip approximately shoulder-width apart. Wrap your thumbs around the bar.
- Extend your legs. Place both heels on the floor in front of you with your knees straight and toes pointing upward. Leave enough room to pull your lower chest to the bar.
- Lift into the starting position. Brace your abdomen and squeeze your glutes as you raise your hips. Align your shoulders, hips, knees and ankles in one line, with your elbows straight and your back and hips clear of the floor.
- Check your position. Keep your neck neutral and wrists aligned with your forearms. Your torso will be more horizontal than during the high bar variation, but it does not need to be exactly parallel to the floor.
- Pull your chest toward the bar. Bend both elbows and draw your upper arms back, allowing your shoulder blades to move toward each other. Keep your elbows roughly 30–45 degrees from your torso.
- Make gentle chest contact. Bring your lower chest or sternum to the bar while maintaining the straight body line. Avoid lifting your hips separately, reaching with your chin or bending your knees.
- Lower under control. Extend both elbows fully without dropping your hips or allowing your back to touch the floor. Keep your heels in their original position.
Exhale as you pull and inhale as you lower. Use a smooth rhythm rather than bouncing from the bottom or pushing off the floor.
What Counts as a Full Repetition?
A strict repetition begins with straight elbows, finishes with gentle lower-chest contact and returns under control to straight elbows.
- The bar height, grip width and heel position stay unchanged.
- Both knees remain straight, with the heels on the floor.
- The shoulders, hips, knees and ankles maintain one continuous body line.
- The back and hips remain clear of the floor.
- The chest reaches the bar without a hip thrust, chin reach, bounce or leg drive.
Do not count a repetition if you miss chest contact, fail to straighten your elbows, bend your knees, move your feet, rest on the floor or use momentum to finish the pull. Bent-knee rows and partial repetitions are different training variations and should be recorded separately.
Why Is the Low Bar Row Harder Than the High Bar Row?
The lower bar places your body in a less upright position. This changes the leverage and generally increases the demand on your pulling muscles compared with the higher-bar setup, provided you preserve the same leg position and range of motion.
The exercise still trains the same basic pattern: the arms pull while the trunk and legs hold their alignment. Bar height alone does not determine difficulty; foot placement, body proportions and execution also matter. Use the complete setup when comparing the two variations.
Benefits of the Low Bar Bodyweight Row
- Develops horizontal pulling strength: The upper arms and shoulder blades move together as the chest approaches the bar.
- Trains the back and elbow flexors: The upper back, lats, rear deltoids and arm muscles produce the pull.
- Practises full-body tension: The abdomen, glutes and legs maintain alignment throughout the set.
- Connects the row progression: It provides a floor-supported step between high bar rows and feet-elevated rows.
Rows can complement strict pull-up training, but include suitable vertical pulling practice if that is your goal. Improving a horizontal row does not automatically mean you can perform a pull-up.
Common Mistakes and Corrections
Keeping the High Bar Stance After Lowering the Bar
Lowering the bar changes the geometry of the movement. Set up underneath it and find a heel position that allows both straight elbows and chest contact. Do not expect the previous heel marker to fit the new bar height.
Letting the Hips Sag
Brace before pulling and keep the trunk and legs moving together. If you cannot maintain the line, raise the bar rather than continuing with sagging hips.
Thrusting the Hips Up to Reach the Bar
The lower chest reaches the bar through the pull. Keep the hips aligned with the shoulders and legs instead of lifting the pelvis separately to create momentum.
Bending the Knees During the Pull
A bent-knee row is a useful regression, but it changes the leverage. Keep both knees extended for this variation and do not switch leg positions halfway through a set.
Reaching With the Chin or Flaring the Elbows
Keep your head aligned with your torso and pull toward the lower chest. Let the elbows travel back at a comfortable angle rather than directly sideways toward your ears.
Shortening the Range or Resting on the Floor
Lower to straight elbows while keeping the hips clear of the floor. If the equipment prevents that position, adjust its height. If fatigue prevents it, finish the set.
Sets, Reps and Progression
As a coaching starting point, use 2–3 sets of 6–12 controlled repetitions with 90–120 seconds of rest. Choose a setup that leaves about two clean repetitions in reserve. If six full repetitions are currently too demanding, use shorter sets or return to a higher bar.
When you can repeat three sets of 10–12 clean repetitions across two sessions, try feet-elevated inverted rows with a stable, low foot support. Keep the same straight-leg and chest-contact requirements, and reduce the repetitions as needed. This is a coaching guideline, not a validated pass-or-fail test.
You can also make training more demanding by pausing briefly at the top or using a slower descent. Record those changes separately from ordinary repetitions. For structured vertical pulling practice alongside rows, see the 6-week pull-up workout plan.
Keep Your Setup Consistent When Retesting
Record the floor-to-centre-of-bar height, mark your heel position and keep your grip width, footwear and tempo consistent. A side-view photograph helps you reproduce the body position. Reset the heel marker when changing from the high bar setup to hip height.
For an assessment, follow its specified setup and rep standard. More repetitions with bent knees, a different angle or a shorter range are not directly comparable with your previous straight-leg result.
Comfort and Readiness
Warm up with a few controlled higher-bar rows before trying the lower setup. You should be able to grip securely and maintain the body line without sharp pain. Stop if the equipment moves, your heels slip or you experience sharp pain, numbness or dizziness. Persistent symptoms warrant advice from a qualified healthcare professional.
Low Bar Bodyweight Row FAQ
What does hip height mean?
Set the bar approximately level with the crease at the front of your hips when standing upright. Check that the actual setup allows straight elbows, lower-chest contact and clearance from the floor. Record the measured height rather than relying on the label alone.
Should my body be completely horizontal?
No. With the heels on the floor, the body angle depends on the bar height, your proportions and heel position, and it changes during the repetition. Maintain a straight body line and full range rather than forcing an exact angle.
Is this an inverted row or an Australian pull-up?
Yes. Those names describe the same general bodyweight-row family. The low bar bodyweight row uses a fixed bar around standing hip height and the straight-leg form defined on this page.
What should I do if I cannot touch my chest to the bar?
Check your heel position and equipment clearance first. If the setup permits contact but you cannot complete the pull with good form, raise the bar and use the easier high bar variation.
Tips for the proper execution of Low Bar Bodyweight Row
Set the bar approximately at your standing hip crease and check that your hips and back remain clear of the floor with your elbows straight.
Set up underneath the lower bar and find a new heel position instead of automatically reusing your high bar stance.
Use an overhand grip around shoulder width, wrap your thumbs around the bar and keep your wrists aligned with your forearms.
Keep both knees straight, toes pointing upward and heels fixed throughout the set.
Brace the abdomen and squeeze the glutes so your shoulders, hips, knees and ankles remain aligned.
Pull the lower chest to the bar without lifting your hips separately or reaching forward with your chin.
Let the shoulder blades move naturally as you lower and pull, keeping the elbows roughly 30–45 degrees from the torso.
Muscles worked when doing Low Bar Bodyweight Row
The low bar bodyweight row combines elbow flexion with movement of the upper arms and shoulder blades. The back and arm muscles create the pull, while the trunk, hips and legs maintain the straight body line.
Main Pulling Muscles
- Latissimus dorsi: Helps draw the upper arms back toward the torso.
- Rhomboids and middle trapezius: Draw the shoulder blades toward each other during the pulling phase.
- Rear deltoids: Assist the backward movement of the upper arms.
- Biceps brachii, brachialis and brachioradialis: Bend the elbows as the chest approaches the bar.
Supporting Muscles
- Forearm and hand muscles: Maintain the grip.
- Rotator cuff and scapular stabilizers: Help control the shoulders through the movement.
- Abdominals, obliques and spinal stabilizers: Maintain trunk alignment.
- Glutes: Maintain hip extension and help prevent the hips from sagging.
- Quadriceps and hamstrings: Contribute to keeping the legs aligned and rigid.
Compared with the high bar variation, the hip-height setup generally increases the demand through a more horizontal body position. It does not turn the row into a different muscle-isolation exercise; the same pulling pattern and stabilizing roles remain.
Primary Muscle(s):

Lats
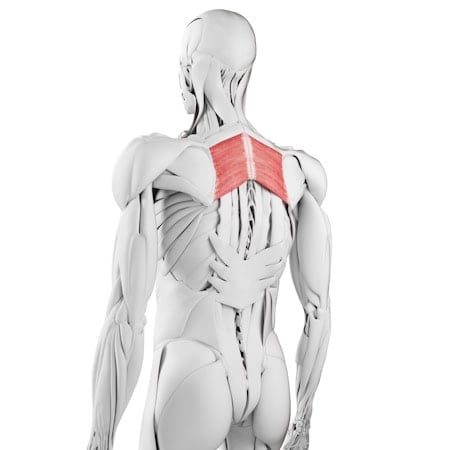
Rhomboid
Secondary Muscle(s):
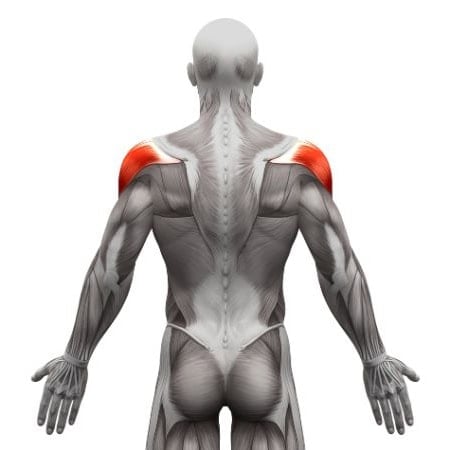
Rear delt

Trapezius

Biceps
Equipment needed for Low Bar Bodyweight Row
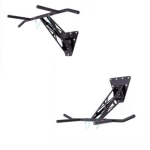
Adjust the difficulty of Low Bar Bodyweight Row
Raise the bar to return to a more upright row, or progress to feet-elevated rows after developing controlled hip-height repetitions. Maintain straight knees, fixed heels, full elbow extension and lower-chest contact. Pauses, slower lowering and a weighted vest can increase the training challenge. Change one variable at a time and record altered setups separately when comparing assessment results.
How to make Low Bar Bodyweight Row harder?
How to make Low Bar Bodyweight Row easier?
How to make Low Bar Bodyweight Row harder?
To make Low Bar Bodyweight Row harder:
-
Progress to feet-elevated inverted rows by placing the heels on a stable, non-slip box or bench while preserving straight legs and lower-chest contact.
-
Pause for one to two seconds with the lower chest lightly touching the bar without shrugging or arching the lower back.
-
Take three seconds to lower from chest contact to straight elbows while keeping the hips clear of the floor.
-
Wear a securely fitted weighted vest while keeping the same bar height, heel position and full range of motion.
How to make Low Bar Bodyweight Row easier?
To make Low Bar Bodyweight Row easier:
-
Raise the bar toward lower-chest height and return to the High Bar Bodyweight Row with a more upright body position.
-
Use an intermediate bar height between the hip and lower chest to reduce the challenge while keeping the legs straight and completing the full range.
-
Use a bent-knee bodyweight row with feet flat on the floor as a separate regression. Maintain hip alignment and avoid using leg drive to complete the pull.
