
Feet-Elevated Assisted Ring Muscle-Up
How to do Feet-Elevated Assisted Ring Muscle-Up?
What is the Feet-Elevated Assisted Ring Muscle-Up?
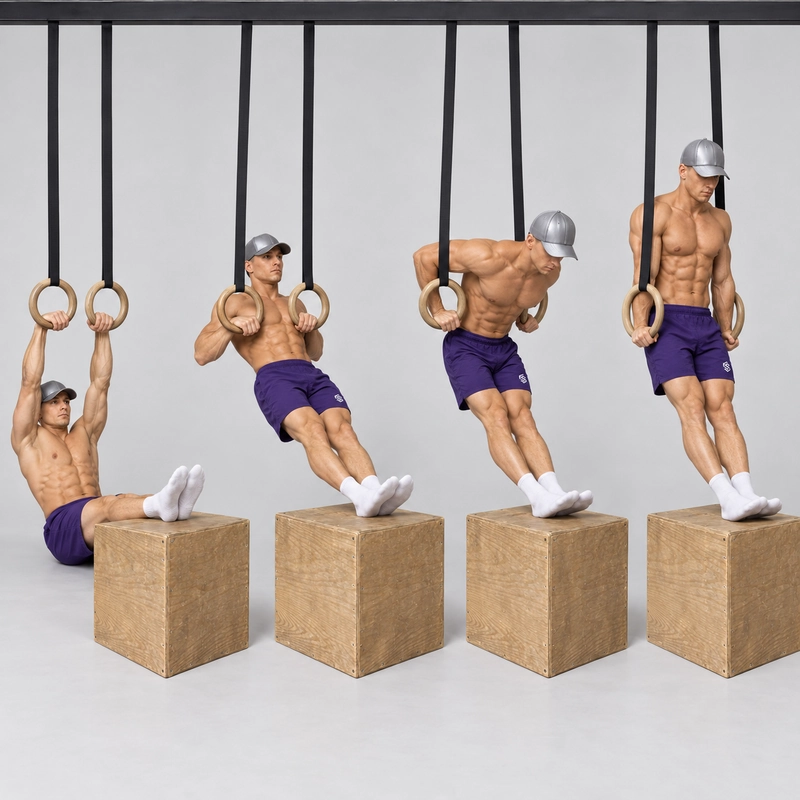
The Feet-Elevated Assisted Ring Muscle-Up connects a pull, turnover and dip while both feet stay supported on a stable plyo box. Begin below the rings with straight elbows, a secure false grip and straight knees. Pull the rings towards the lower chest, bring both shoulders over the hands together, then press into a stable straight-arm support. Reverse the movement deliberately while maintaining foot contact.
The main setup uses the heels or rear part of the feet on the box in front of you. Keep enough contact on its top surface to avoid slipping off the edge as the body changes position. The feet may pivot comfortably, but they should not leave the box or shuffle to manufacture an easier transition.
This is an assisted progression towards the Ring Muscle-Up. The box shares support with the rings, so a completed repetition is not an unassisted muscle-up. You also do not need to be able to perform a full strict muscle-up before practising this version.
It is different from the Ring Muscle-Up Transition, which isolates the change from the high-pull position into the bottom of a dip. Here, the repetition includes the preceding straight-arm pulling start and the press to straight elbows. It also goes beyond Feet-Elevated Ring Rows: a row returns from the chest-high pulling position without moving into support above the hands.
CrossFit Journal’s ring-scaling article calls a comparable elevated-foot sequence a “rowing muscle-up.” Its description and photo sequence provide coaching context for this assisted configuration. This page uses the more explicit name to identify the foot support and full movement.
Why use a plyo box and straight legs?
The box creates a consistent elevated support for both feet. It lets you connect the phases without needing a free-hanging start, while giving you a clear place to maintain contact during the return. Straight knees remove the usual bent-knee standing push-off used in some low-ring regressions, but they do not remove foot assistance.
You can still press through the supported feet and share bodyweight between the box and rings. How much the box helps depends on your pressure, body position and the relationship between box, rings and anchor. There is no fixed assistance percentage implied by the exercise name.
The task is to make the upper body perform a recognisable pull, transition and press with enough assistance to stay controlled. Avoid both extremes: driving so heavily through the feet that you bypass the pull, or reducing assistance until the turnover becomes a one-arm scramble.
“Straight legs” means the knees remain straight throughout the main version. Your hips do not have to remain fully extended. As the chest comes over the hands and the torso rises into support, the angle between torso and legs can change. Trying to keep the whole body as one rigid plank through the entire turnover can prevent a workable path.
The elevated-foot geometry is also different from a strict vertical muscle-up. The initial pull is row-like or inclined, and the box continues supplying support above the rings. Use the drill to practise coordination and assisted strength, alongside separate vertical pulling and ring-support work.
Equipment, placement and readiness
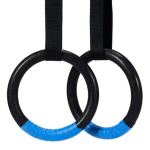
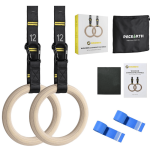
- Rings and anchor: use a secure overhead structure and correctly installed straps. Check the buckles, anchor and matching ring height before loading the setup.
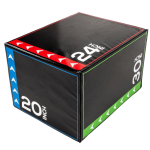
- Plyo box: choose a solid, non-slip box that will not tip or slide when you push down or reposition your torso. Its top must provide room for both feet without balancing on an edge.
- Ring height: set the rings low enough to access the false grip and manage a controlled exit, but high enough to allow a straight-arm start with the hips clear of the floor and a complete press above the hands.
- Box position: place it in front of the body. Test the pull, turnover and support positions before starting working repetitions. You need room to bring the torso over the rings without losing foot contact.
- Starting relationship: begin reclined behind the working rings rather than assuming that the torso must start directly beneath the overhead anchor. The straps may angle during the row-like start.
- Clearance: leave space for the elbows, torso and straps to move. Do not set the box so close that the thighs or knees obstruct the turnover.
No single box height or ring measurement fits every athlete. Choose a configuration that permits the complete sequence with straight knees and steady foot contact. Mark or measure the box position and ring height once you find a workable setup, so that later comparisons use the same geometry.
Before a complete attempt, practise the false grip under partial load, a controlled assisted high pull, a symmetrical low-ring turnover and an assisted dip. A supported version of the Ring False Grip Hang can help establish hand placement. The False Grip Pull-up trains a separate pulling component; you can scale its loading rather than requiring the full unsupported exercise first.
Use Feet Assisted Ring Dips to practise a controllable pressing range. A supported Ring Support Hold helps you learn the finish. You should be able to maintain control above the hands before joining the phases into a full repetition.
Readiness is specific to the chosen assistance. There is no compulsory pull-up count that grants access to this drill. You need a grip that remains secure, a transition you can keep symmetrical, a pressing position you can control and a way to return safely. If one component is missing, practise it separately with more accessible support.
For a broader component-based approach, CrossFit’s muscle-up development guide separates strength practice from assisted technique work. Its examples also change leg position and assistance between drills; they are coaching options rather than validated entry tests for this specific setup.
How to do the Feet-Elevated Assisted Ring Muscle-Up
- Set the false grip. While partly supported, seat each ring across the heel of the palm near the wrist crease. Close the fingers and thumbs securely. Load gradually rather than dropping into a grip that you cannot hold.
- Establish the assisted start. Place both feet securely on the box, keep the knees straight and lean back below the rings. Extend the elbows naturally, keeping the hips clear of the floor and the straps tensioned. Settle before pulling.
- Pull towards the lower chest. Bend the elbows and draw your upper body towards the rings. Keep the rings close to the torso and use steady foot support. Do not jump, bend the knees for a push-off or jerk the pelvis upward.
- Move both shoulders over the hands. Continue into the turnover as the rings reach the lower chest. Bring the chest forward over the hands and send both elbows behind the torso together. Keep foot contact and avoid pulling the rings wide to escape the difficult position.
- Control the assisted dip position. Arrive above the hands without dropping between the rings. Let the wrists move naturally from their pulling false-grip position into palm support while retaining a secure hold. Do not freeze the wrist angle or release and regrip suddenly.
- Press to straight arms. Push down through the rings until both elbows are straight. Stabilise the rings close beside the hips. The feet remain on the box and the knees stay straight; the hips may be folded as the torso becomes more upright.
- Show the finish. Pause briefly enough to demonstrate control rather than bouncing straight down. A deliberate ring turn-out is optional and is not needed for the basic repetition.
- Reverse under control. Bend the elbows into the assisted dip, move both shoulders back through the turnover and re-establish the pulling false grip. Continue lowering towards the original straight-arm position, keeping the feet supported and the rings close.
- Reset or end the set. Settle at the bottom before repeating. If grip, foot contact or shoulder control is deteriorating, stop and use the planned low-ring exit rather than attempting another turnover.
What counts as a full repetition?
Start below the rings with straight elbows, straight knees, a secure false grip and both feet on the box. Complete a visible pull, symmetrical turnover and press to stable straight-arm support. Keep both feet supported throughout and return through the same phases under control. The hips should not rest on the floor to reset between phases.
The foot assistance does not have to be zero. It does need to remain deliberate, without a jump or sudden leg-driven thrust. A turnover-only drill, incomplete dip, one-arm transition, loss of box contact or bent-knee push-off does not meet this version’s standard.
If you can complete the ascent but cannot yet reverse it, use a planned controlled exit and record an ascent-only attempt separately. Do not pretend that a drop from support is the controlled return described here. For repeatable practice, note the assistance and setup rather than comparing rep counts across substantially different configurations.
Common mistakes and corrections
Keeping the knees straight but treating the hips as immovable
The body changes shape as it passes over the hands. Maintain straight knees while allowing a controlled hip fold. A straight-leg assisted muscle-up is not a rigid-plank exercise through every phase, and the support finish does not need to look like the reclined start.
Stopping at an ordinary row
If you pull only to a low chest position and stop, you may never bring the shoulders far enough over the hands. Use more assistance or adjust the setup so that the high pull connects smoothly into the turnover. Keep the rings near the torso rather than reaching for an exaggerated wide path.
One elbow turns over before the other
Check ring height, grip symmetry and foot contact. Increase assistance and practise the isolated transition if necessary. Do not count a one-arm scramble as progress simply because the torso finishes above the rings.
The false grip slides into the fingers
Stop, unload and reset the hand position. Start with supported false-grip holds or rows and increase load gradually. Grip pressure is part of the skill, but sharp wrist discomfort, tingling or numbness is a reason to stop, not to squeeze harder.
The feet slip or the box moves
Fix the equipment setup before continuing. Place the heels far enough onto the top to maintain contact through the entire path, use suitable surface grip and choose a box that resists the forces you apply. Do not balance the feet on an edge or have someone hold an unstable box during hard attempts.
Jumping through the transition
The box should provide steady support. If you need a sudden push, knee bend or hip thrust, increase accessible assistance or return to an easier configuration. A jumping muscle-up is a different drill with a different movement standard.
Forcing extra dip depth after an uncontrolled turnover
Enter a depth you can support as part of the transition. Keep the rings close and avoid sinking abruptly between them. If the turnover puts the shoulders into a position you cannot control comfortably, practise supported components instead of trying to press out of a collapsed catch.
Assuming a higher box always means a harder repetition
Changing elevation affects body position, foot pressure and the available path. It may alter one phase differently from another. Test any change carefully, and compare the whole setup rather than using height alone as a difficulty scale.
Programming and progression
Use this as focused technique and assisted strength practice while your grip and shoulders are fresh. A conservative starting example is three to four sets of two to four controlled cycles, with roughly 90 seconds to three minutes of rest or longer if needed. Start with fewer repetitions if the turnover or return is new. These are coaching suggestions, not experimentally validated requirements for this drill.
Use a smooth pace through the ascent and a deliberate return. A brief top pause makes the finish visible. Avoid turning every attempt into a maximal slow eccentric before you can coordinate the full pathway. Breathe comfortably and stop the set when you need momentum, an asymmetrical turnover or a rushed descent.
First make the same setup repeatable. Then reduce foot pressure modestly without changing knee position or losing the assisted return. You can also add a small pause or a slower descent while preserving the geometry. Change one variable at a time so that you know whether control or assistance has changed.
If the straight-leg box configuration is not yet manageable, use a floor-supported bent-knee regression that gives you more accessible leg assistance. Isolating the turnover or training the assisted pull and dip separately can also resolve a missing phase. Keep those drills labelled separately rather than recording them as full elevated-foot repetitions.
Progress towards a strict ring muscle-up through separate work on secure false-grip vertical pulling, deep ring dip control, unsupported support and the complete transition. A successful box-assisted repetition does not establish that those abilities are ready at full bodyweight. Removing the box is a change in the task, not simply a small increase in the same exercise.
Record ring height, box height, box distance, contact position and the quality of each phase. A side-oblique video can reveal knee bending, foot shuffling or a turnover that is being bypassed. Stop for sharp pain, numbness or uncontrolled loss of grip; seek appropriate professional guidance if symptoms persist or recur with lighter loading.
Frequently asked questions
Do the feet stay on the box at the top?
Yes. This version retains bilateral foot support through the pull, transition, press and return. Lifting the feet changes the assistance standard.
Can I push through the box with straight legs?
Yes. Straight knees do not prevent you from sharing bodyweight with the foot support. Use steady pressure and avoid a sudden thrust. Assistance should make the upper-body path controllable rather than replace it.
Do I need to keep my hips fully extended?
No. Keep the knees straight, but allow the hip angle to change as the torso moves above the hands. The whole body does not remain a rigid plank throughout the turnover.
Is this an L-sit ring muscle-up?
No. The box supports the feet. An unsupported L-sit variation requires the athlete to hold the legs without external foot support.
What box height should I use?
Choose a stable height and ring relationship that permit straight knees, continuous foot contact, a complete turnover and a controllable exit. No exact height was specified for this version, and a taller box is not a universal progression.
Is a false grip required?
The main version on this page uses a false grip for the pull and turnover. Establish it before loading, let the hands move into support naturally at the top and restore the pulling position on the return. A regular-grip variation is a separate configuration.
Does this count as my first strict ring muscle-up?
No. It is a complete assisted sequence, but the feet share support with the rings. Record it as the elevated-foot assisted version.
Tips for the proper execution of Feet-Elevated Assisted Ring Muscle-Up
Set the rings to matching heights and test the anchor, straps and buckles before loading them.
Use a stable plyo box with enough top surface for both feet. Place the heels securely away from the edge.
Establish the false grip under partial load before entering the straight-arm starting position.
Keep the knees straight while allowing the hips to fold as the torso moves into support above the rings.
Pull towards the lower chest and connect the pull to the turnover. Do not stop at an ordinary row.
Keep the rings close and move both shoulders and elbows through the transition together.
Use steady foot assistance. Avoid a jump, knee-driven push-off or sudden hip thrust.
Finish with straight elbows and stable rings beside the hips. Both feet remain on the box.
Reverse the transition deliberately and restore the pulling false grip before returning to straight arms.
Compare repetitions using the same ring height and box placement. Stop when grip, foot contact or transition symmetry deteriorates.
Muscles worked when doing Feet-Elevated Assisted Ring Muscle-Up
The Feet-Elevated Assisted Ring Muscle-Up combines pulling, turnover and pressing while the box shares support with the hands. Muscle demand changes with the phase and the amount of foot assistance; this description is not a direct measurement of activation in this specific drill.
- Pull: the latissimus dorsi, upper-back muscles and elbow flexors, including the biceps, help draw the torso towards the rings.
- Transition and dip: the chest, anterior deltoids and other shoulder muscles contribute as the torso passes over the hands. The triceps extend the elbows during the press to support.
- Grip: the forearm and hand muscles help retain the false grip during pulling and control the change into palm support.
- Ring stability: shoulder-blade and rotator-cuff muscles help manage the independently moving rings through each phase.
- Trunk and legs: the abdominal and hip muscles coordinate body position as the hip angle changes. The quadriceps help maintain straight knees, while the supported feet share load through the box.
The legs are part of the assistance and positioning system, not a source of jumping momentum. Do not assume that straight knees mean all bodyweight is carried by the upper body, or that equal box heights create equal muscle loading between athletes.
Primary Muscle(s):

Lats

Lower chest
Secondary Muscle(s):

Anterior delt

Biceps

Triceps

Abdominal
Equipment needed for Feet-Elevated Assisted Ring Muscle-Up
Adjust the difficulty of Feet-Elevated Assisted Ring Muscle-Up
Adjust assistance and control before changing elevation. Use enough foot pressure to connect a symmetrical pull, turnover and dip, then reduce it gradually while preserving straight knees and continuous contact. Ring height, box position and foot elevation change the geometry together, so compare the complete setup. Floor-supported, bent-knee, turnover-only and unsupported versions have different standards and should be recorded separately.
How to make Feet-Elevated Assisted Ring Muscle-Up harder?
How to make Feet-Elevated Assisted Ring Muscle-Up easier?
How to make Feet-Elevated Assisted Ring Muscle-Up harder?
To make Feet-Elevated Assisted Ring Muscle-Up harder:
-
Reduce pressure through the feet gradually while keeping the same box position, ring height and straight knees. Maintain contact and avoid substituting a jump for assistance.
-
Slow the controlled return through the dip, turnover and pull. Keep the rings close and restore the false grip without dropping or changing foot position.
-
Add a brief pause in a controllable high-pull or assisted dip position, then continue smoothly. Do not choose a position where you must collapse or twist to restart.
-
Progress towards a strict unsupported ring muscle-up after developing secure false-grip vertical pulling, deep ring dip control and unsupported support. Treat removal of the box as a separate exercise and assistance standard.
How to make Feet-Elevated Assisted Ring Muscle-Up easier?
To make Feet-Elevated Assisted Ring Muscle-Up easier:
-
Use a floor-supported bent-knee assisted muscle-up with accessible foot pressure before returning to the straight-leg box setup. Keep the phases controlled and label the different support configuration.
-
Practise only the low-ring turnover with substantial foot support. Start near the top of the pull, move both shoulders over the hands and reverse without forcing a full dip or straight-arm pulling start.
-
Train supported false-grip pulls and feet-assisted ring dips separately if one phase prevents a controlled full repetition. Join them again only when the transition and return remain manageable.
