
Feet-Elevated Archer Row
How to do Feet-Elevated Archer Row?
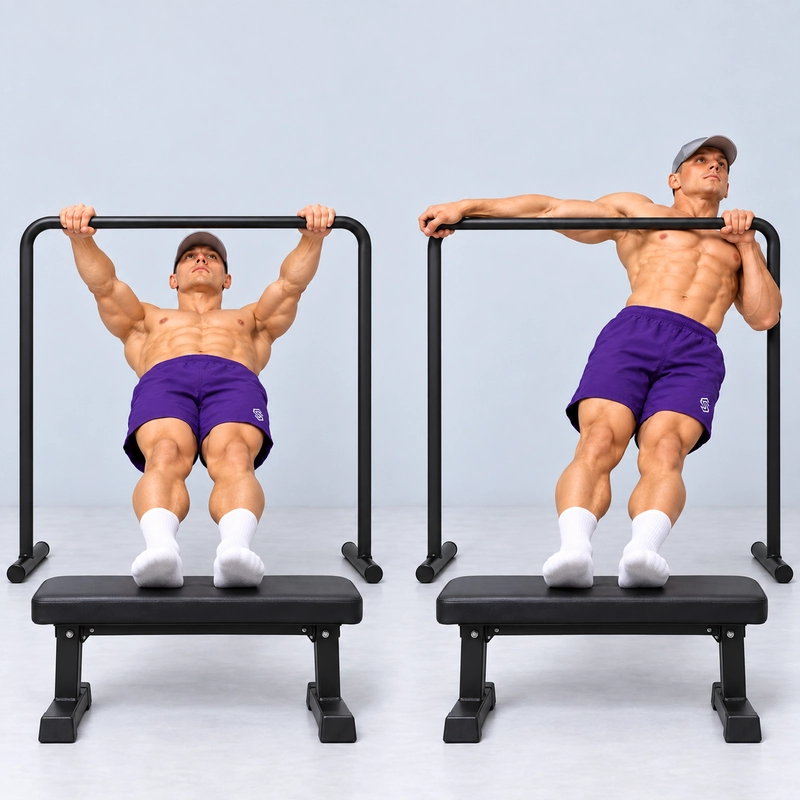
The feet-elevated archer row is an asymmetrical bodyweight row performed with both hands on one horizontal dip-bar rail and both heels supported on a workout bench. Use a bar approximately hip height, or around 90 cm (35.4 in), and a bench approximately knee height. Keep the legs straight as you pull toward one hand while the opposite elbow stays straight and assists.
This is a more demanding variation of the Archer row with heels on the ground when the bar, grip and technique are otherwise comparable. Foot elevation changes the body position and leverage. Both hands still contribute; the exercise is not a true one-arm row.
This page defines a fixed dip-bar rail and a lower bench supporting the heels. The heels do not rest on a second rail at the same height as the hands. Ring archer rows use independently moving handles and are a separate equipment version.
Equipment and Setup
Use a securely anchored dip station or a dip bar designed to resist both backward and sideways pulling forces. Both hands grip the same horizontal rail. A freestanding bar that works for dips may still tip or slide during an archer row, so confirm suitability for this use before loading it.
- Hand rail: approximately 90 cm (35.4 in) above the floor, often roughly hip height. This is a setup guide, not an exact height for every athlete.
- Foot support: a stable workout bench around knee height, often approximately 40–50 cm (15.7–19.7 in). Record its actual height rather than relying on the label.
- Grip: a wide overhand grip on the same rail, with enough usable width to pull toward either hand while the opposite elbow stays straight.
- Heel position: both heels supported securely, approximately hip-width apart, with straight knees and the toes pointing upward.
- Bench distance: far enough from the rail to extend the legs and complete chest contact, while permitting full elbow extension and floor clearance at the bottom.
Use a broad, non-slip bench surface and keep the heels away from its edge. Check that neither the bench nor the dip bar rocks, slides or lifts when force is applied toward either side. Reposition the equipment before the set, not while your body is suspended.
How to Do a Feet-Elevated Archer Row
- Enter beneath the rail. Sit underneath the dip bar and take a comfortable wide overhand grip, with both thumbs wrapped around the same rail.
- Place the heels on the bench. Set both heels securely on the bench before lifting into the row. Straighten the knees and keep the feet approximately hip-width apart.
- Lift into the centre position. Brace the abdomen and glutes, raise the hips and straighten both elbows. Maintain one line through the shoulders, hips, knees and ankles, with the back and hips clear of the floor.
- Pull toward the right hand. Bend the right elbow and draw the upper arm back as the upper body travels upward and toward the right grip. Keep the left elbow straight, with its hand still gripping and assisting on the rail.
- Reach controlled chest contact. Bring the right side of the lower chest gently to the rail without a chin reach, hip thrust or twist of the chest away from the pelvis.
- Return to the centre. Lower under control until both elbows are straight and the body is centred beneath the grip again. Keep both heels fixed on the bench.
- Repeat on the left. Bend the left elbow, keep the right elbow straight and bring the left side of the lower chest to the rail before returning to centre.
Exhale as you pull and inhale as you lower. You may alternate sides or complete one side before the other, but return to the arms-straight centre position between repetitions. After the set, lower the hips under control before removing the feet from the bench.
What Counts as a Full Repetition?
A strict repetition starts from the centre with both elbows straight, reaches gentle working-side lower-chest contact and returns under control to the same centre position.
- The pulling-side elbow bends; the assisting elbow stays straight without forced hyperextension.
- Both hands retain their original grip on the same dip-bar rail.
- Both knees remain straight and both heels stay in their original positions on the bench.
- The shoulders, hips and legs remain aligned, with the back and hips clear of the floor.
- The chest reaches the rail without bouncing, hip thrusting or reaching with the chin.
- Both elbows straighten before the next pull starts.
A controlled lateral shift toward the working hand is part of the archer pattern. Keep the shoulders and pelvis moving together rather than twisting the torso to reach the rail. Do not count a repetition if the assisting elbow bends, a heel slides or lifts off the support, the knees bend, chest contact is missing or momentum completes the pull.
Count repetitions per side. Four repetitions per side means four right-side pulls and four left-side pulls, for eight individual pulls in total.
Why Elevate the Feet?
Raising the heels from the ground to a bench changes the body angle and leverage, generally making an otherwise comparable archer row more demanding. Keep the bar height, grip, leg position and range consistent when comparing the two versions.
A 90 cm (35.4 in) rail and knee-height bench do not guarantee an exactly horizontal torso or a fixed percentage of bodyweight through the hands. The angle changes during the row and depends on your proportions and the distance between supports.
Benefits of the Feet-Elevated Archer Row
- Progresses side-dominant rowing: You keep both hands available while using a more demanding elevated-foot setup.
- Trains the back and elbow flexors: The pulling-side elbow bends as the upper arm and shoulder blade move through the row.
- Practises trunk control: The body remains aligned while travelling toward one hand.
- Provides another loading option: Foot elevation changes the task without immediately removing the assisting hand.
The straight assisting arm still contributes force. This exercise does not establish a measured one-arm strength result or guarantee a one-arm pull-up.
Readiness and Progression
First develop controlled floor-supported Archer Rows, keeping the opposite elbow straight and achieving reliable chest contact on both sides. Feet-elevated inverted rows with two arms help you practise body tension and the bench setup before adding the side-dominant pull.
Begin with a lower foot support if a knee-height bench is too demanding. Increase the height only when you can maintain full range and alignment. There is no universal repetition threshold that guarantees readiness.
Common Mistakes and Corrections
Using a Dip Bar That Tips or Slides
Archer rows load the equipment unevenly. Use a station secured for the direction of force; do not continue if a base or support moves.
Letting the Heels Slide Across the Bench
Use a broad, stable support with secure heel contact. Keep the original heel positions on both sides rather than moving the feet to follow the torso.
Bending Both Elbows
That is an assisted side-dominant row rather than the strict archer variation. Lower the foot support or return the heels to the ground if you cannot keep the opposite elbow straight.
Dropping or Thrusting the Hips
Maintain the body line and let the pull bring the chest to the rail. Avoid sagging between the supports or throwing the hips upward to complete the repetition.
Twisting to Reach the Bar
A sideways shift is expected, but the shoulders and pelvis should remain coordinated. Do not rotate the chest separately to shorten the remaining range.
Staying at the Top Between Sides
Moving across the rail without lowering is a typewriter-row variation. Return to centre with both elbows straight between archer-row repetitions.
Sets, Reps and Progression
As a coaching starting point, use 2–3 sets of 3–5 controlled repetitions per side with 2–3 minutes of rest between sets. Choose a setup that leaves one or two clean repetitions in reserve. Start with the less capable side and match its controlled repetitions on the other side.
When you can repeat three sets of five full repetitions per side across two sessions, add repetitions before making another setup change. A brief pause, a slower descent or a securely fitted weighted vest can provide later overload. These are coaching guidelines, not assessment cutoffs.
Work toward one-arm rows by reducing assistance gradually in an appropriate setup. Removing the second hand is a substantial change; use an easier angle when first practising it rather than assuming this bench-supported position will remain manageable.
Keep Your Setup Consistent When Retesting
Record the floor-to-centre-of-rail height, bench-top height, distance between supports, grip width and exact heel positions. Keep footwear, tempo and chest-contact criteria consistent. Record right and left results separately.
Changing the bench height or support distance changes the task. The straight assisting elbow improves form consistency but does not reveal how much force the other hand contributes.
Comfort and Safety
Warm up with easier two-arm and floor-supported archer rows. Do not force the extended elbow into hyperextension or use a grip that causes shoulder discomfort. Stop if either support moves, heel contact becomes insecure or you experience sharp pain, numbness or dizziness. Persistent symptoms warrant advice from a qualified healthcare professional.
Feet-Elevated Archer Row FAQ
How high should the dip bar and bench be?
Use a dip-bar rail around 90 cm (35.4 in), approximately hip height, and a workout bench around knee height. A practical bench starting range is 40–50 cm (15.7–19.7 in), but use your actual equipment dimensions and check that full range is possible.
Do both hands grip the same bar?
Yes. Use a wide overhand grip on one horizontal rail. The feet rest on a separate bench; this is not a neutral-grip row with one hand on each parallel rail.
Is this the same as resting the feet on the other dip bar?
No. Here the bench supports the heels around knee height, below the hand rail. An equal-height rail-to-rail setup changes the support geometry and should be labelled separately.
Does the straight arm still help?
Yes. The assisting hand and shoulder can transmit force while the elbow stays straight. Both hands remain loaded during an archer row.
What if the bench is too high for me?
Use a lower stable support or return your heels to the ground. Preserve the straight assisting elbow and full range rather than using bent knees, a twisting finish or partial repetitions.
Tips for the proper execution of Feet-Elevated Archer Row
Use a dip-bar rail around 90 cm (35.4 in) high and confirm that it is secure against backward and sideways pulling forces.
Use a comfortable wide overhand grip that permits working-side chest contact while the opposite elbow stays straight.
Keep both knees straight and place the heels approximately hip-width apart on a stable knee-height bench, away from its edge.
Start each repetition centred beneath the grip with both elbows straight and the hips clear of the floor.
Pull upward and toward one hand by bending that elbow while keeping the opposite elbow straight without forcing hyperextension.
Bring the working-side lower chest to the bar without reaching with the chin, shrugging or thrusting the hips upward.
Keep the shoulders and pelvis moving together during the lateral shift rather than twisting the torso to finish the pull.
Keep both hands fixed on the same rail and both heels fixed on the bench throughout the set.
Lower to the arms-straight centre position between sides; do not travel sideways across the bar while staying at the top.
Count each pull for its working side: four repetitions per side means four right-side pulls and four left-side pulls.
Muscles worked when doing Feet-Elevated Archer Row
The feet-elevated archer row trains the back and elbow flexors through an asymmetrical horizontal pull with the heels supported on a bench. The bending arm performs the main elbow-flexion action, while the extended arm assists through its grip and shoulder. The trunk and legs maintain alignment between the hand rail and foot support.
Main Pulling Muscles
- Latissimus dorsi: Helps draw the pulling-side upper arm back toward the torso.
- Rhomboids and middle trapezius: Contribute to shoulder-blade control and retraction during the pull.
- Rear deltoids: Assist the backward movement of the pulling-side upper arm.
- Biceps brachii, brachialis and brachioradialis: Bend the pulling-side elbow.
Supporting Muscles
- Extended-arm shoulder muscles and rotator cuff: Help transmit assistance and control the shoulder while the elbow stays straight.
- Forearm and hand muscles: Maintain both grips on the bar.
- Abdominals, obliques and spinal stabilizers: Help maintain trunk alignment and control unwanted twisting.
- Glutes and thigh muscles: Maintain the straight-leg body position.
Both arms contribute to the exercise. A straight assisting elbow does not establish that all of the upper-body load has moved onto the bending arm, and the exact load split cannot be determined from appearance alone.
Primary Muscle(s):

Lats
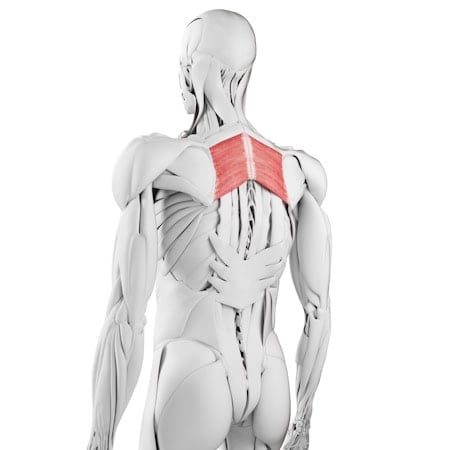
Rhomboid
Secondary Muscle(s):
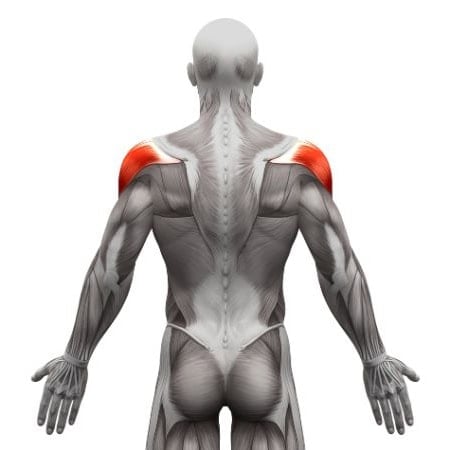
Rear delt

Trapezius

Biceps
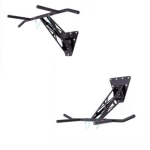
Equipment needed for Feet-Elevated Archer Row
Adjust the difficulty of Feet-Elevated Archer Row
Lower the heel support or return the heels to the ground to reduce the challenge while retaining strict archer technique. Pauses, slower lowering and a securely fitted weighted vest can add training overload. Keep the hand rail around 90 cm (35.4 in), the bench at a recorded knee-height setting, the legs straight and the full range consistent when assessing this bench-supported version.
How to make Feet-Elevated Archer Row harder?
How to make Feet-Elevated Archer Row easier?
How to make Feet-Elevated Archer Row harder?
To make Feet-Elevated Archer Row harder:
-
Pause for one to two seconds at working-side chest contact while keeping the opposite elbow straight and the body aligned.
-
Take three seconds to lower from the bar to the arms-straight centre position without moving either heel.
-
Use a securely fitted weighted vest while maintaining the same rail height, bench height, hand spacing, heel positions and full range.
-
Increase the foot-support height only after mastering the current setup, using a stable support and recording the higher-foot variation separately.
-
Develop assisted one-arm rows with progressively less help before attempting a true one-arm row. Begin with an easier angle when removing the second hand.
How to make Feet-Elevated Archer Row easier?
To make Feet-Elevated Archer Row easier:
-
Use a lower, stable foot support while keeping the same hand rail, straight legs, straight assisting elbow and full chest contact.
-
Return the heels to the ground and perform the standard Archer Row with the same wide grip and straight assisting elbow.
-
Perform feet-elevated inverted rows with both arms pulling evenly to practise the bench setup and full-body alignment.
-
Allow the assisting elbow to bend during a separate assisted side-dominant row if needed. Record this regression separately from the strict archer version.
