
Knee-Height Incline One-Arm Push-Up
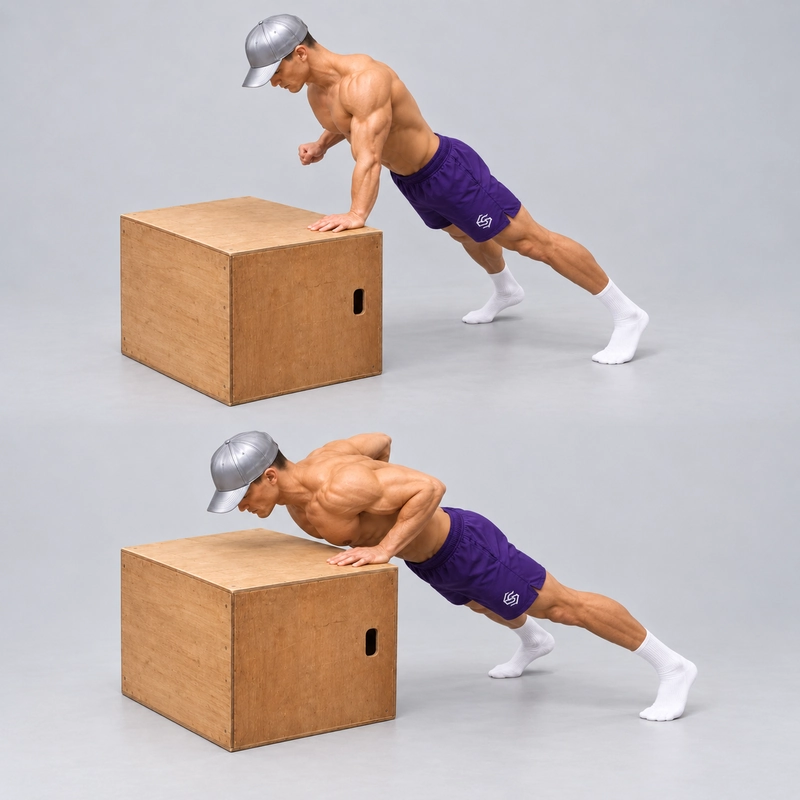
How to do Knee-Height Incline One-Arm Push-Up?
The knee-height incline one-arm push-up is a low-incline progression toward the one-arm push-up on the floor. Support one hand on a stable workout bench, plyo box or low bar around knee height, leave both feet on the floor and lower the chest toward the support. The working arm completes the press while the free hand remains clear.
This variation is useful when you can press on a higher incline but lose depth, stall near the bottom or twist excessively as the hand support gets lower. It gives you a manageable place to develop the lower portion of the movement before removing the incline entirely.
A support around 40–50 cm (15.7–19.7 in) is a practical starting reference. Knee height varies, so measure the surface under the hand. Your knees stay straight and off the floor. A dip bar can work if its rail actually reaches the intended low height; a 90 cm (35.4 in) rail is a higher incline.
With otherwise comparable stance and range, lowering the working hand generally increases the pressing challenge. A study measuring forces in push-up variations found reduced peak hand-supported forces in its elevated-hand conditions compared with regular push-ups. It tested two-arm versions, providing context for incline scaling rather than a measured load for this unilateral bench setup.
What Changes When You Move From Hip Height to Knee Height?
The basic movement remains a one-hand press, but the lower support brings the exercise closer to the floor version. You need to preserve chest depth and return from the bottom with the working arm while keeping the torso and pelvis connected.
Keep your existing foot spacing when first trying the lower height. Narrowing the stance at the same time introduces another challenge and makes it harder to identify why the new setup fails. Expect the repetition count to fall when the support is lowered.
Choose the height at which a complete repetition is available. Reaching a lower bench with only a shallow elbow bend is not the same progression as completing the intended range there.
Choose a Low Support That Fits the Movement
Workout Bench
Use a rigid, stationary bench with a firm hand-contact area. Place the working palm near a safe edge that allows the chest to approach beside the hand. Check that the bench cannot slide or tilt when pressure is applied off-center.
Excessively soft upholstery can let the palm sink or the wrist roll. Choose secure contact and a smooth or firmly padded chest approach rather than pressing against a hard corner.
Plyo Box
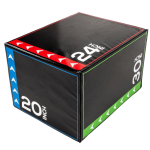
A stable box can provide a repeatable height and firm palm contact. Use its intended stable orientation and measure the top surface. Set the palm near the edge with enough room for the fingers and chest path, while keeping the box planted on a non-slip floor.
Choose another box or a compatible secured riser system when an intermediate height is needed. Loose weights, cushions and improvised stacks make a poor height adjustment.
Low or Height-Adjustable Dip Bar
The rail must be approximately knee high and stable under single-arm pressing force. Lock all height adjustments and check for sliding, rocking or lifting of the base. A bar that supports vertical dips may still be unsuitable for the sideways component of an incline press.
Take a wrapped grip with the thumb around the rail. Record its orientation: a front-to-back rail permits a neutral grip, while a cross-body rail places the hand differently. Use the chest-depth target that fits the apparatus without painful contact.
If your dip bars are fixed around 90 cm (35.4 in), use them for the hip-height variation. Do not tip them onto their sides or raise the feet to turn them into this knee-height, floor-footed setup.
Prepare for the First Low-Incline Set
Begin with easy presses at a higher support, then a few two-hand repetitions at the chosen low height. The two-arm knee-height incline push-up helps you check the bench position and chest approach before removing one hand.
Include comfortable preparation from the wrist warm-up routine. Then transfer gradually toward one hand and test a short straight-arm hold. Keep the other hand available to restore support.
If the single-arm hold cannot be controlled, use a higher incline. If the hold is steady but the first descent immediately collapses, retain deliberate assistance or move to an intermediate height. A top hold alone does not establish readiness to press from the bottom.
How to Do a Knee-Height Incline One-Arm Push-Up
- Fix the setup. Measure the hand-contact height and establish the chest-depth target. Confirm that the bench, box or low bar remains stationary.
- Start with two-hand support. Step back until the legs are straight and the shoulders, hips and ankles form a continuous inclined line. Plant both toes/forefeet on the floor with a controllable stance.
- Set the working contact. Use a firm palm on a bench or box, or a wrapped grip on a rail. Position the hand so the working shoulder and chest can move toward it comfortably.
- Establish the unilateral top. Transfer toward the working side and lift the free hand away. Keep it behind the back or beside the torso. Pause briefly to confirm that the pelvis remains steady.
- Descend through the intended range. Bend the working elbow along a comfortable diagonally backward path. Let the chest and pelvis move toward the support together while the neck follows the torso.
- Control the bottom. Reach the chosen chest target without resting against the support. Avoid a sudden hip roll, chin reach or bounce as the elbow bends farther.
- Press out of the low position. Push through the working hand while keeping the torso connected to the legs. The chest and hips should leave the bottom together.
- Complete the finish. Return to controlled straight-elbow support with the same contact points and stance. Let the shoulder blade move with the press rather than holding it pinned back.
- End with support restored. Put the free hand down before stepping forward or changing sides. Reposition between sets rather than moving the feet to rescue the last repetitions.
Use a smooth lowering phase of roughly two seconds, then a deliberate press. Breathe in on the way down and out during the press if comfortable. A small coordinated body shift can occur; keep it repeatable instead of using an abrupt torso turn to escape the bottom.
Set the Depth Before You Count Repetitions
For a bench or box, gentle chest contact with the agreed smooth or padded edge beside the working hand gives a clear target. Begin and finish with the working elbow straight, and keep the free hand off all supporting surfaces.
A bar may require a different contact location or a visible side-view depth target. Define it in advance and use it consistently. Do not force the chest onto a painful rail or assume that any elbow bend demonstrates the same range.
- Both feet stay floor-supported and the knees remain straight.
- The working hand remains fixed at the measured height.
- The chest reaches the recorded endpoint without bouncing or resting.
- The press returns to a straight working elbow with no second-hand or thigh assistance.
- The trunk does not sag, fold into a pike or twist abruptly to complete the movement.
- The equipment stays still from the first repetition to the last.
A systematic review of range of motion in resistance training found that strength gains depend partly on the range trained and tested. For this transition, keeping the bottom position consistent helps you identify whether you are improving the intended movement. The review did not validate a specific knee-height one-arm depth standard.
If the Low-Incline Rep Breaks Down
| What you notice | What to change next |
|---|---|
| You can hold the top but cannot reverse from the bottom. | Raise the hand slightly or use clearly recorded free-hand assistance through the same range. |
| The first rep is clean, but later reps stop short. | End the set earlier and rest longer before repeating the same setup. |
| The hips lift first or the chest suddenly turns away. | Return to a height where the torso rises as a connected unit. Keep the original stance. |
| The palm or bar grip feels insecure. | Change the contact surface or apparatus before increasing the training demand. |
| One side needs a different depth or support height. | Log the difference and use a controllable setup on each side rather than matching unlike rep counts. |
These observations guide exercise selection; they do not diagnose a specific weak muscle or medical problem.
Use Assistance Without Losing the Low-Incline Pattern
If the bottom press is the limiting part, place the free hand on the same stable support and use enough assistance to finish with the intended body line. Keep the working hand, foot positions and depth unchanged. Reduce that assistance over time, recording assisted and unassisted sets separately.
Archer push-ups provide another assisted unilateral pattern. Uneven push-ups change the hands' relative heights, while staggered push-ups change their forward-backward positions. Use these as additional training branches rather than assuming that any one of them is a mandatory step before the low incline.
Controlled one-arm lowering-only practice can also be used at the bench. After the descent, replace the free hand and return with both arms. Choose a height where the lowering remains smooth, and log these as negatives rather than complete one-arm repetitions.
A Training Session for the Bench-to-Floor Transition
As an initial coaching option, use three working sets of 3–6 full-range repetitions per arm at the same low incline. Rest two to three minutes before another demanding effort on the same arm, and stop with roughly one clean repetition in reserve when possible.
- Warm up at a higher incline, then check the low support with both hands.
- Start the working sets with the weaker side and use comparable setup criteria on both arms.
- If later sets lose range, reduce the rep target. If the first set is already uncontrolled, raise the hand or add deliberate assistance.
- Record clean repetitions, actual height and the depth target before changing anything for the next session.
Practise this focused work about twice per week initially, allowing recovery around other demanding presses. Avoid repeatedly testing a floor maximum after every set. Build repeatable low-incline practice before making the next setup harder.
The sets, repetitions and frequency are coaching starting points, not a validated prescription for everyone. Change them according to effort, technique and recovery.
How to Move Below Knee Height
When the current sets are complete and repeatable across more than one session, reduce the hand-support height while keeping the same stance, grip type and depth criteria. A small change of around 3–5 cm (1.2–2 in) can be useful if suitable stable equipment is available. This is an example, not a required increment.
Rebuild the repetitions at the new height before lowering again. If the next available box is much lower, use deliberate assistance there while retaining full repetitions at the previous height. Do not solve a large height jump by silently reducing chest depth.
As you approach the floor, re-establish the depth standard: an edge target becomes chest-to-floor contact. Choose a stance you can reproduce and learn the floor attempt without narrowing the feet simultaneously. Low-incline performance can guide that attempt but does not guarantee a full floor repetition.
The one-arm push-up guide explains the broader progression and stricter floor-version context. Keep the floor test separate from your bench results.
Other Ways to Progress at the Same Height
A short bottom pause can help you check whether you can press without a bounce. A slower descent adds challenge without changing the apparatus. A narrower stance changes the support task. Add one of these deliberately, rather than combining all three when you also lower the hand.
For a floor one-arm goal, lowering the support is the most direct setup progression. Pauses and stance variations can supplement that route when no suitable lower surface is available.
Check That Progress Is Real
Film the same angle with the working hand, chest, hips and feet visible. Compare the bottom depth and elbow finish as well as the repetition count. Keep support type, stance width, foot distance, grip, tempo and free-arm position identifiable.
A lower support with a shorter range is a changed task. A wider stance can also alter what you can complete. Record each arm separately and keep palm-on-bench results distinct from wrapped-grip bar results when comparing performance.
When to End the Set
Stop when the depth shortens, the elbow no longer reaches the intended finish, or the hips begin to rise separately. Restore the free hand and reset rather than continuing with changing technique.
Sharp pain, pinching, numbness, joint instability, slipping contact or moving equipment also warrant stopping. Seek qualified healthcare advice for persistent or recurring symptoms. An exercise adjustment can make training more manageable, but it is not a diagnosis or rehabilitation prescription.
Knee-Height Incline One-Arm Push-Up FAQ
Is this a one-arm push-up from the knees?
No. Only the working hand is at knee height. Both feet remain on the floor and both knees stay straight and off the ground.
Can I use my normal 90 cm dip bars?
They create a hip-height incline. Use a stable low or adjustable rail around knee height for this version, measuring its actual contact height.
Why can I lower but not press back up?
The bottom return may exceed the demand you can currently complete with that setup. Raise the support slightly or add deliberate assistance while preserving the range. Lowering-only work should be recorded as a negative.
Should I narrow my feet to prepare for the floor?
You can train a narrower stance separately, but keep your current stance when first lowering the hand. That makes the height transition easier to judge.
Is a bar repetition the same as a bench repetition?
The exercise pattern is related, but grip and chest-target geometry differ. Track the apparatus and target rather than comparing them as identical tests.
Do I need to complete a fixed rep number before trying the floor?
No validated universal rep cutoff is established here. Repeatable low-incline sets can inform your next step; use a smaller height reduction or a controlled floor attempt according to your technique.
Tips for the proper execution of Knee-Height Incline One-Arm Push-Up
Measure the hand-contact height; approximately 40–50 cm (15.7–19.7 in) is a practical knee-height guide, not a universal measurement.
Choose a stationary bench, stable plyo box or locked low bar that stays secure under off-center single-arm pressing force.
Keep your existing stance when first moving from a higher incline to knee height so that you change one setup variable at a time.
Establish the two-hand starting position, transfer toward the working side and remove the free hand only when the top is controlled.
Maintain floor support through both toes/forefeet with straight knees and a connected shoulder-to-ankle body line.
Move the chest and pelvis toward the support together as the working elbow bends along a comfortable diagonally backward path.
Use the same safe chest-depth target on every repetition; reduce the support challenge rather than shortening the range to continue.
Press out of the bottom without bouncing, lifting the hips first or suddenly rolling the torso away from the working arm.
Finish with a straight working elbow and keep the free hand clear during every counted unassisted repetition.
Log each arm separately, including support height, stance, apparatus, grip and depth; record assisted reps and negatives separately.
Muscles worked when doing Knee-Height Incline One-Arm Push-Up
The knee-height incline one-arm push-up loads a unilateral press while the feet support the lower body. Lowering from a higher incline increases the challenge when other technique variables remain comparable, without creating a different set of primary pressing muscles.
Pressing Muscles
- Pectoralis major: Helps drive the working upper arm through the press and controls the lowering phase.
- Triceps brachii: Extends the working elbow from the bottom toward the straight-arm finish.
- Anterior deltoid: Assists the shoulder movement on the working side.
Control and Support
- Abdominals and obliques: Help maintain trunk shape and manage rotation with one hand supporting the press.
- Serratus anterior and other scapular stabilizers: Coordinate the working shoulder blade with the moving arm.
- Glutes, quadriceps and spinal stabilizers: Help preserve the relationship between the torso, hips and straight legs.
- Forearm and hand muscles: Maintain stable palm contact or a wrapped rail grip.
A stalled repetition does not identify one weak muscle by itself. Review height, range, stance and coordination before changing the training plan. No isolated chest-region benefit or exact activation percentage is claimed.
Primary Muscle(s):

Middle chest

Triceps
Secondary Muscle(s):

Anterior delt

Abdominal
Equipment needed for Knee-Height Incline One-Arm Push-Up
Adjust the difficulty of Knee-Height Incline One-Arm Push-Up
Use an intermediate higher support or deliberate free-hand assistance when the knee-height bottom press is not controllable. To progress toward the floor, lower the working hand in small stable steps while preserving stance and chest depth. Add pauses or stance changes separately. Track negatives, assisted repetitions and different grips as distinct training conditions.
How to make Knee-Height Incline One-Arm Push-Up harder?
How to make Knee-Height Incline One-Arm Push-Up easier?
How to make Knee-Height Incline One-Arm Push-Up harder?
To make Knee-Height Incline One-Arm Push-Up harder:
-
Reduce the hand-contact height using suitable stable equipment while keeping the stance and grip type consistent, then rebuild full repetitions.
-
Pause briefly at the defined bottom target without resting on the support, then press to a straight working elbow.
-
Use a controlled three-second descent at the same support height and through the same chest-depth range.
-
Train a narrower foot stance as a separate progression at the current height, preserving depth and avoiding an abrupt twisting finish.
How to make Knee-Height Incline One-Arm Push-Up easier?
To make Knee-Height Incline One-Arm Push-Up easier:
-
Raise the working hand to an intermediate height between knee and hip level, retaining the same stance and complete pressing range.
-
Keep the free hand on the same stable support for deliberate assistance through the bottom and return; log these as assisted repetitions.
-
Use two-hand knee-height incline push-ups to recheck the setup, or controlled one-arm lowering with a two-hand return as separate negative practice.
