
One-Arm Dead Hang
How to do One-Arm Dead Hang?
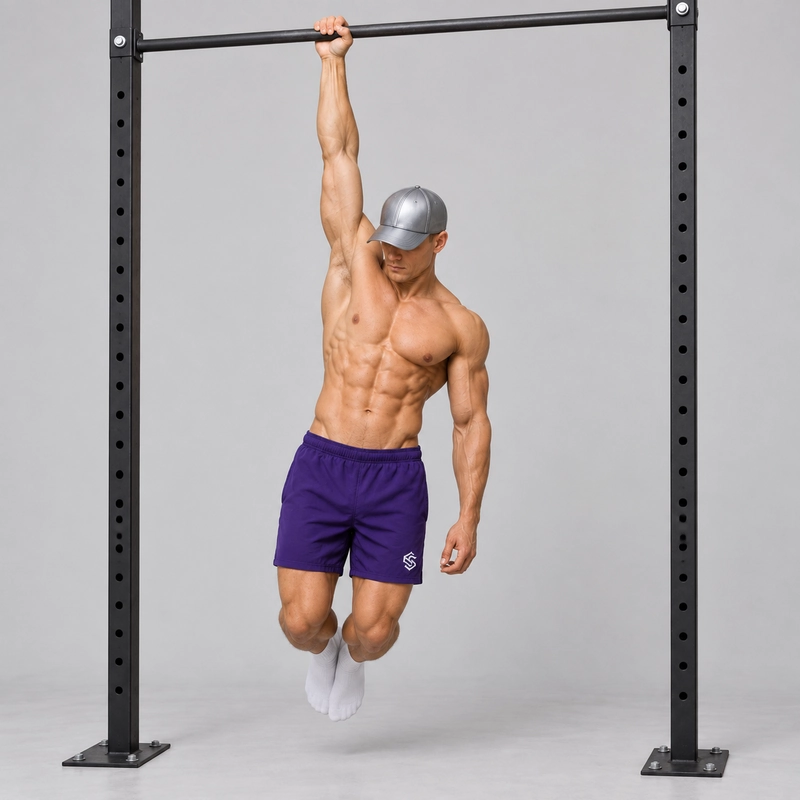
The One-Arm Dead Hang, also called a Single-Arm Dead Hang, is a straight-arm hold in which one hand supports your body from a pull-up bar. Both feet are clear of the floor and the free hand provides no assistance. The main version on this page is a controlled passive hang; an active hold and a small passive-to-active shoulder movement are explained separately below.
Compared with a two-arm Dead Hang, the exercise places the support through one grip and asks you to manage the rotation that comes with hanging from one side. It develops unilateral grip endurance and familiarity with straight-arm one-hand support. It does not include the elbow bend and ascent required for a One-Arm Pull-Up.
Begin with assistance even if you can perform strong bilateral pulling. GMB's hanging guide distinguishes active and passive positions and recommends gradual exposure to assisted single-arm hanging. A comfortable two-arm hold is useful preparation, but no specific hang time proves that full one-arm loading is appropriate.
Passive hold, active hold and the motion between them
| Version | Shoulder action | What to record |
|---|---|---|
| Passive One-Arm Dead Hang | Allow comfortable overhead elevation without deliberately pulling the shoulder down to lift the body. Maintain a secure grip and controlled position. | Seconds in the passive hold, per side. |
| Active One-Arm Hang | Gently engage the shoulder and back to raise the body slightly while the elbow stays straight. Avoid forcing maximal depression or pinching the shoulder blade hard backward. | Seconds in the active hold, per side. |
| Passive-to-active-to-passive drill | Move smoothly between the positions with a small straight-arm shoulder movement. | Completed control cycles, per side, with assistance noted. |
Passive does not mean uncontrolled. Your hand and forearm still work to keep the grip closed, and some shoulder stabilization is normal. Let the shoulder settle only as far as comfortable. Do not deliberately release all control, force a deeper stretch or drop suddenly into the lower position.
Active does not mean a partial pull-up. Keep the elbow straight and create only a small rise through the shoulder action. Some shoulder elevation remains normal with the arm overhead. Lattice Training's one-arm engagement instruction recommends a comfortable engaged position instead of either complete relaxation or maximal retraction.
Neither mode is universally better. Choose the passive hold for the main dead-hang standard, the active hold for deliberate shoulder-support practice, and the moving drill when you can control the transition. If one position causes discomfort, use assistance or a different preparation exercise rather than assuming the other mode will automatically solve it.
Readiness, bar and access
Use a secure bar and installation suitable for your bodyweight and the intended loading. Keep enough clearance to hang without contacting obstacles and use a stable step or box to reach the grip and unload afterward. Position the support where you can return your feet to it deliberately. Do not jump into one-arm loading or rely on grip failure to end the set.
First build comfortable two-arm hangs and gentle assisted weight transfers. Strict Pull-Ups develop related pulling strength, while the two-hand Ring Scapula Pull-Up can help you learn straight-arm shoulder engagement. Neither exercise guarantees readiness for an unassisted one-arm hang.
Prepare the hands, wrists, elbows and shoulders progressively. Use the Wrist Warm-Up Routine, easy bilateral support and short foot-assisted one-arm holds before the full version. The warm-up should familiarize you with the load, not exhaust the grip.
How to do a One-Arm Dead Hang
- Set the grip with your feet supported. Take a closed overhand grip with the working hand. Wrap the thumb around the bar and choose a comfortable wrist angle. Set the hand position before loading it; do not adjust a slipping grip under full one-arm load.
- Transfer weight gradually. Begin with both hands or the feet sharing the load. Shift support toward the working hand until you can lighten the other hand without a sudden drop into the shoulder. Keep the working elbow straight without forcing it beyond its natural extension.
- Remove assistance deliberately. Take the free hand off the bar and gradually lift the feet only if you can support the full load comfortably. Start the timer once the free hand is clear, the feet are unsupported and the chosen shoulder position is established.
- Maintain the passive hold. Allow comfortable shoulder elevation without deliberately performing a scapular lift. Keep the grip secure, the head relaxed and the body settled beneath the working hand. Do not turn “passive” into a forced end-range stretch.
- Manage the body position. Keep enough trunk tension to limit swinging. A modest turn or tilt can occur naturally under one-hand support; you do not need perfectly level shoulders or a rigidly forward-facing chest. Avoid repeatedly twisting, kicking or using the free arm to create momentum.
- Keep the elbow straight. Bending it changes the task toward a flexed-arm hold. Bend the knees if needed for floor clearance, but do not rest the feet on a support during the measured unassisted interval.
- Finish before control is lost. Stop timing when the planned duration is complete, the shoulder mode changes, the grip begins to slip, the elbow bends, or any external assistance returns.
- Unload before letting go. Place the feet back on the support, or restore two-hand support, then release the working hand. Rest and repeat on the other side using the same bar, grip and shoulder mode.
The free hand must not grip the working wrist, forearm, clothing, bar, strap or another support during an unassisted result. Holding your own wrist turns the exercise into an assisted one-arm hang.
How to practise the active-to-passive motion
Start with foot assistance or two-hand shoulder movements before using full one-arm bodyweight. The Swiss military sports scapular pull-up instructions describe the bilateral principle: change shoulder engagement while keeping the elbows extended. The one-arm version adds unilateral loading and needs its own gradual progression.
- Find the comfortable passive position. Keep the grip closed and elbow straight, using enough assistance to remain controlled. You do not need your deepest possible shoulder position.
- Engage without bending the elbow. Gently use the shoulder and back to lift the torso a small amount. Think of raising the body toward the fixed hand through shoulder control, not curling the elbow or pulling the chin toward the bar.
- Pause in the active position. Briefly show control without forcing the shoulder down as far as possible or arching the chest upward.
- Return slowly. Reduce the deliberate lift and let the body settle back into the comfortable passive position over roughly two seconds. Keep the same grip and straight elbow; do not drop or rebound.
- Count one control cycle. Passive to active and back to passive equals one cycle. Stop if you cannot separate shoulder motion from elbow bending or body swing.
This repeated movement is a one-arm scapular engagement drill, sometimes described as a one-arm scapular pull-up. Count its cycles separately from static hold seconds. If you only alternate active and passive positions during a continuous hang, record it as a mixed drill rather than a single uninterrupted passive-hold result.
Completion and timing standards
- Only one hand contacts the bar during an unassisted timed interval.
- The working elbow stays straight; a flexed-arm lock-off is a different exercise.
- Both feet remain unsupported, and the free hand provides no assistance.
- Use the declared shoulder mode throughout the interval: passive or active.
- Maintain a secure grip and controlled body position without repeated swinging or a kip.
- Begin timing only after removing assistance and establishing the position.
- End timing at the first loss of the selected standard, then unload deliberately.
Record left and right independently. Keep the same grip orientation, bar diameter, shoulder mode, assistance and use of chalk when comparing sessions. A ring, neutral handle, towel, thick bar or lifting strap changes the setup and should be labeled accordingly. A strap-assisted hang is not the same grip-endurance result as holding the bare bar.
Common mistakes
- Sudden one-hand release: transfer the load gradually instead of dropping from two hands to one.
- Trying to pin the shoulder down: use a comfortable active position rather than maximal depression or forced retraction.
- Opening the grip in the passive mode: passive refers to the shoulder action, not the fingers.
- Bending the elbow during engagement: use more assistance and reduce the movement until the elbow can remain straight.
- Fighting every small rotation: accept a controlled self-selected orientation; do not create repeated twists to stay square to the camera.
- Hiding assistance: foot contact or a free-hand grip changes the result even if the assistance seems small.
- Combining shoulder modes under one time: log a mixed-position drill separately from a consistent passive or active hold.
- Hanging until the hand opens: finish while you can still return to support under control.
Suggested training dose
A practical starting option for an athlete ready for the unassisted hold is 2 to 3 sets of 3 to 8 seconds per side, resting approximately 90 to 150 seconds between attempts. Use foot or free-hand assistance if you cannot complete even a short controlled interval. These are adjustable coaching suggestions, not readiness cutoffs or validated strength-test norms.
For the moving drill, begin with 2 sets of 2 to 4 small control cycles per side with assistance. Keep each return slow enough to avoid a drop. Do not add both maximal static holds and high-repetition shoulder cycles simply because the grip has not yet failed.
Increase one variable at a time: less assistance, a slightly longer hold, or more controlled cycles. Keep the same mode and setup. Include recovery around demanding pulling and grip sessions; a routine for easy two-arm hangs is not automatically an appropriate daily schedule for full one-arm loading.
If your goal is the One-Arm Pull-Up, develop bent-arm pulling separately. The Band-Assisted One-Arm Pull-Up provides a full pulling movement with a clearly described assistance setup. A longer dead hang alone does not demonstrate the strength or coordination needed to pull up.
When to reduce the load or stop
Use assistance or stop if you experience sharp shoulder, elbow or hand pain, tingling, numbness, a feeling of shoulder instability or uncontrolled slipping. Do not force passive end range as a treatment for pain. If symptoms recur, or you have a history of shoulder dislocation or injury that affects overhead loading, get appropriate individual guidance before progressing.
Frequently asked questions
Should the shoulder be active or passive?
Either can be trained with the right level of assistance and control. This page's main dead-hang result uses the passive mode; the active hold deliberately adds a small shoulder lift. Record which version you performed.
Is some body rotation allowed?
Yes. A modest, controlled turn under one-hand support is normal. Repeated swinging, twisting for momentum or an orientation that causes discomfort is a reason to reset or reduce the load.
Can I hold my wrist with the free hand?
You can use it as a deliberately assisted drill, but it does not count as an unassisted One-Arm Dead Hang. Record the support method and do not compare that time directly with one-hand-only holds.
Tips for the proper execution of One-Arm Dead Hang
Use a secure bar and a stable access support so you can load and unload the working hand deliberately.
Set a closed overhand grip with the thumb wrapped before transferring weight onto one hand.
Reduce foot or free-hand assistance gradually rather than dropping suddenly into a full one-arm hang.
Keep the working elbow straight without forcing it beyond its natural extension; bending it changes the exercise.
In the passive version, allow comfortable shoulder elevation without deliberately lifting through the shoulder or forcing a deeper stretch.
In the active version, create a small controlled rise through shoulder engagement rather than a partial elbow pull-up.
Keep the grip working in both modes; passive shoulder positioning does not mean relaxed fingers or an uncontrolled drop.
Allow a modest controlled body turn, but avoid repeated twisting, kicking or swinging to extend the hold.
Time passive and active holds separately, and count passive-to-active-to-passive movements as control cycles.
Stop before the grip fails, restore foot or two-hand support, and record each side with the same bar and grip conditions.
Muscles worked when doing One-Arm Dead Hang
The One-Arm Dead Hang primarily challenges the muscles that keep the working hand closed around the bar. Shoulder and trunk demands depend on whether the hold is passive, active or moving between the positions.
Primary muscles
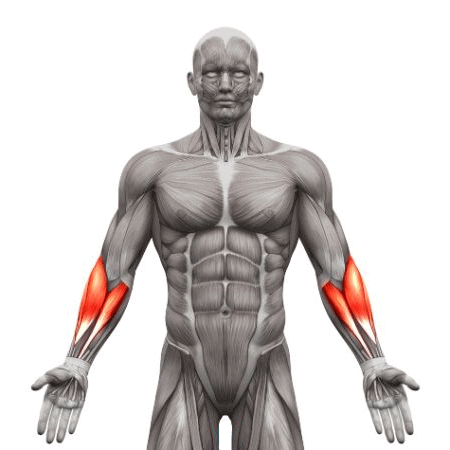
- Forearm finger flexors: sustain the grip while one hand supports the body.
- Intrinsic hand muscles: help maintain contact and coordinate the grip around the bar.
Secondary and stabilizing muscles
- Rotator cuff and shoulder-girdle muscles: contribute to control of the overhead support position. A passive hang does not imply zero muscle activity.
- Latissimus dorsi and other shoulder/back muscles: contribute more deliberately when you lift into an active hang or practise the shoulder-engagement cycle.
- Abdominals, obliques and spinal stabilizers: help manage the body's position and rotation beneath one hand.
- Elbow and wrist stabilizers: help maintain the straight-arm support and secure wrist position.
The exercise does not require repeated elbow flexion, so it should not be presented as a full biceps or one-arm pulling repetition. No precise activation ranking, tissue-loading percentage or force ratio between two-arm and one-arm hangs is established here.
Primary Muscle(s):
Forearm
Secondary Muscle(s):
Equipment needed for One-Arm Dead Hang
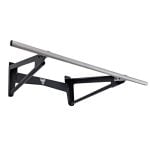
Adjust the difficulty of One-Arm Dead Hang
Adjust assistance before chasing hold time. Use the feet or a second hand to share the load, then remove help gradually while maintaining a straight elbow and comfortable shoulder position. Record passive holds, active holds and shoulder-control cycles separately. Progress one variable at a time and keep the grip and apparatus consistent; switching to a towel, ring or lifting strap changes the task.
How to make One-Arm Dead Hang harder?
How to make One-Arm Dead Hang easier?
How to make One-Arm Dead Hang harder?
To make One-Arm Dead Hang harder:
-
Add a small amount of hold time while preserving the same grip, shoulder mode and controlled exit. Extend the weaker side's useful practice without turning every set into a maximum-duration attempt.
-
Maintain a clearly labeled active one-arm hold for a short interval. This adds deliberate shoulder-support work; log it separately rather than treating it as a longer passive dead hang.
-
Progress the assisted passive-to-active-to-passive drill toward a few unassisted control cycles. Keep the elbow straight, use a small range and lower smoothly; record cycles rather than static hold seconds.
-
After bodyweight holds are comfortable and repeatable, use a slightly thicker bar or a securely fitted grip attachment for a different grip challenge. Re-establish short controlled holds and record the new diameter instead of comparing its time directly with a standard bar.
How to make One-Arm Dead Hang easier?
To make One-Arm Dead Hang easier:
-
Use a foot-assisted one-arm hang on a low bar or with a stable support beneath the feet. Keep enough leg support to hold the chosen shoulder mode comfortably, then reduce the assistance gradually.
-
Keep the second hand on the bar to share the load while shifting more support toward the working hand. Use a secure second-hand grip and reduce its contribution gradually; record the result as assisted.
-
Return to two-arm dead hangs and assisted straight-arm shoulder-engagement practice. Learn a predictable entry, hold and unload sequence before taking the second hand away.
